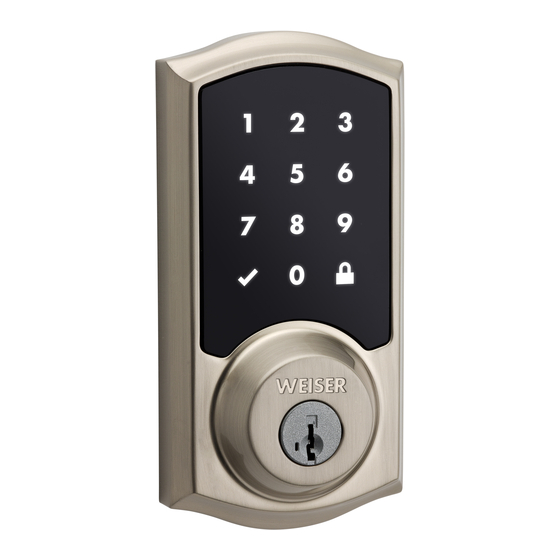
Weiser Smartcode 10 Programming And Troubleshooting Manual
Weiser smartcode 10 touchscreen electronic deadbolt
Hide thumbs
Also See for Smartcode 10:
- User manual ,
- Installation manual (20 pages) ,
- Installation and user manual (9 pages)
Subscribe to Our Youtube Channel
Summary of Contents for Weiser Smartcode 10
- Page 1 62812 / 01 Programming and Troubleshooting Guide Mastercode Troubleshooting: Installation Troubleshooting: Door Jamming and Door Handing Troubleshooting: Touchscreen Troubleshooting: Battery Battery FAQ USA: 1-800-677-5625 Canada: 1-800-501-9471 1 / 15 ©2015 Spectrum Brands, Inc. www.weiserlock.com...
-
Page 2: Enabling And Setting The Mastercode
62812 / 01 Mastercode About the Mastercode Using a Mastercode is an optional, added-security measure. It is not enabled by default. A Mastercode is used to add and delete user codes, but it cannot unlock the door (unless the same code is programmed as a user code, though this is not recommended). - Page 3 62812 / 01 If programming is successful, the Checkmark will illuminate and you will hear one beep. If programming is unsuccessful, the “X” pattern will fl ash three times, and you will hear three beeps. Make sure the Mastercode has not already been programmed.
- Page 4 62812 / 01 Adding User Codes with the Mastercode Enabled The procedure for adding user codes is different when the Mastercode is enabled. For instuctions on how to add user codes when the Mastercode is disabled, see the Installation and User Guide that came with your lock.
- Page 5 62812 / 01 Deleting a Single User Code with the Mastercode Enabled 1. Keep door open. Press the Program button once. The Checkmark will 5. Press Lock symbol once. fl ash fi ve times and you will hear fi ve beeps. 6.
- Page 6 62812 / 01 9. Press Lock symbol once. If programming is successful, the Checkmark will illuminate and you will hear one beep. If programming is unsuccessful, the “X” pattern will fl ash three times with three beeps. Make sure to enter a valid Mastercode in step 4. 10.
- Page 7 62812 / 01 Deleting All User Codes with the Mastercode Enabled 1. Keep door open. Press the Program button once. The Checkmark will 5. Press Lock symbol once. fl ash fi ve times and you will hear fi ve beeps. 6.
- Page 8 62812 / 01 9. Press Lock symbol once. If programming is successful, the Checkmark will illuminate and you will hear one beep. If programming is unsuccessful, the “X” pattern will fl ash three times with three beeps. Make sure to enter a valid Mastercode in step 4 during your next attempt.
- Page 9 62812 / 01 Disabling and Deleting the Mastercode 1. Keep door open. Press and HOLD the Program button until the 5. Press Lock symbol once. Checkmark symbol illuminates (about 5 seconds). 6. Re-enter Mastercode. 2. Press Checkmark symbol once. 7. Press Lock symbol once. 3.
- Page 10 62812 / 01 Troubleshooting: Installation The interior mounting screws are diffi cult to tighten. The interior and exterior assembly won’t mount parallel to the door edge. The interior assembly does not fi t on the mounting plate. If you encounter any of the problems above, the deadbolt latch may be installed upside down.
- Page 11 62812 / 01 Troubleshooting: Door Jamming and Door Handing The lock jams and the turnpiece does not rotate smoothly. The lock beeps, the Checkmark and Lock symbols alternate fl ashing, and the door cannot lock. The door handing process was not executed The deadbolt latch and strike are misaligned, during installation.
- Page 12 62812 / 01 The hole in the door frame for the latch bolt is The clutch is disengaged. not drilled deep enough. Remove the battery pack. Remove the interior assembly from the door. Verify that the lock can be operated smoothly with the key while Make sure the hole in the door frame is drilled at least 1”...
- Page 13 62812 / 01 The door handing process does not happen automatically when the batteries are installed. The handing process may have been executed The battery level is too low. previously. This is indicated by the Checkmark and Lock symbols fl ashing simultaneously fi ve times with fi ve beeps.
- Page 14 62812 / 01 Troubleshooting: Touchscreen The touchscreen is unresponsive. Screen activation One-second pause To activate the screen, use one of the three options below: The lock requires a one-second pause immediately after locking or unlocking before the touchscreen will re-activate. Fully remove hand 1.
-
Page 15: Battery Faq
62812 / 01 Troubleshooting: Battery The batteries drain within one day. The lock must be replaced. Contact Technical Support. Battery FAQ How long will the lock operate on a set of I replaced my batteries less than a year ago batteries? and need to replace them again.


Need help?
Do you have a question about the Smartcode 10 and is the answer not in the manual?
Questions and answers
what would the master code usually be
The Mastercode for the Weiser Smartcode 10 is not set by default. It must be manually enabled and programmed by the user. The Mastercode must be 4 to 8 digits long.
This answer is automatically generated
The smart lock will not open with master code even after programming. The lock appears to take the new code as it flashes green twice after programming but the lock won’t open