Table of Contents
Advertisement
Quick Links
Advertisement
Table of Contents

Related Manuals for Lenovo ThinkVision C400


Summary of Contents for Lenovo ThinkVision C400
- Page 1 C400 Wireless Projector User’s Guide...
- Page 3 C400 Wireless Projector User’s Guide...
- Page 4 RESTRICTED RIGHTS. Use, duplication or disclosure by the Government is subject to the GSA ADP Schedule contract with Lenovo Group Limited, if any, or the standard terms of this commercial license, or if the agency is unable to accept this Program under these terms, then we provide this Program under the provisions set forth in Commercial Computer Software–Restricted Rights at FAR 52.227-19, when applicable, or under Rights in...
-
Page 5: Table Of Contents
Wireless projector system tray icon . Exit . Uninstallation . Chapter 4. Connecting devices to the projector ... . . 4-1 Connecting devices Remote mouse control using USB . Connecting to a computer monitor . - Page 6 Appendix F. Notices ..F-1 Trademarks . Appendix G. Electronic emissions notices ....G-1 C400 Wireless Projector: User’s Guide Federal Communications Commission (FCC) Class A Statement of Compliance . F-2...
-
Page 7: Safety Information
Lees voordat u dit product installeert eerst de veiligheidsvoorschriften. Les sikkerhetsinformasjonen (Safety Information) før du installerer dette produktet. Antes de instalar este produto, leia as Informações sobre Segurança. Antes de instalar este producto lea la información de seguridad. © Lenovo 2005. Portions © IBM Corp. 2004. - Page 8 Läs säkerhetsinformationen innan du installerar den här produkten. C400 Wireless Projector: User’s Guide...
-
Page 9: General Safety Guidelines
Note: Some parts can be upgraded or replaced by the customer. These parts are referred to as Customer Replaceable Units, or CRUs. Lenovo expressly identifies CRUs as such, and provides documentation with instructions when it is appropriate for customers to replace those parts. You must closely follow all instructions when performing such replacements. -
Page 10: Extension Cords And Related Devices
In addition many mobile products such as ThinkPad notebook PCs utilize a rechargeable battery pack to provide system power when in portable mode. Batteries supplied by Lenovo for use with your product have been tested for compatibility and should only be replaced with Lenovo approved parts. -
Page 11: Heat And Product Ventilation
shorten the life of the battery and can also pose a safety hazard. Do not let rechargeable Lithium-Ion batteries completely discharge or store these batteries in a discharged state. Heat and product ventilation Computers generate heat when turned on and when batteries are charging. Notebook PCs can generate a significant amount of heat due to their compact size. - Page 12 C400 Wireless Projector: User’s Guide...
-
Page 13: Registering Your Option
Registering your option Thank you for purchasing this Lenovo register your product and provide us with information that will help Lenovo to better serve you in the future. Your feedback is valuable to us in developing products and services that are important to you, as well as in developing better ways to communicate with you. - Page 14 C400 Wireless Projector: User’s Guide...
-
Page 15: Chapter 1. Product Description
The ThinkVision enables you to make professional presentations. Being lightweight and compact in size, the C400 Wireless Projector is a great departmental solution and allows you to move easily from boardroom to the conference room. Some main features of this projector are: v Extremely powerful, lightweight, and portable at 3.4 kg (7.5 lbs). -
Page 16: Packing Checklist
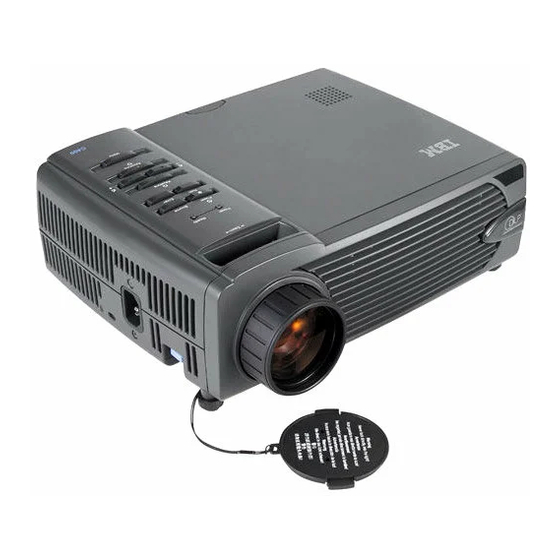
In addition to this user’s guide, your option package contains the following: Figure 1-1. Standard Accessories 1 Projector with lens cap 2 Video cable (S-video) 3 Power cord 4 Computer cable (DVI-DB15) 5 User’s Guide and installation CD C400 Wireless Projector: User’s Guide... -
Page 17: Projector Features
Be sure to attach the lens cap and place the projector into the soft case with the lens facing upward to avoid damaging the lens. - Page 18 3 Enter 4 Keystone/Up button 5 Volume/right button 6 Menu 7 Power LED 8 Power button 9 Re-Sync 10 Volume/left button 11 Keystone/down button C400 Wireless Projector: User’s Guide Back angle of projector Power Ready Keystone Keystone Enter Menu Re-Sync Source...
- Page 19 Side view of the projector 1 Kensington lock slot 2 Power 3 Height adjuster button 4 Height adjuster Connectors on back of the projector 1 Wireless LED 2 Wireless Power LED 3 RS 232 4 Video Out 5 DVI-I In...
- Page 20 Bottom view of the projector 1 Height adjuster 2 Height adjuster button 3 Projection lamp cover 4 Mounting bracket holes C400 Wireless Projector: User’s Guide...
-
Page 21: Chapter 2. Setting Up The Projector
Starting the projector To start the projector, do the following. 1. Connect the power cord to the projector as shown below. Connect the other end of the cord to an electrical outlet. The Power and Lamp-ready LEDs turn 2. Remove the lens cover. -
Page 22: Turning Off The Projector
Attention: Do not look directly into the projection lens when the lamp is turned on. The bright light might harm your eyes. 6. If you have connected more than one input device to the projector, toggle the Source button to change devices. (DVD and HDTV are supported through the DVI-I cable connector.) -
Page 23: Positioning The Projector
1.5 m (4.9 ft) from the projection screen. v Position the projector within 2.7 m (9 ft) of your power source and within 1.8 m (6 ft) of any wired video devices (unless you purchase extension cables). To ensure adequate cable access, do not place the projector within .15 m (6 in.) of a... - Page 24 3.2 m/10.5 ft 3.6 m/11.81 ft 4.0 m/13.12 ft 4.4 m/14.43 ft 4.8 m/15.74 ft 5.2 m/17.06 ft 5.6 m/18.37 ft C400 Wireless Projector: User’s Guide Image height Image Width (zoom max/min) (zoom max/min) 0.7 m/0.5 m 0.9 m/0.7 m 25.6 in./21.2 in.
-
Page 25: Adjusting The Projector Level And Height
Adjusting the projector level and height To adjust the projector level and height, complete the following procedure: 1. To raise the height of the projector, lift the projector 1 and press the height-adjuster buttons 2 . The elevator foot 3 drops down. -
Page 26: Adjusting The Volume
1. Twist the rings on the projector to adjust the focus 1 and zoom 2 , as shown below. 2. Use the Keystone buttons on the projector or the remote to correct image-trapezoid (wider top or bottom) effect. The keystone control appears on the On Screen Display (OSD), as shown. -
Page 27: Chapter 3. Using The Wireless Features
To install the software from the CD or view the User’s guide: 1. Insert the C400 Wireless Projector Software & User’s Guide CD into the CD 2. If the CD does not start, click Start and then click Run. - Page 28 To bind a projector, launch the Lenovo Wireless Projector software application, which will automatically search for available wireless projectors. A list of available projector(s) will appear. Right-click over the projector in the list that you wish to bind and select the Bind option from the pop-up menu (as shown below).
- Page 29 To indicate that binding is on, the projector icon in the list of wireless projectors displays a blue double arrow. Once binding is selected with one wireless projector, the user can simply toggle projection on/off with the hotkey combination Ctrl+F5 or by selecting Project and End Project from the system tray icon.
-
Page 30: Wireless Software Configuration
Unknown Note: Projector property cannot be retrieved during wireless projecting. Wireless software configuration Right-click the Lenovo Wireless Projector system tray icon on the bottom right of the screen. Select Configuration to open the Configuration window. C400 Wireless Projector: User’s Guide... -
Page 31: Selecting Adapter
Internet. You can select one of the WLAN adapters to project by clicking the drop-down list box, as shown below: Note: Anytime you move the mouse pointer over the Lenovo Wireless Projector system tray icon, the information for the selected WLAN adapter will appear. -
Page 32: Remote Controller Emulation
The Remote controller emulation item can only be shown on the system tray menu on the bottom right corner of the desktop, when the projector is in wireless projecting status. Right-click the Lenovo Wireless Projector system tray icon, and select Emulation remote controller to open the controller panel, as shown below. -
Page 33: Buttons Of The Remote Emulation Controller
The projector has a built-in USB port, which can play pictures from a USB memory key. The USB image display option will only be shown on the Lenovo Wireless Projector tray menu on the bottom right corner of the desktop, while the projector is in a wireless projecting state, as shown below. -
Page 34: Ending Projection
Right-click the Lenovo Wireless Projector icon in the system tray and select USB image display to start this function. Note: You may also start USB image display with the projector OSD menu. For information go to “USB image display” on page 3-7 on page 5-3. -
Page 35: Exit
Program. You will lose all saved session keys anytime you stop the Lenovo Wireless Projection Software, (even when it is in wireless projection.) Note: Lenovo Wireless Projecting Software can exit any time even when it is in wireless projection, then, all saved session keys will be lost. - Page 36 3-10 C400 Wireless Projector: User’s Guide...
-
Page 37: Chapter 4. Connecting Devices To The Projector
Chapter 4. Connecting devices to the projector This chapter provides information on connecting devices to the C400 Wireless Projector. Connecting devices Computers and video devices can be connected to the projector at the same time. Refer to the documentation that comes with the connecting device to verify that the device has the appropriate output connector. -
Page 38: Connecting To A Computer Monitor
Connecting to a computer monitor If you want to see the image on a separate monitor as well as on the projection screen, plug the monitor cable to the monitor out connector on the projector. C400 Wireless Projector: User’s Guide ®... -
Page 39: Chapter 5. Maintenance
Note: To prevent discoloration or fading of the case, do not use abrasive alcohol-based cleaners. Replacing the projector lamp The projector lamp should only be replaced with an Lenovo certified replacement part, which you can order from your business partner or go to www.lenovo.com/think. - Page 40 5. Lift the module handle up and pull up firmly as shown in 4 . 6. Reverse steps 1 through 5 to install the new lamp module. Note: The lamp module should be oriented as shown below when replacing. C400 Wireless Projector: User’s Guide...
-
Page 41: Resetting The Lamp Timer
550 lumens. Using the security slot The projector has a security slot, as shown. Refer to the information that comes with the lock for instructions on how to use it. 1 Kensington lock slot... - Page 42 C400 Wireless Projector: User’s Guide...
-
Page 43: Chapter 6. Using The Projector Features
2. Insert the supplied batteries into the remote control battery compartment, aligning the polarity (+/-) of the batteries with the polarity icons in the compartment, as shown. 3. Replace the cover, as shown. © Lenovo 2005. Portions © IBM Corp. 2004. -
Page 44: Using The Remote Control
7 Right mouse button 8 Up cursor 9 Right cursor/Page up 10 Enter 11 Down cursor 12 Zoom + 13 Zoom - C400 Wireless Projector: User’s Guide 14 Mute 15 Freeze 16 Volume up 17 Blank 18 Volume down 19 Wireless... -
Page 45: Operating Range
Operation description There are two ways of starting the USB image display: v When the projector is in wireless projecting status, right click Lenovo Wireless Projector system tray icon, and select USB image display in the tray menu. v Press menu button on the control panel of the projector or remote controller, then select Information →Wireless Setting→USB Image Display in the OSD... -
Page 46: Previous
Click right button to switch to non-full screen mode. Exit Exit stops the USB image display mode. To re-establish projection, select from the Lenovo Wireless Projector system tray icon, and choose project. C400 Wireless Projector: User’s Guide... -
Page 47: Chapter 7. On-Screen Display Menu Controls
Note: You must have a display on the screen in order to access some functions of the OSD. Navigating the OSD You can use the remote control or the buttons on the top of the projector to navigate and make changes to the OSD. The following sections show the menus in the OSD. - Page 48 Video and S-Video connections. Color Tint Note: Adjustments for this item are only available with Composite Video and S-Video connections. C400 Wireless Projector: User’s Guide Description Press the cursor left/right button to adjust the brightness. Range: 0 to 100 Press the cursor left/right button to adjust the contrast.
-
Page 49: Properties Menu
Item Gamma Color Space Cancel Properties menu The Properties menu can be found through the main menu. To access the Properties menu, follow these steps: 1. Press the Menu button to open the main menu. 2. Press the cursor left/right button to move to the Properties menu. 3. -
Page 50: Options Menu
The Options menu is shown below. The following table shows the options that you will see in the Options menu and the default. C400 Wireless Projector: User’s Guide Description Press the cursor left/right button to move the image up or down. -
Page 51: Setup Menu
Item Blank Screen Auto Source Auto Power Off Volume Menu Position Menu Display Translucent Menu Cancel Setup menu To access the Setup menu, follow the steps below: 1. Press the Menu button to open the main menu. 2. Press the left/right cursor to move to the Setup menu. 3. - Page 52 Note: Adjustments for this item are only available with Composite Video and S-Video connections. Projection Frequency Tracking C400 Wireless Projector: User’s Guide Description Press the cursor right/left button to select the Video standard. Range: Auto/NTSC/PAL/SECAM Press the cursor right/left button to enable or disable AGC for video source.
-
Page 53: Information Settings Menu
Description Press the cursor left/right button to adjust the secondary image size. Note: Pip Size is only available when the projector is connected to dual input sources. Range: Off/Small/Medium/Large Press the cursor left/right button to adjust the secondary image location. -
Page 54: Projector Wireless Configuration
Lamp Hour Reset Cancel Projector wireless configuration You can configure a wireless projector with OSD menu. C400 wireless OSD menu also includes some special items such as Showing Projector’s ID Number, Connecting Reset, Wireless Repair, USB Image Display, Stop USB Image Display, Enable WEP, Disable WEP, Refresh Session Key and Showing Session Key. - Page 55 If select ″Yes″, any exisiting wireless projecting session or USB image display will be terminated immediately. When the projector is WEP-disabled and there is no session key shown at the bottom right corner of the projection screen display, you can start a wireless projecting or retrieve the status of the projector without any session key.
- Page 56 7-10 C400 Wireless Projector: User’s Guide...
-
Page 57: Appendix A. Troubleshooting
Table A-1. Troubleshooting Problem No image appears on the screen. © Lenovo 2005. Portions © IBM Corp. 2004. Solution v Make sure your computer and projector are turned v Verify the settings on your notebook or desktop PC. v Turn off all equipment and power up again in the... - Page 58 Replace the lamp module. “Replacing the projector lamp” on page 5-1. v Put the old lamp back in the projector and have the projector serviced. v Power surges can cause the lamp to turn off. Press the Power button twice to turn off the projector.
-
Page 59: Projector Leds
The sound is distorted. Projector LEDs The LED on top of the projector indicates the state of the projector and can help you troubleshoot. There are two-second pauses between the blinking cycles. For more details on LED projector errors, contact your Lenovo representative. - Page 60 C400 Wireless Projector: User’s Guide...
-
Page 61: Appendix B. Frequently Asked Questions (Faq's)
If you are unable to browse the Internet after a wireless projection Remote controller acting as a mouse USB image display © Lenovo 2005. Portions © IBM Corp. 2004. Solution After launching wireless projecting software, right-click the projector in the list, and select Bind. - Page 62 WLAN adapter is unplugged or disabled, but the projector screen maintains the last image for several seconds C400 Wireless Projector: User’s Guide Solution When the wireless projector is idle, its ID is shown at the bottom left corner of the projection screen.
-
Page 63: Appendix C. Specifications
Appendix C. Specifications Following are specifications for the C400 Wireless Projector. Temperature (non-operating) Altitude (operating) Altitude (non-operating) Humidity (operating) Humidity (non-operating) Dimensions Weight Optics (focus range) Lamp type Input power requirements © Lenovo 2005. Portions © IBM Corp. 2004. 5° to 35° C (41° to 95° F) at sea level -10°... - Page 64 C400 Wireless Projector: User’s Guide...
-
Page 65: Appendix D. Service And Support
Telephone technical support Installation and configuration support through the Customer Support Center will be withdrawn or made available for a fee, at Lenovo’s discretion, 90 days after the option has been withdrawn from marketing. Additional support offerings, including step-by-step installation assistance, are available for a nominal fee. - Page 66 C400 Wireless Projector: User’s Guide...
-
Page 67: Appendix E. Lenovo Statement Of Limited Warranty Lsolw-00 05/2005
Country-unique Terms, and Part 3 - Warranty Information. The terms of Part 2 replace or modify those of Part 1. The warranties provided by Lenovo Group Limited or one of its subsidiaries (called ″Lenovo″) in this Statement of Limited Warranty apply only to Machines you purchase for your use, and not for resale. - Page 68 If the Machine does not function as warranted during the warranty period, contact a Service Provider. If you do not register the Machine with Lenovo, you may be required to present proof of purchase as evidence of your entitlement to warranty service.
- Page 69 Personal Data. Limitation of Liability Lenovo is responsible for loss of, or damage to, your Machine only while it is 1) in your Service Provider’s possession or 2) in transit in those cases where Lenovo is responsible for the transportation charges.
-
Page 70: Part 2 - Country-Unique Terms
Governing Law Both you and Lenovo consent to the application of the laws of the country in which you acquired the Machine to govern, interpret, and enforce all of your and Lenovo’s rights, duties, and obligations arising from, or relating in any manner to, the subject matter of this Statement of Limited Warranty, without regard to conflict of law principles. - Page 71 Limitation of Liability: The following is added to this section: Where Lenovo is in breach of a condition or warranty implied by the Trade Practices Act 1974 or other similar legislation, Lenovo’s liability is limited to the repair or replacement of the goods or the supply of equivalent goods.
- Page 72 2. as to any other actual damage arising in any situation involving nonperformance by Lenovo pursuant to, or in any way related to the subject of this Statement of Limited Warranty, the charge paid by you for the individual Machine that is the subject of the claim.
- Page 73 Consumer Guarantees Act 1993 or other legislation which cannot be excluded or limited. The Consumer Guarantees Act 1993 will not apply in respect of any goods which Lenovo provides, if you require the goods for the purposes of a business as defined in that Act.
- Page 74 Machine in any of those countries from a Service Provider, provided the Machine has been announced and made available by Lenovo in the country in which you wish to obtain service. If you purchased a Personal Computer Machine in Albania, Armenia, Belarus,...
- Page 75 Service Provider, provided the Machine has been announced and made available by Lenovo in the country in which you wish to obtain service.. If you purchase a Machine in a Middle Eastern or African country, you may obtain...
-
Page 76: European Union (Eu)
598 (2) of the Austrian Code of Civil Procedure, the parties expressly waive the application of paragraph 595 (1) figure 7 of the Code. Lenovo may, however, institute proceedings in a competent court in the country of installation. - Page 77 Limitation of Liability: The following replaces the terms of this section in its entirety: Except as otherwise provided by mandatory law: 1. Lenovo’s liability for any damages and losses that may arise as a consequence of the fulfillment of its obligations under or in connection with this Statement...
- Page 78 In case your Service Provider is unable to repair a Lenovo Machine, you can alternatively ask for a partial refund as far as justified by the reduced value of the unrepaired Machine or ask for a cancellation of the respective agreement for such Machine and get your money refunded.
- Page 79 For the purposes of this section, a “Default” means any act, statement, omission, or negligence on the part of Lenovo in connection with, or in relation to, the subject matter of this Statement of Limited Warranty in respect of which Lenovo is legally liable to you, whether in contract or tort.
- Page 80 Save with respect to any liability referred to in item 1 above, under no circumstances is Lenovo or any of its suppliers, resellers or Service Providers liable for any of the following, even if Lenovo or they were informed of the possibility of such losses: 1.
-
Page 81: Part 3 - Warranty Information
1. Customer Replaceable Unit (″CRU″) Service Lenovo will ship CRUs to you for you to install, Tier 1 CRUs are easy to install whereas Tier 2 CRUs require some technical skill and tools. CRU information... - Page 82 Machine and are available from Lenovo at any time on your request. You may request that a Service Provider install CRUs, at no additional charge, under the type of warranty service designated for your Machine. Lenovo specifies in the materials shipped with a replacement CRU whether a defective CRU must be returned.
-
Page 83: Worldwide Telephone List
566-5161 ext. 8201 Toll Free within the Dominican Republic: 1-200-1929 (Spanish) Ecuador 1-800-426911 (Spanish) El Salvador 250-5696 (Spanish) Estonia +386-61-1796-699 Finland Up and running support: 09-459-6960 Warranty service and support: +358-800-1-4260 (Finnish) Appendix E. Lenovo Statement of Limited Warranty LSOLW-00 05/2005 E-17... - Page 84 English speaking operator. PC Software: 0120-558-695 Overseas calls: +81-44-200-8666 (Japanese) Korea 1588-5801 (Korean) Latvia +386-61-1796-699 Lithuania +386-61-1796-699 Luxembourg +352-298-977-5063 (French) Malaysia 1800-88-8558 (English, Bahasa, Melayu) Malta +356-23-4175 Mexico 001-866-434-2080 (Spanish) Middle East +44 (0)1475-555-055 E-18 C400 Wireless Projector: User’s Guide...
- Page 85 Warranty service and support (software): 08457-151-516 (English) United States 1-800-426-7378 (English) Uruguay 000-411-005-6649 (Spanish) Venezuela 0-800-100-2011 (Spanish) Vietnam For northern area and Hanoi: 84-4-8436675 For southern area and Ho Chi Minh City: 84-8-829-5160 (English, Vietnamese) Appendix E. Lenovo Statement of Limited Warranty LSOLW-00 05/2005 E-19...
-
Page 86: Guarantee Supplement For Mexico
All software programs pre-loaded in the equipment shall only have a thirty- (30) day guarantee for installation defects from the date of purchase. Lenovo is not responsible for the information in such software programs and/or any additional software programs installed by you or installed after purchase of the product. -
Page 87: Appendix F. Notices
Web sites. The materials at those Web sites are not part of the materials for this Lenovo product, and use of those Web sites is at your own risk. -
Page 88: Trademarks
Furthermore, some measurements may have been estimated through extrapolation. Actual results may vary. Users of this document should verify the applicable data for their specific environment. Trademarks The following terms are trademarks of Lenovo in the United States, other countries, or both: Lenovo ThinkPad... -
Page 89: Federal Communications Commission (Fcc) Class A Statement Of Compliance
Lenovo is not responsible for any radio or television interference caused by using other than recommended cables and connectors or by unauthorized changes or modifications to this equipment. - Page 90 Directive 89/336/ECC on the approximation of the laws of the Member States relating to electromagnetic compatibility. Lenovo cannot accept responsibility for any failure to satisfy the protection requirements resulting from a non-recommended modification of the product, including the fitting of non-Lenovo option cards.
- Page 91 89/336/CEE en lo que a la legislatura de los Estados Miembros sobre compatibilidad electromagnética se refiere. Lenovo no puede aceptar responsabilidad alguna si este producto deja de satisfacer dichos requisitos de protección como resultado de una modificación no recomendada del producto, incluyendo el ajuste de tarjetas de opción que no sean Lenovo.
- Page 92 Additional Compliances Notices C400 Wireless Projector: User’s Guide...
- Page 94 Part Number: 40Y7781 Printed in USA (1P) P/N: 40Y7781...
Need help?
Do you have a question about the ThinkVision C400 and is the answer not in the manual?
Questions and answers