
Related Manuals for CAB E2


Summary of Contents for CAB E2
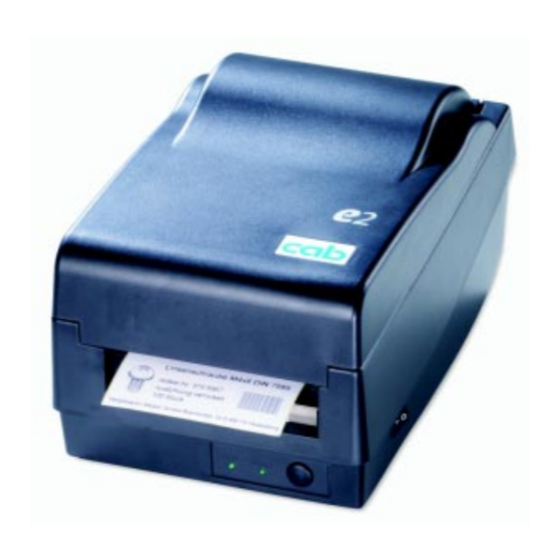
- Page 1 Operator´s manual for the Thermal / Transferprinter cab Produkttechnik GmbH Edition 1 5/2002...
-
Page 2: Proprietary Statement
Produkttechnik GmbH & Co KG. has been advised of the possibility of such damages. - Page 3 A Letter to Our Customers Dear Customers, Congratulation for selecting the cab e2 series printer! We believe soon you will find that you have made clever choice! This booklet is intended for helping you to know your printer better, then further to optimize it.
-
Page 4: Table Of Contents
Replacing Thermal Print Head ..................40 Reference Technical Information ..................41 Printer Programming Language A, PPLA ..............43 Interface Specifications ....................44 ASCII TABLE ........................ 48 Appendix I - Installing Dispenser Kit................49 Appendix II - Installing the Cutter ..................53 cab Produkttechnik GmbH... -
Page 5: Checking Your Box
Having performed the primary inspections, next step, please check whether you have received the following accessories together with the printer. If there is any item missing, contact your local dealer to get it. cab Produkttechnik GmbH... -
Page 6: Power Supply
2. Plug the other end of the cord into an appropriate AC electrical outlet. 3. When plugging the connector into power jack, please leave the power switch at „O“position and don’t touch the 36 pin parallel connector. cab Produkttechnik GmbH... -
Page 7: Parts And Features
Parts and Features cab Produkttechnik GmbH... - Page 8 Produkttechnik GmbH...
-
Page 9: Loading The Ribbon
1. Lift the top cover to expose the media compartment. 2. Unlatch the print head module by pushing the two white release levers on the sides toward the rear. 3. Turn over the print head module to expose the ribbon supply holder. cab Produkttechnik GmbH... - Page 10 6. Insert the ribbon roll into the supply holder. ( first snap in the left side and then the right side) 7. Turn back the print head module and then insert the bare core into the pick-up holder. (first snap in the left side, then the right side) cab Produkttechnik GmbH...
- Page 11 8. Turn the wheel of the print head module to ensure the ribbon is tightly wound. 9. Press down the print head module firmly till you hear a snap. cab Produkttechnik GmbH...
-
Page 12: Loading The Media
Loading the Media e2 printers can be operated in three different options: standard, peel-off, or with a cutter. - Standard mode allows you to collect each label freely. - In peel-off mode, the backing material is being peeled away from the label as it is printed. - Page 13 4. Click the media hanger back to the media compartment. 5. Move the media roll to the left end. 6. Move the shield to the left next to the media. cab Produkttechnik GmbH...
- Page 14 7. Unlatch the print head module. 8. Hold the print head module upright with one hand to allow the media pass under it. Lead the media through the media guides with the other hand. 9. Lead the media over the platen roller. cab Produkttechnik GmbH...
- Page 15 10. Turn back the print head module and then press it down firmly till you hear a snap. 11. Close the top cover and turn on the printer or press the feed button if the printer is already on. cab Produkttechnik GmbH...
-
Page 16: Peel Off Mode
(Installing the dispenser kit, please refer to the Appendix I) Follow the common procedure of „Loading the Media“of Standard Mode from step 1 to step 8. 9. Remove approximately 6" long labels from the label backing paper. cab Produkttechnik GmbH... - Page 17 10. Trim the edge of the label backing paper with scissor or knife. 11. Lead the backing paper over the dispenser bar, then thread it back into the slot between the dispenser bar and H cover, ensuring that it is inserted between white plastic roller and platen roller. cab Produkttechnik GmbH...
- Page 18 12. Press „FEED“ button and the label backing paper will come out from the slot under the H cover. 13. On e2 Peel-Off mode, powered on status, in case of improper installation, just keep pressing the „FEED“button to back-feed thelabel stock to re-install it.
-
Page 19: Cutter Mode
11. Close the top cover and turn on the printer or press the „FEED“ button if the printer is already on. Note : The „FEED“ button will not drive the printer to cut. The cutting work can be executed only when the software setting is ready. cab Produkttechnik GmbH... -
Page 20: Operator Controls
Keep pressing while turning on the power- to print out a configuration profile Ready Indicator Show the printers status Green-printer is ready to operate Blinking-printer is paused Power indicator Shows the power and error status Off-printer power off Green-printer power on Blinking-error occurs cab Produkttechnik GmbH... -
Page 21: Performing Calibration
4. At this moment, the printer will feed the label stock 12 inches in length, and come back to the factory default settings. Note : All settings are stored in non-volatile E2PROM andcannot be destroyed even turn off the printer. cab Produkttechnik GmbH... -
Page 22: Hooking Up The Printer And Computer
The other end of this signal interface cable connects to a serial port at the host computer. For technical and pinout information, please refer to the Reference Technical Informa- tion-Interface Specification on this booklet. cab Produkttechnik GmbH... -
Page 23: Parallel Interface Requirements
2. It is not necessary to set the switch or send any command to select the parallel or serial port . The printer can automatically detect it. 3. The default settings can be read from the configuration report. cab Produkttechnik GmbH... -
Page 24: Communicate With The Printer
Windows. Before installation 1. Check the contents of the driver to ensure it is complete. 2. Make a backup copy of this driver. 3. Read the README.TXT file for installation guide and change notices. cab Produkttechnik GmbH... -
Page 25: Installing Driver
„LPT2 :“ or „LPT3 :“ , for serial port select „COM1 :“ or „COM2 :“. 9. After the related files have been copied to your system, theinstallation is complete. 10. If you need to print from the label printer, set „Label Dr. 200"(or Label Dr.300) as the Default Printer. cab Produkttechnik GmbH... - Page 26 LabelView File ⇒ Select Printer ⇒ Label Dr. on LPT1: ⇒ OK CodeSoft File ⇒ Printer ⇒ Windows ⇒ Label Dr. on LPT1: ⇒ OK LabelMatrix File ⇒ Printer Setup ⇒ Label Dr. on LPT1: ⇒ OK cab Produkttechnik GmbH...
- Page 27 (Accessory setting) To use the cutter and peeler function you still need to enter More Options and select one of the items. Device options (Speed) Set the print speed. For the e2 printer , the speed ranges from 1 to 3 IPS. cab Produkttechnik GmbH...
- Page 28 ⇒ click „Details“ ⇒ select the IO port ⇒ click „OK“ Paper size Orientation Paper source(Media type) Media choice (Darkness) Copies Properties menu ⇒ click „Paper“ ⇒ click each item to select desired parameter ⇒ click „OK“. cab Produkttechnik GmbH...
- Page 29 Output bin (Accessory setting) Properties menu ⇒ click „Paper“ ⇒ click „more option“ ⇒ select Enable/without ⇒ cutter, peeler ⇒ click „OK“ Print quality (Speed) Properties menu ⇒ click „Device Options“ ⇒ select parameters ⇒ click „OK“ cab Produkttechnik GmbH...
- Page 30 Create a new size Properties menu ⇒ click „Paper“ ⇒ select „Custom“ ⇒ User-Define size ⇒ set up a new size ⇒ click „OK“ cab Produkttechnik GmbH...
- Page 31 ⇒ select the IO port ⇒ click „OK“ Paper source (Media type) Back to Printers menu ⇒ right click to get pop-up menu ⇒ select „Printing Reference“ ⇒ click „Paper Quality“ ⇒ select media type ⇒ click „OK“ cab Produkttechnik GmbH...
- Page 32 ⇒ select „Portrait“ or „Landscape“ ⇒ click „OK Paper size Copies Media choice (Accessory setting) Paper/Output (Speed) Print quality (Darkness) Printing Reference menu ⇒ click „Layout“ ⇒ click „Advanced“button ⇒ click each item to select the parameters ⇒ click „OK“ cab Produkttechnik GmbH...
- Page 33 ⇒ right click to get popup menu ⇒ select „Server Properties“ ⇒ enter a form name for the new form in „Form description for“ ⇒ reset the paper size in the specific squares of the „Measurements“ ⇒ ⇒ click „OK“ cab Produkttechnik GmbH...
- Page 34 Paper size Orientation Paper source (Media type) Copies Media choice (Accessory setting) Printers menu r⇒ ight click to get pop-up menu ⇒ select „Document Defaults“ ⇒ click „Advanced“ button ⇒ click each item to select desired parameter cab Produkttechnik GmbH...
- Page 35 Print quality (Darkness) Default Document menu ⇒ click „Advanced“ ⇒ click each item to ⇒ select desired parameter click „OK“ Create a new size Please refer to the procedure of create a new size on Win 2000. cab Produkttechnik GmbH...
-
Page 36: Troubleshooting
Normally, when the printer is in abnormal condition, the „POWER“ LED will keep blinking. The printing work and the communication between the host and printer will stop. To understand the problem, please check both LEDs first: A. Power and Ready LEDs blink at the same tempo cab Produkttechnik GmbH... - Page 37 Power and Ready LEDs blink alternately C. Only the Power LED blinks cab Produkttechnik GmbH...
-
Page 38: Miscellaneous
Label Dr. for your Windowssystem and the label printer has been selected. • Vertical streaks in the printout usually indicate a dirty or faulty print head.(Refer to the following example) Clean the print head first, if they still persist, replace the print head. cab Produkttechnik GmbH... - Page 39 . Refer to the next chapter and clean the related spare parts. Recovery To continue your print jobs after the abnormal conditions have been corrected, simply press the panel button or restart the printer. Make sure that the LED is not blinking and remember to resend your files. cab Produkttechnik GmbH...
-
Page 40: Caring For Your Printer
5. Disconnect the print head cable. 6. Dissemble the print head and the mounting bracket by releasing screws. 7. Replace with new print head, then resemble the print head module in reverse order. Be careful not to touch the print head elements. cab Produkttechnik GmbH... -
Page 41: Reference Technical Information
4.3 in.(109mm) outside diameter, 1 in.(25 mm) inside diameter Label indexing Black stripe and gap Ribbon types Wax, Wax/Resin and Resin Ribbon size OD 1.45 in. (37 mm); ID 0.5 in. (12.7mm); Length11 Dimension W7.3 x D10.9 x H6.0 in. cab Produkttechnik GmbH... - Page 42 Weight 1.7 kg (3.74 lbs) Electrical FCC class B 19Vac Or DC24V (min 2.5A), 50/60Hz CE, UL and CUL approved. Operating temperature 40°F ~100°F (4°C~38°C) Storage temperature 40°F~140°F (4°C~60°C) Humidity 15~85% RH cab Produkttechnik GmbH...
-
Page 43: Printer Programming Language A, Ppla
Bar code types Code 39, Code 93, Code 128/subset A,B,C,Codabar, Interleave 2 of 5, UPC A/E/2 and 5add-on, EAN-8/13, UCC/EAN-128, Postnet,Plessey, HBIC, Telepen and FIM. MaxiCode and PDF417 (2D symbologies). Graphics PCX, BMP, IMG and HEX formats cab Produkttechnik GmbH... -
Page 44: Interface Specifications
The RS232 connector on the printer side is a female, DB-9. Note : Pin 9 is reserved for KDU (keyboard device unit), therefore do not connect these pins if you are using a general host like a PC. Connection with host: cab Produkttechnik GmbH... - Page 45 Alternatively you can just connect the 3 wires in the following way. cab Produkttechnik GmbH...
- Page 46 Handshaking : XON/XOFF as well as CTS/RTS (hardware flow control). If you run an application with the bundled printer driver under Windows and use the serial port, you should check the above parameters and set the flow control to „Xon/Xoff „or „hardware“. cab Produkttechnik GmbH...
-
Page 47: Auto Polling
PC via different port. However as no port contention is made for this printer, If both PC transmit data at the same time to this printer, the data may become damaged in the receiving buffer. cab Produkttechnik GmbH... -
Page 48: Ascii Table
ASCII TABLE cab Produkttechnik GmbH... -
Page 49: Appendix I - Installing Dispenser Kit
6. Route the peeler sensor cable through the guides along the left side of the top cover. 7. Fix the sensor cable and sensor board with Loctite-444 instant adhesive or equivalent. cab Produkttechnik GmbH... -
Page 50: Middle Cover
8. Release the two screws at the bottom of the base housing. 9. Remove the middle cover. 10. Take off the H Cover. 11. Tape the direction label on the top of the H cover with the arrow sign heading toward the opposite of you. cab Produkttechnik GmbH... -
Page 51: Base Housing
Ensure that the dispenser bar is paralleled with the black platen roller and it’s long thinner end is at the left. 18. Secure back the screw on the left bracket of the chassis. 19. Guide the sensor cable connector through the hole on the upper left corner of middle cover. cab Produkttechnik GmbH... - Page 52 20. Insert the sensor connector into its receptacle on the main logic board of the base housing. 21. Click the middle cover back to the base housing. First click in the front part then the rear. 22. Secure the two screws at the bottom of the base housing. cab Produkttechnik GmbH...
-
Page 53: Appendix Ii - Installing The Cutter
Appendix II - Installing the Cutter 1. Turn off the printer power, unplug the power cable and Centronics / Serial cable. 2. Remove the top cover. 3. Remove two screws at base housing. cab Produkttechnik GmbH... - Page 54 4. Remove the whole print head assembly by releasing 4 screws at its feet. cab Produkttechnik GmbH...
- Page 55 7. Plug the cutter’s connector into the PCB’s header connector (JP13). 8. Reinstate the print head assembly by securing back the 4 screws. 9. Click back the middle cover. 10. Secure two screws back at base housing. 11. Click back the top cover. cab Produkttechnik GmbH...
Need help?
Do you have a question about the E2 and is the answer not in the manual?
Questions and answers