
Related Manuals for CAB THARO Apollo Series


Summary of Contents for CAB THARO Apollo Series
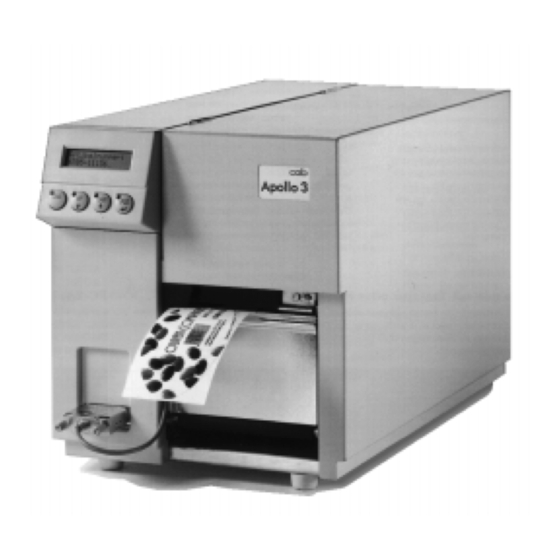
- Page 1 Transfer Printer Apollo Apollo 1 / Apollo 2 / Apollo 3 Operator's Manual Edition 2/01...
- Page 2 Fax : (330) 225-0099 Web : http://www.cabgmbh.com e-mail : info@cabgmbh.com copyright by cab / 900 8085 / L39 / 1 Technische Änderungen vorbehalten In accordance with our policy of continual product improvement, we reserve the right to alter specifications without notice Données technique modifiables sans prévais...
- Page 3 - Produkttechnik GmbH Karlsruhe. Edition 2/01 Printed in Germany cab - Produkttechnik GmbH & Co KG / Tharo Systems, Inc.
-
Page 4: Table Of Contents
5. Connecting the Printer ....................32 Connection to Power Supply ................... 32 Connection to a Computer ....................33 6. Media Loading ....................... 34 Loading Labels ........................ 34 Loading Transfer Ribbon ....................36 cab - Produkttechnik GmbH & Co KG / Tharo Systems, Inc. - Page 5 Explanation of the Self Test Printout ................76 11. Printer Info Display ......................80 Viewing the Printer Info Display ..................80 Definition of the Printer Info Display ................80 cab - Produkttechnik GmbH & Co KG / Tharo Systems, Inc.
- Page 6 Writing on the Memory Card ................... 102 Printing from a Memory Card .................. 103 Keyboard Adapter ......................104 Installation of the Keyboard Adapter ..............104 Key Assignment ...................... 105 Special Key Functions .................... 105 cab - Produkttechnik GmbH & Co KG / Tharo Systems, Inc.
- Page 7 Cleaning the Printhead ....................D-2 Adjustment of the Printhead ..................D-3 Appendix E - Firmware Updates ..................E-1 General Updates ......................E-1 Firmware Updates Apollo 3 ................... E-1 Index EC-Conformity Declaration cab - Produkttechnik GmbH & Co KG / Tharo Systems, Inc.
-
Page 8: A General Guide To Thedocumentation
Detailed information about service and maintenance are included in the "Service Manuals" of the Apollo 1, Apollo 2 and Apollo 3. (e.g. replacement of components, adjustment instructions, circuit diagrams, spare parts lists, etc.) cab - Produkttechnik GmbH & Co KG / Tharo Systems, Inc. -
Page 9: Trademarks
Speedo ™ is a registered trademark of Bitstream, Inc. TrueType ™ is a registered trademark of Apple Computer, Inc. Easylabel ® is a registered trademark of Tharo Systems, Inc. cab - Produkttechnik GmbH & Co KG / Tharo Systems, Inc. -
Page 10: Characteristics Of The Thermal Printhead
Careful use will allow you to print approximately between 18 to 30 miles (30 to 50 km) of print media before the printhead needs replacing. Improper usage can cause damage to the printhead. cab - Produkttechnik GmbH & Co KG / Tharo Systems, Inc. -
Page 11: Product Description
Additional accessories are, for instance, external rewinders for large print jobs, a label cutter, or an easy-to-install tamp applicator for automatically applying labels. The modular design of the Apollo guarantees efficient service. cab - Produkttechnik GmbH & Co KG / Tharo Systems, Inc. -
Page 12: Compliances
WARNING ! This is a Class A product. In a domestic environment this product may cause radio interference in which case the user may be required to take adequate measures. cab - Produkttechnik GmbH & Co KG / Tharo Systems, Inc. -
Page 13: Technical Specifications
Graphic elements : Line, box, circle, ellipse, fill-in segment, arrow Graphic file type : .PCX, .IMG, .BMP, .TIF, .GIF, and .MAC files cab - Produkttechnik GmbH & Co KG / Tharo Systems, Inc. - Page 14 To avoid smudging of the transfer ribbon onto the label material, the printhead can be lifted during backfeed. (Apollo 1 only) cab - Produkttechnik GmbH & Co KG / Tharo Systems, Inc.
- Page 15 Internal Rewinder Ribbon Saver External Rewinder Cutter Rewind Guide Plate Present Sensor Memory Card Keyboard Adapter Applicator Standard Option Table 1 a Overview of the equipment of the different Apollo's cab - Produkttechnik GmbH & Co KG / Tharo Systems, Inc.
-
Page 16: Optional Features
The sensor, which is attached to the Apollo by the peripheral connector, indicates the presence of a label, and pauses the printing process until the label is removed. cab - Produkttechnik GmbH & Co KG / Tharo Systems, Inc. -
Page 17: Memory Card
EASYLABEL is an intelligent and useful label design software which is easy to use in connection with your Apollo. EASYLABEL can be run on all Microsoft Windows compatible computers. For further information about EASYLABEL, contact your local Apollo reseller. cab - Produkttechnik GmbH & Co KG / Tharo Systems, Inc. -
Page 18: Print Media
If in doubt, we will perform test prints with your label material to find the best suitable transfer ribbon. cab - Produkttechnik GmbH & Co KG / Tharo Systems, Inc. -
Page 19: Print Media For Direct Thermal Printing
If in doubt, your local distributor will advise you on a good combination of suitable material, or carry out tests to find out which ribbon fits your label material best. cab - Produkttechnik GmbH & Co KG / Tharo Systems, Inc. -
Page 20: Label/ Tag Media Specifications
.08 (2) .2 (5) * for Apollo 3/200M : 36.8 (934), for Apollo 3/300M : 16.4 (417) Table 1 b Label formats in inches (figures in brackets are in mm) cab - Produkttechnik GmbH & Co KG / Tharo Systems, Inc. -
Page 21: Transfer Ribbon
"trailer", which attaches the end of the ribbon to the core. NOTICE ! Make certain before purchasing transfer ribbon that the "trailer" (see above) is not more than 5.9" (150mm) long. cab - Produkttechnik GmbH & Co KG / Tharo Systems, Inc. -
Page 22: General Safety Instructions
The supplied equipment of the Apollo depends on the requested options. Compare the delivered accessories with your order. NOTICE ! Please keep the original packaging in case the printer must be returned ! cab - Produkttechnik GmbH & Co KG / Tharo Systems, Inc. -
Page 23: Printer Component Location
Fig. 4 a Front view - Display - Function keys with indicator LEDs - Cover - Ribbon shield screw - Ribbon shield - Dispense/ Tear-off plate - Peripheral port cab - Produkttechnik GmbH & Co KG / Tharo Systems, Inc. - Page 24 4 - Media retainer 5 - Media retainer knurled head screw 6 - Print mechanism (for details see Figure 4 c) 7 - Knurled knob 8 - Media rewind hub cab - Produkttechnik GmbH & Co KG / Tharo Systems, Inc.
- Page 25 9 - Accessory lock/ release lever 10 - Printhead levelling adjustment screw 11 - Media feed roller 12 - Dispense/ Tear-off plate 13 - Ribbon shield 14 - Thermal printhead cab - Produkttechnik GmbH & Co KG / Tharo Systems, Inc.
- Page 26 5 - Media retainer knurled head screw 6 - Print mechanism (for details see Figure 4 e) For Apollo 2/300R only 7 - Media rewind hub 8 - Knurled knob cab - Produkttechnik GmbH & Co KG / Tharo Systems, Inc.
- Page 27 7 - Printhead levelling adjustment screw 8 - Media feed roller 9 - Dispense/ Tear-off plate 10 - Ribbon shield 11 - Thermal printhead For Apollo 2/300R only 12 - Rewind assist roller cab - Produkttechnik GmbH & Co KG / Tharo Systems, Inc.
- Page 28 2 - Ribbon supply hub 3 - Media hub 4 - Media retainer 5 - Media retainer knurled head screw 6 - Print mechanism (for details see Figure 4 g) cab - Produkttechnik GmbH & Co KG / Tharo Systems, Inc.
- Page 29 7 - Accessory lock/ release lever 8 - Printhead levelling adjustment screw 9 - Media feed roller 10 - Dispense/ Tear-off plate 11 - Ribbon shield 12 - Thermal printhead cab - Produkttechnik GmbH & Co KG / Tharo Systems, Inc.
- Page 30 3 - Input voltage selector cover 4 - Power switch 5 - Power supply connector 6 - Serial interface port 7 - Parallel interface port 8 - Slot for fanfold paper cab - Produkttechnik GmbH & Co KG / Tharo Systems, Inc.
- Page 31 3 - Serial interface port 4 - Input voltage selector/ Fuse holder 5 - Input voltage selector cover 6 - Power switch 7 - Power supply connector 8 - Slot for fanfold paper cab - Produkttechnik GmbH & Co KG / Tharo Systems, Inc.
-
Page 32: Connecting The Printer
Slide the voltage selector back into the power supply module so that the correct voltage is visible in the lid window (2). Connect the printer to a grounded outlet using the power cable supplied in the accessories package. cab - Produkttechnik GmbH & Co KG / Tharo Systems, Inc. -
Page 33: Connection To A Computer
Make sure that all connected computers and their connecting cables are correctly grounded. 1 - Parallel interface port 2 - Serial interface port Apollo 1/2 Apollo 3 Fig. 5 b Interface ports (detailed view/ rear of the printer) cab - Produkttechnik GmbH & Co KG / Tharo Systems, Inc. -
Page 34: Media Loading
The broken-dotted line shows the media path of fanfold paper (6). For printers with internal rewinder, pay special attention that the media is properly fed above the internal rewind hub (7) when loading. cab - Produkttechnik GmbH & Co KG / Tharo Systems, Inc. - Page 35 9. Turn the lever (1) counter-clockwise until it stops and, thereby, lock the printhead. NOTICE ! If you do not use the printer for an extended period of time, lift the printhead to avoid possible flattening of the print roller. cab - Produkttechnik GmbH & Co KG / Tharo Systems, Inc.
-
Page 36: Loading Transfer Ribbon
For Apollo 1, first turn the lever (1) to a central position between the locked and unlocked positions. 7. To lock the printhead, rotate the lever (1) back counter-clockwise. cab - Produkttechnik GmbH & Co KG / Tharo Systems, Inc. -
Page 37: Adjustments Concerning The Labels
Adjust the sensor position using the knurled knob (2). By turning the knob clockwise the sensor moves outwards, and by turning the knob counter-clockwise the sensor moves inwards. cab - Produkttechnik GmbH & Co KG / Tharo Systems, Inc. -
Page 38: Adjustment Of The Printhead Support
As the adjustment criterion, check the quality of the print image. 3. Tighten the locking screw (2). NOTICE ! Incorrect adjustments of the printhead support may cause wrinkles in the transfer ribbon. cab - Produkttechnik GmbH & Co KG / Tharo Systems, Inc. -
Page 39: Adjustment Of The Transfer Ribbon
"1", the tension is highest on the outside, and if it is in position "5", the tension is highest on the inside. 3. After completing the adjustment, tighten the securing screw (4). cab - Produkttechnik GmbH & Co KG / Tharo Systems, Inc. -
Page 40: Control Panel
On the following pages, you will find descriptions of the system modes of the Apollo, the related indications by the LCD display and the LEDs as well as a description of the function keys under differing conditions. cab - Produkttechnik GmbH & Co KG / Tharo Systems, Inc. -
Page 41: System Mode System Test
The bottom line of the display shows the numbers "123456" one after the other depending on the progress of the several test steps. LED Display All LEDs flash up once briefly. Function keys The function keys have no effect. cab - Produkttechnik GmbH & Co KG / Tharo Systems, Inc. -
Page 42: System Mode Online
ONL key Pressing both keys together for at least 5 seconds will switch into the SETUP mode. (LED ONL off) CAN key Table 8 a Key functions in ONLINE mode cab - Produkttechnik GmbH & Co KG / Tharo Systems, Inc. -
Page 43: System Mode Offline
(only if memory card is installed and formats are stored on it) PSE key Display shows current printer mode. ("Printer info"/ see also Chapter 11) Table 8 b Function keys in OFFLINE mode cab - Produkttechnik GmbH & Co KG / Tharo Systems, Inc. -
Page 44: System Mode Print
Switch into ONLINE mode. (LED ONL on) PSE key Interrupts the current print job. Switch into PAUSE mode. (LED PSE on) Table 8 c Function keys in PRINT mode cab - Produkttechnik GmbH & Co KG / Tharo Systems, Inc. -
Page 45: System Mode Pause
Switch into ONLINE mode. (LED PSE off) PSE key Continues the current print job. Switch into PRINT mode. (LED PSE off) Table 8 d Function keys in PAUSE mode cab - Produkttechnik GmbH & Co KG / Tharo Systems, Inc. -
Page 46: System Mode Fault-Correctable
PSE key Continues current print job after error correction. Switch into PRINT mode. (LED ONL on, LED CAN off, LED PSE off) Table 8 e Function keys in mode FAULT-CORRECTABLE cab - Produkttechnik GmbH & Co KG / Tharo Systems, Inc. -
Page 47: System Mode Fault-Irrecoverable
If ONLINE mode cannot be entered, switch printer on and off again. If the fault remains contact Technical Service. Table 8 f Function keys in mode FAULT - IRRECOVERABLE cab - Produkttechnik GmbH & Co KG / Tharo Systems, Inc. -
Page 48: System Mode Setup
Reduces numerical setup values. CAN key Skips to previous setup parameter. Increases numerical setup values. PSE key Confirms selected settings for parameters. Table 8 g Function keys in SETUP mode cab - Produkttechnik GmbH & Co KG / Tharo Systems, Inc. -
Page 49: System Mode Test Print
Following the completion of the system test, the display shows "Test print". LED Display LED ONL on. Function Keys CAN key Cancels the test print. Switch into SYSTEMTEST mode. Table 8 h Function keys in TEST PRINT mode cab - Produkttechnik GmbH & Co KG / Tharo Systems, Inc. -
Page 50: System Mode Monitor Mode/ Ascii Dump Mode
ONL key Switch into ONLINE mode. FF key Initiates a paper feed of about .8 in (21 mm). Table 8 i Function keys in MONITOR MODE/ ASCII Dump mode cab - Produkttechnik GmbH & Co KG / Tharo Systems, Inc. -
Page 51: System Mode Label From Card
Moves the cursor to the right when setting the quantity of labels to print. Switch into PRINT mode. Table 8 k Function keys in the LABEL FROM CARD mode cab - Produkttechnik GmbH & Co KG / Tharo Systems, Inc. -
Page 52: Setup
Note, that in some cases the printer may initially be set to certain parameters which may differ from the default settings. (e.g. "Country") On the following pages, you will find details to change the setting of the parameters. cab - Produkttechnik GmbH & Co KG / Tharo Systems, Inc. -
Page 53: Overview Of The Setup Parameters
(#) ..Parameter is limited 14 Copy card changeable via software 15 Backfeed 16 Debug mode 17 Tear-off position 18 Pause reprint Country Fig. 9 a Setup parameters cab - Produkttechnik GmbH & Co KG / Tharo Systems, Inc. -
Page 54: Country/Land
Suisse 1 Country Pays Belgie Suomi Nazione Italia Pais España Zeme Ceska republica Land Danmark Confirmation xxxx xxxxxxxxx 2 Transfer print xxxx xxxxxxxxx Fig. 9 b Set "Country" parameter cab - Produkttechnik GmbH & Co KG / Tharo Systems, Inc. - Page 55 Suomi 22.01.2001 14:15:56 Nazione Italia 22-01-2001 14:15:56 Pais España 22-01-2001 14:15:56 Zeme Ceska republica 22.01.2001 14:15:56 Land Danmark 22/01/2001 14:15:56 Table 9 Specific format settings for date and time cab - Produkttechnik GmbH & Co KG / Tharo Systems, Inc.
-
Page 56: Transfer Print
Default Setting : Transfer print ON 1 Country Selection Transfer print 2 Transfer print Transfer print Confirmation Transfer print 3 Label sensor Transfer print Fig. 9 c Set "Transfer print" parameter cab - Produkttechnik GmbH & Co KG / Tharo Systems, Inc. -
Page 57: Label Sensor
1 Apollo 1 Selection 2 Apollo 2 Label sensor Gap sensor 3 Apollo 3 Label sensor Bottom-Reflect Confirmation Label sensor 4 Interface Label sensor Fig. 9 d Set "Label sensor" parameter cab - Produkttechnik GmbH & Co KG / Tharo Systems, Inc. -
Page 58: Interface
Centronics : Parallel interface, available at each computer The parameter setting cannot be changed via software. Default Setting : Interface RS-232, baud rate 9600, protocol RTS/CTS (network address A) cab - Produkttechnik GmbH & Co KG / Tharo Systems, Inc. - Page 59 1200 Baud rate Network address Baud rate Network address 57600 Baud rate Network address Confirmation 1200 Interface xxxxxxx 5 Cut Position Interface xxxxxxx Fig. 9 e Set "Interface" parameter cab - Produkttechnik GmbH & Co KG / Tharo Systems, Inc.
-
Page 60: Cut Position
Cut Position ± 0.x mm ± x.0 mm Confirmation Cut Position ± x.x mm 6 Peel Position Cut Position ± x.x mm Fig. 9 f Set "Cut Position" parameter cab - Produkttechnik GmbH & Co KG / Tharo Systems, Inc. -
Page 61: Peel Position
Peel Position ± 0.x mm ± x.0 mm Confirmation Peel Position ± x.x mm 7 Printhead pos. Peel Position ± x.x mm Fig. 9 g Set "Peel Position" parameter cab - Produkttechnik GmbH & Co KG / Tharo Systems, Inc. -
Page 62: Printhead Position
There are additional offset values in x- and y-direction. Any front panel value and software command value are totaled together for printing. The current field to be changed is flashing. cab - Produkttechnik GmbH & Co KG / Tharo Systems, Inc. - Page 63 Printhead pos. Y: ± 0.y mm Y: ± y.0 mm Confirmation Printhead pos. Y:±y.y mm Yes 8 Heat level Printhead pos. Y:±y.y mm Fig. 9 h Set "Printhead Position" parameter cab - Produkttechnik GmbH & Co KG / Tharo Systems, Inc.
-
Page 64: Heat Level
Heat level 8 Heat level Heat level Heat level ± 0 Confirmation Heat level ± x 9 Printer info Heat level ± x Fig. 9 i Set "Heat level" parameter cab - Produkttechnik GmbH & Co KG / Tharo Systems, Inc. -
Page 65: Printer Info
8 Heat level Printer info Printer info Version xxxxxxx 9 Printer info Printer info xxxxxx m/ xxxx h 10 Set date Fig. 9 k Printer info display cab - Produkttechnik GmbH & Co KG / Tharo Systems, Inc. -
Page 66: Set Date
10 Set date Set date Set date Set date 01.xx.xxxx xx.01.xxxx xx.xx.1970 Confirmation Set date xx.xx.xxxx 11 Set time Set date xx.xx.xxxx Fig. 9 l Set system date cab - Produkttechnik GmbH & Co KG / Tharo Systems, Inc. -
Page 67: Set Time
11 Set time Set time Set time Set time 00.xx.xx xx.00.xx xx.xx.00 Confirmation Set time xx.xx.xx 12 Character set Set time xx.xx.xx Fig. 9 m Set system time cab - Produkttechnik GmbH & Co KG / Tharo Systems, Inc. -
Page 68: Character Set
Character set ISO 8859-8 Character set Windows 1252 Character set Windows 1250 Confirmation Character set xxxxxxx 13 Format card Character set xxxxxxx Fig. 9 n Set "Character set" parameter cab - Produkttechnik GmbH & Co KG / Tharo Systems, Inc. -
Page 69: Format Card
Delete/Format a memory card If the procedure has been started without having a card installed the display will show "No card". Pressing the key will skip to the following parameter. cab - Produkttechnik GmbH & Co KG / Tharo Systems, Inc. -
Page 70: Copy Memory Card
If data with a capacity of more than 1Megabyte has to be copied, the duplication process will be divided into several cycles. Alternately, the printer display will ask to insert either the source card or the duplicate card. cab - Produkttechnik GmbH & Co KG / Tharo Systems, Inc. -
Page 71: Backfeed
15 Backfeed Backfeed Backfeed head down always Confirmation Backfeed 16 Debug mode Backfeed 1 Apollo 1 2 Apollo 2 3 Apollo 3 Fig. 9 q Set "Backfeed" parameter cab - Produkttechnik GmbH & Co KG / Tharo Systems, Inc. -
Page 72: Debug Mode
Default Setting : Debug mode OFF 15 Backfeed Selection Debug mode 16 Debug mode Debug mode Confirmation Debug mode 17 Tear-off positio Debug mode Fig. 9 r Set "Debug mode" cab - Produkttechnik GmbH & Co KG / Tharo Systems, Inc. -
Page 73: Tear-Off Position
Default Setting : Tear-off position OFF 16 Debug mode Selection Tear-off positio 17 Tear-off positio Tear-off positio Confirmation Tear-off positio 18 Pause reprint Tear-off positio Fig. 9 s Set "Tear-off position" parameter cab - Produkttechnik GmbH & Co KG / Tharo Systems, Inc. -
Page 74: Pause Reprint
Default Setting : Pause Reprint ON 17 Tear-off positio Selection Pause Reprint 18 Pause reprint Pause Reprint Confirmation Pause Reprint 1 Country Pause Reprint Fig. 9 t Set "Pause Reprint" parameter cab - Produkttechnik GmbH & Co KG / Tharo Systems, Inc. -
Page 75: 10 Self Test / Test Print
To cancel the test print press the key. NOTICE ! The self test can also be carried out with the command "t" from the ONLINE mode (see Programming Manual Apollo). cab - Produkttechnik GmbH & Co KG / Tharo Systems, Inc. -
Page 76: Explanation Of The Self Test Printout
Bar code with informationen test information Available fonts Test pattern Fig. 10 Self test printout On the following pages you will find detailed information about the contents of the test printout. cab - Produkttechnik GmbH & Co KG / Tharo Systems, Inc. - Page 77 Brightness Service information on brightness used at gap sensor Peripheral device : Type of device connected to peripheral port Memory card Type and capacity of memory card (PCMCIA/PC card) cab - Produkttechnik GmbH & Co KG / Tharo Systems, Inc.
- Page 78 Bar Code with Test Information This special bar code is designed for use by Technical Service. It contains compressed information about the current configuration of the Apollo as well as previously occurred faults. cab - Produkttechnik GmbH & Co KG / Tharo Systems, Inc.
- Page 79 With these patterns a range of print faults can be analyzed. The printout shows errors such as varying print intensity which indicates the printhead being misadjusted or dirty, or missing ink dots causing vertical white lines. cab - Produkttechnik GmbH & Co KG / Tharo Systems, Inc.
-
Page 80: 11 Printer Info Display
On the third page, the version and the date of the firmware are shown. The example as shown in Figure 11c represents the firmware version No. 2.64 as at January 12, 2001. cab - Produkttechnik GmbH & Co KG / Tharo Systems, Inc. - Page 81 Printer info 5: WIndows 1252 Fig. 11 e Printer info display 5 The last of the info pages shows the name of the character set as selected in setup. cab - Produkttechnik GmbH & Co KG / Tharo Systems, Inc.
-
Page 82: 12 Monitor Mode/ Ascii Dump Mode
21 15 29 1D 06 06 14 0E 22 16 30 1E 07 07 15 0F 23 17 31 1F Table 12 Representation of the control characters in monitor mode cab - Produkttechnik GmbH & Co KG / Tharo Systems, Inc. -
Page 83: Example Of Ascii Dump Mode
ASCII Dump mode. Fig. 12 a "Normal" label Fig. 12 b The same label as above printed in ASCII Dump mode cab - Produkttechnik GmbH & Co KG / Tharo Systems, Inc. - Page 84 This page is intentionally left blank cab - Produkttechnik GmbH & Co KG / Tharo Systems, Inc.
-
Page 85: 13 Options
2 - 2 Rewind axle adapters, with a diameter of 3 in or 75 mm 3 - 2 x 1A Fuses (for use at 115V) 4 - Power cable 5 - Clamp 6 - Flange cab - Produkttechnik GmbH & Co KG / Tharo Systems, Inc. -
Page 86: Safety Instructions
Set the switch (1) to the required method of rewinding : - Rewind with labels on the inner side of the silicon liner - Rewind with labels on the outer side of the silicon liner cab - Produkttechnik GmbH & Co KG / Tharo Systems, Inc. -
Page 87: Connecting The Rewinder To The Power Supply
Connect the rewinder to a grounded outlet using the power cable supplied in the accessories package. cab - Produkttechnik GmbH & Co KG / Tharo Systems, Inc. -
Page 88: Rewinding Directly Onto The Rewind Axle
The label strip must be able to move slightly between the disc and the flange. 6. Tighten knurled screw (2) in the flange (3). 7. Switch the rewinder ON. CAUTION ! When switched ON, the rewinder immediately starts rotating ! cab - Produkttechnik GmbH & Co KG / Tharo Systems, Inc. -
Page 89: Rewinding On To 3 In/ 75 Mm Cardboard Rolls
8. Slide flange onto the rewind axle (2) until it stops at the cardboard. Tighten knurled screw. 9. Switch the rewinder ON. CAUTION ! When switched ON, the rewinder immediately begins rotating ! cab - Produkttechnik GmbH & Co KG / Tharo Systems, Inc. -
Page 90: Cutter
The printer must be switched OFF before mounting the cutter ! The cutter may be used only when mounted onto the Apollo ! Fig. 13 f Mechanical mounting of the cutter cab - Produkttechnik GmbH & Co KG / Tharo Systems, Inc. - Page 91 The printer will feed one blank label forwards which will be cut off by the cutter. The label stock feed is now synchronized for the start of the printing process. cab - Produkttechnik GmbH & Co KG / Tharo Systems, Inc.
-
Page 92: Internal Rewinder M
(6) snaps into the gear (4) it is recommended to turn a little the rewinder during inserting. Push the assembly further into the printer until the flange (7) fits tightly the mounting plate. cab - Produkttechnik GmbH & Co KG / Tharo Systems, Inc. - Page 93 5. Turn the rewind plate (8), so that the two other holes (11,12) become accessible one after the other and insert screws at this two positions too. 6. Tighten all screws (10). 11 12 Fig. 13 k Mounting the internal rewinder (2) cab - Produkttechnik GmbH & Co KG / Tharo Systems, Inc.
-
Page 94: Rewind Guide Plate
2. Remove the tear-off plate (4) from the mounting holes (2). 3. Slide the rewind guide plate (3) into the mounting holes (2). 4. Turn the lever (1) clockwise until it stops. cab - Produkttechnik GmbH & Co KG / Tharo Systems, Inc. -
Page 95: Inserting The Labels For Internal Rewind
9. Lock the printhead by turning the lever (5) counter-clockwise until it stops. NOTICE ! If you do not use the printer for an extended period of time, lift the printhead to avoid possible flattening of the print roller. cab - Produkttechnik GmbH & Co KG / Tharo Systems, Inc. -
Page 96: Present Sensor
3. Slide the present sensor (2) into the mounting holes (3). 4. Turn lever (4) clockwise until it stops. 5. Connect the cable (5) of the present sensor (6) to the 15 pin peripheral port of the Apollo. cab - Produkttechnik GmbH & Co KG / Tharo Systems, Inc. -
Page 97: Inserting The Labels For Peel-Off
(in direct programming use the "P" command). NOTICE ! If you do not use the printer for an extended period of time, lift the printhead to avoid possible flattening of the print roller. cab - Produkttechnik GmbH & Co KG / Tharo Systems, Inc. -
Page 98: Cut-/ Peel-Off-Adapter
: the print is released, if there is no label in the presentation position with cutter assembly : the print including the following cut is released cab - Produkttechnik GmbH & Co KG / Tharo Systems, Inc. -
Page 99: Installation And Operation
Pin 1 of the 9-pin connector) when the printer is switched ON. 7. Start a print job in the cut or peel-off mode. 8. Release the print of single labels by actuating the external switch. cab - Produkttechnik GmbH & Co KG / Tharo Systems, Inc. -
Page 100: Memory Cards
In case the battery has to be replaced, it is usually found in a slot (2) above the switch (1). For replacing or inserting the battery in sRAM cards refer to the instructions of the manufacturer. cab - Produkttechnik GmbH & Co KG / Tharo Systems, Inc. -
Page 101: Installation Of The Memory Card
Insert the card (1) that way into the slot (2), that the one-rail guide is at the upper and the two-rail guide at the lower side of the card . cab - Produkttechnik GmbH & Co KG / Tharo Systems, Inc. -
Page 102: Formatting The Memory Card
Whenever the file "ABC" is called up, exactly one label will be printed. If you want to print the label in a variable quantity do not use the A command within the label description. cab - Produkttechnik GmbH & Co KG / Tharo Systems, Inc. -
Page 103: Printing From A Memory Card
6. To pause the selection of a label or the input of the number of labels you may press the key. The data saved on the card is also accessible via interface and computer. cab - Produkttechnik GmbH & Co KG / Tharo Systems, Inc. -
Page 104: Keyboard Adapter
Make sure that the printer is switched OFF ! 3. Connect the keyboard to the 5 pin DIN connector (2) of the keyboard adapter. cab - Produkttechnik GmbH & Co KG / Tharo Systems, Inc. -
Page 105: Key Assignment
(while printing same effect as CANCEL) [SPACE] While printing same effect as PAUSE. [Shift]+[Del] To delete the input line. [ ],[ ] To scroll up/down the list of labels on the memory card. cab - Produkttechnik GmbH & Co KG / Tharo Systems, Inc. - Page 106 This page is intentionally left blank. cab - Produkttechnik GmbH & Co KG / Tharo Systems, Inc.
-
Page 107: Appendix A - Character Tables
Appendix A - Character Tables Setup Selectable Character Tables Table A-1 a Character set "Windows 1252" Table A-1 b Character set "Windows 1250" cab - Produkttechnik GmbH & Co KG / Tharo Systems, Inc. - Page 108 Table A-1 c Character set "ISO 8859-1" Table A-1 d Character set "Codepage 850" cab - Produkttechnik GmbH & Co KG / Tharo Systems, Inc.
- Page 109 Table A-1 e Character set "EBCDIC" Table A-1 f Character set "Macintosh" cab - Produkttechnik GmbH & Co KG / Tharo Systems, Inc.
- Page 110 Table A-1 g Character set "Codepage 852" Table A-1 h Character set "ISO 8859-8" cab - Produkttechnik GmbH & Co KG / Tharo Systems, Inc.
-
Page 111: Unicode Tables
Unicode Tables Table A-2 a "Unicode" ( 0000 - 00FF ) cab - Produkttechnik GmbH & Co KG / Tharo Systems, Inc. - Page 112 Table A-2 b "Unicode" ( 0100 - 01FF ) cab - Produkttechnik GmbH & Co KG / Tharo Systems, Inc.
- Page 113 Table A-2 c "Unicode" ( 2000 - 20FF ) cab - Produkttechnik GmbH & Co KG / Tharo Systems, Inc.
- Page 114 Table A-2 d "Unicode" ( 2100 - 21FF ) cab - Produkttechnik GmbH & Co KG / Tharo Systems, Inc.
-
Page 115: Special Characters - Keyboard Adapter
France SU : Suomi UK : United Kingdom IT : Italia US : SP : España SG : Schweiz DK : Danmark SF : Suisse CZ : Ceska republika cab - Produkttechnik GmbH & Co KG / Tharo Systems, Inc. - Page 116 For example : For "ñ" : 1 character [~] - 2 character [ALT-n] NOTICE ! For inserting the Z1 character, you may use the information as in Table A-3a. A-10 cab - Produkttechnik GmbH & Co KG / Tharo Systems, Inc.
-
Page 117: Appendix B - Pin Assignment Of The Interface Connectors
Transmit data (RS-422, RS-485) TDATA- Transmit data (RS-422, RS-485) RDATA+ Receive data (RS-422, RS-485) RDATA- Receive data (RS-422, RS-485) Data terminal ready Table B-1 Signals of the serial interface connector cab - Produkttechnik GmbH & Co KG / Tharo Systems, Inc. -
Page 118: Interface Cable For
RS-232 with protocol " ---" or "XON/XOFF" Apollo 9 pin connector 25 pin plug Fig. B-3 Interface cable with 9 pin computer connector for RS-232 with protocol " ---" or "XON/XOFF" cab - Produkttechnik GmbH & Co KG / Tharo Systems, Inc. - Page 119 The pins of TDATA+ and RDATA+ and the pins of TDATA- und RDATA- have to be connected with ea ch other. For long transmission distances it is recommanded to terminate the lines. cab - Produkttechnik GmbH & Co KG / Tharo Systems, Inc.
-
Page 120: Pin Assignment Of The Parallel Interface Connector
Signal Signal /STROBE DATA 1 DATA 2 DATA 3 DATA 4 DATA 5 DATA 6 DATA 7 DATA 8 /ACKNLG BUSY SLCT Table B-2 Signals of the Centronics interface cab - Produkttechnik GmbH & Co KG / Tharo Systems, Inc. -
Page 121: Centronics Interface Cable
In the event of any difficulties, consult the manufacturer of your computer on the pin assignment of the computer's interface. Use the pin assignment of the printer as shown in Table B-1 to obtain a suitable cable. cab - Produkttechnik GmbH & Co KG / Tharo Systems, Inc. -
Page 122: Pin Assignment Of The Peripheral Port
Control bit 1 PAO3 Control bit 3 Logic grounding PGND Power grounding + 24V Voltage for power level I < 1,2 A Table B-3 Pin assignment of the peripheral port cab - Produkttechnik GmbH & Co KG / Tharo Systems, Inc. - Page 123 PSE key Continues current print job after error correction. Switch into PRINT mode. (LED ONL on, LED CAN off, LED PSE off) Table C-1 Function keys in mode FAULT-CORRECTABLE cab - Produkttechnik GmbH & Co KG / Tharo Systems, Inc.
-
Page 124: Appendix C - Error Messages/ Problem Resolution
If the suggested solutions turn out unsuccessful, contact our Technical Service. A list of errors, which are exclusively related to the applicator, is included in the manual of the applicator. cab - Produkttechnik GmbH & Co KG / Tharo Systems, Inc. - Page 125 Ext. I/O error Refers to the peripheral connector; Switch printer off and then on. Caused by connected optional If error recurs check the connected device device. Table C-3 Error messages cab - Produkttechnik GmbH & Co KG / Tharo Systems, Inc.
-
Page 126: Error Messages
If error recurs → contact Service. Current print job contains too much Cancel current print job. Memory overflow information Reduce amount of information. (selected fonts, large graphics) Table C-3 Error messages (continuation) cab - Produkttechnik GmbH & Co KG / Tharo Systems, Inc. - Page 127 Set software to direct thermal mode. labels for direct thermal mode (without transfer ribbon); but the Restart print job. software is set for transfer printing. Table C-3 Error messages (continuation) cab - Produkttechnik GmbH & Co KG / Tharo Systems, Inc.
- Page 128 Repeat the write process or format card; the card. Hardware error Deactivate write protection. Write protected Refers to the optional memory card; Write protection is activated Table C-3 Error messages (continuation) cab - Produkttechnik GmbH & Co KG / Tharo Systems, Inc.
-
Page 129: Appendix D - Maintenance/ Cleaning/ Adjustment Of The Printhead
1. Lift the printhead. 2. Remove the label stock and transfer ribbon from the printer. 3. Remove all accumulations of dirt and dust with isopropyl alcohol and a soft cloth. cab - Produkttechnik GmbH & Co KG / Tharo Systems, Inc. -
Page 130: Cleaning The Printhead
3. Clean the printhead surface with a special cleaning pen, or use a cotton swab soaked with isopropyl alcohol. 4. Allow it to dry for about 2 to 3 minutes before restarting the printer. cab - Produkttechnik GmbH & Co KG / Tharo Systems, Inc. -
Page 131: Adjustment Of The Printhead
- First, turn both screws constantly until at least one side of the print image is optimum. Following, adjust the screw which is located at the side of the label where the quality is still poor. cab - Produkttechnik GmbH & Co KG / Tharo Systems, Inc. - Page 132 6. Perform a test print, for instance a wide black line over the whole width of the label, and review the results. 7. Repeat steps 2 to 6 as necessary to complete the adjustment. cab - Produkttechnik GmbH & Co KG / Tharo Systems, Inc.
-
Page 133: Appendix E - Firmware Updates
The file may be distributed on a disk or else is available on the Internet. The cab and THARO Internet addresses are included in our latest brochures. Firmware Updates Apollo 3 1. In Setup mode, set the serial interface of the Apollo 3 on the highest possible speed that is supported by your computer, or else use the Centronics interface. - Page 134 This page is intentionally left blank. cab - Produkttechnik GmbH & Co KG / Tharo Systems, Inc.
- Page 135 Cover 23 Cut- /peel-off adapter 98f. Gap sensor 57 Cut position 60 Graphic elements 13 Cutter 16,90f. Graphic file types 13 Cutter blocked C-3 Cutter jammed C-3 Cutter stuck C-3 cab - Produkttechnik GmbH & Co KG / Tharo Systems, Inc.
- Page 136 Protocol 58f. Memory card, formatting 102 Protocol error C-6 Memory card, installing 101 PSE (key) 40ff. Memory card, printing from 103 Punch hole 20 Memory card slot module 30f.,101 cab - Produkttechnik GmbH & Co KG / Tharo Systems, Inc.
- Page 137 SYSTEM TEST (System mode) 41 Tear-off plate 23,25,27,29 Tear-off position 73 Technical Secification 13 ff. TEST PRINT (System mode) 49 Thermal transfer printing 19 Time 55,67 Top-reflect 57 Trademarks 9 cab - Produkttechnik GmbH & Co KG / Tharo Systems, Inc.
- Page 138 Industrial and Small Plants Signed for, and on behalf of, the Manufacturer : cab Produkttechnik Sömmerda Gesellschaft für Computer- und Automationsbausteine mbH 99610 Sömmerda Sömmerda, 08.01.01 Erwin Fascher Managing Director cab - Produkttechnik GmbH & Co KG / Tharo Systems, Inc.
- Page 139 1. If your company is in Europe, Africa, or the Middle East your manual supplier is: cab Produkttechnik Wilhelm-Schickard-Straße 14 D-76131 Karlsruhe TEL: +49 721 6626 00 * FAX: +49 721 6626 249 2.
Need help?
Do you have a question about the THARO Apollo Series and is the answer not in the manual?
Questions and answers