Table of Contents
Advertisement
Quick Links
Advertisement
Table of Contents
Troubleshooting

Related Manuals for Lantronix UBox UBX4100


Summary of Contents for Lantronix UBox UBX4100
-
Page 1: User Guide
Distributed by: Grid Connect Inc. 1841 Centre Point Cr. #143 Naperville, IL 60563 +1 630 245-1445, +1 630 245-1717 FAX www.gridconnect.com | www.ipenabled.com | www.factorycomm.com UBox USB Device Server User Guide Model UBX4100 Part Number 900-373 Revision A June 2005... - Page 2 Copyright Copyright © 2005, Lantronix. All rights reserved. No part of the contents of this book may be transmitted or reproduced in any form or by any means without the written permission of Lantronix. The information contained herein is subject to change without notice.
-
Page 3: Table Of Contents
Step 1- Connect the UBox to Your Network ___________________________________________ 10 Step 2 - Connect the UBox’s Power Supply and Read the LEDs___________________________ 11 Installing the UBox Software ____________________________________________________ 13 Uninstalling the Lantronix UBox Software __________________________________________ 14 4: Using USB Devices on the Network Overview ___________________________________________________________________ 15... - Page 4 Device Status ________________________________________________________________ 27 Separating Compound Devices __________________________________________________ 28 Types of USB Devices ___________________________________________________________ 28 Separating Compound Devices ____________________________________________________ 28 5: Changing the UBox's Settings Overview ___________________________________________________________________ 29 Viewing UBox Settings_________________________________________________________ 29 Editing Server Settings: Access Tab ______________________________________________ 31 Editing Server Settings: Network Tab _____________________________________________ 34 Editing Server Settings: USB Device Configuration Tab_______________________________ 36 Applying, Canceling, or Removing Server Settings ___________________________________ 39 Restoring Default Settings ______________________________________________________ 40...
-
Page 5: Figures
CE Mark Declaration of Conformity _______________________________________________ 70 Canada Digital Apparatus EMI Standard ___________________________________________ 70 VCCI_______________________________________________________________________ 70 Australia/New Zealand _________________________________________________________ 71 D: Lantronix Software License Agreement E: Lantronix Warranty Figures Figure 2-1. Model UBX4100 Part Numbers...8 Figure 3-1. Ethernet Connection ...10 Figure 3-2. -
Page 6: Tables
Contents Figure 7-2. Resetting the UBox ...55 Figure 7-3. Position of Status Lights on the UBox...58 Figure 7-4. IP Address on Servers Tab...62 Figure 7-5. Local Area Connection Properties – Advanced Tab...63 Figure 7-6. Advanced Settings Window ...64 Figure 7-7. Service Settings –Adding a UDP ...64 Figure 7-8. -
Page 7: 1: Using This Guide
1: Using This Guide Purpose and Audience The Lantronix UBox USB Device Server makes it possible to share USB devices such as printers, scanners , and storage drives over a Local Area Network. This guide provides the information needed to configure, use, and update the UBox. -
Page 8: 2: Introduction
2: Introduction The Lantronix UBox makes it possible to share, access, and control USB devices over a LAN. This User Guide deals with the UBX4100, which supports 10/100 Ethernet connectivity to four USB 2.0 devices at a full 12 Mbps speed per port. -
Page 9: Connectivity To Network
Half and full duplex support IP addressing: Static/DHCP/Zeroconfig Requirements Windows: Windows 2000/XP or later What's Inside the Package The Lantronix UBox package includes: Lantronix UBox USB Device Server Power Supply Quick Start Guide CD with software and User Guide UBox User Guide... -
Page 10: 3: Installing The Ubox
3: Installing the UBox The UBox package has two components: the UBox hardware and the UBox software. Both have their own settings and configuration options. This chapter includes the following topics: Installing the UBox Hardware Installing the UBox Software Uninstalling the UBox Device Server Software Installing the UBox Hardware Warning: Do not connect a USB device to the UBox until you have... -
Page 11: Step 2 - Connect The Ubox's Power Supply And Read The Leds
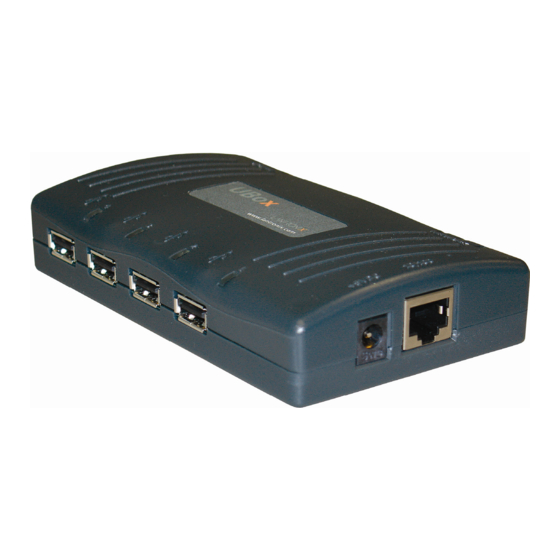
Installing the UBox Step 2 - Connect the UBox’s Power Supply and Read the LEDs 1. Connect the power supply (included in the box) to the UBox’s power connector. Figure 3-2. UBox Power Supply Power Connector Figure 3-3. UBox Connections UBox User Guide... -
Page 12: Figure 3-4. System Leds
2. Once the UBox has power, notice the following: The UBox's status lights turn on and off. After a few seconds, the lights stop blinking. If the UBox is responding properly, the four green USB lights turn on and stay solid. The first green SYSTEM light blinks on and off every few seconds. -
Page 13: Installing The Ubox Software
Install the software automatically. If you see an additional prompt regarding logo testing, click Continue Anyway to proceed. Once the Lantronix UBox Installer completes the installation, it automatically launches the Lantronix UBox application. The Lantronix UBox USB Device Server window opens with the USB Devices tab open. You will use this application to configure the UBox. -
Page 14: Uninstalling The Lantronix Ubox Software
To uninstall the Lantronix UBox software: 1. Click Start Settings Control Panel) Add or Remove Programs. 2. Select Lantronix UBox USB Device Server and click the Change/Remove button. 3. Follow the instructions on the screen to complete the uninstall process. -
Page 15: 4: Using Usb Devices On The Network
Connecting Your USB Device Step 1 - Connect a USB Device to the UBox 1. Connect your USB device to any USB port on the Lantronix UBox. Figure 4-1. Connecting a USB Device to the UBox USB Ports... -
Page 16: Figure 4-2. Usb Devices Tab Showing Attached Devices
2. On the Start menu, click Programs Lantronix UBox USB Device Server UBox USB Device Server. The Lantronix UBox USB Device Server window opens. The USB Devices tab displays a list of USB devices currently connected to each UBox on the network, the status of the software connection, and the location (UBox name and port) on the UBox to which it is attached. -
Page 17: Step 2 -Connect A Networked Usb Device
Action Device Name Status Location Step 2 –Connect a Networked USB Device 1. Select the USB device under Device Name, and click the Connect the Action column to the left of the device name. The status is now Connected. At this point, you can use it as if it were connected directly to your computer. UBox User Guide The Connect/Disconnect icon USB device. -
Page 18: Figure 4-3. Selected Device Displaying Device Details
Note: By default, the UBox is configured for Multi-User Connect Mode. In this mode, all USB devices are shared in a one-at-a-time mode. If a device is in use by another user, that USB device's status displays as In Use By [ComputerName]. Before you can use the device, you must connect to it to gain exclusive access. -
Page 19: Step 3 - Disconnect Your Usb Device(S)
USB device's software. If your USB device requires such action when the device is directly connected to your computer, please perform them before clicking the Disconnect icon in the Lantronix UBox software. If you forget to disconnect a USB device, the USB device automatically disconnects if your computer goes to “sleep”... -
Page 20: Using Multiple Uboxes And Usb Devices
Using Multiple UBoxes and USB Devices Compound Devices You can connect up to eight USB devices to one Lantronix UBox. While the UBox only has four USB ports, it supports eight devices because of how compound USB devices work. Compound USB devices are devices that have multiple components connected to an embedded USB hub inside one USB device. -
Page 21: Using The Ubox System Tray
Configure Auto Connect. Connect to and disconnect from USB devices on your UBox. To use the system tray: 1. Find the Lantronix UBox System Tray icon right corner of your screen (next to the time). 2. Right-click the UBox application icon 3. -
Page 22: Auto Connecting Printers
Auto Connect is only enabled in the Multi-User Connect Mode. Before You Begin Before you begin, please make sure that you have installed and connected your printer using the Lantronix UBox's USB Devices tab (see Device on page 15). UBox User Guide Opens a window that displays the currently installed software version. -
Page 23: Figure 4-6. Epson Printer Connected
1. Select the printer on the USB Devices tab and do one of the following: Right-click the UBox icon in the system tray and select Auto Connect Settings. Click the Auto Connect Settings button in the lower right corner. The Lantronix UBox Auto Connect window opens. UBox User Guide Figure 4-6. Epson Printer Connected... -
Page 24: Figure 4-7. Auto Connect Enabled
You may see your printer listed multiple times if you or your printer's software created multiple printers in Windows's Printers and Faxes window. You can either delete the extra printers in the Printers and Faxes window or enable Auto Connect for all of the printers. -
Page 25: Using Forced Device Disconnect
When the printer has finished printing, Auto Connect disconnects your printer and makes it available to other users. Multiple Print Jobs from Multiple Users If you have two users printing to the same printer, Auto Connect connects whichever computer reaches the UBox first. The second user's print job stays in the queue until the first user finishes printing. -
Page 26: Using Multi-And Single-User Connect Modes
Figure 4-9. Forced Device Disconnect on the Advanced Menu A message displays cautioning you to make sure the device is not being used. 3. If you are sure that you want to continue, click the Yes button. The device status is now Available. -
Page 27: Device Status
Please note that you can also configure a single USB device to be dedicated to particular computer and still share other USB devices with other computers. You can select the desired mode on the Servers tab. For details, please see 5: Changing the UBox's Settings. -
Page 28: Separating Compound Devices
Separating Compound Devices Types of USB Devices USB devices fall into one of the following categories: Single USB device: A USB device that contains only one component (for example, a single button mouse). Composite USB device: A device that provides multiple functions but appears as one device (for example, a multifunction printer). -
Page 29: 5: Changing The Ubox's Settings
5: Changing the UBox's Settings Overview The Lantronix UBox comes pre-configured for use with most networks. However, you may want to change some of the settings for your specific network or USB device- sharing needs. This chapter describes how to change the UBox's settings and what the settings affect. -
Page 30: Figure 5-1. Servers Tab
3. Select a UBox. Detailed information about the UBox displays under Server Details on the right side of the window. 4. Review the following information: Server # Server Name Status UBox User Guide Figure 5-1. Servers Tab Your UBox's MAC/Network address, found on the label on the bottom of the unit. -
Page 31: Editing Server Settings: Access Tab
Editing Server Settings: Access Tab The Access tab contains settings that pertain to accessing the UBox hardware and how the UBox shares USB devices at the server level. These changes affect the selected UBox. To edit the UBox’s Settings on the Access Tab: 1. -
Page 32: Figure 5-2. Edit Server Configuration - Access Tab
Figure 5-2. Edit Server Configuration – Access Tab Notes: Firmware Upgrade: After clicking the Edit Configuration button, a message may display informing you about new firmware. You can only update your UBox's settings after you have upgraded your firmware. While updating your UBox, its icon disappears while the new firmware is being loaded. - Page 33 Requires Configuration Password Configuration Password and Renter Password Requires Client Access Password Client Access Password and Reenter Password 3. Click the Apply button to submit the changes. The UBox reboots automatically to apply the changes. UBox User Guide connected to the UBox. Before using a USB device (e.g., a printer or scanner), you must click the Connect icon on the USB Devices tab.
-
Page 34: Editing Server Settings: Network Tab
Editing Server Settings: Network Tab The Network tab contains network settings determining how the UBox communicates on your network. You can configure how the UBox obtains its IP address, what TCP/UDP port it uses to communicate (useful when dealing with firewalls), and the method that the UBox uses to “announce”... - Page 35 IP Address Subnet Mask Gateway UDP Port and TCP Port UBox User Guide Note: You can get more information about Zeroconfig (also called Zeroconf) at http://www.zeroconf.org/ Use Static IP: Use this mode if you want your UBox always to use the same network settings. You must enter the IP Address, Subnet Mask, and Gateway for the UBox to communicate with the network.
-
Page 36: Editing Server Settings: Usb Device Configuration Tab
Discovery Mode Multicast Address Editing Server Settings: USB Device Configuration Tab The USB Device Configuration tab on the Edit Server Configuration window shows USB devices that are connected to the UBox and configuration records for each device. On this tab, you make changes to USB devices connected to your UBox. You can configure: A USB device to require a password before you can access the device. -
Page 37: Figure 5-4. Edit Server Configuration - Usb Device Configuration Tab
1. On the Edit Server Configuration window, click the USB Device Configuration tab. Figure 5-4. Edit Server Configuration – USB Device Configuration Tab 2. Update the following settings as desired: Server Serial No. Device Name Location/Serial Number Status 3. To add or change information about a device, select the device and click the Add or Edit button (The Edit button is active if you have already added information.) The Device Configuration window opens. -
Page 38: Figure 5-5. Device Configuration Window
The following information displays at the top: USB Product Name Vendor ID (VID) Product ID (PID) USB Serial Number: 4. Update the following settings as desired: Alternate Name Requires Password To Connect UBox User Guide Figure 5-5. Device Configuration Window Name programmed into the USB device by the manufacturer. -
Page 39: Applying, Canceling, Or Removing Server Settings
Connection Password and Reenter Password Share Mode Client Name 5. Click the OK button. The updated information displays. An asterisk displays in the Cfg column to indicate that the device has been configured. 6. To edit the configuration: a) Select the device and click the Edit button. b) Repeat steps 4-5. -
Page 40: Restoring Default Settings
The UBox alerts you if the software and firmware do not match. Figure 5-6. Firmware Update Notification Window You can update the firmware at any time using the Lantronix UBox application. To update the firmware: 1. On the Servers tab, select the UBox you want to update. -
Page 41: Figure 5-7. Servers Tab
Changing the UBox's Settings Figure 5-7. Servers Tab 2. Click the Update Server Firmware button. An update confirmation window displays. Figure 5-8. Update Server Firmware 3. Click the Update button to start the upgrade. Note: Always have the latest firmware installed on your UBox. We do not recommend using older firmware on your UBox with newer UBox software on your computer (or vice versa). -
Page 42: Overriding Server Network Settings
Overriding Server Network Settings You can override server network settings to configure a UBox that has been placed in a static IP-based network. This makes it so that you do not have to change your local TCP settings, connect to the UBox using a direct Ethernet connection, or set up a DHCP address. -
Page 43: Refreshing Data
IP Address Subnet Mask Gateway Refreshing Data You can refresh the USB Devices, Servers, and Local Settings tabs. This forces the UBox software to obtain the most recent status of the UBox hardware. To refresh the displayed information: 1. On the USB Devices, Servers, or Local Settings tab, click the Refresh button. The most current hardware information displays on each of the tabs. -
Page 44: 6: Changing Local Software Settings
6: Changing Local Software Settings To modify the settings for the UBox software, you use the Local Settings tab. These settings are kept on your computer. Note: The Servers tab is for modifying the settings for the UBox. These settings are stored on the UBox hardware. See Settings. -
Page 45: Figure 6-1. Local Settings Tab
2. In the Personal Communications Settings area, update the following information as needed: Client Name UDP Port Multicast Address 2. Do one of the following: To cancel the changes you made, click the Cancel Changes button. To restore default values, click the Restore Defaults button. To save your changes, click the Apply Changes button. -
Page 46: Updating Server Access Settings
Updating Server Access Settings The Server Access Settings area in the Local Settings tab is for connecting to a UBox that is either password protected or uses active discovery. For most users, Server Access Settings are blank. To update server access settings: 1. -
Page 47: Viewing Or Removing Device Passwords
Server # Server Name Status Password Active Discovery. 4. To edit the settings, select the UBox and click the Edit button. The Edit Local Server Access window opens. Repeat step 3. 5. To remove the UBox from the list, select it and click the Remove button (to the right of the Server Access Settings area). -
Page 48: Switching Between Sets Of Uboxes
Switching Between Sets of UBoxes The UBox software on your computer can only “see” eight UBoxes at a time. This is true even with Active Discovery, which can see UBoxes with different UDP port numbers. To use a ninth UBox, you have two options: Change both the local UDP port and the UBox UDP port to the same new port number so your computer can see the UBox. -
Page 49: 7: Troubleshooting
If you cannot proceed past a certain section, please contact Lantronix Technical Support. Troubleshooting: Status Lights Look at the status lights on your Lantronix UBox hardware. These status lights will be in one of the following states: On (doesn't blink) -
Page 50: Boot-Up
SYSTEM Note: For a detailed description of every light and its status, please read A: Status Light While the UBox is booting up, different status lights turn on and off. Once the UBox is running, the status lights have new meanings that help troubleshoot the UBox. Boot-Up The following table explains what the SYSTEM status lights mean during the boot-up process. -
Page 51: System Status Lights 2 And 3
SYSTEM Status Lights 2 and 3 Look at the USB status lights 2 and 3 (two red lights under SYSTEM). Status 2 is the red light in the middle, and Status 3 is the rightmost red light). Note the status of each. -
Page 52: Usb Status Lights 1-4
Currently, the UBox does not support isochronous USB devices (e.g., webcams and USB speakers). If you have a USB device that is not isochronous, please check the Lantronix web site or contact Lantronix Technical Support. Note: While most USB devices work with the UBox, future software updates from Lantronix will support certain incompatible USB device. -
Page 53: Troubleshooting: Udp Ports
Troubleshooting: UDP Ports Make sure that your UBox software and hardware are communicating on the same UDP port. To verify this, open the Lantronix UBox application. Your UBox should display. In the Lantronix UBox application, is your UBox listed? Status... -
Page 54: Troubleshooting: Network Issues
(e.g., web, email, ftp) to come in and out of your network. Since the UBox is a new product, these firewalls usually do not know about Lantronix UBox network data and may prevent you from communicating with your UBox. -
Page 55: Figure 7-2. Resetting The Ubox
If you are using a firewall, configure the firewall software to allow UDP traffic on port 10010 and to allow TCP/IP traffic on port 10010. The UBox uses both UDP and TCP/IP to communicate. Note: For step-by-step instructions on configuring the software firewall that is built into Windows XP, see Final Step If still have problems with your UBox, try resetting the UBox hardware and then... -
Page 56: Rebooting The Ubox Into Safe Mode Using The Reset Button
1. Press and hold the reset button until the lights turn off (this takes 3 or more seconds). It takes approximately 15 seconds to complete the reset. 2. In the Lantronix UBox application, make sure that your Local UDP Port is set to 10010. -
Page 57: Technical Support
When you report a problem, please provide the following information: Your name, and your company name, address, and phone number Lantronix model number Software version Description of the problem Status of the unit when the problem occurred (please try to include... -
Page 58: A: Status Light Behavior
A: Status Light Behavior The Lantronix UBox comes equipped with ten LED lights that report the status of the Lantronix hardware. Figure 7-3. Position of Status Lights on the UBox SYSTEM The meaning of these lights changes depending on whether the UBox is booting up (you have just turned on the UBox), or if it is running. - Page 59 UBox is not finding a valid Ethernet connection, or you have configured the UBox to use an invalid IP address. Please contact Lantronix Tech Support for further details. If SYSTEM 2 and 3 never stop blinking, the UBox is not finding a...
-
Page 60: Table 7-2. Ubox Status Lights -- Ubox Is Running
8 USB devices (by using multiple compound USB devices), or the UBox is having problems communicating with the device. Please check the UBox's USB device compatibility on the Lantronix web site or contact Lantronix Tech Support. Resetting the UBox Hardware... -
Page 61: B: Configuring The Windows Xp Firewall
B: Configuring the Windows XP Firewall The following instructions detail how to configure Window XP's built-in firewall for use with the Lantronix UBox. While these instructions are specific for this software, you can apply the basic idea of these instructions to configuring other firewalls. -
Page 62: Step 2 - Access Your Firewall Software (Windows Xp And Xp Service Pack 1 Only)
64. To obtain your UDP and TCP port numbers: The Lantronix UBox defaults to using UDP port 10010 and TCP/IP port 10010. If you have not changed these settings, we will use these port numbers when we configure your firewall. If you have changed the UBox's UDP and/or TCP port numbers, use that number instead of 10010. -
Page 63: Figure 7-5. Local Area Connection Properties – Advanced Tab
Dynamic addresses can change at any moment, making it harder for firewalls to keep track of. If you need to use a firewall, we suggest that you configure your UBox to use a static IP address. Also, if your firewall is currently turned on, you will not be able to see the UBox. -
Page 64: Figure 7-7. Service Settings –Adding A Udp
4. Click the Advanced tab, and then click the Settings button. The Advanced Settings window opens Step 3a - Add Settings to the Firewall to Allow Communication with the UBox To add your UDP Port to the firewall: 1. In the Advanced Settings window, click the Add button. The Service Settings window opens. -
Page 65: Figure 7-8. Service Settings – Adding A Tcp
1. Click the OK buttons on the remaining windows to finish up. Your firewall is now configured to allow access to the Lantronix UBox. If you have multiple computers, please repeat these steps for every computer that will access the UBox. -
Page 66: Step 3B - Access And Configure Your Firewall Software (Windows Xp Service Pack 2 Only)
Configuring the Windows XP Firewall Step 3b - Access and Configure Your Firewall Software (Windows XP Service Pack 2 Only) To access your firewall software: 1. From the Start menu, click Control Panel. The Control Panel window opens. 2. Double-click Windows Firewall. The Windows Firewall window opens. (If you do not see Windows Firewall, click Switch to Classic View on the side panel.) Figure 7-9. -
Page 67: Figure 7-11. Add A Port Window - Udp
1. On the Exceptions tab, click the Add Port button. The Add a Port window displays. Figure 7-11. Add a Port Window - UDP 2. In the Name field, enter something descriptive like “Lantronix UBox UDP.” 3. In the Port number field, type 10010. UBox User Guide... -
Page 68: Figure 7-12. Add A Port Window - Tcp
To close the remaining windows: 1. Click the OK buttons on the remaining windows. Your firewall is now configured to allow access to the Lantronix UBox. If you have multiple computers, please repeat these steps for every computer that will access the UBox. -
Page 69: C: Compliance
Caution: Changes or modifications to the UBox USB DevicenServer not expressly approved by Lantronix could void the user's authority to operate this equipment. Note: This equipment has been tested and found to comply with the limits for a Class B digital device, pursuant to Part 15 of the FCC Rules. -
Page 70: Ce Mark Declaration Of Conformity
Conforms to the following Product Specifications: EN 55022: 1998 Class B EN 55024: 1998 following the provisions of the Electromagnetic Compatibility Directive. Director of Quality Assurance, Lantronix 15353 Barranca Parkway, Irvine, CA 92618 USA Tel: 949-453-3990 Fax: 949-453-3995 Canada Digital Apparatus EMI Standard This Class B digital apparatus meets all the requirements of the Canadian Interference-Causing Equipment Regulations. -
Page 71: Australia/New Zealand
Compliance Australia/New Zealand This device complies with AS/NZS 3548 Class B limits for the operation of Information Technology Equipment. UBox User Guide... -
Page 72: D: Lantronix Software License Agreement
Agreement constitutes a waiver of Lantronix’s rights under any copyright law. 2. Grant of License. Lantronix grants to you the right to use this copy of the software ("Software") on one or more computers provided that the Software is only used with the Lantronix UBX4100 hardware. - Page 73 6. LIMITATION OF LIABILITY. Lantronix's entire liability and your sole remedy under this License Agreement is, at Lantronix's option, either: a) the return of payment as evidenced by a copy of your purchase receipt; or b) the replacement of the media not meeting Lantronix's Limited Warranty.
-
Page 74: E: Lantronix Warranty
If the product is not under warranty, the customer may have Lantronix repair the unit on a fee basis or return it. No services are handled at the customer's site under this warranty. This warranty is voided if the customer uses the product in an unauthorized or improper way, or in an environment for which it was not designed.
Need help?
Do you have a question about the UBox UBX4100 and is the answer not in the manual?
Questions and answers