
Related Manuals for Lantronix SLM


Summary of Contents for Lantronix SLM
- Page 1 Secure Lantronix Management (SLM) Virtual Secure Lantronix Management (vSLM) Appliance User Guide Part Number 900-386 Revision I October 2012...
- Page 2 Copyright & Trademark © 2012 Lantronix, Inc. All rights reserved. No part of the contents of this book may be transmitted or reproduced in any form or by any means without the written permission of Lantronix. Lantronix® is a registered trademark and SLM™, vSLM™ and DeviceInstaller™ are trademarks of Lantronix, Inc.
-
Page 3: Revision History
The user is cautioned that changes and modifications made to the equipment without approval of the manufacturer could void the user's authority to operate this equipment. Changes or modifications to this device not explicitly approved by Lantronix will void the user's authority to operate this device. - Page 4 SNMP settings for SLPs in bulk; connect directly to the port of an SLC or SLB; apply power to multiple ports on an SLP; view port logs, make a web channel connection to an SLC; update SLM and SLP firmware; read SLC information to the SLM database; create banners for the CLI.
-
Page 5: Table Of Contents
Firmware ________________________________________________________________29 Protocols Supported _______________________________________________________ 29 SLM Hardware ___________________________________________________________30 Product Information Label ___________________________________________________ 30 SLM-01 and SLM-02 Package Contents ________________________________________ 31 3: Quick Setup Installing the SLM _________________________________________________________ 32 Connecting a Terminal to the Console Port __________________________________ 32 Connecting to a Network Port _____________________________________________ 33... - Page 6 Step 4: Auto-Detect Devices ________________________________________________ 58 Step 5: Associate Account Groups with Ethernet and Managed Devices ______________ 58 Step 6: Manage Devices ___________________________________________________ 58 Step 7: Maintain the SLM ___________________________________________________ 58 7: Network and Modem Settings IP Address and Other Required Information _____________________________________ 60...
- Page 7 Updating or Deleting an Account Group ____________________________________ 119 Setting Password Requirements for User Accounts ___________________________ 119 Assigning Account Group Device Rights ___________________________________ 121 Viewing Currently Logged-In Accounts ________________________________________ 123 Account Group Commands _________________________________________________ 124 Accounts _______________________________________________________________125 Viewing Accounts _____________________________________________________ 126 SLM User Guide...
- Page 8 Properties (Ethernet Device Menu Tree) ___________________________________ 162 Port Access _________________________________________________________ 163 Updating Passwords in Bulk _____________________________________________ 167 Changing SNMP Settings for SLC, SLB and SLPs in Bulk ______________________ 169 SLM Proxy __________________________________________________________ 170 Ethernet Device Commands ________________________________________________ 171 Persistent Connection Commands ___________________________________________ 174 Trap Commands _________________________________________________________176...
- Page 9 Ethernet Devices - Connection Methods ___________________________________ 224 Managed Devices - Connection Methods ___________________________________ 225 Browsing to an Ethernet or Managed Device's Web Page _________________________225 Making a Secure Channel Connection to an SLC, SLM, or SLB _________________ 226 SLM User Guide...
- Page 10 Maintenance Commands __________________________________________________ 243 Date and Time ___________________________________________________________ 245 Date and Time Commands _________________________________________________ 246 SNMP & Syslog __________________________________________________________247 Device Firmware Updates __________________________________________________ 249 SLM Firmware _______________________________________________________249 SLC/SLB Firmware ____________________________________________________ 251 SLP Firmware ________________________________________________________ 253 Spider Firmware ______________________________________________________ 254 WiBox Firmware ______________________________________________________ 255...
- Page 11 Setting up NFS _______________________________________________________ 278 Setting up CIFS ______________________________________________________ 279 Setting up Log Properties _______________________________________________ 281 Logging Commands ______________________________________________________ 283 12: Using SLM on a Mobile Browser Requirements ___________________________________________________________ 288 Using the SLM Mobile Browser ______________________________________________288 Logging in to the SLM __________________________________________________ 288...
- Page 12 Factors Affecting Security __________________________________________________ 360 Available Services and Port Numbers _________________________________________ 360 Appendix C: Safety Information Safety Precautions _______________________________________________________ 362 Cover ______________________________________________________________362 Power Plug __________________________________________________________ 362 Input Supply _________________________________________________________ 362 Grounding ___________________________________________________________362 Rack _______________________________________________________________ 362 Port Connections _____________________________________________________363 SLM User Guide...
- Page 13 Appendix D: Technical Specifications Appendix E: Compliance SLM-01 ________________________________________________________________ 365 SLM-02 ________________________________________________________________ 366 Appendix F: Protocol Glossary SLM User Guide...
-
Page 14: List Of Figures
Figure 5-4 Example of a Help Page __________________________________________________ 51 Figure 5-5 Logout on the Page Header________________________________________________ 52 Figure 7-1 SLM Configuration Page (SLM-01 and SLM-02) ________________________________ 61 Figure 7-2 vSLM Configuration Page _________________________________________________ 61 Figure 7-3 Network Settings Page ___________________________________________________ 62... - Page 15 Figure 8-11 TACACS+ Authentication Page - Configure Tab______________________________ 108 Figure 8-13 SecurID Authentication Page_____________________________________________ 109 Figure 8-15 Manage SSH Keys - SLM Keys Tab _______________________________________ 111 Figure 8-19 Manage SSH Keys - SLC/SLB Keys Tab ___________________________________ 113 Figure 8-21 Manage SSH Keys - Copy Keys Tab_______________________________________ 114...
- Page 16 Figure 9-8 Add SLP Device Page - Configure Tab ______________________________________ 142 Figure 9-9 Add Spider Device Page - Configure Tab____________________________________ 143 Figure 9-10 Add Other Lantronix Device Page - Configure Tab ___________________________ 143 Figure 9-11 Add Non Lantronix Device Page - Configure Tab_____________________________ 144...
- Page 17 Figure 11-20 SSH Login to SLC ____________________________________________________ 228 Figure 11-21 Web Channel Connection to an SLC______________________________________ 229 Figure 11-22 Telnet Connection ____________________________________________________ 229 Figure 11-23 SLM Services Page ___________________________________________________ 233 Figure 11-25 Services Page - Banners Tab ___________________________________________ 234 Figure 11-27 Services - SSL Tab ___________________________________________________ 235...
- Page 18 Figure 11-35 Date & Time Page ____________________________________________________245 Figure 11-38 SNMP & Syslog Page _________________________________________________ 247 Figure 11-40 Device Firmware Update Page - SLM Tab _________________________________ 249 Figure 11-43 Device Firmware Update Page - SLC/SLB Tab______________________________ 251 Figure 11-46 Device Firmware Update - SLP Tab ______________________________________ 253...
-
Page 19: List Of Tables
List of Tables Table 3-3 SLM LED Functions ______________________________________________________ 33 Table 3-7 Enter Network Settings ___________________________________________________ 36 Table 3-9 Quick Setup Script _______________________________________________________ 38 Table 3-13 Network Port Settings ___________________________________________________ 41 Table 3-15 Network Gateway Settings ________________________________________________ 42 Table 3-17 Date & Time ___________________________________________________________43... - Page 20 Table 10-28 Managed Device - Configure Tab ________________________________________ 207 Table 10-29 Managed Device - Configure Tab (View Only) ______________________________ 207 Table 11-2 Available Search Fields _________________________________________________ 215 Table 11-4 Device Search Results __________________________________________________ 216 Table 11-5 Search by Port ________________________________________________________ 217 SLM User Guide...
- Page 21 Table 11-39 SNMP & Syslog - Configure ____________________________________________ 247 Table 11-41 Device Firmware Update - SLM Tab ______________________________________ 249 Table 11-42 Device Firmware Update - SLM Tab - FTP/SFTP Server ______________________ 250 Table 11-44 Device Firmware Update - SLC/SLB Tab __________________________________ 251...
- Page 22 Table 12-2 Log Filter by Last and Date/Time __________________________________________ 298 Table A-1 Command Syntax ______________________________________________________ 301 Table A-2 Actions and Category Options _____________________________________________ 301 Table B-1 Administration _________________________________________________________ 360 Table B-2 Management __________________________________________________________ 361 Table B-3 Device Access _________________________________________________________ 361 Table D-1 Technical Specifications _________________________________________________ 364 SLM User Guide...
-
Page 23: 1: About This Guide
About This Guide Purpose and Audience This guide provides the information needed to install, configure, and use the Secure Lantronix Management Appliance (SLM) which includes the SLM-01, SLM-02 and the vSLM. The SLM enables IT professionals to remotely and securely configure and administer multiple Lantronix and non-Lantronix devices. -
Page 24: Additional Documentation
SLM Online Help for the Command commands. Line Interface SLM Online Help for the Web Interface Provides online Help for configuring and operating the SLM using the web interface. Provides online Help for the utility that enables you to change an Detector Online Help automatically assigned IP address to a static IP address quickly. -
Page 25: Terminology
Terminology In this User Guide, we use the following terms: Term Definition A Lantronix or non-Lantronix device that the SLM discovers on the network. Ethernet Device Ethernet devices include: Secure Lantronix Management Devices: Members of the Secure Lantronix Management IT family of products: the Secure Lantronix Console (SLC) -
Page 26: Figure 1-1 Rights Of Ethernet Device Group And Managed Device Group To Devices
1: About This Guide Figure 1-1 Rights of Ethernet Device Group and Managed Device Group to Devices SLM User Guide... -
Page 27: 2: Introduction
With an SLC, the user logs in only once, to the SLM, and then any subsequent device logins are automatic. The SLM can also use LDAP, RADIUS, NIS, Kerberos, TACACS+, and SSH public key to authenticate users connecting remotely to the command line interface. -
Page 28: It Management Application
2: Introduction IT Management Application The following diagram shows how a user can perform management activities through the SLM. Figure 2-1 SLM Overview Figure 2-2 vSLM Overview SLM User Guide... -
Page 29: Firmware
SNMP trap target Mobile phone WAP browser access Protocols Supported In addition to supporting the TCP/IP network protocol, the SLM supports: SSH for connections in and out of the SLM SMTP for mail transfer SNMP for remote monitoring and management ... -
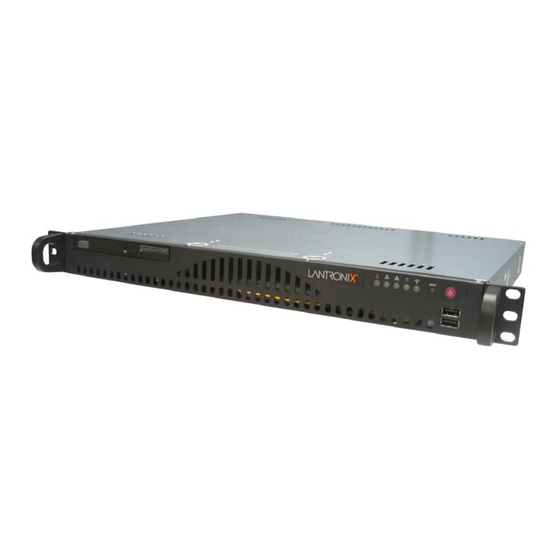
Page 30: Slm Hardware
2: Introduction SLM Hardware The hardware included with the SLM-01 and SLM-02 have the following features: 1U rack mountable Two network ports for conventional Ethernet network; uses standard RJ45-terminated Category 5 cables: SLM-01: One 10/100Base-T and one 10/100/1000Base-T connection ... -
Page 31: Slm-01 And Slm-02 Package Contents
Power cord Rack slide kit Verify and inspect the contents of the SLM package using the enclosed packing slip or the list above. If any item is missing or damaged, contact your place of purchase immediately. SLM User Guide... -
Page 32: 3: Quick Setup
Connecting a Terminal to the Console Port The serial console port is for local access to the SLM. You can attach a dumb terminal or a computer with terminal emulation to the console port using a null-modem serial cable with DB9 on the SLM side. -
Page 33: Connecting To A Network Port
AC power input (North American cord provided). Monitoring the LEDs The SLM has five LEDs on the front panel to signal information during boot-up and while the SLM is running. Figure 3-2 LEDs on Front of SLM... -
Page 34: Quick Network Setup
If you assign an IP address manually, it must be within a valid range and unique to your network. Required Information To set up the SLM quickly so you can use it on your network, you must first enter some basic information about one network port and the network. IP address (if not already assigned): ______. -
Page 35: Figure 3-4 Lantronix Detector Window
2. From the Timeout drop-down menu (in the toolbar), select the number of milliseconds before the search stops. The default is 500. 3. Click the Search icon. A list of Lantronix Ethernet devices on the network displays. SLM User Guide... -
Page 36: Figure 3-5 Slmdetector Device List Window
Figure 3-5 Detector Device List Window 4. If the SLM has an automatically assigned IP address and you want to change it, select the SLM and click the Network Settings icon. The Enter Network Settings window displays. Figure 3-6 Network Settings Window The Device Type and MAC Address (Ethernet Address) fields identify the unit. -
Page 37: Using Quick Setup On The Command Line Interface
Using Quick Setup on the Command Line Interface If the SLM does not have an IP address, connect a dumb terminal or a PC running a terminal emulation program (VT100) to access the command line interface. If the unit already has an IP address, you can use SSH to connect to the command line interface and add or change the IP address or other network-related information. -
Page 38: Table 3-9 Quick Setup Script
IP address of the router for this network. Gateway IP Address The default host name is SLM. The host name can be a short host name or Hostname a fully qualified domain name. For example, we might add lantronix.com to the factory default name of SLM to get SLM.lantronix.com. -
Page 39: Using The Web Interface
Once the SLM has an IP address, you can use the web interface to configure required network parameters that determine how the SLM interacts with the attached network. The unit might have a DHCP-assigned IP address or one assigned manually using Detector or a serial connection to the command line interface. -
Page 40: Figure 3-11 Slm Home Page
3: Quick Setup 2. In the URL field, type https:// followed by the IP address of your SLM. 3. Log in using sysadmin as the user name and PASS as the password. The SLM Configuration page opens. Figure 3-11 SLM Home Page... -
Page 41: Figure 3-14 Network Settings -Gateways Tab
Note: Enter all IP addresses in dot quad notation. If specifying an IP address, enter the network segment on which the SLM resides. Subnet Mask There is no default. 3. To save your entries, click Apply. Clicking Apply commits these changes immediately. -
Page 42: Figure 3-16 Date & Time Page
Settings. To set the local date, time, and time zone: You can specify the current date, time, and time zone at the SLM's location (default), or the SLM can use NTP to synchronize with an NTP server on your network. -
Page 43: Figure 3-18 Account Page For Sysadmin
From the drop-down lists, select the current hour and minute. Time From the drop-down list, select the appropriate time zone. Time Zone Indicates how long the SLM has been up and running. SLM Up Time 3. To save, click Update. To change the administrator password: The default sysadmin password is PASS. -
Page 44: Quick Setup Command
Displays the quick setup script on the CLI; only the sysadmin account can use this command. Next Steps After quickly getting the SLM up and running, you can complete the configuration on the web pages. To learn more about the interfaces, go to Chapter 5: Web and Command Line Interfaces. -
Page 45: 4: Virtual Slm Deployment
VMware. vSLM can be downloaded from the Lantronix website and launched on a desktop or server, and used to administer Secure Lantronix Mangement devices like the SLM hardware version. This chapter describes the differences between the SLM and vSLM. -
Page 46: 30-Day Trial License
4: Virtual SLM Deployment 5. Start the VM. To deploy the OVF version: 1. Download the vslm-<firmware version>.OVF.zip distribution from the Lantronix website. 2. Unpack vslm-3.4b.OVF.zip for distribution: vslm-3.4b.OVF/ vslm-3.4b.OVF/vslm-3.4b-disk1.vmdk vslm-3.4b.OVF/vslm-3.4b.mf vslm-3.4b.OVF/vslm-3.4b.ovf vslm-3.4b.OVF/vslm-OVF-README.txt 3. Launch your virtualization manager and open or import the unpacked .zip files ... - Page 47 4: Virtual SLM Deployment To obtain a permanent vSLM license, contact Lantronix Sales at 800-422-7055. You will need to provide the unique signature for your vSLM: [sysadmin@SLMB1DC]> admin signature show Signature: 6f32deb993d767081dada4ff9a2b27c2 SLM User Guide...
-
Page 48: 5: Web And Command Line Interfaces
1. Open a web browser (Internet Explorer 6.0. and later or Firefox 1.5 and later with JavaScript enabled). 2. In the URL field, type https:// followed by the IP address of your SLM. 3. To configure the SLM, use sysadmin as the user name and PASS as the password. (These are the default values.) Notes: The administrator may have changed the password using the method described in the ... -
Page 49: Typical Slm Web Page
Tabs: Display a series of pages related to a particular entity (e.g., account group, network settings, and Ethernet devices). Home Button: Displays the Lantronix web site home page. Reload Button: Use to refresh the tree structure after auto-detect, or if some other process (another logged-in user) makes changes that affect the database. -
Page 50: Notes
To delete a saved note, click in the box, press CTRL+A, press Delete, and then click the Update button. To save a new note, click the Update button. A confirmation message displays. The next time you open the page, it displays the note and the date and time of the update. SLM User Guide... -
Page 51: Web Page Help
1. Click the Search button. A search field displays. 2. Enter the word(s) you want to search for and press Enter. Note: You can also enter the word in the search field to the left of the Lantronix logo and press Enter. SLM User Guide... -
Page 52: Logging Out Of The Web Interface
Figure 5-5 Logout on the Page Header Command Line Interface (CLI) A command line interface is available for entering the commands for the SLM. You can access the CLI using SSH or a serial terminal connection. In this User Guide, after each section of instructions for using the web interface, you will find related CLI commands. -
Page 53: Commands
5: Web and Command Line Interfaces b. Enter your SLM password and press Enter. Note: When SecurID is enabled, the user must enter the number on the RSA token. Depending on the state of the user, the login page may require a PIN number, passcode, or new token code. -
Page 54: Command Help
Enter. You can override the number of lines (or disable the feature altogether) with the set cli command. To clear an IP address, type 0.0.0.0. Logging Out of the CLI To log out of the SLM command line interface: 1. Type logout and press Enter. SLM User Guide... -
Page 55: Cli Commands
Description Displays the terminal lines settings. show history Syntax show history Description Displays the 100 most recent CLI commands. Session Commands connect terminate Syntax connect terminate <connect ID> <one or more parameters> Parameters outbound <outbound ID> SLM User Guide... - Page 56 Use show connection to view the current connections and their ID. Examples connect terminate 3 connect terminate 3 outbound 1 Description Terminates a user connection to the SLM session. Use show connection to view the current connections and IDs. show connection Syntax show connection Description Displays active user connections and connection IDs.
-
Page 57: 6: Configuration And Operation Overview
Configuration and Operation Overview To best use the SLM, review the setup and configuration process outlined below before undertaking the tasks detailed in Chapters 6-10. Note: Throughout this user guide, the term "administrator" means the person using the sysadmin user name and those members of the Administrators Account Group permitted to perform the task. -
Page 58: Step 4: Auto-Detect Devices
The administrator uses auto-detection methods to find Lantronix devices and other devices on the network and to add them to the SLM database for the SLM to manage. There is no need to add a device manually, although that option is available. Currently, auto-detect supports Lantronix Discovery Protocol (LDP) for SLCs and other Lantronix devices, the Lantronix SCS05/20 device discovery protocol, and SNMP for SLPs, SLKs, and all other Ethernet devices. - Page 59 6: Configuration and Operation Overview Auto-Save: The administrator saves the configuration of one SLM on another SLM. If there is a need, the second SLM can "become" the first SLM. Configuration Save and Restore: The administrator saves and restores system configurations, providing rapid recovery of inadvertent configuration changes.
-
Page 60: 7: Network And Modem Settings
Network and Modem Settings This chapter is primarily for the administrator. It explains how to enter the network configuration, IPv4 filters, and modem settings for the SLM using the SLM web interface or the CLI. If you used a procedure in... -
Page 61: Using The Web Interface
2. In the URL field, type https:// followed by the IP address of your SLM. 3. Log in using sysadmin as the user name and PASS as the password. The SLM Configuration page opens. Figure 7-1 SLM Configuration Page (SLM-01 and SLM-02) -
Page 62: Network Port(S)
7: Network and Modem Settings Network Port(s) Notes: On the SLM-02, both Network Ports 1 and 2 are 10/100/1000Base-T. Previous versions of the SLM have one 10/100Base-T and one 10/100/1000Base-T network port. One possible use for the two Ethernet ports is to have one port on a private, secure network, ... - Page 63 Network Port 1. All network traffic that matches the Network Port 2 IP address and subnet mask goes out Network Port 2. If you set a default gateway, the SLM sends any network traffic that does not match Network Port 1 or Network Port 2 to the default gateway for routing.
-
Page 64: Table 7-5 Dns Servers
Select one of the following: Active Backup: Only one of the two Ethernet interfaces will be active (involved in transmitting and receiving data) at any one time. If the SLM detects that the Ethernet interface has lost network connectivity, the system makes the secondary interface the new active one after a few seconds (~3.5 - 4) of delay. -
Page 65: Network Gateways
7: Network and Modem Settings Table 7-6 Hostname Hostname Setting Description The default hostname is SLM. You can specify a fully qualified domain name (for Hostname example, SLM.lantronix.com). There is a 64-character limit (contiguous characters, no spaces). Note: The hostname becomes the prompt in the command line interface. -
Page 66: Keep Alive
Network Port 1. All network traffic that matches the Network Port 2 IP address and subnet mask goes out Network Port 2. If you set a default gateway, the SLM sends any network traffic that does not match Network Port 1 or Network Port 2 to the default gateway for routing. -
Page 67: Viewing Network Statistics
Users logged in locally (not using remote authentication) may change passwords at any time, unless the administrator has disabled this option. To change your password: 1. On the menu, click Configuration. The Configuration Home page opens. 2. Click the Password tab. The following page opens: SLM User Guide... -
Page 68: Network Commands
<1|2|3> ipaddr <IP Address> Description Configures up to three DNS servers. set network gateway Syntax set network gateway <parameters> Parameters default <IP Address> precedence <dhcp|default> alternate <IP Address> pingip <IP Address> ethport <1 or 2> pingdelay <1-250 seconds> failedpings <1-250> SLM User Guide... - Page 69 7: Network and Modem Settings Description Sets the default gateway. set network host Syntax set network host <Hostname> Description Sets the SLM hostname. set network port Syntax set network port <1|2> <parameters> Parameters state <dhcp|bootp|static|disable> [ipaddr <IP Address> mask <Mask>] mode <auto|10mbit-half|100mbit-half|10mbit-full|100mbit-full>...
-
Page 70: Ipv4 Filters
Warning: IPv4 filters configuration is a feature for advanced users. Adding and enabling IPv4 filter sets incorrectly can disable your SLM. IPv4 Filters act as a firewall to allow or deny individual or a range of IP addresses, ports, and protocols. -
Page 71: Figure 7-14 New Ipv4 Filter Definition - Configure Tab
Allow permits the packet through the filter. Name that identifies a filter. The name may be composed of letters, numbers and Filter Name hyphens only. (The name cannot start with a hyphen.) Example: FILTER-2 SLM User Guide... -
Page 72: Updating Or Deleting An Ipv4 Filter
Updating or Deleting an IPv4 Filter The administrator can update or delete IPv4 filters. To update or delete an IPv4 filter: 1. On the List tab, click the Edit icon to the left of the filter. The Configure tab displays. SLM User Guide... -
Page 73: Figure 7-16 Ipv4 Filter - Configure Tab
Click IPv4 Filters on the menu tree. The deleted filter is no longer on the menu tree or listed on the List tab. 3. To update an IPv4 filter: a. Edit the information as desired. b. Click the Update button. A confirmation message displays. SLM User Guide... -
Page 74: Viewing The System Ipv4 Filter Sets
To view an individual IPv4 filter set: 1. On the menu, click the individual filter set name. The IPv4 Filter page for the filter set displays. 2. Click the Show tab. Figure 7-18 IPv4 Filter - Show Tab SLM User Guide... -
Page 75: Setting Properties Of An Ipv4 Filter
Figure 7-19 IPv4 Filter Definitions - Properties Tab 3. Enter the following: Table 7-20 IPv4 Filter Definitions - Properties Tab IPv4 Filter Setting Description To enable the filters, select the check box. Disabled by default. Enable IPv4 Filters SLM User Guide... -
Page 76: Ipv4 Filter Commands
Note: There may be times when a complex IPv4 filter set may accidentally lock all users out of the SLM. To allow testing of new filter sets, the administrator can enable and test the filter sets for a specified period. - Page 77 Syntax set ipfilter test <number of minutes> Description Enables or disables IPv4 filter test mode. show ipfilter Note: Type show ipfilter to display index. Syntax show ipfilter <parameters> Parameters [name <Filter Name>] [index <number>] SLM User Guide...
-
Page 78: Ipsec Management
Description Displays all IP filtering rules for all chains. IPsec Management Internet Protocol Security (IPsec) for the SLM includes IKE policy for internet key exchanges and Virtual Private Network connections. Internet Key Exchange (IKE) Policies The administrator can view, add, and update one or more IKE policies. -
Page 79: Table 7-22 Ike Policy Exchange Information
Mode during the security association phase of the key exchange. Exchange Type Note: Aggressive mode will be available in a future release. Local SLM identification type: Local Peer ID Type IPv4: Internet Protocol version 4 IPv6: Internet Protocol version 6... -
Page 80: Adding An Ike Policy
RSA Signature: Uses a private and public key that together comprise a digital signature. Note: This feature will be available in a future SLM release. Select the mode during the security association phase of the key exchange: Exchange Type Main Mode: (default) Note: Aggressive mode will be supported in a future release. - Page 81 IPv6: Internet Protocol version 6 FQDN: Fully Qualified Domain Name User Email: Email address of the local user Enter the local SLM identification value. This value depends on the Local Peer ID Local Peer ID Value Type setting. Select the method of filtering outgoing data:...
-
Page 82: Updating Or Deleting An Ike Policy
Click IKE Policies on the menu bar. 3. To update a policy: a. Edit the information as desired. b. Click the Update button. A confirmation message displays. 4. To save your entries, click the Save button. SLM User Guide... -
Page 83: Vpn Connections
Network port on the SLM that connects to the VPN. Network Port IP protocol selected to protect data traffic. Local Protocol Method selected to protect data traffic on the TCP port of the SLM. Local Port Subnet prefix length for Subnet type clients. Subnet Prefix Algorithm for verifying data integrity. -
Page 84: Adding A Vpn
Address Type Single: The single host that is the destination of the IPsec traffic. Remote Peer IP Start Starting IP address in a range of remote IP addresses. Prefix of the subnet for Subnet Type peers. Subnet Prefix SLM User Guide... -
Page 85: Updating Or Deleting A Vpn
Click VPN Connections on the menu bar. 3. To update a policy: a. Edit the information as desired. b. Click the Update button. A confirmation message displays. 4. To save your entries, click the Save button. SLM User Guide... -
Page 86: Connecting A Vpn
The administrator can configure dial-in and dial-out from either the web interface or the CLI. A user dialing in from a remote computer in text mode can access the CLI on the SLM. A user dialing in from a remote computer in PPP mode can access the CLI and the web ... -
Page 87: Configuring A Modem
Name that identifies the modem. Name Identifies the type of modem (e.g., PCI or USB). Modem Type Communication speed between the SLM and a modem. Baud Number of data bits used to transmit a character. Data Bits Type of parity checking. Parity checking detects simple, single-bit errors. -
Page 88: Figure 7-32 Modem Page - Configure Tab
Note: We recommend that the modem initialization script always be preceded with AT and include E1 V1 x4 Q0 so that the SLM can properly control the modem. Communication speed between the SLM and the modem. From the drop-down list, Baud select the baud rate. -
Page 89: Enabling Or Disabling Dial-In Connections
3. To save, click the Submit button. A confirmation message displays. Viewing a List of Profiles The administrator can view a list of modem connections. 1. On the menu, click Configuration > Network Settings > Modem Management > Modem Profiles. The following page opens: SLM User Guide... -
Page 90: Adding A Profile
The format in which the data flows back and forth: Modem Mode Text: In this mode, the SLM assumes that the modem is for remotely logging into the CLI. Text mode is only for dialing in. PPP: This mode establishes an IP-based link over the modem. Dial-out mode uses PPP connections (e.g., the SLM connects to an external network). -
Page 91: Figure 7-38 New Profile-Configure Tab
SLC hangs up and calls the user back. The SLM then logs in again. This feature is currently available in text mode only. If you select the check box, when the SLM attempts to connect to an SLC via a text Auto Login mode connection, it automatically uses the Login and Password specified on the SLC Device page. -
Page 92: Table 7-40 New Profile - Configure Tab - Text Mode
PPP Mode Setting Description Negotiate IP Address For the remote device or PC to specify the local (SLM) IP and remote addresses, select Yes. Defaults to Yes. For the SLM to assign the local (SLM) IP and remote IP addresses, select No, and enter the local IP (IP address of the SLM) and remote IP (IP address of the remote device or PC). -
Page 93: Updating And Deleting A Profile
Discovering a USB Modem The system administrator can attach a USB modem to an SLM and configure it into the system without rebooting the SLM. For the vSLM, a USB modem must first be connected to the vSLM VM SLM User Guide... -
Page 94: Modem Commands
MyPCIModem Description Terminates modem dial-out connection. set modem edit Syntax set modem edit <Modem Name> <parameters> Parameters name <New Name> baud <300-115200> flowcontrol <none|xon/xoff|rts/cts> initscript <Modem Initialization Script> defaultinitscript <Modem Default Initialization Script> dialin <Dial Account Name|CLEAR|disable|enable> SLM User Guide... -
Page 95: Dial Account Commands
Syntax show modem <parameters> Parameters [name <Modem Name>] [index <number>] Description Displays modem settings. show modem status Syntax show modem status Description Displays the status of the modem. Dial Account Commands set dialaccount add Syntax SLM User Guide... - Page 96 <disable|enable> (apply only text mode) dialbacknumber <dial-back number|CLEAR> (apply only text mode) CLEAR removes the dial-back number. userprofile <disable|enable> (apply only text mode) Uses local user-defined dial-back configuration. timeout <disable|1-30 minutes> Description Modifies a dial account's settings. set manageddevice config SLM User Guide...
- Page 97 Note: Type show dialaccount to display index. Syntax show dialaccount <parameters> Parameters [name <Dial Account Name>] [index <number>] Examples show dialaccount show dialaccount name ppp-pap show dialaccount index 2 Description Displays dial account settings. show dialaccount mapping SLM User Guide...
- Page 98 7: Network and Modem Settings Syntax show dialaccount mapping Description Shows dial account used by dial-in and dial-out. SLM User Guide...
-
Page 99: 8: User Management
By default, local authentication is enabled and is the first method the SLM uses to authenticate users. The administrator can select additional authentication methods, such as NIS, LDAP, RADIUS, SecurID, and SSH public key or CLI login. -
Page 100: Figure 8-1 User Authentication - Configure Tab
Table 8-2 User Authentication - Configure Tab User Description Authentication Setting The SLM authenticates users in the local database by user name and password. If Local this method is enabled, it always responds. A network naming and administration system developed by Sun Microsystems for NIS (Network smaller networks. -
Page 101: Nis
3. To disable a method currently in the Enabled methods list, select the method and click the right arrow between the lists. 4. To set the order in which the SLM will authenticate users, click the up and down arrows to the left of the Enabled methods list. -
Page 102: Figure 8-3 Nis Authentication Page - Configure Tab
The IP addresses or hostnames of up to five slave servers. Server #1 - 5 Broadcast for Server Select the check box for the SLM to send a broadcast datagram to find the NIS Server on the local network. Enabled Displays selected if you previously enabled this method on the User Authentication page or on this page. -
Page 103: Ldap
If the dsmith LDAP acccount is a member of more than one group starting with "SLM_" the first one found will be used. If later, the LDAP account dsmith is assigned to a different "SLM_xxxxx" group, then at the next login, the dsmith account on the SLM will be moved to the new account group. -
Page 104: Table 8-6 Ldap Authentication Settings
A-Z, and 0-9. Retype Password The maximum length is 127 characters. Number of the TCP port on the LDAP server to which the SLM talks. The default Port setting is 389. Select to enable. Active Directory is a directory service from Microsoft that is a part of Active Directory Windows 2000 and later versions of Windows. -
Page 105: Radius
8: User Management RADIUS The administrator can configure the SLM to use RADIUS to authenticate users attempting to log in to the SLM through the web interface, SSH public key, Telnet, or the console port. Note: For a user to log in remotely using RADIUS, the user's account must have remote access (Remote Only or Local &... -
Page 106: Kerberos
Older RADIUS servers may use 1645 as the default port. Check your RADIUS server configuration. Text that serves as a shared secret between a RADIUS client and the server (SLM). Server #1 Secret The shared secret is used to encrypt a password sent between the client and the server. -
Page 107: Figure 8-9 Kerberos Authentication Page - Configure Tab
8: User Management To configure the SLM to use Kerberos to authenticate users: 1. On the menu, select Configuration > Authentication > Kerberos. The following page opens. Figure 8-9 Kerberos Authentication Page - Configure Tab 2. Enter the following: Table 8-10 Kerberos Authentication Settings... -
Page 108: Tacacs
The SLM supports the TACACS+ protocol (not the older TACACS or XTACACS protocols). The administrator can configure the SLM to use TACACS+ to authenticate users attempting to log in to the SLM through the web interface, SSH, Telnet, or the console port. -
Page 109: Securid
Upon the first successful authentication, the SecurID server places a shared node Clear Node Secret secret key on the SLM. There may be times when this file needs to be cleared by both sides, so this option is available. SLM User Guide... -
Page 110: Ssh Keys
SSH key for authentication. Exported Keys The SLM can generate SSH keys for SSH connections out of the SLM for any SLM user. The SLM retains both the private and public key on the SLM, and makes the public key available for export through SCP, FTP, or copy and paste. -
Page 111: Figure 8-15 Manage Ssh Keys - Slm Keys Tab
The imported key file does not contain the host from which the user will be making an SSH connection. The SLM local user login for the connection is different from the user name from which the key was generated or is not included in the imported key file. -
Page 112: Table 8-17 Imported Key Settings
To add or view export SLC keys: You can enable the SLM to retrieve all the public keys (each with a specific user and host name) from a particular SLC and store them in the SLM database. Then you can push those public keys to other SLCs, allowing those particular users to access the other SLCs from those particular hosts. -
Page 113: Figure 8-19 Manage Ssh Keys - Slc/Slb Keys Tab
TTf+YWzHCr1mX/+yRUyA+I9VXb9cI2r9uqIlMk/GVTgpI/8YERnAsQ9AeRfy/20MXOSGg895 tdBW6piLKWoJ5P6NRcXsFJScmowGXNU4snUpk2cvVNyGiVMe9jb454fb080+/lphmMrJMUPY X3uG22Qsm0KZGosnLFKtYzimDaOoRQ2QI9my19i/baFX9RiH2yda+vLmBsTchaEx30Dp7Pw baHi7gf8Rb9Q== 5. To delete one or more keys: a. Select the check box for each key to be deleted and click the Delete button. b. In response to the request for confirmation, click OK. SLM User Guide... -
Page 114: Copy Keys
8: User Management Copy Keys If your SLM is set up with dual booting, you can move SSH keys from one boot partition to another. To copy a key: 1. On the menu, select Configuration > Authentication > SSH Keys, and then click the Copy Keys tab. - Page 115 <Bind Password> adsupport <enable|disable> encrypt <enable|disable> Description Configures the SLM to use LDAP to authenticate users who log in to the SLM via SSH, Telnet, the web, or the console port. set nis Syntax set nis <one or more parameters>...
- Page 116 <IP Address or Name> port2 <TCP Port> secret2 <Secret> Description Configures the SLM to use RADIUS to authenticate users who login to the SLM via SSH, Telnet, the web, or the console port. set sshkey delete Syntax set sshkey delete keyuser <SSH Key User> keyhost <SSH Key Host>...
-
Page 117: Account Groups
There are four types of account groups: Administrators, Ethernet Device, Managed Device, and Menu Only. Administrators Account Group: Has rights and permissions to configure the SLM and to add, edit, and delete account groups within the Ethernet Device, Managed Device, and Menu Only categories. -
Page 118: Viewing Account Groups
Figure 8-23 Account Groups Page - Members Tab Adding an Account Group 1. On the Account Groups page, click the Group tab. The following page opens: Figure 8-24 Account Group Page - Group Tab Enter the following: SLM User Guide... -
Page 119: Updating Or Deleting An Account Group
Edit the name as desired. b. Click the Update icon. A confirmation message displays. c. Click Accounts on the menu tree. The updated group is on the menu tree and listed on the Members tab. Setting Password Requirements for User Accounts SLM User Guide... -
Page 120: Figure 8-27 Account Groups Page - Passwords Tab
(minutes) Note: The SLM ships with a default maximum of 25 concurrent user sessions (or "seats"). If you require more than 25 concurrent user sessions, please contact your sales associate to order them. When all seats are in use, the sysadmin can still log in one more time, from the CLI interface only, and terminate other connections. -
Page 121: Assigning Account Group Device Rights
Ethernet devices. All members of the group inherit these permissions. 1. Select the account group from the menu. The following page opens. Figure 8-29 Ethernet Device Account Group - Accounts Tab 2. Click the Assign tab. The following page opens: SLM User Guide... -
Page 122: Figure 8-30 Ethernet Device Account Group - Assign Tab
All members of the group inherit these permissions. 1. Select the account group from the menu. The following page opens: Figure 8-31 Managed Device Account Group - Accounts Tab 2. Click the Assign tab. SLM User Guide... -
Page 123: Viewing Currently Logged-In Accounts
Viewing Currently Logged-In Accounts Administrators can see which users are currently logged into the SLM and whether they are connected to any managed devices. The page also displays the maximum number of concurrent users for which this SLM is licensed. -
Page 124: Account Group Commands
Type of interface (web or command line) the user is logged in to. U.I. IP address of the client. Location Date and time the user last accessed the SLM. Last Access Number of minutes since the user last took an action in the session. Minutes Idle... -
Page 125: Accounts
To assign unique permissions to an individual account, create the account as the sole member of an account group. The sysadmin account always has all permissions enabled. SLM User Guide... -
Page 126: Viewing Accounts
Table 8-37 Account Groups - Accounts Tab Account Groups Description Setting The user name for logging in to the SLM. Name User's email address; may be used for event notification. Email Address Indicates whether the user has permission to open the Network Settings page and Config Network configure network settings. -
Page 127: Adding An Account To The Administrators Account Group
The sysadmin account can add other administrators to the Administrators Group, assigning a user name and email address for each user. The name is for logging in over the web interface or the command line interface. The SLM uses the email address to send emails to users based on configured alarm settings. -
Page 128: Figure 8-39 Administrator Account Group - Accounts Tab
Table 8-41 Add New Account to Group - Configure Tab Setting Description User ID for logging into the SLM. Must be alphanumeric, start with an alpha Name character, and may include an underscore ( _ ). User's password for logging in to the SLM. -
Page 129: Adding An Account To An Ethernet Or Managed Device Account Group
Administrators assign a user name and email address for each user. The name is for logging in over the web interface or the command line interface. The SLM uses the email address to send emails to users based on configured alarm settings. -
Page 130: Figure 8-43 Add New Accounts To Group - Configure Tab
Table 8-44 Add New Account to Group - Configure Tab Account Setting Description User ID for logging into the SLM. Must be alphanumeric, start with an alpha, and Name may include an underscore ( _ ). User's password for logging in to the SLM. -
Page 131: Updating Or Deleting An Account
page for SLP password synchronization to work. Rebooting the SLM for any reason causes it to ignore user account password changes made but not yet pushed. Once the SLM authenticates them, users with dial-back access can dial into the Enable Dial-Back SLM and enter their login and password. -
Page 132: Account Commands
To verify the deletion, click the account group in the menu. The user is no longer listed. Account Commands Use the following commands to configure local accounts (including sysadmin) to authenticate users who login to the SLM by means of SSH, Telnet, the web, or the console port. set account add Syntax set account add <User Name>... - Page 133 Note: Administrators with permission to change passwords must enter the username. Other users may not enter a username (they are changing their own password). Description Configures a user account's password for the SLM. show account Syntax show account <User Name>...
- Page 134 Displays accounts by index number. show account search Syntax Note: All searches are case insensitive. show account search name <name> show account search email <email address> Examples show account search name sys Description Searches for accounts by name or email address. SLM User Guide...
-
Page 135: 9: Ethernet Device Management
Auto-detect enables the SLM to search for and register Ethernet devices automatically. When the SLM detects an Ethernet device, it also scans the device for ports and port information. You only need to define search protocols and parameters once; they are saved for use in any future searches. -
Page 136: Table 9-2 Automatic Device Detection - Configure Tab
Starting IP Address: The IP address at the beginning of the range in which the SLM is to detect devices. Ending IP Address: The IP address at the end of the range in which the SLM is to detect devices. -
Page 137: Auto-Detect Commands
Starting IP Address: The IP address at the beginning of the range in which the SLM is to detect devices. Ending IP Address: The IP address at the end of the range in which the SLM is to detect devices. - Page 138 IP range: 192.168.0.1-192.168.0.155 timeout 1500 timeout: default is 1000 ms; range is 1000-60000 ms Description Sets Lantronix discovery protocol search filters. The ending IP address is optional. admin autodetect filter scs Syntax admin autodetect filter scs <IP range> [timeout <number of milliseconds>]...
-
Page 139: Ethernet Devices
Administrator and Ethernet Device Account groups add devices manually, edit device settings, and delete devices. Listing Devices You can view a list of all devices in the SLM database. The list may include other Lantronix-built devices and even non-Lantronix devices. Note: The examples in this section show SLCs. -
Page 140: Figure 9-3 All Ethernet Devices Page - List Tab
To list all Ethernet devices of a specific type: To list all SLCs managed by the SLM, click Ethernet Devices > SLC on the menu tree. The following page opens: Figure 9-4 Manage Group Page - List Tab To list devices in any other device group (e.g., SLK, SLP, or Other Lantronix), click Ethernet... -
Page 141: Adding A Device Manually
9: Ethernet Device Management Adding a Device Manually If you know there is a new device on the network, or for some reason, the SLM does not auto- detect a device, the administrator can manually add it. To add a device: Note: Ethernet device pages may differ slightly, depending on the type of device. -
Page 142: Figure 9-7 Add Slk Device Page - Configure Tab
9: Ethernet Device Management Figure 9-7 Add SLK Device Page - Configure Tab Figure 9-8 Add SLP Device Page - Configure Tab SLM User Guide... -
Page 143: Figure 9-9 Add Spider Device Page - Configure Tab
9: Ethernet Device Management Figure 9-9 Add Spider Device Page - Configure Tab Figure 9-10 Add Other Lantronix Device Page - Configure Tab SLM User Guide... -
Page 144: Figure 9-11 Add Non Lantronix Device Page - Configure Tab
Link Status (view device. only) Login (not on SLM) User name for logging into any Ethernet device that can be logged into using http or https. Password for logging into any Ethernet device that can be logged into using http or Password and https. -
Page 145: Updating Or Deleting Ethernet Device Settings
The Administrator and Ethernet Device Account groups can edit settings for Secure Lantronix Management devices (SLCs, SLBs, SLKs, SLPs, SLBs, Spiders, and other SLMs) and other Ethernet devices. They can also delete a device from the SLM database so that the SLM will no longer manage it. -
Page 146: Figure 9-13 Update Slc Device Page - Configure Tab
Description If desired, create a managed device from the Ethernet device. For more information, Managed Device Creating Individual Managed Devices (on page 197). Note: This field is unavailable if no Managed Device Groups exist in the system. SLM User Guide... -
Page 147: Device Locator
SLM. Device Locator takes advantage of the SLM device management to assign a specific Row, Cluster and Rack Position to any device in the SLM database. Once the physical location of the device has been entered into the device record (or determined during the discovery... -
Page 148: Configuring Device Racks
Note that if a rack is removed from the end of a cluster, then the other racks are "enlarged" to physically fill out the cluster. If a rack is removed from the middle of a cluster, then a "hole" is shown in the cluster to indicate an available space. SLM User Guide... -
Page 149: Assigning Devices To Racks
Available Devices list one or more at a time by using Ctrl-click or Shift-click to select multiple devices. Also note that devices may be "removed" from a rack and placed back in the "Available Devices" pool by use of the right pointing arrow. Repeat this action to populate more racks. SLM User Guide... -
Page 150: Viewing Ethernet Device And Rack Locations
Some users may have read-only access and may only view all traffic on the connection. Other users may have read/write access and can type into the connection from the SLM side. Should a persistent connection fail (e.g., inadvertently closed by user or a network problem), the SLM will detect this condition and attempt to reestablish the connection. -
Page 151: Figure 9-18 Device Page - Percons Search
To view a specific persistent connection to a device: 1. On a specific device page, click the PerCons tab (see Figure 9-18). 2. click the Edit icon to the left of the connection. The PerCons page opens. SLM User Guide... -
Page 152: Figure 9-19 Device Page - Persistent Connection
9: Ethernet Device Management Figure 9-19 Device Page - Persistent Connection SLM User Guide... -
Page 153: Figure 9-20 Add Persistent Connection
Secure Channel: SLC, SLB, Spider, and SLM only Telnet TN3270: A special Telnet program that connects to mainframes. It is only available if the Ethernet Device is of type Non-Lantronix. No Lantronix devices use this protocol. Select to enable the SLM to log the persistent connection. - Page 154 Connection Enabled Clear this box to define the persistent connection, but not to initiate it. Later, when you want to activate the connection, return and select this box. If specified, this is the account the SLM will use for logins when establishing the Login persistent connection.
-
Page 155: Figure 9-22 Edit Persistent Connection
On the menu tree, click the name of the desired connection (at the end of the list of ports for a device). The PersCon page displays. 2. Click the Delete button. SLM User Guide... -
Page 156: Polling
Ethernet Device Description Setting Select to have the SLM poll Ethernet devices on the network at regular intervals. Periodically poll Disabled by default. If you select this option, then any Ethernet device that has its "poll" flag set but fails to respond to Auto Connection Fail Count consecutive polling attempts displays with a vertical red stripe in its icon on the menu tree. -
Page 157: Slc/Slb Local Connections
Enter the number of consecutive times the system must fail to reach the SLC before the SLM will connect through a modem. Enter 0 (zero) to disable this feature. Once the connection is established, it will remain connected until after either a successful Ethernet poll or a manual disconnect of the modem by an SLM user. -
Page 158: Device Modem
The Modem tab allows you to define modem connectivity between the SLM and the Ethernet device. This can included a PPP profile definition for the SLM to use to communicate with the device if the Ethernet connection should become severed, or a text profile to be used in call back mode, where the SLM calls the SLC/SLB, the SLC/SLB hangs up and then calls the SLM back (this for security purposes). -
Page 159: Viewing Session & Audit Log Files, Ping And Snmp Walk
The Modem Connect button establishes a PPP connection between the SLM and the remote Ethernet device. It is used when there is a network interruption and the SLM needs to contact the Ethernet device. Click this button to establish the connection manually. -
Page 160: Traps
Traps are notifications of events sent from one device to another. The traps listed below are those sent by other devices (SLMs, SLCs, SLPs, and SLKs) and received by the SLM. This feature is applicable when you select Enable Traps Reception on the SNMP Agent page. Examples of traps... -
Page 161: Figure 9-30 All Ethernet Devices Page -- Traps Tab
Trap Community Name of the device sending the trap; it is derived by associating the sender's IP Device address to a device name in the SLM database. Message text in the trap. Description The entire contents of the SNMP trap. -
Page 162: Properties (Ethernet Device Menu Tree)
Premier Wave, Other Lantronix, and Non Lantronix folders. Don't Detect: Prevents devices of this type from being auto detected. 3. To remove all devices of a type currently in the SLM database, select its checkbox. Note: Check boxes are active only if you change the display mode to Don't Detect. -
Page 163: Port Access
2. Click the Port Access tab. A list of all SLBs and their IP addresses displays, along with all of their ports and the power load of each port. Note: Hovering over a port reveals the port name. SLM User Guide... -
Page 164: Figure 9-36 Manage Slb Group - Port Access Tab
1. On the menu, click Ethernet Devices > SLP. The Manage SLP Group page displays: 2. Click the Port Access tab. A list of all SLPs displays, along with all of their ports and the power load of each port. Note: Hovering over a port reveals the port name. SLM User Guide... -
Page 165: Figure 9-37 Manage Slp Group - Port Access Tab
1. On the menu, click Ethernet Devices > Spider. The Manage Spider Group page displays. 2. Click the Port Access tab. All Spiders in the system display as boxes with IP addresses. Some boxes may display the current view of the device the Spider is controlling. SLM User Guide... -
Page 166: Figure 9-38 Manage Spider Group - Port Access Tab
1. On the menu, click Ethernet Devices > UDS/SDS. The Manage UDS/SDS Group page opens. 2. Click the Port Access tab. A list of all current UDS and SDS port connections displays, along with drop down lists of the unmanaged UDS/SDS ports. SLM User Guide... -
Page 167: Updating Passwords In Bulk
Updating Passwords in Bulk The administrator and Ethernet device users can perform bulk password updates on multiple devices in the local database. These changes can also be pushed to remote SLM, SLC, SLP, and SCS05/20 devices. The user has access to the device. -
Page 168: Figure 9-40 All Ethernet Devices Page - Passwords Tab
SDS, EDS, EDS-MD, XPort, Premier Wave, Other Lantronix, Non Lantronix Select the checkbox when you want to push the password change to remote SLM, Push Passwords to SLC, SLP, and SCS05/20 devices. Devices 3. Click the Update button. A confirmation message displays. -
Page 169: Changing Snmp Settings For Slc, Slb And Slps In Bulk
Select this check box to upload these SNMP settings to all devices of the same type Push to all devices (SLC, SLP, pr SLB) in the 3. Click the Update button. A confirmation message displays. Note: To clear all values before saving, click the Reset button. SLM User Guide... -
Page 170: Slm Proxy
To use the SLM as a proxy server: 1. On the menu, click Ethernet Devices. The All Ethernet Devices page displays. 2. Click the SLM Proxy tab. The tab displays a list of all the Ethernet Devices with a column for each method of connection. -
Page 171: Ethernet Device Commands
Parameters [name <Device Name>] [ipaddr <IP Address>] [location <Location>] [login <Loginname>] [model <Model>] [sshport <TCP Port for SSH>] [version <Version>] Description Finds Ethernet devices by device name or IP address and modifies device parameters. set ethernetdevice port SLM User Guide... - Page 172 <device name> Description Searches for and displays Ethernet or managed devices by device name. show device all Syntax show device all show device Description Displays all Ethernet and managed devices. show ethernetdevice account Syntax show ethernetdevice account <accountName> SLM User Guide...
- Page 173 Displays firmware versions of all Ethernet devices managed by the SLM. show ethernetdevice group Syntax show ethernetdevice group <Group Name> [firmware] group name: SLM, SLC, SLK, SLP, SCS, SCSX, SLB, SPDR, WiBox, UDS, EDS, EDSMD, Xport, PWave, other, non Note: Ethernet device group names are not case sensitive.
-
Page 174: Persistent Connection Commands
4 Description Displays all devices that match the criteria entered. For example, if you specify name slc, the SLM searches for all devices whose name starts with slc. Persistent Connection Commands set persistent add Syntax set persistent add <persistentConnectionName>... - Page 175 Syntax show persistent [[name] <persistentConnectionName>][device <devname|IP>][all] Notes: The device parameter is necessary only to discriminate between two or more persistent connections that are visible to the current user and are using the same name. SLM User Guide...
-
Page 176: Trap Commands
<Device Name or IP address> [index <number>] Description Displays the current trap log information for an Ethernet device using device name, IP address, or index number. show traplog group show traplog group Note: Type show traplog group to display the index. SLM User Guide... - Page 177 9: Ethernet Device Management Syntax show traplog group <Device Group Name> [index <number>] Group name: SLM, SLC, SLK, SLP, SCS, SCSX, SLB, SPDR, WiBox, UDS, EDS, EDSMD, Xport, PWave, other, non Description Displays the current trap log information for an Ethernet device group by index number.
-
Page 178: Ports
Managed Device users can only interact with managed devices (which may manage one or more ports, and/or a local Ethernet device) that they have permissions Note: Port pages may differ slightly, depending on the type of Ethernet device. The procedures below note these differences. SLM User Guide... -
Page 179: Viewing A List Of Ports
Table 9-46 Device - Ports Tab Port Setting Description Name of the Ethernet device port. Name Number of the Ethernet device port (e.g., a number between 1 and 48 for the SLC Port Number 48). Name of the parent Ethernet device. Console SLM User Guide... -
Page 180: Adding A Port
SLM. For example, a threshold preset at 128 characters means that as soon as the SLC receives 128 bytes of data on this particular device port, it captures log data and sends it to the SLM. The minimum byte threshold is 1, and the default is 1024. -
Page 181: Figure 9-47 New Slc Port Page - Configure Tab
Device (view only) Name of the port (e.g., name of the device to which it is attached). Name Ethernet device type (e.g., SLC, SLM, SLK). Parent Device Type (view only) Indicates whether logging is enabled on the port. Disabled by default. -
Page 182: Table 9-49 New Port - Configure Tab - Data Settings
SLC receives 128 bytes of data on this particular device port, it captures log data and sends the received data regarding this device port to the SLM. The minimum byte threshold is 1, and the default is 1024. -
Page 183: Updating Or Deleting A Port
Automatically assigned Telnet, SSH, and TCP port numbers. You may override this Port value, if desired. If selected, the SLM requires user authentication before granting access to the port. Authenticate Value to use when creating a terminal window (by Java applet) to that port. -
Page 184: Figure 9-52 Port Page - Configure Tab
(which is 23); otherwise use the entered value. (SCS and SLP) 2. Click the Update button. When the update is complete, a confirmation message displays. Note: Port configuration fields differ depending on the parent device type. SLM User Guide... -
Page 185: Connecting Directly To The Port Of An Slc Or Slb
1. On the Manage SLC Group Page, click the Port Access tab. The following page displays: Figure 9-54 Manage SLC Group Page - Port Access Page 2. Click the desired port on the specific SLC. The following page displays: Figure 9-55 Connection to Selected SLC Port SLM User Guide... -
Page 186: Statistics
You can power on, power off, or cycle power on multiple ports on an SLP. To manage power on multiple ports of an SLP: 1. On the SLP's Device page, click the Ports tab. The following page opens: SLM User Guide... -
Page 187: Viewing Port Logs
To view logs: 1. On the Port page, click the Logs tab. The following page displays: Figure 9-58 Port Page - Logs Tab 2. To view a log, select the log from the appropriate drop-down list: SLM User Guide... -
Page 188: Port Commands
Select the log of this particular SLC or SLB device port. SLC/SLB Portlog SLC/SLB Port Active Select the log of a currently active SLM user session to the port. Select a session log of a saved SLM user session to the port. - Page 189 Searches Ethernet ports by port name and displays port information. show port all Syntax show port all show port Displays all Ethernet ports. show port index Note: Type show port all to display index. Syntax show port index <number> Description Displays Ethernet ports by index. SLM User Guide...
-
Page 190: 10: Managed Devices
10: Managed Devices The SLM can treat any device connected to a port or connected to the local network as a managed device. Furthermore, multiple managed device objects in the system may be fused into a single managed device to streamline managed device operations and access. -
Page 191: Managed Device Groups
View the following information about each managed device: Table 10-3 Managed Device Groups - Devices Tab Managed Device Description Setting Name of the managed device. Name Name of an SLC or SCS serial port that is connected to this managed device. Serial Port SLM User Guide... -
Page 192: Viewing Managed Device Groups
Figure 10-4 Managed Device Groups Page - List Tab To view a list of devices belonging to a Managed Device Group: 1. On the menu tree, click the name of the device group. The following page opens: SLM User Guide... -
Page 193: Adding A Managed Device Group
Updating or Deleting a Managed Device Group The administrator can update or delete a Managed Device Group. To update or delete a Managed Device Group: 1. On the menu, click the Managed Device Group and then the Configure tab. The following page opens: SLM User Guide... -
Page 194: Configuring Polling Settings
Configuring Polling Settings The system administrator or permitted user can specify polling settings for the Managed Device Group. The SLM polls the Managed Device Group's connections according to these settings. To configure polling settings: 1. On the menu, click Managed Devices, and then click the Polling tab. The following page... -
Page 195: Managed Device Group Commands
(if interval a on which the SLM should poll the connections. Default is Sunday. multiple of 7) Enter the time of day at which the SLM should poll the connections. Default is Poll Hour 11:00p. 3. To save the settings, click the Update button. -
Page 196: Figure 10-10 Managed Device Page -- Connect Tab
Figure 10-10 Managed Device Page -- Connect Tab An icon bar contains a series of icons representing the types of connections the SLM can make to managed devices. Buttons above or below the icons enable you to connect directly to the managed device. -
Page 197: Creating Individual Managed Devices
Power connection: Enables the SLM to control power on the managed device through an SLP port. Two power connections are available. If the SLM detects that the power is on, then only the Power Off Note: and Cycle Power buttons display. If the SLM detects that the power is off, only the Power On button displays. -
Page 198: From A Port
10: Managed Devices From a Port You can create a managed device from a port on a Lantronix device server such as an SLC, SLK, SLP, SCS05/20, or SCSxx00. The managed device represents the physical device connected to the port. -
Page 199: From A Ports List
You can create one or more managed devices from an Ethernet device's ports list. In this example, we show ports on an SLC. To create one or more managed devices on the Ports page: 1. On the Device page, click the Ports tab. The following page opens: SLM User Guide... -
Page 200: Figure 10-15 Device Page - Ports Tab
6. Ine response to the confirmation request, click OK. The menu tree displays the new managed device(s) in the assigned Managed Device Group. 7. If desired, repeat through above to create managed devices and assign them to step 2 step 6 other Managed Device Groups. SLM User Guide... -
Page 201: From An Ethernet Device
5. To view the Connect tab for the managed device, click the name of the managed device on the menu. Above the network icon are buttons for connecting to the device through the network. Note: For more information about connection methods, see Connecting to Ethernet and Managed Devices (on page 224). SLM User Guide... -
Page 202: Fusing Managed Devices
10: Managed Devices Fusing Managed Devices While the SLM can communicate with a device connected to a port of a Lantronix device server (e.g., an SLC, SLK, or SCS05/2) individually, it is often more convenient to communicate from a single web page to a virtual managed device composed of more than one connection to the device. -
Page 203: Fusing An Ethernet Device With An Existing Managed Device
Fusing an Ethernet Device with an Existing Managed Device The physical device to which a Lantronix device server or a modem is connected may be fused with an existing managed device. To fuse a device with an existing managed device: 1. -
Page 204: Continuing The One-At-A-Time Fusion Process
This page that opens displays a table listing all the managed devices within the group. Figure 10-21 Managed Device Group - List Tab 2. Select the check box for each managed device you want to fuse. 3. Click the Fuse button. SLM User Guide... -
Page 205: Figure 10-22 Managed Device Group Page - List Tab (After Fusion)
You can change the name of the virtual managed device, identify the device type if a local device is a component of the virtual device, and change the Managed Device Group to which the virtual managed device belongs. SLM User Guide... -
Page 206: Configuring A Modem Connection To A Managed Device
Configuring a Modem Connection to a Managed Device It is useful to enable the SLM to connect over the telephone should a network connection fail. This is possible if, for example, the SLM has an internal or a physically connected modem, and a managed device such as a UNIX server on the network is connected to a modem .You can... -
Page 207: Configuring A Managed Device
SLK or Spider. Indicates whether the managed device is connected to a power port on an SLP or Power Point 1 and 2 SLB. 4. To save any changes, click the Update button. SLM User Guide... -
Page 208: Updating Or Deleting A Managed Device
<ethernetDevice|IP> [port <portName|portNumber>] Description Create a new managed device from the specified Ethernet device or port. set manageddevice assign Syntax set manageddevice assign <managedDeviceName> group <managedDeviceGroup> [write|remove] Description Assigns or removes permissions for a managed device. SLM User Guide... - Page 209 Defuses an Ethernet device or port from an existing managed device. set manageddevice fuse Syntax set manageddevice fuse <managedDeviceName> ethernetdevice <ethernetDevice|IP> [port <portName|portNumber>] Description Fuses an Ethernet device or port to an existing managed device. set manageddevice index Note: Type show manageddevice all to display index. SLM User Guide...
- Page 210 Description Defuses an Ethernet device or port from an existing managed device. set mgroup add <newManagedGroupName> Syntax set mgroup add <newManagedGroupName> Description Creates a new managed device group. set mgroup delete <existingManagedGroupName> Syntax set mgroup delete <existingManagedGroupName> SLM User Guide...
- Page 211 Entries are not case sensitive. Description Searches for and displays Ethernet or managed devices by device name. For example, if you specify name slc, the SLM searches for all Ethernet and managed devices whose name starts with slc. show device all...
-
Page 212: Managed Device Users
Powers managed device on or off. Examples set ma config port-1 name waimea-port-1 Specifies a managed device name (port-1) and renames it to waimea-port-1. set ma config slp-sunset-port1 state off Specifies a managed device name (slp-sunset-port1) and turns the power off. SLM User Guide... - Page 213 <number> disconnect modem Note: Type show manageddevice all to display index. Syntax set manageddevice index <number> disconnect modem Example set ma index 2 disconnect modem Description Finds a managed device by index number and disconnects modem. SLM User Guide...
-
Page 214: 11: Operation And Maintenance
Depending on permissions, the typical user employs SLM to: Search for SLCs and other Ethernet devices, ports, and managed devices. Connect by browser, SSH, or secure channel to Secure Lantronix Management devices and to the managed devices connected to their ports. -
Page 215: Search For An Ethernet Device
Thus, Irv returns all devices with locations starting with Irv, for example, Irvine. Case insensitive. Model: Model name of the device(s) (e.g., SLC16, SLM 2.0). Firmware: Version of the device's firmware (e.g., 4.0). -
Page 216: Figure 11-3 Example Of A Search By "Eds" Ethernet Device
The Channel Key does not indicate whether or not there is an active secure channel communication session, but instead indicates whether or not a secure channel was established to the device in the past, enabling the SLM to connect to the device without using a password. -
Page 217: Search For Ports
Number: Number of the port for which you are searching. 3. Click the Search button. The Search Results - Ports page opens, listing all ports that meet the search criteria that you have permission to see. SLM User Guide... -
Page 218: Figure 11-6 Example Of A Search By Port
For SLC v4.0 and later: The maximum time frame in seconds before the SLC sends data to the SLM. The default setting is 30 seconds. Maximum size of each log file in kilobytes. Once it is reached, a new log file is Max Log Size (KB) created. -
Page 219: Search For Persistent Connections
Available access to this persistent connection. Indicates whether the SLM is enabled to log the persistent connection. Logging Enabled Indicates whether the connection has been enabled and ready to activate. -
Page 220: Search For Users
Search for Users To search for users, administrators with account rights can search using two criteria. To search for users on the network: 1. From the Table drop-down list at the top of any page, select User. SLM User Guide... -
Page 221: Figure 11-13 Example Of A Search By User
The following information (if available) displays for each user retrieved by the search. Table 11-14 Search Results - Users User Setting Description The user name for logging in to the SLM. Name User's email address; may be used for event notification. Email Address... -
Page 222: Using Wildcards
SLM will update that new password on all SLMs, SLCs, SCSxx05/20s, and SLPs. Date and time the user last logged into the SLM, or the date and time of account Last Access creation if the user has never logged in. - Page 223 4 Description Displays all devices that match the criteria entered. For example, if you specify name slc, the SLM searches for all devices whose name starts with slc. show ethernetdevice search port Syntax show ethernetdevice search port <one or more parameters>...
-
Page 224: Connecting To Ethernet And Managed Devices
Connecting to Ethernet and Managed Devices Connections Overview From the SLM, you can connect to Secure Lantronix Management and other Ethernet devices just as you would if you logged into the device directly. You can also connect to Managed Devices. -
Page 225: Managed Devices - Connection Methods
If the Login and Password fields in the device record have been completed, the SLM uses them for an automatic login when you browse to secure devices. However, if you use Microsoft Internet Explorer on the client machine, you must change the registry to use this feature. -
Page 226: Making A Secure Channel Connection To An Slc, Slm, Or Slb
SLM or an SLC and its ports and managed devices. Secure channel is actually a special form of SSH connection. If you use the secure channel, you need only supply the password when logging into the SLM. If you use SSH, you have to supply the password every time. -
Page 227: Making An Ssh Connection To An Ethernet Or Managed Device
Making an SSH Connection to an Ethernet or Managed Device Users can use SSH from the web page of a Java-enabled web browser to connect to the command line interface of any Secure Lantronix Management or other discovered Ethernet device. -
Page 228: Making A Web Channel Connection To An Slc
The web channel feature uses the existing secure channel key to the SLC to authenticate through the web interface. This enables an SLM user to connect to the web interface on an SLC without having to enter a username and password. The web connection to the SLC filters through the SLM. -
Page 229: Making A Telnet Connection To An Ethernet Device
1. Click the Telnet button. A Java applet runs, and then the Telnet command line interface displays. Figure 11-22 Telnet Connection 2. Configure or manage the device as directed by the device's User Guide or online Help. SLM User Guide... -
Page 230: Connection Commands
SLC48 has ports 1 to 48. Modem connection is available for managed devices only. With the modemssh option, the SLM dials out to the managed device in PPP, and then connects it via SSH. With modemtelnet option, the SLM dials out to the managed device in PPP, and then connects it via Telnet. -
Page 231: Managed Device Users
<Device Name> [<secure|ssh|telnet|serial|modem|modemssh|modemtelnet| modemcallback>][port <port>] Specify secure to connect through a secure channel. Secure channel is the default method of connection for SLC/SLB, SLC ports, and SLM, and SSH is the default for other devices. SLM User Guide... -
Page 232: Services
SLC48 has ports 1 to 48. Modem connection is available for managed devices only. With the modemssh option, the SLM dials out to the managed device in PPP, and then connects it via SSH. With modemtelnet option, the SLM dials out to the managed device in PPP, and then connects it via Telnet. -
Page 233: Figure 11-23 Slm Services Page
Enable SSH Logins Enabled by default. If selected, enables the SLM to allow users to access the CLI using SSH version Enable SSH v1 Logins Allows you to change the SSH TCP port to a value in the range of 1 - 65535. The SSH Port default is 22. -
Page 234: Banners
1. On the Services page, click the Banners tab. The following page displays: Figure 11-25 Services Page - Banners Tab 2. Enter the following information: Table 11-26 SLM Services - Banners SLM Service Setting Description Enter the text to display at CLI connection. -
Page 235: Ssl
11: Operation and Maintenance The SLM has a default Secure Socket Layer (SSL) certificate. The SSL tab enables administrators to view and update SSL certificate information. The SSL certificate, consisting of a public/private key pair used to encrypt HTTP data, is associated with the web server. You can import a site- specific SSL certificate, if desired. -
Page 236: Status
Password & Retype Password 3. Click the Submit button. Note: You must reboot the SLM for the update to take effect. Status Administrators can view the system status on the Status tab, and if they desire, email it to another person. -
Page 237: Figure 11-29 Services Page - Status Tab
11: Operation and Maintenance Figure 11-29 Services Page - Status Tab SLM User Guide... - Page 238 11: Operation and Maintenance Continuation of (part 2 of 3) Figure 11-29 SLM User Guide...
-
Page 239: Services Commands
2. To email the status, enter the recipient's email address and click the Send Report button. Services Commands set service auditlog Syntax set service auditlog <enable|disable> Description Enables or disables audit logging. set service telnet Syntax set service telnet <enable|disable> SLM User Guide... -
Page 240: Maintenance
Save a snapshot of all database settings (configuration, configured users, and discovered devices) on the SLM or the user's client machine. Restore the configuration, either to a previously saved configuration or to the factory defaults. Update user passwords on selected SLMs/SLCs/SLBs/SLPs and SCS05/20s (password ... -
Page 241: Figure 11-30 Slm Maintenance Page
Description Setting Select this option to terminate all connections and reboot the SLM immediately. Reboot Select this option to terminate all connections, shut down the SLM immediately, and Shutdown turn off the power. Note: It is recommended that virtual SLMs be shutdown or restarted using the vSLM reboot and shutdown commands available via the web or CLI, rather than using the virtualization manager to shutdown or restart the vSLM. -
Page 242: Table 11-33 Slm Maintenance - Boot Banks
Returns the SLM settings to a previously saved configuration. If you select this Restore option, the SLM reboots after you apply the update. If you select this option, the Configuration from Browse button becomes available. Browse to the saved configuration. -
Page 243: Maintenance Commands
SLM. to Client The SLM sends the file containing the state of the system to the client machine for storage. The default file name is configsave.slm, but you may save it using any name. This is the file uploaded to the SLM upon system restore. - Page 244 11: Operation and Maintenance admin locallog clear traplog group <group name> group name: SLM, SLC, SLK, SLP, SCS, SCSx, SLB, SPDR, WiBox, UDS, EDS, EDSMD, Xport, PWave, LTRX, or other Description Clears all of the entries in the auditlog, syslog, or traplog.
-
Page 245: Date And Time
Displays general system information. Date and Time You can specify the current date, time, and time zone at the SLM's location, or the SLM can use NTP to synchronize with an NTP server on your network. To set the local date, time, and time zone: 1. -
Page 246: Date And Time Commands
Broadcast from NTP Server: Enables the SLM to accept time information periodically transmitted by the NTP server. This is the default if you enable NTP. Poll NTP Server: Enables the SLM to query the NTP Server for the correct time. If you select this option, complete one of the following: Public: Select this option if you want to use a public NTP server, and select the ... -
Page 247: Snmp & Syslog
1. On the menu, click Configuration > Services > SNMP & Syslog. The following page opens: Figure 11-38 SNMP & Syslog Page 2. Enter the following information: Table 11-39 SNMP & Syslog - Configure Setting Description Enables read-only access into the SLM. Disabled by default. SNMP Agent SLM User Guide... - Page 248 IP address of your network's Simple Mail Transfer Protocol (SMTP) relay server. SMTP Server Remote Syslog Server Select to indicate that the SLM will act as a remote syslog server to receive syslogs from other Ethernet devices (devices that have the SLM's IP Address specified as that device's syslog server).
-
Page 249: Device Firmware Updates
FTP, SFTP, and Local File. FTP is the default. Note: The Local File option is active only when at least one file exists in the SLM FW Upgrade Files directory. The name of the firmware update file downloaded from the Lantronix web site. -
Page 250: Table 11-42 Device Firmware Update - Slm Tab - Ftp/Sftp Server
Enter or browse to the file where the update is stored. Client File If you have an active Lantronix service plan for your SLM, you can download Check Lantronix update files directly from the Lantronix server onto your SLM. If you select this... -
Page 251: Slc/Slb Firmware
SLC/SLB to download the SLC/SLB firmware file directly from a server to the SLC/SLB. FTP on SLM and SFTP on SLM: The SLM first checks to see whether the SLM firmware file already exists on the SLM local hard disk. If not, the SLM downloads it using FTP or SFTP. -
Page 252: Table 11-45 Device Firmware Update - Slc/Slb Tab - Ftp/Sftp Server
If the user selects the firmware file from the SLC/SLB FW Upgrade Files directory, no entry is required. Otherwise, enter a key for validating the firmware file. Lantronix provides the key with the firmware file (32 hex characters). From the drop-down list, select the firmware update (from the Files > SLC/SLB FW Local File Upgrade Files directory.) -
Page 253: Slp Firmware
SLP directly from a server. Select FTP on SLM or SFTP on SLM for the SLM to first check to see whether the SLP firmware file already exists on the SLM local hard disk. If not, the SLM downloads it using FTP or SFTP. -
Page 254: Spider Firmware
Description If the user selects the firmware file from the SLP FW Upgrade Files directory, no entry is required. Otherwise, enter a key for validating the firmware file. Lantronix provides the key with the firmware file (32 hex characters). From the drop-down list, select the firmware update (from the Files > SLP Upgrade Local File Files directory.) -
Page 255: Wibox Firmware
Enter or browse to the file where the update is stored. Client File 3. In the Spider Devices to Update area, select one or more of the Spiders the SLM is managing. (Use Ctrl+click for multiple selections.) 4. To update the Spiders, click the Update button. When the update is complete, a confirmation message displays. -
Page 256: Figure 11-51 Device Firmware Update Page - Wibox Tab
Not all WiBox units share the same code. See the User Guide for your WiBox to find the correct code. 3. In the WiBox Devices to Update area, select one or more of the WiBoxes the SLM is managing. (Use Ctrl+click for multiple selections.) 4. -
Page 257: Uds/Sds Firmware Updates
Not all UDS/SDS units share the same code. See the User Guide for your UDS/SDS to find the correct code. 3. In the UDS/SDS Devices to Update area, select one or more of the UDS/SDS units the SLM is managing. (Use Ctrl+click for multiple selections.) 4. -
Page 258: Managing Alternate Slms
11: Operation and Maintenance Managing Alternate SLMs When Auto save configuration to other SLMs is enabled, the SLM immediately saves its own configuration to up to eight remote SLMs. After that, every time the SLM configuration has changed, it waits 60 minutes to make sure there are no more changes before saving another configuration to the remote SLMs. -
Page 259: Managing Devices Through The Actions Tab
3. To perform an action on all of the listed SLCs, select the check box in the column header, To perform an action on multiple SLCs, select the check box for each desired SLC. Before performing an action on another group of devices, access the SLM auditlog or SLM syslog file. -
Page 260: Rebooting Or Shutting Down
Getting a Log File Use the Actions tab to get a syslog or audit log file from one or more SLCs. Notes: The SLM stores files in the Files directories. You can display a file from the appropriate Files directory. -
Page 261: Getting Or Restoring A Configuration File
SLM or another PC), this SLC allows that particular user to access the SLC from that particular host. When you enable Get SSH keys from an SLC, the SLM retrieves all the imported public keys from that particular SLC and stores them in the SLM database. Then you can push those public keys retrieved from one SLC to other SLCs, allowing those particular users to access other SLCs from those particular hosts. -
Page 262: Reading Information
To send an applet file to one or more UDS devices: 1. Select the applet file from the drop down list. This file is found in the SLM folder "UDS Applet Files" under Configuration in the Files area. This applet file must be previously placed in this folder. -
Page 263: Issuing A Cli Command
The following commands will not work because the SLC CLI does not send status "settings successfully updated", which lets the SLM know that the command was successful: show [anything] Examples of commands that do work are:... -
Page 264: Figure 11-59 Viewing Progress Of Update Fw And Cli Commands
Name of the task. Name Informational text. Status Percentage of the task that is complete. Progress 3. To view details of the last device action status of the SLMs/SLCs/SLPs/SCS, click the Dev. Status tab. The following page opens: SLM User Guide... -
Page 265: Events
SNMP trap, a system event like network failure, or a text string match in a certain log. There are several types of logs in the SLM system: data logs (device port buffering), syslogs, event logs, access logs (user access), and audit logs. The alarm could send an email to a user, send an SNMP trap, or write to a log file (local syslog or remote syslog). -
Page 266: Figure 11-62 Event Management Page - Events Tab
SNMP community name should be the SNMP community of the device 172.19.100.123. Otherwise the device will not receive the trap. 3. Click the Define Alarm button. The alarm displays in the Alarm list on the right. 4. Enter the following information: SLM User Guide... -
Page 267: Table 11-64 Event Management - Events Tab - Trigger Type
If you specify the device's IP Address with this trigger type, the SLM sets the trigger should polling fail on this device. If you do not specify the device's IP Address, the SLM sets the trigger on all the devices on which polling failed. - Page 268 Ethernet port that is down (for example, 2). %: Defined percentage of the SLC port log file's capacity. For detailed instructions on completing the OID for a trap, see the Lantronix web site www.lantronix.com/support). 5. In the Alarms list to the right, select the alarm(s) to be associated with the selected trigger.
-
Page 269: Figure 11-65 Snmp Trap Configuration (From Lantronix Tech Support Faq)
11: Operation and Maintenance Figure 11-65 SNMP Trap Configuration (from Lantronix Tech Support FAQ) SLM User Guide... -
Page 270: Updating And Deleting Events
1. Select the alarm from the Current Alarms list and click the Remove Alarm button. A confirmation message displays. 2. Click OK. The alarm is no longer in the Alarms list or in any events that use that alarm. SLM User Guide... -
Page 271: Viewing The Event Log
To retrieve files from the SLC, use the Manage SLC Group Actions tab. File Types You can view and store the following files in the SLM database. You can also import or export them by means of an NFS or CICS mount. - Page 272 Lantronix web site (www.lantronix.com) or by using anonymous FTP (ftp.lantronix.com). Configuration Files SLM Configuration Files: Contain all of the SLM's settings that have been saved to file. They can be backed up to a location that is not on the SLM.
-
Page 273: File Format
For edge device based logging, the filename is made up of only three of these fields: <hostname>_<host_mac_address>-<device_port_number>.log Viewing, Deleting, and Renaming Files In this section, we show how to view, delete, and rename files. In our example, we use an SLM syslog file. To view a file: 1. -
Page 274: Figure 11-69 Slm Syslog Files Page - Files Tab
11: Operation and Maintenance Figure 11-69 SLM Syslog Files Page - Files Tab The available files (of the selected type) display in the list box. 2. Select View and then the file you want to view. 3. Click the Submit button. The Display tab opens and shows the contents of the selected file. -
Page 275: Exporting, Uploading, And Downloading Files
4. Click the Submit button. A confirmation message displays. Exporting, Uploading, and Downloading Files Administrators can export (copy), upload, and download files. To open the Files page: On the menu, click Files and then the file type you want to export. The following page opens: SLM User Guide... -
Page 276: Figure 11-71 Files Page
3. Click the Browse button and locate the file on your client machine to upload. 4. If this is an SLM FW Upgrade or SLC FW Upgrade (which also handles SLB), enter the md5sum value for this file in the Key field. -
Page 277: Copying Files
Table 11-73 File Management - Copy Tab Setting Description From the drop-down list, select the type file to copy. The default setting is SLM FW File type to copy Upgrade. Select the type of server from which to copy. The default setting is SFTP. -
Page 278: Setting Up Nfs
2. Enter the following information for importing a file: Note: The first three lines are for mounting remote NFS directories (the SLM functions as an NFS client). Once the directory is mounted, the SLM can import files from that share point. SLM User Guide... -
Page 279: Setting Up Cifs
The local directory on the SLM on which to mount the remote directory. The SLM Local directory creates the local directory automatically. Select the check box to enable the SLM to import the file by means of the NFS Mount server. Disabled by default. -
Page 280: Figure 11-78 File Management - Cifs Tab
Password required to authenticate the user on the remote CIFS server. Password and Retype Select the check box to enable the SLM to import the file from the CIFS server. Mount Disabled by default. If enabled, indicates that the user can read and write to the imported directory. -
Page 281: Setting Up Log Properties
Setting up Log Properties The administrator specifies the properties of log files. To set up log properties: 1. On the menu, click Files and then the Logging tab. The following page opens. Figure 11-81 File Management Page -- Logging Tab SLM User Guide... -
Page 282: Table 11-82 File Management - Logging Tab - Port Logs
2. Enter the following: Table 11-82 File Management - Logging Tab - Port Logs Setting Description Maximum space used for all session log files in gigabytes. It is 30 GB for SLM-01 Maximum log space and 60 GB for SLM-02. (30 GB available) -
Page 283: Logging Commands
<Device Name or IP Address> admin locallog clear traplog group <group name> group name: SLM, SLC, SLK, SLP, SCS, SLB, SPDR, WiBox, LTRX, or other Description Clears all of the entries in the auditlog, syslog, or traplog. - Page 284 Displays part of portlog by index from the top. Index is the number specified by lastminutes and date. show portlog index <number> <parameters> Parameters [top <number of lines>] Displays the part of portlog by index from the top. [tail <number of lines>] SLM User Guide...
- Page 285 Displays the contents of the portlog file by index. Note: Index is the number specified by parameters lastminutes and date. If you specify 0 as number of lines, all lines display. If you specify both date and time, the SLM ignores the date option. Examples show portlog index 3 Displays the specified portlog from top.
- Page 286 To get this index, type show sessionlog type slcportsaved date 0205. show sessionlog type device index 3 date 0205-0209 Displays device session log by the index '3'. To get this index, type show sessionlog type device date 0205-0209. SLM User Guide...
- Page 287 Type show traplog to display the index. Syntax show traplog group <Device Group Name> [index <number>] Group name: SLM, SLC, SLK, SLP, SCS, LTRX, or other Description Displays the current trap log information for an Ethernet device group by index number.
-
Page 288: 12: Using Slm On A Mobile Browser
Your phone's web browser must be XHTML Mobile 1.0-compliant, which most mobile browsers are. If you want to access the SLM WAP site via SSL (https), your phone browser must support SSL. An example of such a browser is Opera Mini. -
Page 289: Using Links To Select Options
12: Using SLM on a Mobile Browser The SLM main menu (Home page) displays a list of options: Using Links to Select Options To select an option: 1. Click the link (blue). For example, click Log on the Home page to display a menu of logs. -
Page 290: Logging Out
12: Using SLM on a Mobile Browser For example, towards the bottom of the Portlog Details page, the + symbol displays. If you select the +, further details display. If you select the -, the previous page of details displays. -
Page 291: Main Menu
12: Using SLM on a Mobile Browser Select on the browser page Tap on the keypad Back (bottom of page) Back or its equivalent on your Return to the previous page phone Name of menu (if at bottom of Return to a menu... -
Page 292: Status Menu
12: Using SLM on a Mobile Browser Status Menu The SLM Status menu has three options: System Information, Connections, and Routes. System Information To view the status of the system: 1. On the Status Menu, select System Information or tap the 1 key. The system configuration displays. -
Page 293: Connections
12: Using SLM on a Mobile Browser Connections To view information about the SLM's connections: 1. On the Status Menu, select Connections or tap the 2 key. The Connections menu displays. 2. To view individual connections, click the blue link on the Connections menu or tap the key number displayed to the left of the option. -
Page 294: Route Information
Device Menu The Device Menu provides access to Ethernet devices, unreachable Ethernet devices, and Managed Devices. To view information about the devices the SLM is managing: 1. On the Main menu, select Devices. The Devices menu displays. SLM User Guide... -
Page 295: Ethernet Devices
12: Using SLM on a Mobile Browser Ethernet Devices To view information about an Ethernet device: 1. From the Devices menu, select Ethernet Devices. The green icon to the right of a device indicates that the device is reachable; the red indicates that the device is unreachable. -
Page 296: Ethernet Unreachable Devices
12: Using SLM on a Mobile Browser Ethernet Unreachable Devices To view Ethernet devices to which the SLM has not been able to connect: 1. On the Devices menu, select Ethernet Unreachable Devices. The Ethernet Unreachable Devices page displays a list of unreachable devices. -
Page 297: Managed Devices
12: Using SLM on a Mobile Browser Managed Devices To obtain information about managed devices: 1. Select Managed Devices on the Devices menu. The Managed Devices page displays a list of managed devices. 2. Select a managed device to view its details. -
Page 298: Log Menu
12: Using SLM on a Mobile Browser Log Menu Filtering Logs The Log filter page enables you to view logs matching specified criteria (number of lines and date/ time). The settings are for the current session only. Once you save the filter, it applies for all log commands and is available as long as you are on the system (until logout or timeout). -
Page 299: View Logs
To view audit, trap, system, or port logs: 1. Select Log on the Main menu. The SLM Log menu displays. 2. Select the type of log you want to see (e.g., tap 2 to see the SLM's audit logs). SLM User Guide... - Page 300 12: Using SLM on a Mobile Browser 3. Select the log to view details. 4. Select the + button to see more details. 5. Select the + to scroll to see more lines of details. Note: You can set the number of lines you see at a time on the Log filter page.
-
Page 301: Appendix A: Command Reference
After an introduction to using commands, this chapter lists and describes all of the commands available on the SLM command line interface accessed through SSH, secure channel (SLC only), Telnet, or a serial connection. The commands are in alphabetical order by category. -
Page 302: Command Help
20), the "--Type 'm'(more) to see the next page-" message displays. To display the next page, type more and press Enter. You can override the number of lines (or disable the feature altogether) with the set cli command. To clear an IP address, type 0.0.0.0. SLM User Guide... -
Page 303: Authentication Commands
<Bind Password> adsupport <enable|disable> encrypt <enable|disable> Description Configures the SLM to use LDAP to authenticate users who log in to the SLM via SSH, Telnet, the web, or the console port. set nis Syntax set nis <one or more parameters>... - Page 304 <IP Address or Name> slave4 <IP Address or Name> slave5 <IP Address or Name> Description Configures the SLM to use NIS to authenticate users who log in to the SLM via SSH, Telnet, the web, or the console port. set radius Syntax set radius <one or more parameters>...
- Page 305 Description Displays all RADIUS information. show sshkey import Syntax show sshkey import <one or more parameters> Parameters [keyuser <SSH Key User>] [keyhost <SSH Key IP Address or Name>] [viewkey <enable|disable>] Description Displays imported SSH keys. show sysinfo SLM User Guide...
-
Page 306: Account Commands
Display health status of HP iLO remote device. Account Commands Use the following commands to configure local accounts (including sysadmin) to authenticate users who login to the SLM by means of SSH, Telnet, the web, or the console port. set account add Syntax set account add <User Name>... - Page 307 Note: Administrators with permission to change passwords must enter the username. Other users may not enter a username (they are changing their own password). Description Configures a user account's password for the SLM. show account Syntax show account <User Name>...
-
Page 308: Account Group Commands
[menu <Menu Name|CLEAR>] Description Modifies an account group. Group type is Administrators, Ethernet User, Managed User, or Menu User. CLEAR removes the current menu assignment. show accountgroup Syntax show accountgroup <Group Name> show accountgroup name <Group Name> SLM User Guide... -
Page 309: Administrative Commands
Deletes one of the current auto-detect search filters. The command displays an index of current filters. Type the index number of the filter you want to delete and press Enter. admin autodetect filter ltrx <IP subnet> Sets Lantronix discovery protocol search filters. admin autodetect filter scs <IP range> [timeout <number of milliseconds>] Sets SCS discovery protocol search filters. - Page 310 Displays the banner configuration. admin copybank Syntax admin copybank Description Copies the SLM firmware running in the current bank to the other bank. admin config Syntax admin config factorydefaults Description Restores the SLM configuration and device database settings to factory defaults.
- Page 311 Appendix A: Command Reference Syntax admin config rebuilddatabase Description Removes and rebuilds the SLM configuration and database from scratch, in case of database corruption that cannot be fixed by the factory default. admin locallog Syntax admin locallog clear auditlog admin locallog clear syslog admin locallog clear traplog device <Device Name or IP Address>...
- Page 312 Description Display license options. admin shutdown Syntax admin shutdown Description Terminates all connections, shuts down the SLM, and turns off the power. admin switch bank Syntax admin swithchbank bank [1|2] Description Switches the SLM to the next boot bank. admin signature restore...
-
Page 313: All Devices Commands
<device name> Description Searches for and displays Ethernet or managed devices by device name. For example, if you specify name slc, the SLM searches for all Ethernet and managed devices whose name starts with slc. show device all... -
Page 314: Auto-Detect Commands
IP range: 192.168.0.1-192.168.0.155 timeout 1500 timeout: default is 1000 ms; range is 1000-60000 ms Description Sets Lantronix discovery protocol search filters. The ending IP address is optional. admin autodetect filter scs Syntax admin autodetect filter scs <IP range> [timeout <number of milliseconds>]... - Page 315 Attempts secure channel using password mypass. Detects only Lantronix devices and removes existing non-Lantronix devices. Description Starts the SLM auto-detect device process, using the protocol and filters configured. show progress Syntax show progress Description Shows the progress of background tasks.
-
Page 316: Cli Commands
Specify secure to connect through a secure channel. Secure channel is the default method of connection for SLC/SLB, SLC ports, and SLM, and SSH is the default for other devices. Port is the number of a physical port on the SLC. - Page 317 SLC48 has ports 1 to 48. Modem connection is available for managed devices only. With the modemssh option, the SLM dials out to the managed device in PPP, and then connects it via SSH. With modemtelnet option, the SLM dials out to the managed device in PPP, and then connects it via Telnet.
-
Page 318: Managed Device Users
SLC48 has ports 1 to 48. Modem connection is available for managed devices only. With the modemssh option, the SLM dials out to the managed device in PPP, and then connects it via SSH. With modemtelnet option, the SLM dials out to the managed device in PPP, and then connects it via Telnet. - Page 319 SLM database. connect wakeonlan Syntax connect wakeonlan Parameters Device <Device Name or IP Address> [password <Password>] Description Send a Wake On LAN packet to an Ethernet device. The specified device must exist in the SLM database. SLM User Guide...
-
Page 320: Date And Time Commands
Displays output IP routing table, and optionally, network connections and statistics. diag nettrace Syntax diag nettrace <one or more parameters> Parameters [ethport <1|2>] [protocol <tcp|udp|icmp>] [host <IP Address or Name>] [numpackets <number of packets>] [snaplen <capture bytes>] [verbose <0|1|2|3>] SLM User Guide... - Page 321 <Number of Times to Ping> Default is 5. packetsize <Size in Bytes> Default is 64. Description Verifies that the SLM can reach a host over the network. diag ping6 Syntax diag ping6 <IP Address or Name> <one or more parameters> Parameters interface <interface name>...
-
Page 322: Dial Account Commands
Appendix A: Command Reference Description Displays information on the internal memory, storage and processes of the SLM. Dial Account Commands set dialaccount add Syntax set dialaccount add <Dial Account Name> <parameters> Parameters modemmode <text|ppp> Note: If you select text, all other parameters except timeout are ignored. - Page 323 Syntax set modem edit <Modem Name> dialin <Dial Account Name|CLEAR|disable|enable> Description Modifies a dial-in account name. show dialaccount Note: Type show dialaccount to display index. Syntax show dialaccount <parameters> Parameters [name <Dial Account Name>] [index <number>] SLM User Guide...
-
Page 324: Ethernet Device Commands
[login <Loginname>] [model <Model>] [readinfo] [sshport <TCP Port for SSH>] [tnport < TCP Port for Telnet> [tn3270lu <Logical Unit> [version <Version>] Description Finds Ethernet devices by device name or IP address and modifies device parameters. set ethernetdevice delete SLM User Guide... - Page 325 Finds a port by device name or IP address with the port number and modifies port parameters. set ethernetdevice sync Syntax set ethernetdevice sync <Device Name or IP Address> action <read|write> Description Finds an Ethernet device-by-device name or IP address and synchronizes device information. show device Note: Entries are not case sensitive. SLM User Guide...
- Page 326 <Device Name or IP Address> Description Finds an Ethernet device-by-device name or IP address and displays device information. show ethernetdevice firmware Syntax show ethernetdevice firmware Description Displays firmware versions of all Ethernet devices managed by the SLM. show ethernetdevice group SLM User Guide...
- Page 327 Appendix A: Command Reference Syntax show ethernetdevice group <Group Name> [firmware] group name: SLM, SLC, SLK, SLP, SCS, SLB, SPDR, WiBox, UDS, EDS, EDSMD, XPORT, PWAVE, LTRX, or other Note: Ethernet device group names are not case sensitive. Description Displays Ethernet devices by device group.
-
Page 328: Ipv4 Filter Commands
Appendix A: Command Reference Description Displays all devices that match the criteria entered. For example, if you specify name slc, the SLM searches for all devices whose name starts with slc. show ethernetdevice unreachablelist Syntax show ethernetdevice unreachablelist Description Displays unreachable Ethernet devices in short form. - Page 329 Type show ipfilter to display index. Syntax show ipfilter <parameters> Parameters [name <Filter Name>] [index <number>] Examples show ipfilter show ipfilter name MyFilter show ipfilter index 2 Description Displays IPv4 filter information. show iptables Syntax show iptables SLM User Guide...
-
Page 330: Logging Commands
<Device Name or IP Address> admin locallog clear traplog group <group name> group name: SLM, SLC, SLK, SLP, SCS, LTRX, SLB, SPDR, WiBox, or other Description Clears all of the entries in the auditlog, syslog, or traplog. - Page 331 [lastminutes <minutes>] [date <MMDD>] [date <MMDD-MMDD>] [loglastminutes <minutes>] [logdate <MMDD>] [logdate <MMDD-MMDD>] If you specify both the date and time, the SLM ignores the date. Description Displays the specified part of the auditlog by index. Examples show auditlog Lists auditlog files.
-
Page 332: Event Log
Lists portlog files modified in last 5 minutes. show portlog date 0205 Lists portlog files last modified on 0205. show portlog date 0205-0209 Lists portlog files last modified between 0205 and 0209. show portlog file Note: Type show portlog to display index. SLM User Guide... - Page 333 Displays the contents of the portlog file by index. Note: Index is the number specified by parameters lastminutes and date. If you specify 0 as number of lines, all lines display. If you specify both date and time, the SLM ignores the date option. Examples show portlog index 3 Displays the specified portlog from top.
-
Page 334: Session Log
Syntax show sessionlog type <sessiontype> <parameters> sessiontype: <slcportactive|slcportsaved|scsport|device> Parameters [lastminutes <minutes>] [date <MMDD>] [date <MMDD-MMDD>] Description Lists session log files. Note: edge device log files do not use the date as part of the filename makeup. SLM User Guide... -
Page 335: System Log
Displays the first 10 lines of device session log by the index '3'. To get this index, type show sessionlog type device lastminutes 5. System Log show syslog Syntax show syslog <parameters> Parameters [tail] (default) [top] [lastminutes <minutes>] [date <MMDD>] [date <MMDD-MMDD>] SLM User Guide... - Page 336 [lastminutes <minutes>] [date <MMDD>] [date <MMDD-MMDD>] [loglastminutes <minutes>] [logdate <MMDD>] [logdate <MMDD-MMDD>] If you specify both the date and time, the SLM ignores the date. Description Displays the specified part of the syslog by index. Examples show syslog Lists syslog files.
-
Page 337: Trap Log
Displays the part of syslog in index 3 time stamped, on 0205. Trap Log show traplog Syntax show traplog <parameters> Parameters [tail] (default) [top] [lastminutes <minutes>] [date <MMDD>] [date <MMDD-MMDD>] Description Lists traplog files. show traplog group Note: Type show traplog group to display the index. SLM User Guide... - Page 338 Appendix A: Command Reference Syntax show traplog group <Device Group Name> [index <number>] Group name: SLM, SLC, SLK, SLP, SCS, SLB, SPDR, WiBox, LTRX, or other Description Displays the current trap log information for an Ethernet device group by index number.
-
Page 339: Maintenance Commands
Restores the SLM configuration and device database settings to factory defaults. admin config rebuilddatabase Syntax admin config rebuilddatabase Description Removes and rebuilds the SLM configuration and database from scratch, in case of database corruption that cannot be fixed by the factory default option. admin config showfiles Syntax admin config showfiles... - Page 340 <Device Name or IP Address> admin locallog clear traplog group <group name> group name: SLM, SLC, SLK, SLP, SCS, LTRX, SLB, SPDR, WiBox, or other Description Clears all of the entries in the auditlog, syslog, or traplog.
-
Page 341: Managed Devices
Appendix A: Command Reference Description Terminates all connections, shuts down the SLM, and turns off the power. admin version Syntax admin version Description Displays current application version information. show progress Syntax show progress Description Shows the progress of background tasks. - Page 342 Fuses an Ethernet device or port to an existing managed device. set manageddevice index Note: Type show manageddevice all to display index. Syntax set manageddevice index <number> <one or more parameters> Parameters assign group <managedDeviceGroup> [write|remove] Assigns or removes permissions. SLM User Guide...
- Page 343 Creates a new managed device group. set mgroup delete <existingManagedGroupName> Syntax set mgroup delete <existingManagedGroupName> Description Deletes an existing managed device group. The group must be empty. show device Syntax show device <device name> Note: Entries are not case sensitive. SLM User Guide...
- Page 344 Appendix A: Command Reference Description Searches for and displays Ethernet or managed devices by device name. For example, if you specify name slc, the SLM searches for all Ethernet and managed devices whose name starts with slc. show device all...
-
Page 345: Managed Device Users
Specifies a managed device name (slp-sunset-port1) and turns the power off. Description Finds a managed device-by-device name and modifies device parameters. set manageddevice index Note: Type show manageddevice all to display index. Syntax set manageddevice index <number> <one or more parameters> SLM User Guide... -
Page 346: Menu Commands
Syntax set menu add <Menu Name> [command <command number>] Description Creates a new custom user menu or adds a command to an existing custom user menu. set menu delete SLM User Guide... -
Page 347: Modem Commands
(3 minutes) before you use this command when: You dial out via PPP and encounter no dial tone. You dial out via PPP and encounter a busy signal. Syntax reset modem connection SLM User Guide... - Page 348 <Dial Account Name|CLEAR|disable|enable> CLEAR removes the dial account assignment. disable disables dial-in. enable enables dial-in ipfilter <IPv4 Filter Name|CLEAR> ipfilter CLEAR removes the ipfilter assignment. Description Configures a currently loaded modem. show modem Syntax show modem SLM User Guide...
-
Page 349: Network Commands
Syntax admin quicksetup Description Displays the quick setup script on the CLI; only the sysadmin account can use this command. set network bonding Syntax set network bonding <disabled|active-backup|802.3ad-2|802.3ad- 34|adaptive-balancing> Description Configures Ethernet bonding. set network dns SLM User Guide... - Page 350 <1-250 seconds> failedpings <1-250> Description Sets the default gateway. set network host Syntax set network host <Hostname> Description Sets the SLM hostname. set network port Syntax set network port <1|2> <parameters> Parameters state <dhcp|bootp|static|disable> [ipaddr <IP Address> mask <Mask>] mode <auto|10mbit-half|100mbit-half|10mbit-full|100mbit-full>...
-
Page 351: Persistent Connection Commands
[active <enable|disable>] (default enable) [parentlogin <enable|disable>] (default disable) [login <loginAccount>] [password <loginPassword>] [prompt <promptString>] [application <applicationName>] [escapesequence <escapeString>] (default is '\x1BC') [reconnectdelay <1-999>] (default is 1) [eoltranslation <lf | cr>] Description Creates a new persistent connection set persistent edit SLM User Guide... - Page 352 The <devname> following device may be the name of an Ethernet device or the name of a managed device. Persistent connections automatically belong to managed devices that have an Ethernet device component that has persistent connections defined. SLM User Guide...
-
Page 353: Port Commands
Finds a port by device name or IP address with the port number and modifies port parameters. show ethernetdevice port Syntax show ethernetdevice port <Device Name or IP Address> all show ethernetdevice port <Device Name or IP Address> portnumber <Port Number> SLM User Guide... - Page 354 Searches Ethernet ports by port name and displays port information. show port all Syntax show port all show port Displays all Ethernet ports. show port index Syntax show port index <number> Description Displays Ethernet ports by index. SLM User Guide...
-
Page 355: Search Commands
4 Description Displays all devices that match the criteria entered. For example, if you specify name slc, the SLM searches for all devices whose name starts with slc. show ethernetdevice search port Syntax show ethernetdevice search port <one or more parameters>... -
Page 356: Services Commands
Services Commands set service auditlog Syntax set service auditlog <enable|disable> Description Enables or disables audit logging. set service https Syntax set service https <enable|disable> Description Enable or disables HTTPS. set service telnet Syntax set service telnet <enable|disable> SLM User Guide... -
Page 357: Session Commands
Appendix A: Command Reference Description Enables or disables Telnet logging to the SLM. set service sessionlog Syntax set service sessionlog <enable|disable> Description Enables or disables session logging. set service ssh Syntax set service ssh <enable|disable> version <1|2> Description Enables or disables SSH logging to the SLM. -
Page 358: Ssh Key Commands
Appendix A: Command Reference Description Terminates a user connection to the SLM session. Use show connection to view the current connections and IDs. show connection Syntax show connection Description Displays active user connections and connection IDs. SSH Key Commands set sshkey delete Syntax set sshkey delete keyuser <SSH Key User>... - Page 359 Description Shows the progress of background tasks. SLM User Guide...
-
Page 360: Appendix B: Security Considerations
CAT 5 wiring is to tapping. Factors Affecting Security External factors affect the security provided by the SLM, for example: A terminal to the SLM may be secure, but the path from the SLM to the end device may not be secure. -
Page 361: Table B-2 Management
Appendix B: Security Considerations Table B-2 Management Protocol Port# Type SMTP 67/68 BOOTP/DHCP TCP/UDP 161/162 SNMP LDAP 1645/1812 TCP/UDP RADIUS Table B-3 Device Access Protocol Port# Type 20/21 TCP/UDP SSH/SCP TFTP 161/162 SNMP 30718 SLM User Guide... -
Page 362: Appendix C: Safety Information
Appendix C: Safety Information Safety Precautions Please follow the safety precautions described below when installing and operating the SLM. Cover Do not remove the cover of the chassis. There are no user-serviceable parts inside. Opening or removing the cover may expose you to dangerous voltage that could cause fire or electric shock. -
Page 363: Port Connections
The ambient temperature inside the rack may be greater than the room ambient temperature. Make sure to install the SLM in an environment with an ambient temperature less than the maximum operating temperature of the SLM. (See Appendix D: Technical Specifications.) -
Page 364: Appendix D: Technical Specifications
Appendix D: Technical Specifications You can install the SLM either in an EIA-standard 19-inch rack (1U tall) or as desktop unit. Following are specifications for the SLM hardware, which applies to the SLM-01 and SLM-02. Table D-1 Technical Specifications SLM-01... -
Page 365: Appendix E: Compliance
SLM-01 (according to ISO/IEC Guide 22 and EN 45014) Manufacturer's Name & Address: Lantronix Inc., 167 Technology Drive, Irvine, CA 92618 USA Declares that the following product: Product Name(s): Secure Lantronix Management Appliance (SLM-01) Conform to the following standards or other normative documents:... -
Page 366: Slm-02
SLM-02 (according to ISO/IEC Guide 22 and EN 45014) Manufacturer's Name & Address: Lantronix Inc., 167 Technology Drive, Irvine, CA 92618 USA Declares that the following product: Product Name(s): Secure Lantronix Management Appliance (SLM-02) Conform to the following standards or other normative documents:... - Page 367 This product carries the CE mark since it has been tested and found compliant with the following standards: Safety: EN 60950 Emissions: EN 55022 Class B Immunity: EN 55024 Manufacturer's Contact: Lantronix,Inc. 167 Technology Drive, Irvine, CA 92618 USA Tel: 949-453-3990 Fax: 949-450-7249 SLM User Guide...
-
Page 368: Appendix F: Protocol Glossary
An Internet standard that enables a LAN to use one set of IP addresses for internal traffic and a second set of addresses for external traffic. This enables a company to shield internal addresses from the public Internet. SLM User Guide... - Page 369 A company stores user profiles in a central database that all remote servers can share. Secure Channel The name that Lantronix gave to encrypted password-less connections on the SLM. These connections use public key encryption for authentication over SSH. SecurID SecurID is a two-factor authentication method based on the user's SecurID token and pin number.
- Page 370 A method of authentication used in UNIX networks. It allows a remote access server to communicate with an authentication server to determine whether the user has access to the network. WAP (Wireless Application Protocol) WAP is a technical standard for accessing information over a mobile wireless network. SLM User Guide...
Need help?
Do you have a question about the SLM and is the answer not in the manual?
Questions and answers