Advertisement
Table of Contents
- 1 Propane Gas
- 2 Table of Contents
- 3 Introduction
- 4 Technical Data
- 5 Site Requirements
- 6 Installation
- 7 Arranging the Coals
- 8 Commissioning the Stove
- 9 Checking for Spillage
- 10 Completion
- 11 Annual Servicing
- 12 Changing Components
- 13 Fault Finding
- 14 Short Parts List
- 15 Propane Models
- Download this manual
Advertisement
Table of Contents

Subscribe to Our Youtube Channel
Related Manuals for Baxi windermere TF


Summary of Contents for Baxi windermere TF
- Page 1 Please leave these Instructions with the user. Baxi Windermere Baxi Grasmere Gas Stoves Comp N 242300 - Iss 5 - 5/00 Installation and Servicing Instructions Supplied By www.heating spares.co Tel. 0161 620 6677...
-
Page 2: Propane Gas
We hope you get a satisfactory service from Baxi. If not, please let us know. Baxi is a BS-EN ISO 9001 Accredited Company... -
Page 3: Table Of Contents
Contents – Page 3 Section Page Introduction Technical Data Site Requirements Installation Arranging the Coals Commissioning the Stove Checking for Spillage Completion Annual Servicing 10.0 Changing Components 11.0 Fault Finding 12.0 Short Parts List 13.0 Propane Models The following items are packed with the appliance:- Literature Controls Cover Coal Pieces... -
Page 4: Introduction
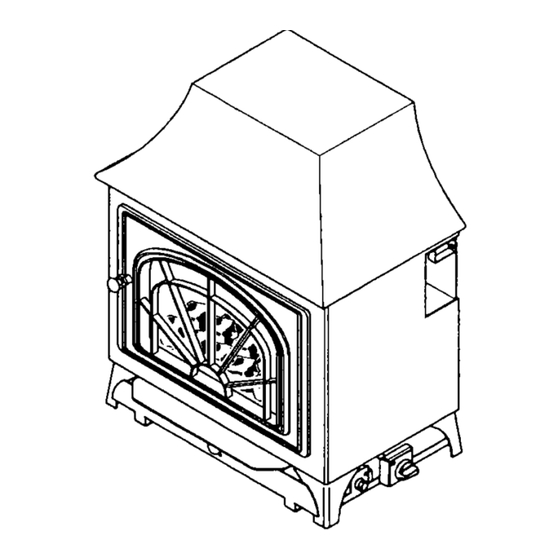
Introduction – Page 4 1.1 Description The Baxi Windermere RF and TF and Grasmere RF and TF are gas fired stove - style appliances with heat inputs of 8.17 kW (27,876 Btu/h) and 6.5 kW (22,178 Btu/h) respectively at maximum setting. They are designed to be used on Natural Gas only at a setting pressure of 20mbar on an installation with a governed meter. -
Page 5: Technical Data
Technical Data – Page 5 Grasmere Windermere Category of Appliance I Category of Appliance I The stove is set for Gas Type G20 at 20mbar. The stove is set for Gas Type G20 at 20mbar. Heat Input High Heat Input High 8.17 Btu/h... -
Page 6: Site Requirements
Site Requirements – Page 6 3.1 Fireplace Surround and Hearth A hearth of non-combustible material must be provided within the fireplace opening on which material the stove stands (where applicable) (Fig. 2). A non-combustible hearth must also be provided in front of the fireplace opening. - Page 7 3.0 Site Requirements – Page 7 3.3 Clearances (Fig. 4a) Any combustible material must be at least 300mm away from the stove or flue pipe. The wall or surround to each side of the stove must be flat and unobstructed for at least 300mm. Any shelf above the stove must be at least 300mm away from the stove or flue pipe.
- Page 8 3.0 Site Requirements – Page 8 3.5 Gas Supply & Connection Determine where the gas supply is to be connected to the appliance. This may be done from either the left or right side, from the front, or a concealed fitting from the rear.
-
Page 9: Installation
Installation – Page 9 4.1 Initial Preparation After unpacking the appliance, carefully remove all items from inside the stove. Care must be exercised when handling the appliance to prevent damage to the paint finish. Avoid touching the appliance with greasy or dirty hands 4.2 Top Flue Outlet Stoves These models must be connected to the flue or chimney with a suitable length of 125mm diameter... - Page 10 4.0 Installation – Page 10 4.4 Fitting the Stove Position the stove in the installation, and in the case of top flue outlet models, connect the flue pipe. When positioning the stove, care must be exercised not to mark the hearth. Purge the gas supply and connect it to the stove inlet elbow (Fig.
-
Page 11: Arranging The Coals
Keep the coals away from children at all times. Never use coals other than those supplied or Genuine Baxi Spare Parts. Never put additional coals on the stove. Please read section 1.3 Important Information. 5.2 Grasmere Remove the coal guard (Fig. - Page 12 5.0 Arranging the Coals – Page 12 5.3 Windermere Carefully unpack the ceramic base and place it centrally over the burner (Fig. 15). Two types of coal are supplied with the Windermere, 24 small coals with location holes, 18 large coals. Take the 24 small coals and locate them on the pegs on the ceramic base (Fig.
-
Page 13: Commissioning The Stove
WARNING: The spillage monitoring device must not be adjusted in any way. The spillage monitoring device must not be altered so that it will not operate or be bypassed in any way. Only use genuine Baxi spare parts. Supplied By www.heating spares.co Tel. 0161 620 6677... -
Page 14: Checking For Spillage
Checking for Spillage – Page 14 7.1 Checking for Spillage CAUTION - Whilst checking for spillage care must be taken to avoid touching hot panels. Before starting the test, close all doors and windows. Operate the stove from cold at maximum input. After approximately 5 minutes check for spillage. -
Page 15: Completion
Completion – Page 15 8.1 Completion Unpack the controls cover and place it centrally underneath the stove (Fig. 24). These instructions and the users instructions should be handed to the customer. At the same time the customer should be shown how to operate the stove safely and efficiently. -
Page 16: Annual Servicing
Keep the coals away from children at all times. Never use coals other than those supplied or Genuine Baxi Spare Parts. Never put additional coals on the stove. Please read section 1.3 Important Information. Servicing should be carried out regularly by a... - Page 17 9.0 Annual Servicing – Page 17 9.2 Preparation For reasons of safety and economy it is important to service the stove annually. WARNING: Isolate the gas supply to the appliance before servicing. For Grasmere models see section 9.3 Grasmere. For Windermere models see section 9.4 Windermere. 9.3 Grasmere Unscrew the brass door knob and open the door (Fig.
- Page 18 9.0 Annual Servicing – Page 18 9.4 Windermere Unscrew the brass knob and open the door (Fig. 34). Remove all the coals and manoeuvre the ceramic base out of the stove and place carefully to one side (Fig. 35 & 36). Undo the disconnecting union on the gas supply.
- Page 19 9.0 Annual Servicing – Page 19 9.5 Cleaning the Pilot (Fig. 41) Undo the feed pipe from the pilot injector and pull the lead off the ignition electrode. Undo the two screws holding the pilot assembly retaining plate. Remove the plate and withdraw the electrode and pilot burner.
-
Page 20: Changing Components
WARNING: The spillage monitoring device must not be adjusted in any way. The spillage monitoring device must not be altered so that it will not operate or be bypassed in any way. Always use a Genuine Baxi Spare Part. TO CHANGE ANY GAS CONTROL COMPONENTS. IT IS NECESSARY TO REMOVE THE COMPLETE CONTROLS ASSEMBLY. - Page 21 10.0 Changing Components – Page 21 10.3 Gas Tap, Igniter and FFD NOTE: The tap incorporates a flow setting device on its outlet connection. This is factory set and must not be adjusted. Pull the electrode lead off the electrode (Fig. 45). Undo the thermocouple nut from the interrupter unit and pull off the two leads (Fig.
- Page 22 10.0 Changing Components – Page 22 10.5 Electrode (Fig. 48) Pull the lead off the electrode and undo the two screws holding the pilot retaining plate. Note the orientation of the electrode, withdraw it and refit the new component in reverse order of dismantling. 10.6 Thermocouple (Figs.
-
Page 23: Fault Finding
11.0 Fault Finding – Page 23 11.1 Fault Finding Supplied By www.heating spares.co Tel. 0161 620 6677... -
Page 24: Short Parts List
12.0 Short Parts List – Page 24 12.1 Short Parts List G.C. No Description Manuf ’s Part No. E37 444 Main Burner - Grasmere 242675 E39 307 Main Burner – Windermere 242676 E37 468 Gas Tap-inc. Lead – Grasmere 242677 E39 314 Gas Tap-inc. -
Page 25: Propane Models
13.0 Propane Models – Page 25 13.1 Windermere Propane Models Most aspects of the Propane Models are the same as Natural Gas, with the exception of the following: The gas type is G31 (Propane) The supply pressure is 37mbar (Max) Heat Input 7.5kW (25,590 Btu/h) (Min)
Need help?
Do you have a question about the windermere TF and is the answer not in the manual?
Questions and answers