Nordson A7A Product Manual
Nordson a7a airless spray gun product manual
Hide thumbs
Also See for A7A:
- Customer product manual (46 pages) ,
- Instruction sheet (9 pages) ,
- Customer product manual (28 pages)

Subscribe to Our Youtube Channel
Related Manuals for Nordson A7A


Summary of Contents for Nordson A7A
- Page 1 A7A Airless Spray Gun Customer Product Manual Part 107 966E NORDSON CORPORATION AMHERST, OHIO USA...
- Page 2 Amherst, OH 44001 Notice This is a Nordson Corporation publication which is protected by copyright. Original copyright date 1987. No part of this document may be photocopied, reproduced, or translated to another language without the prior written consent of Nordson Corporation. The information contained in this publication is subject to change without notice.
-
Page 3: Table Of Contents
......... . 1998 Nordson Corporation... - Page 4 ........Dual-Chamber Stainless Steel Drum Coating A7A Gun .
-
Page 5: Safety
A7A Airless Spray Gun A7A Airless Spray Gun This section contains general safety instructions for using your Nordson 1. Safety equipment. Task- and equipment-specific warnings are included in other sections of this manual where appropriate. Note all warnings and follow all instructions carefully. - Page 6 A7A Airless Spray Gun Safety Symbols WARNING: Risk of electrical shock. Failure to observe this (contd.) warning may result in personal injury, death, or equipment damage. WARNING: Disconnect equipment from line voltage. Failure to observe this warning may result in personal injury, death, or equipment damage.
-
Page 7: Qualified Personnel
Unintended uses may result from taking the following actions: making changes to equipment that have not been recommended or described in this manual or using parts that are not genuine Nordson replacement parts failing to make sure that auxiliary equipment complies with approval... -
Page 8: Installation
A7A Airless Spray Gun Installation Read the installation section of all system component manuals before installing your Nordson equipment. A thorough understanding of system components and their requirements will help you to install this equipment safely and efficiently. WARNING: Failure to follow these safety procedures can result in personal injury or death. -
Page 9: Operation
A7A Airless Spray Gun Installation (contd.) Make sure the spray area floor is conductive to ground and that the operator’s platform is grounded. Use only designated lifting points or lugs to lift and move heavy equipment. Always balance and block loads when lifting to prevent shifting. - Page 10 A7A Airless Spray Gun Operation Know where EMERGENCY STOP buttons, shutoff valves, and fire (contd.) extinguishers are located. Make sure they work. If a component malfunctions, shut down and lock out the equipment immediately. Before operating, make sure all conductive equipment, objects being sprayed, and fluid containers are connected to a true earth ground.
-
Page 11: Less-Obvious Dangers
A7A Airless Spray Gun Operation (contd.) Wear National Institute of Occupational Safety and Health (NIOSH) approved respirators while operating spray equipment and when performing maintenance and cleaning tasks. Wear eye protection when operating spray equipment. Wear gloves and protective clothing to protect your skin from materials. -
Page 12: Action In The Event Of A System Or Component Malfunction
Allow only qualified personnel to perform maintenance, troubleshooting, and repair tasks. Only persons who are properly trained and familiar with Nordson equipment are permitted to service this equipment. Always wear appropriate protective clothing and use safety devices when working on this equipment. - Page 13 A7A Airless Spray Gun Maintenance and Repair (contd.) Never use an open flame to clean the unit or components of the unit. Do not store flammable materials in the spray area or room. Keep paint pumps, pressure pots, and containers of flammable coating materials or solvents far enough away from spray booths to prevent their inclusion in a booth fire.
-
Page 14: Material And Solvent Precautions
MSDS for the injected fluid and for any additives, such as solvents, that are in the injected fluid. Also, Nordson recommends that you carry a National Safety Equipment Manufacturers Association (NSEMA) wallet card to give to emergency medical staff in the event of an injection injury. These cards are supplied with the equipment. - Page 15 A7A Airless Spray Gun Material and Solvent WARNING: Injection hazard. Do not go near a known leak in a Precautions hose or fitting, and stay clear of all spray nozzles or orifices. Do (contd.) not point an applicator at yourself or other personnel. The high-pressure fluid into the body causing serious injury or death.
- Page 16 Contact your coatings, solvent, or adhesive supplier for a nonhalogenated solvent to thoroughly flush the entire system before operating it. If you must continue to use halogenated hydrocarbon solvents, consult your Nordson representative about compatible Nordson components. Manual 4-6 107 966E...
-
Page 17: Disposal
A7A Airless Spray Gun Material and Solvent Precautions (contd.) Table 1 Solvents Containing Halogenated Fluids Chlorinated Solvents Iodinated Solvents Brominated Solvents Fluorocarbon Solvents Carbon Tetrachloride Ethyl Iodide Ethylene Dibromide Dichlorofluoromethane Chloroform Methyl Iodide Methyl Bromide Trichlorofluoromethane Ethylene Dichloride N-butyl Iodide... -
Page 18: Description
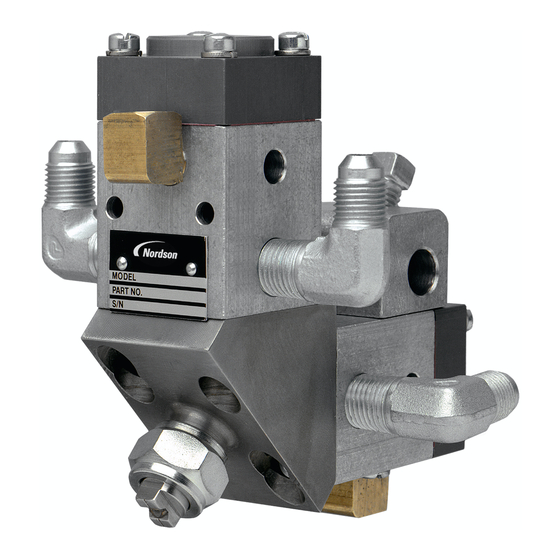
See Figure 1. The Nordson model A7A automatic gun is a compact, 2. Description high-cycle, airless spray gun designed to spray solvent or waterborne coatings. Because of its fast trigger cycle capability, the A7A gun may be used for common product finishing as well as ultra-high speed applications. -
Page 19: Theory Of Operation
See Figure 2. This figure shows a cutaway view of the inner workings of a dual-chamber A7A gun. The operation of the single-chamber gun is similar, since the dual-chamber A7A gun is essentially two single-chamber A7A guns sharing a single nozzle. -
Page 20: Installation
117 bar (1700 psi), or 207 bar (3000 psi) when using the high pressure kit. Introduction See Figure 3. The A7A gun is typically used as part of a larger spraying system. A typical installation is shown below. 0406003A Fig. -
Page 21: Mounting
A7A Airless Spray Gun Mounting See Figure 4. NOTE: The A7A gun has provisions for mounting to a 12.7-mm ( -in.) round bar. Mount the gun or the mounting bar to allow easy removal for service. 1. Slide the mounting bar through the mounting hole on the gun body (1). -
Page 22: Optional Air-Release Valve
See Figure 5. Install an optional air-release valve for quick gun-response applications over long distances. Use the air-release valve and two air sources to fire several A7A guns by the same solenoid. When using this option, the actuator air may be from any convenient air source but must remain constant. -
Page 23: Operation
Failure to observe this warning may result in serious injury or death. The A7A gun operation depends on the system the gun is used with. Refer to your application system manual for information on operation. WARNING: Allow only qualified personnel to perform the follo- 5. -
Page 24: Troubleshooting Chart
A7A Airless Spray Gun Troubleshooting Chart Problem Possible Cause Corrective Action 1. Leaking around nozzle or Dirty or damaged metal sealing Relieve pressure to the system. nozzle retaining nut surfaces Remove the nozzle retaining nut and clean or replace the nozzle and the ball and seat. -
Page 25: Repair
(15). 5. Remove the air cylinder gasket (4) from the gun body. 6. Use the Nordson wrenches provided with the gun to remove the packing cartridge lock nut (6). 7. Use the Nordson wrenches to remove the seal nut (7). -
Page 26: Dual-Chamber Guns
A7A Airless Spray Gun Disassembly (contd.) Following are the steps necessary to replace the packing cartridge: a. Coat the packing cartridge with a small amount of non-detergent grease. b. Insert the O-ring (9) into the gun body (15), then install the packing cartridge. - Page 27 6. Use the Nordson wrenches provided with the gun to remove the packing cartridge lock nut (6). 7. Use the Nordson wrenches to remove the seal nut (7), air piston (5), and O-rings (8 and 9). 8. Remove the screws (25) from the manifold (22).
-
Page 28: Parts
A7A Airless Spray Gun To order parts, call the Nordson Customer Service Center or your local 7. Parts Nordson representative. Use this five-column parts list, and the accompanying illustration, to describe and locate parts correctly. Using the Illustrated Parts List Numbers in the Item column correspond to numbers that identify parts in illustrations following each parts list. -
Page 29: Standard A7A Gun
A7A Airless Spray Gun Standard A7A Gun See Figure 6. Item Part Description Quantity Note — 153 150 Gun, Model A7A, standard 981 140 Screw, fillister head, #10-32 x 1.00 983 120 Washer, lock, split 153 028 Cylinder 153 031... - Page 30 Standard A7A Gun (contd.) Standard Gun Parts List Stainless Steel Gun Parts List High Speed Gun Parts List 0406006A Fig. 6 Standard, stainless steel, and high-speed A7A gun Manual 4-6 107 966E 1998 Nordson Corporation All rights reserved Issued 1/98...
-
Page 31: Stainless Steel A7A Gun
Stainless Steel A7A Gun See Figure 6. Item Part Description Quantity Note — 153 160 Gun, Model A7A, stainless steel 981 140 Screw, fillister head, #10-32 x 1.00 983 120 Washer, lock, split 153 028 Cylinder 153 031 Gasket, gun, H-20... -
Page 32: High-Speed A7A Gun
High-Speed A7A Gun See Figure 6. Item Part Description Quantity Note — 246 789 Gun, Model A7A, high speed 981 140 Screw, fillister head, #10-32 x 1.00 983 120 Washer, lock, split 153 028 Cylinder 153 031 Gasket, gun, H-20... -
Page 33: Tapered Needle And Seat A7A Gun
See Figure 7. Item Part Description Quantity Note — 248 445 Gun, Model A7A, auto, circl, tprd needle and seat 981 140 Screw, fillister head, #10-32 x 1.00 983 120 Washer, lock, split 153 028 Cylinder 153 031 Gasket, gun, H-20... - Page 34 A7A Airless Spray Gun Tapered Needle and Seat A7A (contd.) 0406007A Fig. 7 A7A gun with tapered needle and seat Manual 4-6 107 966E 1998 Nordson Corporation All rights reserved Issued 1/98...
-
Page 35: Compound A7A Gun
A7A Airless Spray Gun Compound A7A Gun See Figure 8. Item Part Description Quantity Note — 510 010 Gun, Model A7A, compound 981 140 Screw, fillister head, #10-32 x 1.00 983 120 Washer, lock, split 153 028 Cylinder 153 031... -
Page 36: Compound And Extended Valve A7A Gun
A7A Airless Spray Gun Compound and Extended Valve A7A Gun Compound Gun Parts List Extended Valve Gun Parts List 0406008A Fig. 8 Compound and extended valve A7A gun Manual 4-6 107 966E 1998 Nordson Corporation All rights reserved Issued 1/98... -
Page 37: Extended Valve A7A Gun
Extended Valve A7A Gun See Figure 8. Item Part Description Quantity Note — 245 375 Gun, Model A7A, w/valved extension 981 140 Screw, fillister head, #10-32 x 1.00 983 120 Washer, lock, split 153 028 Cylinder 153 031 Gasket, gun, H-20... -
Page 38: Dual-Chamber A7A Gun
A7A Airless Spray Gun Dual-Chamber A7A Gun See Figure 9. Item Part Description Quantity Note — 248 937 Gun, Model A7A, dual-chamber 981 140 Screw, fillister head, #10-32 x 1.00 983 120 Washer, lock, split 153 028 Cylinder 153 031... - Page 39 Wrench, adj, module 247 646 Card, medical alert, airless injections NS: Not Shown Dual Chamber Gun Parts List Dual Chamber S.S. Gun Parts List 0406009A Fig. 9 Dual-chamber A7A gun 1998 Nordson Corporation 107 966E Manual 4-6 All rights reserved Issued 1/98...
-
Page 40: Dual-Chamber Stainless Steel Drum Coating A7A Gun
Drum Coating A7A Gun Item Part Description Quantity Note — 149 097 Gun, dual A7A, stainless steel, drum coating 981 140 Screw, fillister head, #10-32 x 1.00 983 120 Washer, lock, split 153 028 Cylinder 153 031 Gasket, gun, H-20... - Page 41 A7A Airless Spray Gun Dual-Chamber Stainless Steel Drum Coating A7A Gun (contd.) Item Part Description Quantity Note - - - - - - Needle and seat C, E 940 174 O-ring, Viton, 0.688 x 0.813 x 0.063 A, C, D, E...
-
Page 42: Standard Dual-Chamber Angled A7A Gun
See Figure 10. A7A Gun Item Part Description Quantity Note — 160 062 Gun, dual, A7A, drum, angled (standard) 153 028 Cylinder 983 120 Washer, lock, split 981 140 Screw, fillister head, #10-32 x 1.00 984 539 Nut, lock - - - - - -... - Page 43 A7A Airless Spray Gun Standard Dual-Chamber Angled A7A Gun (contd.) Standard Dual-Chamber Angled Gun Parts List S.S. Dual-Chamber Angled Gun Parts List 0406010A Fig. 10 Dual-chamber angled A7A gun 1998 Nordson Corporation 107 966E Manual 4-6 All rights reserved Issued 1/98...
-
Page 44: Stainless Steel Dual-Chamber Angled A7A Gun
See Figure 10. Angled A7A Gun Item Part Description Quantity Note — 160 063 Gun, dual, A7A, drum, angled, stainless steel 153 028 Cylinder 983 120 Washer, lock, split 981 140 Screw, fillister head, #10-32 x 1.00 984 539 Nut, lock... -
Page 45: Repair Kit, Piston With Seals
O-ring, Viton, black, 0.563 x 0.688 x 0.063 940 174 O-ring, Viton, black, 0.688 x 0.813 x 0.063 NOTE A: Order two kits to repair both modules of the dual-chamber A7A gun. B: This O-ring may be substituted for part 940 151. Service Kit, Needle and Seat, See Figure 7. -
Page 46: Service Kit, Needle And Seat, Extended
Note — 106 234 Kit, needle and seat, extended - - - - - - Needle and seat, A7A, extended 940 174 O-ring, Viton, black, 0.688 x 0.813 x 0.063 Service Kit, Needle and Seat, See Figure 10. with Retainer... -
Page 47: Service Kit, Ball And Seat, With Retainer
Replacement Packing Cartridges Item Part Description Quantity Note — 153 152 A7A packing cartridge (standard, compound, dual-chamber) — 153 090 Stainless steel A7A packing cartridge — 940 134 O-ring, Viton, 0.438 x 0.563 x 0.063, 90 durometer — 245 778 Corrosion-resistant A7A packing cartridge —... -
Page 48: Conversion Kit, Air Cylinder With Detent Adjustment
- - - - - - Cylinder 153 031 Gasket NOTE A: Order two kits to repair both modules of the dual-chamber A7A gun. B: Items 1, 2, and 3 are shipped preassembled. 0406011A Fig. 11 Air cylinder with detent adjustment conversion kit... -
Page 49: Conversion Kit, High Pressure
O-ring, Viton, 0.218 x 0.344 x 0.063 NOTE A: This conversion kit increases the operating pressure range to 206 bar (3000 psi). B: Order two kits for converting both modules of the dual-chamber A7A gun. 0406012A Fig. 12 High-pressure conversion kit... -
Page 50: Retrofit Kit, Dual-Chamber A7A Gun
Ball, 0.125 dia, stainless steel 248 932 Plug, zn 981 171 Screw, socket head, cap, #10-32 x 1.25 NOTE A: This kit converts two A7A guns into one dual-chamber A7A gun. 0406013A Fig. 13 Dual-chamber retrofit kit Manual 4-6 107 966E... -
Page 51: Conversion Kit, Standard Dual-Chamber Angled A7A Gun
O-ring, Viton, black, 0.688 x 0.813 x 0.063 134 975 Retainer, seat NOTE A: This kit converts two standard A7A guns or one dual-chamber A7A gun into an angled model. See Figure 14. Conversion Kit, Stainless Steel Dual-Chamber, Angled A7A... - Page 52 A7A Airless Spray Gun Conversion Kit, Stainless Steel Dual-Chamber, Angled A7A (contd.) 0406014A Fig. 14 A7A dual-chamber angled gun conversion kits Manual 4-6 107 966E 1998 Nordson Corporation All rights reserved Issued 1/98...
-
Page 53: Recommended Spare Parts
Packing cartridge, ketone resistant Select one of the following: 106 231 Kit, ball and seat (std., high-speed) A7A 106 280 Kit, needle and seat (stainless steel), tprd, A7A 242 575 Ball tip and seat (compound) 106 234 Kit, needle and seat (extended), A7A... -
Page 54: Specifications
C: This fitting connects the air inlet hose to the quick-exhaust valve. D: The air release valve option may be used in a variety of applications: Reduces the cycle time of the A7A gun, if the speed of operation is less than 600 cycles per minute (CPM).
Need help?
Do you have a question about the A7A and is the answer not in the manual?
Questions and answers