Table of Contents
Advertisement
Quick Links
Advertisement
Table of Contents

Related Manuals for GRASS VALLEY Kaleido-IP X310


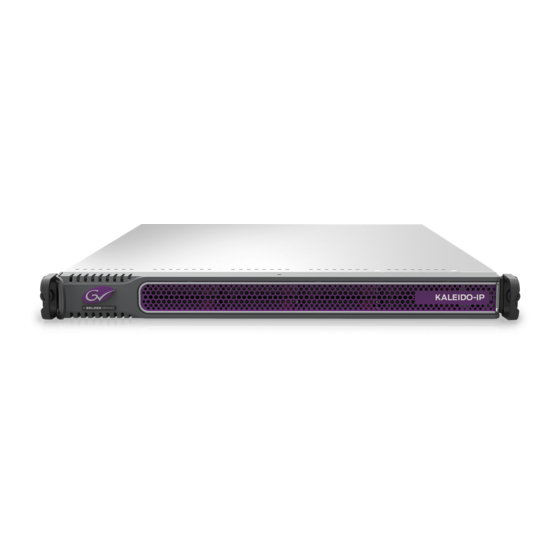
Summary of Contents for GRASS VALLEY Kaleido-IP X310
-
Page 1: Quick Start Guide
Quick Start Guide M926-9405-104 17 December 2014... - Page 2 Grass Valley. A Grass Valley manual may have been revised to reflect changes made to the product during its manufacturing life. Thus, different versions of a manual may exist for any given product.
- Page 3 The presence of this symbol in or on Grass Valley equipment means that it has been tested and certified as complying with applicable Canadian Standard Association (CSA) regulations and recommendations for USA/Canada.
- Page 4 Notices The presence of this symbol in or on Grass Valley product means that it complies with all applicable European Union (CE) directives. The presence of this symbol in or on Grass Valley product means that it complies with safety of laser product applicable standards.
- Page 5 Replace the battery only with the same or equivalent type recommended by the manufacturer. Dispose of used batteries according to the manufacturer’s instructions. Before disposing of your Grass Valley equipment, please review the Disposal and Recycling Information appendix.
- Page 6 Notices Mesures de sécurité et avis importants La présente section fournit des consignes de sécurité importantes pour les opérateurs et le personnel de service. Des avertissements ou mises en garde spécifiques figurent dans le manuel, dans les sections où ils s’appliquent. Prenez le temps de bien lire les consignes et assurez-vous de les respecter, en particulier celles qui sont destinées à...
- Page 7 électrique, de compatibilité électromagnétique et de conformité environnementale. Le symbole ci-contre sur un appareil Grass Valley ou à l’intérieur de l’appareil indique qu’il est conforme aux normes applicables en matière de sécurité laser. Avertissements Les avertissements signalent des conditions ou des pratiques susceptibles d’occasionner des blessures graves, voire fatales.
- Page 8 Notices • Après tout travail d’entretien ou de réparation, faites effectuer des contrôles de sécurité par le personnel technique qualifié. Mises en garde Les mises en garde signalent des conditions ou des pratiques susceptibles d’endommager l’équipement. Veuillez vous familiariser avec les mises en garde ci- dessous : •...
-
Page 9: Safety Compliance
Kaleido-IP X310/X110 Quick Start Guide • Pour plus de sécurité, vérifiez périodiquement la valeur de résistance du bracelet antistatique. Elle doit se situer entre 1 et 10 mégohms. • Si vous devez mettre une carte de côté, assurez-vous de la ranger dans un sac protecteur antistatique. - Page 10 Notices • EN 55024 Class A Immunity • EN 61000-3-2 Limits for harmonic current emissions • EN 61000-3-3 Limitation of voltage fluctuations and flicker This equipment has also been tested and found to comply with the requirements of the EMC directive 2006/95/EC — Low Voltage: •...
-
Page 11: Table Of Contents
Table of Contents 1 Introduction ......... . . 1 Overview. -
Page 13: Introduction
Kaleido-IP unit. Overview This Quick Start Guide is designed to help you get your Kaleido-IP X310, or Kaleido-IP X110 multiviewer up and running for the first time. Grass Valley's Kaleido family of multiviewers ranges from quad-splits to large-scale, multi- room monitoring systems, with outstanding image quality and signal flexibility. -
Page 14: Required Materials
• DVD including the Kaleido-X User’s Manual, database samples, Quick Start guides and hardware reference manuals for all multiviewer models • The Kaleido-IP X310/X110 Quick Start Guide (this document) Note: In line with our commitment to environmental preservation, only the Quick Start Guide for your multiviewer model, and some ancillary documents (e.g. -
Page 15: System Requirements For A Client Pc
Disk space At least 2 GB free Note: The Kaleido-IP X310 and X110 multiviewers cannot be downgraded to a Kaleido-X software version earlier than 7.30. To recover from an unwanted downgrade, use XAdmin’s Upgrade page to upgrade your multiviewer back to Kaleido-X version 7.30 or later. -
Page 17: Setting Up The Kaleido-Ip
Setting Up the Kaleido-IP This chapter will guide you through the installation of a Kaleido-IP X310, or Kaleido-IP X110 multiviewer in its default configuration. Summary Step 1: Physical Setup ..............5 Step 2: Networking Setup . - Page 18 • You may need to upgrade your Kaleido-RCP2 devices (if available) to the latest firmware. The update file can be found on the DVD that shipped with your multiviewer, and on Grass Valley’s support portal. Please refer to the Kaleido-RCP2 Guide to Installation and Operation (available on the DVD, and from the portal), for instructions on how to determine the firmware level, and how to perform the upgrade.
-
Page 19: Cabling Diagram
7, for detailed instructions. Cabling Diagram Cabling diagram for a Kaleido-IP X310 with two additional DATA ports (LAN5–LAN6, not connected). The Kaleido-IP X110 rear panel is identical, except for LAN5 and LAN6, which are not available for this model. -
Page 20: Step 2: Networking Setup
(MGMT), and one for a data network (DATA)—, corresponding network mask and gateway settings, and a system name. The Kaleido-IP X310 model may require up to six IP addresses. In XAdmin and XEdit, a Kaleido-IP X100 or Kaleido-IP X300 with two network adapters is identified as Kaleido-IP-2. - Page 21 Kaleido-IP X310/X110 Quick Start Guide The Kaleido-IP is shipped with the following default settings. Kaleido-IP default IP settings Kaleido-IP-6 Kaleido-IP-4 Kaleido-IP-2 Management IP address (LAN1) 10.0.3.70 10.0.3.70 10.0.3.70 Network mask 255.255.0.0 255.255.0.0 255.255.0.0 Default gateway 10.0.0.1 10.0.0.1 10.0.0.1 Link mode...
- Page 22 Setting Up the Kaleido-IP Networking Setup 4 Click the XAdmin button. 5 If you see a security warning, or a certificate error message, then refer to Registering your Multiviewer's Security Credentials with your Browser, in the Kaleido-X User’s Manual. 6 If the “Log in to XAdmin” page appears, type the password, and then click Log in. 7 Internet Explorer users: If a blank page appears, then refer to Enabling the Compatibility View in Internet Explorer 10, in the Kaleido-X User’s Manual.
- Page 23 Kaleido-IP X310/X110 Quick Start Guide 9 Under General, type a different name for your system if you wish. If there are more than one multiviewer in the same network environment, it is important to assign each a unique system name, so that you can tell them apart (for example, when using a remote control panel such as the Kaleido-RCP2 or RCP-200).
- Page 24 Setting Up the Kaleido-IP Networking Setup Network mask Must be set to the appropriate values, for the management and data networks. Default gateway If your management network is not configured with a gateway, clear the default gateway IP address. Detected link mode By default, all network adapters are set to auto-negotiate. The connection speed and duplex mode will be set automatically based on the corresponding port settings on the associated switch.
-
Page 25: Finding The Management Ip Address And Application Version
Kaleido-IP X310/X110 Quick Start Guide 17 Click OK. Note: Settings cannot be applied to a multiviewer system while an upgrade is in progress. If the multiviewer does not reboot after 10 seconds or so, try clicking Apply settings again after a minute or two, until the multiviewer reboots. -
Page 26: Configuring A Client Pc
Setting Up the Kaleido-IP Networking Setup Management IP address Application version System name Room name Configuring a Client PC The client PC that you will use to communicate with the Kaleido-IP multiviewer (via XAdmin and XEdit) and the multiviewer’s gigabit Ethernet port associated with the management network must have IP addresses within the same subnet. - Page 27 Kaleido-IP X310/X110 Quick Start Guide The Internet Protocol Version 4 (TCP/IPv4) Properties window opens. 5 On the General tab, click Use the following IP address. 6 Type an IP address in the same range as the multiviewer’s current IP address.
-
Page 28: Step 3: Xedit Installation
Setting Up the Kaleido-IP XEdit Installation Step 3: XEdit Installation XEdit is a client application used to create layouts for the monitor wall, and to configure your multiviewer system, from your PC or laptop. When the computer with XEdit is connected to the multiviewer through a TCP/IP network, you can use XEdit to modify layouts and settings directly on the multiviewer, or you can work locally on the computer and then export your changes to the multiviewer. - Page 29 Kaleido-IP X310/X110 Quick Start Guide At the end of the installation process: • If you have Windows 7, or Windows XP, shortcuts ( ) are added to your desktop and to the Start menu (under All Programs). • If you have Windows 8.1, or Windows 8, XEdit will appear on your desktop, in the Apps view with all the other applications on your PC (Windows 8.1), or in your Start...
- Page 30 Setting Up the Kaleido-IP XEdit Installation Depending on your Windows Firewall settings, a security alert may appear. • Click Allow access to unblock the application. If XEdit cannot find all of the fonts it needs already on your PC or laptop, it downloads them from the multiviewer automatically, in which case a message will appear to confirm the font update, and instruct you to restart the application.
-
Page 31: Step 4: System Setup
For more information about calibrating your system, configuring rooms, creating layouts, and operating the monitor wall, refer to the Kaleido-X User’s Manual, available on the DVD that shipped with your system, and from Grass Valley’s support portal. Step 4: System Setup... -
Page 32: Opening Xedit In Online Mode
Setting Up the Kaleido-IP System Setup Opening XEdit in Online Mode To open XEdit in online mode 1 From a workstation on the same subnet as the multiviewer, open a Web browser window and enter the management IP address of your Kaleido-IP multiviewer in the address bar. - Page 33 Kaleido-IP X310/X110 Quick Start Guide Note: Under the network adapter elements, transport streams are listed in alphabetical order. The settings for the selected multicast stream appear in the Properties pane. 3 Replace the default stream name if desired, select the appropriate protocol (RTP, UDP), and enter the multicast group IP address, and port number associated with the actual transport stream you wish to monitor.
- Page 34 Setting Up the Kaleido-IP System Setup Transport stream Program Elementary stream (audio) Elementary stream (video) 4 Repeat this until you have completed the required configuration changes to match the set of transport streams you wish to monitor. 5 If there are default transport streams left, which you will not use, right-click them, and then click Remove.
- Page 35 Kaleido-IP X310/X110 Quick Start Guide • importing transport stream configuration information, from a spreadsheet • adding HLS transport streams • adding source-specific or source-filtered multicast (SSM or SFM) transport streams • adding any-source multicast (ASM) transport streams Adding a Multicast Transport Stream...
- Page 36 Setting Up the Kaleido-IP System Setup The Kaleido-IP establishes a connection with the selected stream. All programs that are part of the stream, and the elementary streams included in these programs, automatically appear under the transport stream element in the System list. Group address Port number (or range) Protocol...
-
Page 37: Defining Logical Sources
Kaleido-IP X310/X110 Quick Start Guide The Kaleido-IP establishes a connection with the selected stream. All programs that are part of the stream, and the elementary streams included in these programs, automatically appear under the transport stream element in the System list. -
Page 38: Step 5: Testing The Monitor Wall Operation
Setting Up the Kaleido-IP Testing the Monitor Wall Operation Logical sources are automatically created for every program signal found in the selected transport stream. 4 Repeat until you have added logical sources for every stream you wish to monitor. 5 If your system involves a control panel from which you will control your multiviewer as a router, then configure source numbers for the KX Router logical router, by typing the appropriate numbers in the first column (#) under Source info, and using the incremental copy tool as needed. - Page 39 Kaleido-IP X310/X110 Quick Start Guide Kaleido-RCP2 will fall back to its default static IP address, subnet mask, and gateway settings: Default IP address 10.0.3.191 Default subnet mask 255.255.0.0 Default gateway 0.0.0.0 Notes • If you need to operate with a fixed IP address, you must use the Configuration menu to disable DHCP and set up the correct IP address, Network Mask, and Gateway (see the “Enabling or Disabling DHCP”...
-
Page 40: Loading A Layout
Setting Up the Kaleido-IP Testing the Monitor Wall Operation If your system was configured prior to shipment, then a layout will appear on all displays. Otherwise, a gray screen will appear with the following message in the middle: “No layout has been assigned to this room. Please load a layout. ” Note: To access other layouts, press the LOAD button. -
Page 41: Specifications
Specifications Kaleido-IP Inputs IP INPUTS Kaleido-IP X310 physical 4 Gigabit Ethernet with RJ-45 connector (MGMT and DATA) 2 additional data Gigabit Ethernet with RJ-45 connector (optional) Kaleido-IP X110 physical 4 Gigabit Ethernet with RJ-45 connector (MGMT and DATA) Transport MPEG transport streams over UDP or RTP Multicast/Unicast... - Page 42 The Kaleido-IP supports two independently configurable and operable display outputs. Connectors HDMI or DisplayPort Standard DisplayPort 1.1a HDMI 1.3a Resolution Up to 1920 × 1200 @ 60 Hz Kaleido-IP X310 Frame Height 43 mm (1.7 in) 1 RU Width 437 mm (17.2 in) Depth 710 mm (28 in) Weight 12.7 kg (28 lbs)
-
Page 43: Operation And Configuration
Kaleido-IP X310/X110 Quick Start Guide Max. storage humidity 90% RH non-condensing Max. functional humidity 65% RH non-condensing Operation and Configuration On-screen control Kaleido-RCP2 (optional) Source and layout XEdit configuration Alarms management iControl (optional) Display Output Extender via Fiber Optic Device... -
Page 45: Appendix: Disposal And Recycling Information
Disposal and Recycling Information Your Grass Valley equipment comes with at least one lithium button battery (Li-MnO located on the main printed circuit board. Before disposing of your Grass Valley equipment, please remove the battery as follows: 1 Make sure the equipment’s AC adapters are unplugged from the power outlet. - Page 46 Seek medical help immediately in case of ingestion, inhalation, skin or eye contact, or suspected exposure to the contents of an opened battery. For more information about recycling, please contact Grass Valley.
-
Page 47: Contact Us
For technical assistance, contact our international support center, at 1-800-547-8949 (US and Canada) or +1 514 333 1772. To obtain a local phone number for the support center nearest you, please consult the Product Support section of Grass Valley’s Web site, at http://www.grassvalley.com/ support/contact An online form for e-mail contact is also available from the Web site.
Need help?
Do you have a question about the Kaleido-IP X310 and is the answer not in the manual?
Questions and answers