Table of Contents

Related Manuals for Yamaha HTR-6063


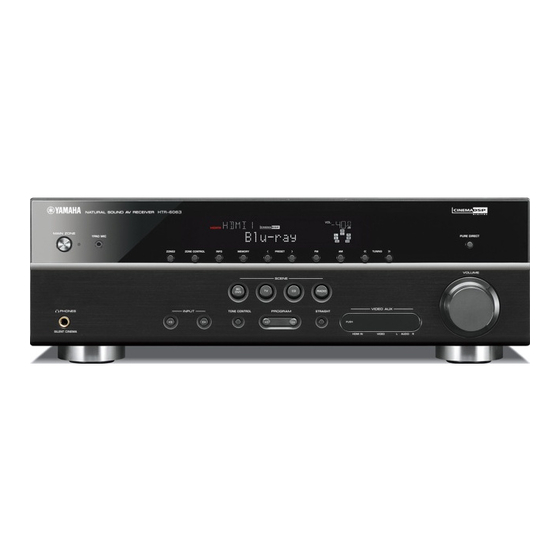
Summary of Contents for Yamaha HTR-6063
- Page 1 Owner’s Manual AV Receiver English for Oceania...
-
Page 2: Table Of Contents
Connecting an external amplifier ........30 Playing back tunes from your iPod™/iPhone™ ... 58 Connecting a SCENE link Connecting the Yamaha iPod universal dock ....58 playback-compatible device ........... 30 Controlling an iPod™/iPhone™ ........58 Using the Trigger function to link Playing iPod/iPhone from the menu screen external component power.......... - Page 3 Setting the impedance of speakers ......... 92 Configuring input sources ..........65 Avoiding crossing remote control signals Input menu..............66 when using multiple Yamaha receivers ......93 Editing the SCENE function (SCENE menu) ....69 Changing TV format ............93 Editing a scene..............69 Removing HDMI video output up-scaling limits...
-
Page 4: Features And Capabilities
– External component operation with this unit’s remote control..............89 ■ Speaker connections for 2- to 7.1-channel configurations – Multiple Yamaha receiver operation without signal interference <Remote ID Switching>....93 – Speaker impedance configuration......................18 ■ Playing back the audio source in another room –... -
Page 5: Using The Tv Osd To Operate The Unit
– Register or clear settings for a selected SCENE <Save>, <Reset> ............70 – Select a sound program..........................48 – Turn on a Yamaha BD/DVD player or CD player connected to this unit automatically when a SCENE is selected <SCENE IR>....................70 View or modify content for the current input source <Content ■... -
Page 6: Adjust Settings For Each Input Source
INTRODUCTION Using the TV OSD to operate the unit ■ HDMI settings – Assign the audio input source for the TV <TV Audio Input>..............84 – Listen to TV audio with HDMI cable connection <ARC (Audio Return Channel)>......84 – Transmit HDMI audio/video to the TV during standby mode <Standby Through> .......85 –... -
Page 7: About This Manual
INTRODUCTION Using the TV OSD to operate the unit About this manual ■ Attaching the VIDEO AUX input cover (supplied) ■ Installing batteries in the remote control To protect against dust, attach the supplied VIDEO AUX input When inserting batteries in the remote control, remove the cover to the VIDEO AUX jacks when you do not use the jacks. -
Page 8: Part Names And Functions
40). during standby mode (☞p. 85). PRESET j / i PROGRAM l / h • When an iPod/iPhone, which is placed in the Yamaha iPod universal Selects an FM/AM preset station (☞p. 56). Selects a sound program (☞p. 41). Press the left or right key dock, is charging while the unit is in standby mode (☞p. -
Page 9: Rear Panel
DOCK jack HDMI1-5 jacks MULTI CH INPUT jacks For connecting an optional Yamaha iPod universal dock (such as For connecting external components equipped with HDMI- For connecting a player that supports a multi-channel output YDS-12), iPod wireless receiver (YID-W10), or Bluetooth wireless compatible outputs to receive audio/video signals (☞p. -
Page 10: Front Panel Display
INTRODUCTION Part names and functions Front panel display VOLUME indicator ■ Switching information on the front panel display Displays the current volume level. The front panel can display sound programs and surround Cursor indicators HDMI indicator Light up if corresponding cursors on the remote control are available decoder names as well as the active input source. -
Page 11: Remote Control
Cursor B / C / D / E, ENTER, RETURN MULTI DOCK DOCK A Yamaha iPod universal dock, iPod wireless Cursor B / C / D / E Select menu items and change settings when receiver, or Bluetooth wireless audio receiver TUNER PHONO menus, etc, are displayed. -
Page 12: On-Screen Display
INTRODUCTION Part names and functions ■ Displaying the following menus or viewing the current status of this unit on the On-screen display TV screen • ON SCREEN menu When a TV is connected to this unit, the supplied remote control can be used to specify and verify this Press ON SCREEN to display the ON SCREEN menu. -
Page 13: Connections
CONNECTIONS Connecting speakers This unit uses acoustic field effects and sound decoders to bring you the impact of a real movie theater or concert hall. These effects will be brought to you with ideal speaker positioning and connections in your listening environment. ■... -
Page 14: Speaker Layout
CONNECTIONS Connecting speakers Speaker layout ■ ■ Assigning a speaker configuration ■ Connections of speakers Enjoying the 7.1 channel audio source A speaker configuration must be assigned to this unit to activate the Connect the speakers to the following jacks according to the ■... - Page 15 CONNECTIONS Connecting speakers ■ ■ Assigning a speaker configuration ■ Connections of speakers Enjoying the 7.1 channel audio source without surround back speakers A speaker configuration must be assigned to this unit to activate the Connect the speakers to the following jacks according to the speakers.
- Page 16 CONNECTIONS Connecting speakers ■ Using speakers in two rooms (Zone2 In addition to the main room, speakers in another room can also function) be controlled. ■ 7.1-channel speaker layout + Zone2 When the built-in amplifier for the speakers in another room is (7 speakers (in main zone) + subwoofer (in main turned on, the speakers that output the sound are switched from zone) + front speakers (in secondary zone))
-
Page 17: Connecting Speakers And Subwoofer
CONNECTIONS Connecting speakers Connecting speakers and subwoofer Connect your speakers to their respective terminals on the rear panel. CAUTION • Remove the AC power cable of this unit from the power outlet before connecting the speakers. • Generally speaker cables consist of two parallel insulated cables. One of these cables is a different color, or has a line running along it, to indicate different polarity. Insert the different colored (or lined) cable into the “+” (positive, red) terminal on this unit and the speakers, and the other cable into the “–”... -
Page 18: Changing Speaker Impedance
CONNECTIONS Connecting speakers ■ ■ Bi-amp connection ■ Multi-zone audio system using the internal Changing speaker impedance This unit can be connected to speakers that support bi-amp amplifier of this unit This unit is configured for 8 Ω speakers at the factory setting. Connect the speakers in the second zone to the EXTRA SP jacks as connections. - Page 19 CONNECTIONS Connecting speakers ■ ■ Connecting speakers Connecting extra speakers Check that “SP IMP.” is displayed on the front panel. This type of jack can connect to the following speakers or The EXTRA SP jacks can connect to the following speakers. connection.
- Page 20 CONNECTIONS Connecting speakers ■ Connecting the subwoofer Connect the subwoofer input jack to the SUBWOOFER 1 or 2 jack on this unit with an audio pin cable. Set the subwoofer volume as follows. Volume: Set to approximately half volume (or slightly less than half).
-
Page 21: Connecting External Components
CONNECTIONS Connecting external components Cable plugs and jacks VIDEO jacks These jacks transmit conventional analog video signals. This unit is equipped with the following input/output jacks. Use jacks and cables appropriate for Use video pin cables. components that you are going to connect. ■... -
Page 22: Connecting A Tv Monitor
CONNECTIONS Connecting external components Connecting a TV monitor When connecting to a non-HDMI compatible TV Connect to the TV using the same type of connection that you used to connect to the external component, and change the inputs on your TV to match that of the external component you are using This unit is equipped with the following three types of output jack for connection to a TV. - Page 23 CONNECTIONS Connecting external components ■ ■ Connecting an HDMI video monitor Connecting a component video monitor Connect the HDMI cable to the HDMI OUT jack. Connect the component video cable to the COMPONENT VIDEO (MONITOR OUT) jacks. Component video input HDMI COMPONENT VIDEO...
- Page 24 CONNECTIONS Connecting external components ■ Listening to TV audio When using other TVs To transmit sound from the TV to this unit, connect the AV1-6 or AUDIO1-2 jacks to the TV’s audio To transmit sound from the TV to this unit, connect as followings according to the TV: output jacks.
-
Page 25: Connecting Bd/Dvd Players And Other Devices
CONNECTIONS Connecting external components MAIN ZONE 2 CODE SET Connecting BD/DVD players and other devices RECEIVER SOURCE ■ Receiving video signals from the HDMI jack and audio signals HDMI from a jack other than HDMI This unit has the following input jacks. Connect them to the appropriate output jacks on AUDIO This unit can use the AV1-6 or AUDIO1-2 input jacks to receive audio signals from V-AUX... - Page 26 CONNECTIONS Connecting external components ■ Connecting BD/DVD players and other devices with component ■ Component connections to analog audio output devices video cables Connect the device with a component video cable to one of the AV1-2 input jacks. Component video / Audio output Using optical digital audio output sources Select the AV1 input to which the playback device is connected for playback.
- Page 27 CONNECTIONS Connecting external components ■ Connecting BD/DVD players and other devices with video cables Using analog stereo audio output sources Select the AV5 or AV6 input to which the playback device is connected for playback. Connect the playback device with a video pin cable to one of the AV3-6 input jacks. Using optical digital audio output sources Select the AV4 input to which the playback device is connected for playback.
-
Page 28: Connecting A Turntable
CONNECTIONS Connecting external components ■ Connecting CD players and other audio devices Using coaxial digital output sources Select the AV input (AV2 or AV3) to which the playback device is connected for playback. Using analog stereo output sources Select the audio input (AUDIO1-2) to which the playback device is connected for playback. (BD/DVD) HDMI OUT DOCK... -
Page 29: Connecting Game Consoles
CONNECTIONS Connecting external components Connecting game consoles • Be sure to turn down the volume when connecting this unit and the other devices. • When both the HDMI connection and the analog video/audio connection are performed between the Use the VIDEO AUX jacks on the front panel to temporarily connect devices such as a game console to HDMI compatible device and this unit, only the HDMI signal will be input. -
Page 30: Connecting An External Amplifier
REMOTE OUT jack, playback begins automatically when the SCENE function is used (☞p. 41). • If the component connected to the REMOTE OUT jack is not a Yamaha product, set “SCENE IR” in the FRONT (PRE OUT) jacks SCENE menu to “Off”... -
Page 31: Using The Trigger Function To Link External Component Power
Using the Trigger function to link external component power Connecting audio/video recording devices When this unit is connected to a Yamaha subwoofer that supports the system connection or the This receiver can transmit selected incoming analog audio/video signals to external components component with TRIGGER IN jack, you can turn on and off the component by using this unit. -
Page 32: Connecting The Fm/Am Antennas
CONNECTIONS Connecting the FM/AM antennas An indoor FM antenna and an AM loop antenna are supplied with this receiver. Connect these antennas ■ Improving FM reception properly to their respective jacks. We recommend using an outdoor antenna. For more information, consult the nearest authorized AM loop antenna dealer. -
Page 33: Setting Up The Speaker Parameters Automatically (Ypao)
Setting up the speaker parameters automatically (YPAO) This unit is equipped with a Yamaha Parametric Room Acoustic Optimizer (YPAO) that adjusts the status, size, and volume balance of the speakers in order to provide an optimal sound field. Using YPAO allows you to automatically configure settings, such as adjusting speaker output and acoustic parameters to suit your listening room (the room in which this unit is placed). - Page 34 CONNECTIONS Setting up the speaker parameters automatically (YPAO) MAIN ZONE 2 CODE SET Display during measurement RECEIVER SOURCE This completes preparation. To achieve more accurate Connect the YPAO microphone to the YPAO HDMI YPAO results, take note of the following when measuring VOL.
- Page 35 CONNECTIONS Setting up the speaker parameters automatically (YPAO) MAIN ZONE 2 CODE SET RECEIVER SOURCE kCursor D / E Result Press to select “SAVE” and Displays the results of automatic HDMI acoustics measurement. Refer to press kENTER. AUDIO “Reviewing and reloading automatic V-AUX setup parameters”...
- Page 36 CONNECTIONS Setting up the speaker parameters automatically (YPAO) MAIN ZONE 2 CODE SET ■ Reviewing and reloading automatic RECEIVER SOURCE Select the desired menu item (or enable a setup parameters HDMI kCursor B / C / D / E function) using The results of automatic acoustics measurement can be AUDIO kENTER.
- Page 37 CONNECTIONS Setting up the speaker parameters automatically (YPAO) MAIN ZONE 2 CODE SET ■ When an error message is RECEIVER SOURCE NOTE kCursor E Press to select “RETRY.” displayed during measurement HDMI Although the results of acoustics measurement can be See “Error messages”...
-
Page 38: Message List
An internal error has Carry out the measuring microphone. Internal Error occurred. process again. Contact a When this message is Yamaha service center if displayed, selecting “E-10” is displayed “PROCEED” will allow again. you to continue measuring. However, we recommend... -
Page 39: Warning Messages
CONNECTIONS Setting up the speaker parameters automatically (YPAO) ■ Warning messages W-1: The speakers displayed Depending on the type of Out of Phase are connected with the speakers, “W-1” may opposite polarity. display even if the Depending on the type of speakers are connected speakers you are using correctly. -
Page 40: Playback
PLAYBACK MAIN ZONE 2 CODE SET Basic playback procedure RECEIVER SOURCE HDMI Adjusting high/low-frequency sound AUDIO Press PROGRAM l / h to adjust the output Turn on external components (TV, DVD V-AUX (Tone control) player, etc.) connected to this unit. level in those frequency ranges. -
Page 41: Changing Input Settings With A Single Key (Scene Function)
Enjoying the desired sound field effect This unit is also equipped with a Yamaha digital sound field processing (DSP) chip. Multi-channel playback from almost any audio source can be enjoyed using a variety of sound decoders and various sound field effect programs stored on the chip. Sound field effect programs built into this unit are called “sound programs.”... -
Page 42: Stereo Playback
PLAYBACK Enjoying the desired sound field effect MAIN ZONE 2 CODE SET ■ ■ Selecting sound program (☞p. 45): Enjoying unprocessed playback Enjoying stereo playback RECEIVER SOURCE gMOVIE MOVIE category: Press repeatedly (Straight decoding mode) Select “2ch Stereo” from the sound programs when you HDMI gMUSIC MUSIC category: Press... - Page 43 PLAYBACK Enjoying the desired sound field effect ■ ■ ■ Enjoying sound programs without Enjoying more spatial sound fields Enjoying sound programs without surround sound speakers (CINEMA DSP 3D mode) presence speakers This unit allows you to use virtual surround speakers to enjoy CINEMA DSP 3D mode creates an intensive and accurate This unit allows you to use virtual presence speakers to create an sound field surround effects, even without any surround speakers...
- Page 44 PLAYBACK Enjoying the desired sound field effect MAIN ZONE 2 CODE SET ■ Enjoying Hi-Fi Sound Quality RECEIVER SOURCE (Pure Direct mode) HDMI Use Pure Direct mode to enjoy the pure high fidelity AUDIO V-AUX sound of the selected source. When Pure Direct mode is enabled, this unit plays back the selected source with the least circuitry.
-
Page 45: Sound Programs
PLAYBACK Enjoying the desired sound field effect Sound programs Action Game This sound field is suitable for action games such as car racing, fighting games and FPS games. The reality of, and emphasis on, various effects makes the player feel like they are right in the middle of the action, allowing for greater concentration. - Page 46 PLAYBACK Enjoying the desired sound field effect ■ ■ Category: MUSIC Category: SUR.DEC (Surround decode mode) This sound field is suitable when listening to music sources such as CDs. Select this program to playback sources with selected decoders. You can playback 2-channel audio sources in up to 7-channels using a surround decoder.
-
Page 47: Configuring The Settings Of This Unit While Viewing The Tv Screen
PLAYBACK Configuring the settings of this unit while viewing the TV screen MAIN ZONE 2 CODE SET RECEIVER SOURCE This unit features a sophisticated on-screen display (OSD) that helps you to control the amplifier function of this unit. With the OSD, you can view information of the HDMI signals being input and the status of this unit. -
Page 48: Select A Scene
PLAYBACK Configuring the settings of this unit while viewing the TV screen MAIN ZONE 2 CODE SET ■ ■ Selecting a scene Selecting a sound program RECEIVER SOURCE NOTES HDMI Menus can be operated and the status of this unit kCursor B / C kCursor B / C to select “Scene”... -
Page 49: Configuring Settings Specific To An Individual Input Source (Option Menu)
PLAYBACK Configuring settings specific to an individual input source (OPTION menu) MAIN ZONE 2 CODE SET RECEIVER SOURCE This unit has a unique OPTION menu for each input source. OPTION menus can be used to enable features such as volume trim for compatible input sources or to display HDMI audio/video data. -
Page 50: Option Menu
When “Tone Control,” “Adaptive DRC,” “CINEMA DSP 3D Mode,” “Dialogue Lift,” or “Extended Surround” is adjusted for an input source, the Not available for Yamaha iPod wireless receiver. same value is applied to other input sources and “ALL” is displayed on the front panel display. - Page 51 PLAYBACK Configuring settings specific to an individual input source (OPTION menu) ■ ■ ■ Auto-adjusting the sound level to make Adjusts the vertical position of dialogues Selecting the 5.1-channel signal playback even low volumes more audible method Dialogue Lift Adaptive DRC Extended Surround Input source: All input sources except MULTI CH...
- Page 52 Songs Plays songs back in random order. Pairing Bluetooth component Albums Plays albums back in random order. Pairing Input source: DOCK (Bluetooth) Performs pairing of this unit and a Bluetooth component (☞p. 63). Not available for Yamaha iPod wireless receiver.
-
Page 53: Confirming And Operating Input Sources From The Content Window
PLAYBACK Confirming and operating input sources from the Content window MAIN ZONE 2 CODE SET RECEIVER SOURCE When DOCK or TUNER is selected, the Content window is displayed on the TV screen. Playback style for iPod and functions for FM/AM tuner can be set in the Content HDMI window. -
Page 54: Fm/Am Tuning
PLAYBACK FM/AM tuning MAIN ZONE 2 CODE SET RECEIVER SOURCE HDMI When using the FM/AM tuner, adjust the direction of ■ Registering stations manually (Manual eTUNING H / I to set a frequency to AUDIO the FM/AM antenna connected to this unit to get the Preset) V-AUX receive. - Page 55 PLAYBACK FM/AM tuning MAIN ZONE 2 CODE SET RECEIVER SOURCE ■ Designating a preset number for HDMI registration AUDIO eMEMORY Press once, to display “Manual Preset” V-AUX on the front panel display. After a small wait, the preset number that the station has been registered to MULTI DOCK will appear.
-
Page 56: Confirming And Operating The Fm/Am Tuner From The Content Window
PLAYBACK FM/AM tuning MAIN ZONE 2 CODE SET Confirming and operating the Screen buttons on the Now playing view RECEIVER SOURCE To use these buttons, first press kENTER. Then select Preset Select FM/AM tuner from the Content HDMI kCursor B / C and kENTER. - Page 57 PLAYBACK FM/AM tuning MAIN ZONE 2 CODE SET ■ Operating from the Content browse RECEIVER SOURCE Now Playing view HDMI Switches the display to the Now playing view. AUDIO V-AUX MULTI DOCK TUNER PHONO PRESET TUNING INFO MEMORY ENHANCER SUR. DECODE MOVIE MUSIC SLEEP...
-
Page 58: Playing Back Tunes From Your Ipod™/Iphone
RECEIVER SOURCE Once you have connected a Yamaha iPod universal dock (such as the YDS-12, sold separately) to this unit, you can enjoy playback of your iPod/iPhone using the remote HDMI control supplied with this unit. When playing back from an iPod/iPhone, you can also use the compressed music enhancer sound programs to give compressed audio... -
Page 59: Playing Ipod/Iphone From The Menu Screen (Menu Browse Control)
ENTER kENTER. The Now playing view appears during playback. Videos will not be displayed when your iPod or Yamaha iPod universal dock do not support the browser function for browsing video files. - Page 60 PLAYBACK Playing back tunes from your iPod™/iPhone™ MAIN ZONE 2 CODE SET RECEIVER SOURCE Play Control HDMI Operates the basic playback functions of iPod/iPhone. AUDIO V-AUX p (Play) Starts playback. s (Stop) Stops playback. MULTI DOCK e (Pause) TUNER PHONO Stops playback temporarily.
-
Page 61: Operating Basic Playback Functions Via The Remote Control (Simple Remote Control)
AUDIO VOL. remote control) V-AUX iPod connected A Yamaha iPod wireless system (YID-W10, sold separately) can be connected to this unit to play back Use the following remote control keys to operate MULTI DOCK iPod/iPhone with wireless connection. The iPod/iPhone (playback, stop, skip, etc.) your iPod/iPhone. - Page 62 ON SCREEN immediately remove the iPod/iPhone from the – The input source switches to DOCK (iPod) when this Yamaha iPod universal dock. “Max Volume” can be ENTER VOLUME unit is turned on. used to specify the maximum volume level to prevent...
-
Page 63: Playing Back Tunes From Bluetooth™ Components
Playing back tunes from Bluetooth™ components MAIN ZONE 2 CODE SET RECEIVER SOURCE You can connect a Yamaha Bluetooth wireless audio receiver (such as the YBA-10, sold separately) to this unit and enjoy wireless playback from Bluetooth-compatible HDMI portable music players. AUDIO V-AUX NOTE When playing back from a Bluetooth component for the first time, you must first pair the devices (register the Bluetooth components). -
Page 64: Using Bluetooth™ Components
Bluetooth component. When the wireless DOCK Bluetooth component list, for example as “YBA-10 VOL. MULTI DOCK connection is complete, Bluetooth components can be YAMAHA.” BT connected TUNER PHONO played back. Depending on Bluetooth components, a wireless PRESET... -
Page 65: Configuring Input Sources (Input Menu)
SETUP MAIN ZONE 2 CODE SET Configuring input sources (Input menu) RECEIVER SOURCE HDMI Settings, such as the name of an input source or the icon displayed for an input source can be changed from the Input menu. AUDIO V-AUX Configuring input sources kCursor D / E jON SCREEN... -
Page 66: Input Menu
SETUP Configuring input sources (Input menu) MAIN ZONE 2 CODE SET ■ Input menu Changing an input source name or RECEIVER SOURCE Press kENTER, and then press icon HDMI kCursor B / C / D / E to edit the new input AUDIO name. -
Page 67: Video And Audio
SETUP Configuring input sources (Input menu) ■ ■ ■ Combining HDMI/AV1-2 input source Setting the format of digital audio signals Selecting the sound program suitable for video and audio listening to compressed audio, such as Decoder Mode Audio In Input source: HDMI1-5, AV1-4, V-AUX Enhancer Input source:... - Page 68 Configuring input sources (Input menu) ■ ■ Setting the interlock functions with iPod/ Outputting a video signal input from iPhone (when a Yamaha iPod wireless another input source while playing a receiver is connected) multi-channel audio signal iPod Interlock Video Out When “MULTI CH”...
-
Page 69: Editing The Scene Function (Scene Menu)
SETUP Editing the SCENE function (SCENE menu) MAIN ZONE 2 CODE SET RECEIVER SOURCE The SCENE function (☞p. 41) can be edited from the SCENE menu displayed on the TV screen. HDMI AUDIO V-AUX Editing a scene kCursor B / C / D / E to adjust the kCursor D / E to select a scene to be... -
Page 70: Scene Menu
“Detail” at right. PRESET TUNING SCENE2 INFO MEMORY SCENE IR Save ENHANCER SUR. DECODE Specify whether or not a Yamaha BD/DVD player or CD MOVIE MUSIC Load SLEEP STRAIGHT PURE DIRECT player connected to this unit turns on automatically. Rename/Icon Select... -
Page 71: Setting Sound Program Parameters (Sound Program Menu)
SETUP Setting sound program parameters (Sound Program menu) MAIN ZONE 2 CODE SET RECEIVER SOURCE Sound effects can be adjusted from the Sound Program menu. HDMI AUDIO V-AUX Editing sound programs kCursor D / E kCursor B / C / D / E to select a sound to adjust the program and press... -
Page 72: Cinema Dsp Parameters
SETUP Setting sound program parameters (Sound Program menu) CINEMA DSP parameters Initial Delay Room Size Surround Initial Delay Surround Room Size DSP Level Change the effect level (level of the sound field effect to be added). Surround Back Initial Delay Surround Back Room Size You can adjust the level of the sound field effect while checking the sound effect. - Page 73 SETUP Setting sound program parameters (Sound Program menu) Liveness Reverb Time Reverb Delay Reverberation time. Adjusts the amount of time taken for the Reverberation delay. Adjusts the time difference between the Surround Liveness dense, subsequent reverberation sound to decay by 60 dB at 1 kHz. beginning of the direct sound and the beginning of the This changes the apparent size of the acoustic environment over an reverberation sound.
-
Page 74: Parameters Usable In Certain Sound Programs
SETUP Setting sound program parameters (Sound Program menu) Parameters usable in certain sound Reverb Level Surround R Level programs Reverberation level. Adjusts the volume of the reverberation Adjusts the volume of the surround R channel. sound. The larger the value, the stronger the reverberation 2ch Stereo only Adjustable range 0 to 100%... -
Page 75: Parameters Usable In Surround Decoder
SETUP Setting sound program parameters (Sound Program menu) Parameters usable in surround decoder Front Presence R Level Center Width Adjusts the volume of the front presence R channel. Spreads the center channel sound to the front left and right Decode Type speakers to suit your needs or preferences. -
Page 76: Setting Various Functions (Setup Menu)
SETUP Setting various functions (Setup menu) MAIN ZONE 2 CODE SET RECEIVER SOURCE Various settings, such as speaker volume or HDMI functions, can be changed from the Setup menu. HDMI AUDIO V-AUX Operating the Setup menu Setup menu setting kCursor B / C to select an item and Speaker press kENTER. -
Page 77: Manual Speaker Setup
SETUP Setting various functions (Setup menu) ■ Setup menu Manages settings for speakers Manual speaker setup Manual Setup The following parameters can be specified manually. Speaker Power Amp Assign Adds the extra speakers to the 7.1-channel speaker Auto Setup connection. Manual Setup Configuration Manually manages speaker configuration, such as... - Page 78 SETUP Setting various functions (Setup menu) Front Surround Back Configuration Selects the size (sound reproduction capacity) of the front Selects the size of the surround back speakers. speakers. Adjusts the output characteristics of the speakers based on Largex1 Select when one large surround back speaker is manually set parameters.
- Page 79 SETUP Setting various functions (Setup menu) Subwoofer Bass Cross Over Level Confirms the subwoofer. Sets the lower limit of low-frequency component which is produced from speakers of which the size is set to “Small.” Separately adjusts the volume of each speaker. Use (Default) Select this when subwoofer is connected.
- Page 80 SETUP Setting various functions (Setup menu) MAIN ZONE 2 CODE SET Front L / Front R / Center / Surround L / Surround R / RECEIVER SOURCE Parametric EQ Test Tone Surround Back L / Surround Back R / Front Presence L / HDMI Front Presence R Adjusts sound quality of tone using a parametric...
-
Page 81: Setting The Audio Output Function Of This Unit
SETUP Setting various functions (Setup menu) ■ ■ Setting the audio output function of this Synchronizing audio/video output Auto-adjusting Dolby Digital and DTS dynamic range unit Lipsync Dynamic Range Adjusts the delay between audio and video output (Lipsync function). Selects the dynamic range adjustment method for audio bitstream (Dolby Digital and DTS) signal playback. -
Page 82: Setting This Unit's Video Output Function
SETUP Setting various functions (Setup menu) ■ Setting the startup volume Setting this unit’s video output function • Analog-to-HDMI video conversion is always possible unless video signals are being input at the HDMI input jacks or 1080p- Initial Volume resolution analog video signals are being input (☞p. -
Page 83: Setting Hdmi Functions
SETUP Setting various functions (Setup menu) ■ Adjusting resolution and aspect ratio with Aspect Setting HDMI functions conversion of video signal to HDMI Through (Default) The aspect ratio of HDMI video signal sources is not adjusted. Processing 16:9 Normal Transmits 4:3 aspect ratio video signals to a 16:9 TV Adjust resolution and aspect ratio with conversion of video input to with black bands on either side of the screen. - Page 84 SETUP Setting various functions (Setup menu) ■ ■ ■ Receiver operation via TV (HDMI Control) Listening to TV audio via single HDMI Selecting an input source to assign audio cable (Audio Return Channel) input for the TV HDMI Control ARC (Audio Return Channel) TV Audio Input Set the HDMI Control function to “On”...
-
Page 85: Setting This Unit's Multi-Zone Function
SETUP Setting various functions (Setup menu) ■ ■ Specify whether or not audio signal is Transmitting HDMI audio/video to the TV Setting this unit’s multi-zone function output through this unit and a TV during standby mode (Standby Through) Audio Output Standby Through Choose whether audio is played back through this unit or through a This function allows audio/video signals from HDMI inputs to... -
Page 86: Making The Receiver Easier To Use
SETUP Setting various functions (Setup menu) ■ ■ Making the receiver easier to use Goes enter standby mode automatically Specifying menu display when you leave it without operating Display Set Auto Power Down Specify front panel display brightness and TV screen wall paper. If you do not operate this unit or use the remote control for an Front Panel Display extended period of time, it will automatically go into standby mode... -
Page 87: Language
SETUP Setting various functions (Setup menu) ■ ■ Setting TRIGGER OUT functions Prohibiting setting changes When “Trigger Mode” is set to “Power,” electronic signal transmission is synchronized with power status Trigger Output Memory Guard of the main zone or Zone2. When “Trigger Mode”... -
Page 88: Confirming Information Of This Unit (Information Menu)
SETUP Confirming information of this unit (Information menu) MAIN ZONE 2 CODE SET RECEIVER SOURCE A variety of information for this unit can be displayed. HDMI AUDIO ■ ■ V-AUX Selecting information Audio information Video information Displays information on the current audio signal. Displays information on the current video signal. -
Page 89: Controlling Other Components With The Remote Control
SETUP Controlling other components with the remote control MAIN ZONE 2 CODE SET RECEIVER SOURCE You can operate an external component such as TV and DVD player with the remote control of this unit by setting the code for external component (remote control code). HDMI The remote control code can be set for each input source. -
Page 90: Default Remote Control Code Settings
For a complete list of control code using an example of the registration of the MULTI DOCK available remote control codes, refer to “Remote Control remote control codes of a Yamaha BD player connected ZONE 2 TUNER PHONO CODE SET Code Search”... -
Page 91: Resetting All Remote Control Codes
SETUP Controlling other components with the remote control MAIN ZONE 2 CODE SET Resetting all remote control codes RECEIVER SOURCE mNumeric Enter a remote control code “2064” using Enter “9981” using keys. HDMI mNumeric keys. Resetting all remote control codes for external AUDIO V-AUX components to the initial factory settings. -
Page 92: Extended Functionality That Can Be Configured As Needed (Advanced Setup Menu)
SETUP Extended functionality that can be configured as needed (Advanced Setup menu) The Advanced Setup menu can be used for unit initialization and other useful extended functions. The Advanced Setup menu can be operated as follows. Displaying/Setting the Advanced Setup Setting the impedance of speakers Use PROGRAM l / h to select the item to be set menu... -
Page 93: Avoiding Crossing Remote Control Signals When Using Multiple Yamaha Receivers
ID (remote MOVIE MUSIC SLEEP STRAIGHT PURE DIRECT control ID). When using multiple Yamaha AV receivers, Press qSOURCE/RECEIVER. Removing HDMI video output up- SCENE you can set each remote control with a unique remote RADIO scaling limits control ID for its corresponding receiver. -
Page 94: Initializing Various Settings For This Unit
SETUP Extended functionality that can be configured as needed (Advanced Setup menu) Initializing various settings for this unit INIT- CANCEL Initializes various settings stored in this unit and sets it back to default. Select the items to be initialized from the following. DSP PARAM Initializes all parameters for the sound programs. -
Page 95: Using The Hdmi Control Function
SETUP Using the HDMI Control function This unit supports the HDMI Control function, which allows you to Connect the TV that supports the HDMI Control If DVD recorder that supports the HDMI Control operate external components via HDMI. If devices that support function to this unit’s HDMI output jack. - Page 96 SETUP Using the HDMI Control function MAIN ZONE 2 CODE SET ■ Switching the input source on this RECEIVER SOURCE kCursor D / E TV output jack Input jack Press repeatedly to select unit automatically when listening HDMI “HDMI” and press kENTER. to TV audio Optical digital audio output AV1 or AV4 (Default)
- Page 97 SETUP Using the HDMI Control function MAIN ZONE 2 CODE SET ■ Single HDMI cable input to TV RECEIVER SOURCE kCursor B / C kCursor C Press repeatedly to select Press to select “TV Audio audio with Audio Return Channel HDMI “Setup”...
-
Page 98: Using Multi-Zone Configuration
• An infrared signal emitter in the main zone. This emitter transmits infrared signals from the remote control may not require an infrared signal emitter. Up to 6 Yamaha components can be connected as shown to a CD player or a DVD player, etc. in the main zone via the infrared signal receiver in the second zone. -
Page 99: Controlling Zone2
SETUP Using multi-zone configuration MAIN ZONE 2 CODE SET Controlling Zone2 RECEIVER SOURCE HDMI The remote control can be used to select and control AUDIO V-AUX Zone2 devices. The available operations are as follows: • Selecting the input source of Zone2. MULTI DOCK •... -
Page 100: Appendix
Refer to the table below when this unit does not function properly. If the problem you are experiencing is not listed below, or if the instructions below do not help, turn off this unit, disconnect the power cable, and contact the nearest authorized Yamaha dealer or service center. - Page 101 APPENDIX Troubleshooting Problem Cause Remedy Problem Cause Remedy page page No picture. The video signal output from this Displays the Advanced Setup menu and Only the center When a monaural source sound Try another sound program. unit is not supported by a monitor select “VIDEO”...
-
Page 102: Hdmi
APPENDIX Troubleshooting HDMI™ Problem Cause Remedy page The audio input The connected component is not Set the playback component properly — sources cannot be set to output the desired digital referring to its instruction manual. Problem Cause Remedy page played in the desired audio signals. -
Page 103: Tuner (Fm/Am)
APPENDIX Troubleshooting Tuner (FM/AM) Problem Cause Remedy page The desired station The signal is weak, or the antenna Adjust the AM loop antenna orientation. Problem Cause Remedy cannot be tuned into connections are loose. page Use the manual tuning method. with the automatic FM stereo reception You are too far from the station... -
Page 104: Ipod™/Iphone
Connect error There is a problem with the signal Turn off the unit and reconnect the Yamaha establishing a connection. path from your iPod/iPhone to the iPod universal dock to the DOCK jack of Completed unit. -
Page 105: Remote Control
APPENDIX Troubleshooting Remote control Problem Cause Remedy page The remote control Wrong distance or angle. The remote control will function within a — does not work or maximum range of 6 m and no more than 30 function properly. degrees off-axis from the front panel. Direct sunlight or lighting (from Adjust the lighting angle, or reposition this —... -
Page 106: Glossary
APPENDIX Glossary Audio information Dolby Pro Logic IIx DTS Digital Surround Dolby Pro Logic IIx is a new technology enabling discrete multichannel DTS Digital Surround was developed to replace the analog soundtracks of playback from 2-channel or multi-channel sources. There are three modes movies with a 5.1-channel digital sound track, and is now rapidly gaining Audio and video synchronization (Lipsync) available: “Music mode”... -
Page 107: Sound Program Information
100 kHz, with a dynamic range of 120 dB. This unit can Based on a wealth of actually measured data, Yamaha CINEMA DSP uses signal. A monitor with component input jacks is required in order to output transmit or receive DSD signals via the HDMI jack. -
Page 108: Video Conversion
APPENDIX Glossary “x.v.Color” A color space standard supported by HDMI version 1.3. It is a more extensive color space than sRGB, and allows the expression of colors that were not hitherto possible. While remaining compatible with the color gamut of sRGB standards, “x.v.Color” expands the color space, and can thus produce more vivid, natural images. -
Page 109: Information On Hdmi
– 576p/50 Hz About trademarks Bluetooth™ Bluetooth is a registered trademark of the Bluetooth SIG and is used by Yamaha in accordance with a license agreement. Manufactured under license from Dolby Laboratories. Dolby, Pro Logic and the double-D symbol are trademarks of Dolby Laboratories. -
Page 110: Specifications
APPENDIX Specifications ■ Input jacks ■ Remote jacks ■ TUNER • Analog audio • REMOTE IN x 1 • Analog Tuner [Canada model] FM/AM x 1 (TUNER) • REMOTE OUT x 1 Audio x 5 (AV5, AV6, AUDIO1, AUDIO2, V-AUX) ■... - Page 111 APPENDIX Specifications ■ AM SECTION • Input Sensitivity/Input Impedance • Channel Separation (1 kHz/10 kHz) [Canada model] [Canada model] • Tuning Range AV5, etc..............200 mV/47 kΩ AV5, etc. (5.1 kΩ shorted) ......60 dB/45 dB or more [Canada model]............530 to 1710 kHz MULTI CH IN ............200 mV/47 kΩ...
-
Page 112: Index
APPENDIX Index Numerics Clear All Preset ................57 Front Presence L Level, Sound Program menu......74 Clear Preset ................. 57 Front Presence R Level, Sound Program menu ......75 5 channel speaker layout .............. 15 COAXIAL jack ................21 Front speaker ................13 5.1-channel speaker layout............ - Page 113 APPENDIX Index Low-frequency sound adjustment..........40 Surround Back L Level, Sound Program menu ......74 Surround Back Liveness, Sound Program menu......73 Rear panel..................9 Surround Back R Level, Sound Program menu ......74 Remote control ................11 Surround Back Room Size, Sound Program menu ..... 72 Manual Preset................
- Page 114 © 2010 Yamaha Corporation YC514A0/OMEN2...
Need help?
Do you have a question about the HTR-6063 and is the answer not in the manual?
Questions and answers