Table of Contents
Advertisement
Ibis 3 Owners Guide
Revision V1
Page 1 of 19
IBIS 3 OWNERS MANUAL
Contents
WARRANTY OF REFRIGERATED AIRCONDITIONING ________________________________________________ 2
GENERAL UNIT INFORMATION __________________________________________________________________ 4
PACKING LIST ________________________________________________________________________________ 5
BEFORE INSTALLATION YOU MUST COMPLETE THE FOLLOWING STEPS _____________________________ 6
INSTALLATION ________________________________________________________________________________ 7
COMMISSIONING OF THE UNIT _________________________________________________________________ 11
MAINTENANCE _______________________________________________________________________________ 12
GENERAL SPECIFICATIONS ___________________________________________________________________ 13
OPERATING INSTRUCTIONS ___________________________________________________________________ 14
IBIS 3 COMPONENTS & SPARE PARTS __________________________________________________________ 16
IBIS 3 WIRING DIAGRAM _______________________________________________________________________ 18
TROUBLE SHOOTING GUIDE ___________________________________________________________________ 19
Advertisement
Table of Contents

Related Manuals for Aircommand IBIS 3


Summary of Contents for Aircommand IBIS 3
-
Page 1: Table Of Contents
BEFORE INSTALLATION YOU MUST COMPLETE THE FOLLOWING STEPS _____________________________ 6 INSTALLATION ________________________________________________________________________________ 7 COMMISSIONING OF THE UNIT _________________________________________________________________ 11 MAINTENANCE _______________________________________________________________________________ 12 GENERAL SPECIFICATIONS ___________________________________________________________________ 13 OPERATING INSTRUCTIONS ___________________________________________________________________ 14 IBIS 3 COMPONENTS & SPARE PARTS __________________________________________________________ 16 IBIS 3 WIRING DIAGRAM _______________________________________________________________________ 18 TROUBLE SHOOTING GUIDE ___________________________________________________________________ 19... -
Page 2: Warranty Of Refrigerated Airconditioning
En el caso que se necesite hacer uso del servicio de garantía, el comprador debe ponerse en contacto con Aircommand Australia para la aprobación del servicio. - Page 3 The unit must be installed by a qualified tradesperson. Failure to properly install the unit or attempting to modify it in any way can be extremely hazardous and may result in property damage and personal injury. Aircommand will not be held responsible for problems relating to incorrect or improper installation methods.
-
Page 4: General Unit Information
IV. GENERATORS The Ibis 3 is designed to run using mains power, however many owners may want to use portable generators to run the unit when in remote locations. Any generator used should deliver high quality, pure sine wave, alternating current at 50Hz, and be able to handle the compressor start up demand. -
Page 5: Packing List
Page 5 of 19 PACKING LIST The components of your Ibis 3 will be contained in 2 cartons. Unpack the carton when you are ready to install and check that the contents are as below: Main Carton - 1160 x 890 x 250mm Weight 47kg Contents: 1. -
Page 6: Before Installation You Must Complete The Following Steps
BEFORE INSTALLATION YOU MUST COMPLETE THE FOLLOWING STEPS Checked that roof thickness is between 25 – 85mm. If roof is greater than 85mm thick you will need an Ibis 3 Thick roof adapter (Part No 8102007) from Aircommand. Note that this measurement must include any ‘H-Frames’ used. -
Page 7: Installation
The unit requires a 360 x 360mm square hole for installation. The Ibis 3 should be placed as close as possible to the centre of the caravan or RV so that conditioned air can circulate evenly. Ensure that the air outlets will not be blowing directly onto obstructions. - Page 8 Ibis 3 Owners Guide Revision V1 Page 8 of 19 2. Attach weather collar to roof Locate the weather collar (Item #1). Flip the collar over and firmly press the sealant The collar has one side marked “THIS SIDE side to the roof of the caravan.
-
Page 9: Electrical Supply
Ibis 3 Owners Guide Revision V1 Page 9 of 19 4. Electrical supply This unit MUST be installed in accordance AS/NZ 3001:2008 “Electrical with installations – transportable structures & vehicles including their site supplies’. Ensure that power is properly disconnected at the supply (mains and/or battery). - Page 10 Ibis 3 Owners Guide Revision V1 Page 10 of 19 Attach plenum assembly cont. 8. Install return air filter Raise the plenum assembly towards the roof top Locate the return air filter. (Item #5). installation. Align the tabs on one side of the filter body ...
-
Page 11: Commissioning Of The Unit
Ibis 3 Owners Guide Revision V1 Page 11 of 19 Press MODE button until COOL is selected. COMMISSIONING OF THE UNIT Figure 20 Turn the power on at the circuit breaker. Using the remote control (Item #6) press the Figure 17 ON/OFF button. -
Page 12: Maintenance
Figure 23 - Remote control batteries 3. Hold Down bolts MAINTENANCE Aircommand suggests that the 4 hold down bolts attaching the unit to the roof are initially checked for 1. Filter tightness within the first 3 months of installation, and... -
Page 13: General Specifications
Ibis 3 Owners Guide Revision V1 Page 13 of 19 GENERAL SPECIFICATIONS Model 8100001 Roof top Unit Inside Plenum Height (mm) Width (mm) Length (mm) 1120 Weight (kg) 45.4 AIRCOMMAND AUSTRALIA PTY LTD IBIS 3 MODEL NO. 8100001 230V AC 50Hz... -
Page 14: Operating Instructions
Ibis 3 Owners Guide Revision V1 Page 14 of 19 OPERATING INSTRUCTIONS WARNING This appliance is not intended for use by persons (including children) with reduced physical, sensory or mental capabilities, or lack of experience and knowledge, unless they have been given supervision or instruction concerning use of the appliance by a person responsible for their safety. - Page 15 Ibis 3 Owners Guide Revision V1 Page 15 of 19 Plenum Status Display (Figure 26) In addition to the remote control there is a status display on the corner of the inside plenum. This row of lights indicates the mode that the air conditioner is operating in.
-
Page 16: Ibis 3 Components & Spare Parts
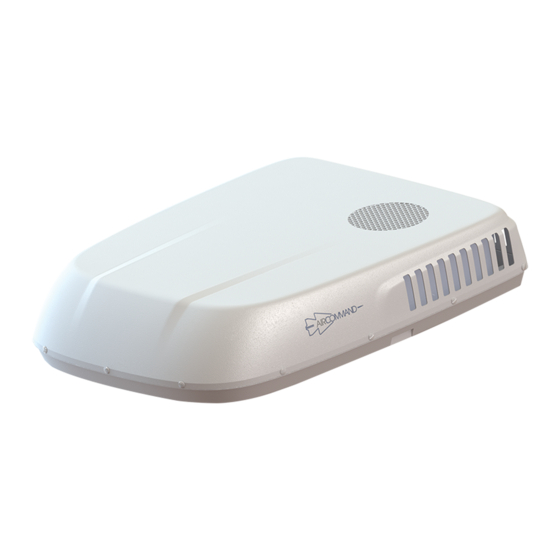
Ibis 3 Owners Guide Revision V1 Page 16 of 19 IBIS 3 COMPONENTS & SPARE PARTS... - Page 17 Ibis 3 Owners Guide Revision V1 Page 17 of 19 Part Description Part # Screw M5x12 - White 8101001 Canopy - Ibis 3 8101020 Speed clip - M5 8101002 Base - Ibis 3 8101030 Evaporator housing 8101005 Evaporator fan deck...
-
Page 18: Ibis 3 Wiring Diagram
Ibis 3 Owners Guide Revision V1 Page 18 of 19 IBIS 3 WIRING DIAGRAM... -
Page 19: Trouble Shooting Guide
6 rapid flashes – inside coil sensor fault “E2” 7 rapid flashes – outside coil sensor fault “E3” 8 rapid flashes - outside coil over temperature “E5” Contact Aircommand Australia for specialist advice on fault correction and access to our service agents. Poor cooling or Return air filter is blocked Remove filter, clean &...
Need help?
Do you have a question about the IBIS 3 and is the answer not in the manual?
Questions and answers