
Related Manuals for Aircommand Cormorant MKII


Summary of Contents for Aircommand Cormorant MKII
-
Page 1: Owners Manual
OWNERS MANUAL - INSTALLATION - COMMISSIONING OF UNIT - SPECIFICATIONS - OPERATING INSTRUCTIONS... -
Page 2: Warranty Of Refrigerated Airconditioning
En el caso que se necesite hacer uso del servicio de garantía, el comprador debe ponerse en contacto con Aircommand Australia para la aprobación del servicio. -
Page 3: Serial Number
Aircommand will not be held responsible for problems relating to incorrect or improper installation methods. - Page 4 The effectiveness of the air conditioner is dependent on several factors e.g. size and heatload of the van. When an Aircommand unit is installed in a van or motorhome Aircommand assumes that the vehicle is well insulated (25mm of foam minimum) in all walls and roof, that the windows are of moderate size (preferably double glazed) and the roof hatches are moderate, insulated and airtight when closed.
-
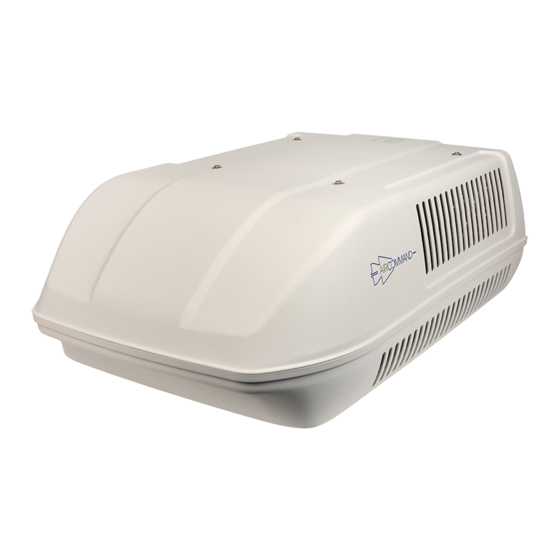
Page 5: Main Components
Failure to properly install the unit or attempting to modify it in any way can be extremely hazardous and may result in property damage and/or personal injury Aircommand will not be held responsible for issues arising from incorrect or improper installation methods... -
Page 6: Installation Position
HOLE Aircommand would recommend 2 or more units to cool effectively. - When considering the installation position Fig 2: The foot print of the rooftop unit, and the plenum, measured from the hole remember to check for clearance around the plenum inside the van. - Page 7 2. ASSESS ROOF STRENGTH - The roof members MUST be strong enough LONGITUDINALS MUST BE to support the weight of the unit (up to 45kg) FIXED SECURELY TO DIRECTION OF TRAVEL without any roof deflection that will cause TRANSVERSE ROOF MEMBERS “pooling”...
-
Page 8: Connect Electrical Supply
4. POSITION CORMORANT ON ROOF - Remove the air conditioner from the carton. - Position the unit over the gasket so that the corners of the square hole in the caravan roof line up with the corners of square hole underneath CORMORANT (Fig 6). - Page 9 7. ASSESS ROOF THICKNESS Duct length required Roof thickness (mm) Hold down bolt length - Measure the roof thickness and (mm) consult the table across to check Include ‘H’ frame if used required (mm) if adjustments to the hold down bolt duct length...
- Page 10 9. ATTACH DUCT TO UNIT - Raise the brace assembly and slip the extension duct over outside diameter of the spigot underneath the rooftop unit. (Fig 11 & 12). When attaching the duct to the unit take care to ensure it forms a tight, unbroken seal that doesn’t allow discharge air to escape.
-
Page 11: Installation Is Now Complete
11. ATTACH PLENUM COVER - Secure the main plenum cover to the duct assembly with the 4 screws provided (Fig 15). TIP: It is important that these screws are not over tightened otherwise the plenum may crack. - Remove the filter elements by pulling them out of the plenum, and use the six self-tapping counter sunk screws to secure the covers edges to the caravan ceiling (Fig... -
Page 12: Commissioning Of The Unit
Fig 17 shows the plenum filter when removed If you have a claim please contact Aircommand directly on The state of the filters can be ascertained from its appearance, (08) 8345 8444 alternatively you can fax (08) 8243 0628 or... -
Page 13: General Specifications
GENERAL SPECIFICATIONS Air – Conditioner Height 325mm Width 675mm Length 975mm Weight 45kg Air Discharge Plenum Height 65mm Width 535mm Length 555mm Weight 2.4kg CORMORANT MODEL: 240V 50Hz Heatpump 115V 60Hz Cooling Only 115V 60Hz Heat Pump Model 13500 Model 15000 Electrical Rating: 240V, 50Hz 115V, 60Hz... -
Page 14: Display Setting
OPERATING INSTRUCTIONS - Turn the unit on by pressing the ON/OFF button once. - Press the MODE button to cycle through options Cool, Dry, Heat and Fan. COOLING - Cycle mode button to highlight COOL. - You may select High, Med, Low or Auto fan speeds by pressing the fan button. - Page 15 - Ensure all windows, doors, skylights and hatches are closed and curtains/awnings used to reduce heat load, check for adequate insulation in roof & walls An error code is displayed on control panel - Contact Aircommand service department (E1 to E5)
Need help?
Do you have a question about the Cormorant MKII and is the answer not in the manual?
Questions and answers