
Subscribe to Our Youtube Channel
Related Manuals for Windster WS-58 series


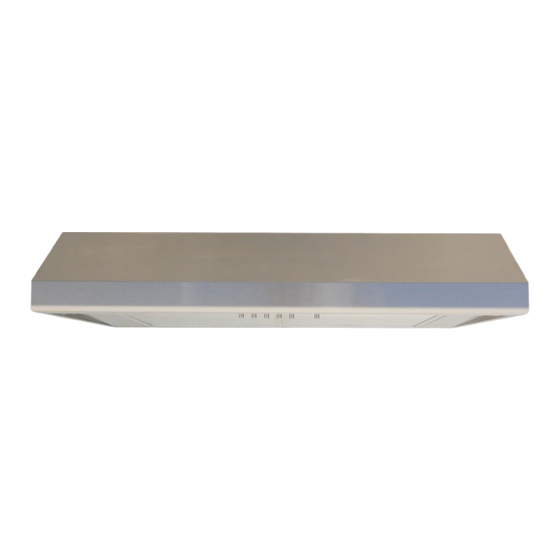
Summary of Contents for Windster WS-58 series
- Page 1 MODEL : WS-58 series OPERATION MANUAL Please read and save this guide through before using your range hood. Store the guide away in a safe place so that you will know where it is, when you want to refer to it.
-
Page 2: Table Of Contents
Table of Contents Important Safety Instructions ---------------------------- Safety Notes ------------------------------------------------------ Tools and Materials Required ---------------------------------- Accessory Package -------------------------------------------- Preparing the Range Hood ----------------------------------- Preparing the Installation Location -------------------------- Providing Electrical Power ------------------------------------- Mounting Range Hood to Cabinet ---------------------------- Replace The LED Light ------------------------------------------- Mounting Range Hood Without Cabinet --------------------- Making The Electrical Connection ----------------------------- P.10... -
Page 3: Important Safety Instructions
A. IMPORTANT SAFETY INSTURCTIONS Read and Save These Instructions CAUTION- To reduce risk of fire and to properly exhaust air, make sure to properly exhaust air. Be sure to duct air outside- Do not vent exhaust air into spaces within walls, ceilings, attics, crawl spaces, or garages. - Page 4 WARNING- To reduce the risk of injury in the event of a range top grease fire, observe the following: SMOTHER FLAMES with a close- fitting lid, cookie sheet, or metal tray, then turn off the burner. Be careful to prevent burns.
-
Page 5: Safety Notes
B. SAFETY NOTES 1. All electrical work must be done in accordance with local and/or national electrical code as applicable for safety. This product must be grounded if your are unfamiliar with methods of installing electrical wiring, secure the services of a qualified electrician. 2. -
Page 6: Tools And Materials Required
C. TOOLS AND MATERIALS REQUIRED C. Tools and Materials Required Drill, electric of ratchet driver, with 3/16" wood bit (for drilling starter holes and 1 ” wood bit (to drill an access holes in the cabinet or ¼ kitchen wall for the electric power line) One common screwdriver. -
Page 7: Preparing The Range Hood
E. PREPARING THE RANGE HOOD E. Preparing The Range Hood 1. Remove the top electrical Electrical Knockout knockout, you may plan to bring power to the range hood either through the cabinet or through the wall (Fig.1) Fig.1 2. Insert a screwdriver into the knockout slot and bend the knockout back and forth. -
Page 8: Preparing The Installation Location
F. PREPARING THE INSTALLATION LOCATION 1. If you want to move the electric range to make room for working on the cabinet turn off the 220 volt power for the electric range at the service entrance. 2. Before moving a gas range, shut off the gas. NOTE: SKIP FOLLOWING STEPS 3A THROUGH 3D IF THE HOOD IS TO BE MOUNTED ON A CABINET WITH A FLUSH BOTTOM... -
Page 9: Providing Electrical Power
4. Screw the four 1" wood screws (for mounting the hood) into the exact center of the arrow and of the keyhole mounting slots marked on the cabinet bottom (for flush installations), or Strips secured marked on the 1” x2” wood strips (for recessed cabinet installation) (Fig.7) Do not turn the mounting screws in all Fig.7... -
Page 10: Mounting Range Hood To Cabinet
H. MOUNTING RANGE HOOD TO CABINET 1. Position the hood in place so that : a. The electrical line is routed through the appropriate Knockout opening. This step will have to be accomplished while positioning the hood (Fig.10) b. The large part of the keyhole mounting slots on the hood fit onto the hood mounting screws projecting from the bottom of the cabinet. -
Page 11: Mounting Range Hood Without Cabinet
J. MOUNTING RANGE HOOD WITHOUT CABINET Bracket 1. Using metal brackets and screws (included), center hood onto Screw board and install screw. 2. Remove the hood from the board and nail the wood board onto the wall. (Be sure the nail is in the center of the stud) 3. -
Page 12: Making The Electrical Connection
K. MAKING THE ELECTRICAL CONNECTION 1. Turn the three nuts at the front of bottom board. 2. Remove screws on wiring case, wire case fish out wires through the knockout. (Fig.12) 3. Mark the electrical connection by fastening all wires to the existing wall wiring according to the their colors. - Page 13 Use for Fan : Fan speed selection and fan off. Fan ON : When the main power button is being pressed, by pressing button for desired fan speed. - slow speed - medium speed - high speed Fan OFF : To turn off the fan, just press the button, or press off main power button.
-
Page 14: Maintenance Instruction
Care Instruction : Please always pull the plug out before cleaning or dismantling, wear " Safety gloves to reduce the risk of any injuries. " Exterior : Can be cleaned with any type of non-abrasive detergent and a clean cloth. Green Pad or any metal type cleaning pad is "... -
Page 15: Ducting
N. DUCTING M. Ducting This style of range must be vented via ducting to the outside of the house. Follow general rules when ducting the hood: Use correct size of ducting (6" or 7” round ), do not reduce size of ducting, make all turns gradual, no short corners. -
Page 16: Parts Layout Diagram
Q. PARTS LAYOUT DIAGRAM Q. Parts Layout Diagram 30” / 2pcs 36” / 3pcs 42” / 3pcs 48” / 4pcs... -
Page 17: Parts List
PARTS LIST Parts List Description Parts no. Per hood 58-0130(30”) / 58-0136(36”) Hood casing 58-0142(42”) / 58-0148(48”) Air chamber 58-02 58-0330(30”) / 58-0336(36”) Top plate 58-0342(42”) / 58-0348(48”) Wire box 58-04 Motor housing 58-05 Motor (L/R) 58-06 Fan (L/R) 58-07 Oil tunnel 58-08 Safety mesh (L/R) -
Page 18: Circuit Diagram
R. CIRCUIT DIAGRAM R. Circuit Diagram NOTE : Any faults with this unit should only be attended to by a qualified technician. MOTOR MOTOR MOTOR AC/DC POWER SUPPLY UNIT Capacitor POWER CORD Voltage : 120V/60Hz Power consumption : maxi 170W (Motor + LED light) -
Page 19: Size
S. SIZE S. Size 6-1/2” 20-7/8” (30”)(36”)(42”) 15” 32° 87°... -
Page 20: Limited Warranty
1) Labor: For a period of one (1) year from the date of purchase, if this product is determined to be defective, Windster will repair or replace the product, at its option, at no charge. After the warranty period, you must pay for all labor charges. - Page 21 EXCEPTIONS. Return Policy Windster offers only the best and highest quality products. If you are not satisfied with your purchase, please contact us within 3 business days of product arrival to obtain a Return Merchandise Authorization (RMA). Returns sent without a RMA will not be accepted.
Need help?
Do you have a question about the WS-58 series and is the answer not in the manual?
Questions and answers