
Subscribe to Our Youtube Channel
Related Manuals for Electrolux W575N


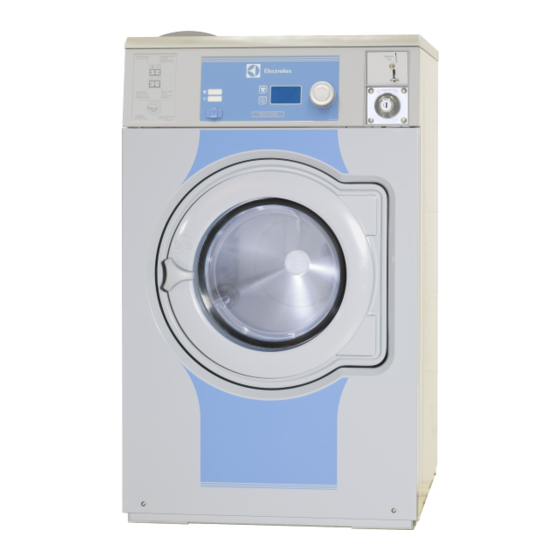
Summary of Contents for Electrolux W575N
- Page 1 Installation manual Washer extractor W575N, W585N, W5105N, W5130N, W5180N, W5250N, W5330N Type W3... 438 9055-30/EN 2013.02.21 Original instructions...
-
Page 3: Table Of Contents
1 Safety Precautions ......................5 1.1 Symbols........................5 2 Technical data ........................6 2.1 Drawing ........................6 2.1.1 W575N, W585N, W5105N, W5130N ..............6 2.1.2 W5180N ......................7 2.1.3 W5250N, W5330N ....................8 2.2 Technical data......................9 2.3 Connections........................ 9 2.4 Sound levels ....................... - Page 4 Contents 11 Function check ......................... 47 The manufacturer reserves the right to make changes to design and component specifications.
-
Page 5: Safety Precautions
Safety Precautions 1 Safety Precautions The machine is only intended for water-wash use. Only use detergent intended for water-wash of textiles. Never use dry cleaning agents. Do not allow minors to use the machine. Do not hose down the machine with water. The machine's door lock must under no circumstances be bypassed. -
Page 6: Technical Data
Technical data 2 Technical data 2.1 Drawing 2.1.1 W575N, W585N, W5105N, W5130N fig.7649A Operating panel Door opening, W575N, W585N: ⌀ 310 mm, W5105N, W5130N: ⌀ 365 mm Detergent container Cold water Hot water Water re-use Drain valve Liquid detergent supply... -
Page 7: W5180N
Technical data 2.1.2 W5180N fig.7783 Operating panel Door opening, W5180N: ⌀ 395 mm Detergent container Cold water Hot water Water re-use Drain valve Liquid detergent supply Electrical connection Steam connection W5180N 1431 1344 1048 1249 W5180N 1229 1129... -
Page 8: W5250N, W5330N
Technical data 2.1.3 W5250N, W5330N fig.7650A Operating panel Door opening, W5250N, W5330N: ⌀ 435 mm Detergent container Cold water Hot water Water re-use Drain valve Liquid detergent supply Electrical connection Steam connection W5250N 1594 1425 1129 1328 W5330N 1679 1464 1034 1034 1367... -
Page 9: Technical Data
Technical data 2.2 Technical data W575N W585N W5105N W5130N W5180N W5250N W5330N Weight, net Drum volume litres Drum diameter Drum speed during wash Drum speed during extraction G-factor, max. Heating: Electricity Heating: Steam Heating: Hot water Frequency of the dynamic... -
Page 10: Sound Levels
2.4 Sound levels The sound power level of the machine is determined by using ISO 3747:2012. According to test code IEC 60704-2-4 the sound power level at extraction and during washing are according to the table: W575N W585N W5105N W5130N... -
Page 11: Setup
Setup 3 Setup 3.1 Unpacking Note! For W5130N-W5330N two persons are recommended for the unpacking. The machine is delivered bolted onto the transport pallet and packed in a crate or box. Remove packing from the machine. Remove the front and rear panel. Remove the bolts between the machine and pallet. -
Page 12: Siting
Setup 3.2 Siting Install the machine close to a floor drain or open drain. The machine should be positioned so that there is plenty of room for working, both for the user and service personnel. The figure shows minimum distance to a wall and/or other machines. ②... -
Page 13: Mechanical Installation
For W5330N two expander bolts MUST also be fitted to the front section of the machine. If not, large vibrations in the machine cabinet may occur. Mark and drill two holes (⌀ 10 mm) about 40 mm deep (1) for the expander bolts in the positions shown. ③ fig.0948A W575N W585N W5105N W5130N W5180N W5250N... - Page 14 Setup Level the machine by using stainless or galvanized steel washers between the machine and the floor. The washers must be of a size to cover the support surface. Fit the washers and self-locking nuts supplied with the machine and tighten well. To tighten the nuts it is recommended to use a rachet wrench, especially in the right rear corner.
-
Page 15: Casting A Plinth
Setup 3.3.1 Casting a plinth A plinth should be used where the existing floor is less than 100 mm thick or in order to ensure that the machine is above the level of any water leakages. The plinth should be approximately 150 - 200 mm in height. ⑤... -
Page 16: Chemical Bolts
Setup 3.3.2 Chemical bolts An alternative to breaking up the existing floor or foundation is to use chemical bolts M16. 1. Mark and drill four holes (⌀ 18 mm) 125 mm deep for the chemical bolts. Check the previous table for the correct position of the holes. 2. -
Page 17: Chemical Anchors
Setup 3.3.3 Chemical anchors If installation shall be done on vinyl floor coverings chemical anchors shall be used. 1. Mark and drill four holes for the chemical anchors. Check the previous table for the correct position of the holes. 2. Cut the flooring material around the washers 3. -
Page 18: Marine Installation
Marine installation 4 Marine installation 4.1 Siting Install the machine close to a floor drain or open drain. The machine should be positioned so that there is plenty of room for working, both for the user and service personnel. The figure shows minimum distance to a wall and/or other machines. ⑨... -
Page 19: Mechanical Installation
Marine installation 4.2 Mechanical installation To ensure steadiness of the machine it is important to fasten the machine to the foundation. Level the machine by using stainless or galvanized steel washers between the machine and the floor. The washers must be of a size to cover the support surface. Fit the washers and self-locking nuts supplied with the machine and tighten well. -
Page 20: Casting A Plinth
Marine installation 4.2.1 Casting a plinth A plinth should be used where the existing floor is less than 100 mm thick or in order to ensure that the machine is above the level of any water leakages. The plinth should be approximately 150 - 200 mm in height. ⑪... -
Page 21: Welding A Foundation
Marine installation 4.2.2 Welding a foundation A welded foundation shall be made where a concrete foundation can not be made. ⑬ fig.5837C W575N W585N W5105N W5130N W5180N W5250N W5330N 1035 W575N W585N W5105N W5130N W5180N W5250N W5330N... -
Page 22: Water Connection
Water type Water connection W575N, W585N W575N, W585N • Cold 1. Cold W575N, W585N, W5105N, W5130N W575N, W585N, W5105N, W5130N • Cold and hot 1. Cold 2. Hot W5180N, W5250N, W5330N W5180N, W5250N, W5330N •... - Page 23 Water connection For installations in UK: WRAS-approved machines must be equipped with check valves on both cold and hot water inlet.
-
Page 24: Connection Of External Dosing Systems
Connection of external dosing systems 6 Connection of external dosing systems 6.1 Connection of the hoses The machine is prepared for connection of external dosing systems or water re-use systems etc. The connections are closed at delivery. Open any of the connections that shall be used by drilling a hole where the hoses shall be connected. -
Page 25: Electrical Connection Of External Dosing System
Connection of external dosing systems 6.2 Electrical connection of external dosing system The power supply to the external dosing system must never be connected to the machine’s incoming terminal block or to the edge connectors on the I/O-board. 6.2.1 Machine with connectors Connect the external dosing system to connections A and B on the machine. -
Page 26: Machine Without Connectors
Connection of external dosing systems 6.2.2 Machine without connectors Connect the external dosing system to the I/O board, which is located to the right of the incoming power supply. The I/O board has edge connectors for connecting external dosing systems. Edge connectors on the I/O board can be loosened for connecting cables. -
Page 27: Outputs
Connection of external dosing systems 6.2.3 Outputs Connect the power supply (e.g. 24V DC) for the external liquid supplies to 9 and 10. If an internal power supply (from the machine) is being used, it can be taken from 1 (N) and connected to 9 and from 2 (L) and connected to 10. -
Page 28: Inputs
Connection of external dosing systems 6.2.4 Inputs The signal level can be 5-24V DC/AC or 100- 240V AC. For 5-24V, the signal reference is connected to 3 and for 100-240V to 4. Potentials on the inputs cannot be mixed. Note! The I/O board will be damaged if the voltage on connection 3 is too high >... -
Page 29: Drain Connection
Drain connection 7 Drain connection Connect a 75 mm (50 mm for models W565-W5105) pipe or rubber hose to the machine’s drain pipe, ensuring a downward flow from the machine. Avoid sharp bends which may prevent proper draining. The drainage pipe should be located over a floor drain, drainage channel or the like so that the distance between the outlet and the drain is at least 25 mm. -
Page 30: Electrical Connection
Electrical connection 8 Electrical connection 8.1 Electrical installation The electrical installation may only be carried out by qualified personnel. Machines with frequency-controlled motors can be incompatible with certain types of earth leakage circuit breaker. It is important to know that the machines are designed to provide a high level of personal safety, which is why items of external equipment such as earth leakage circuit breakers are not necessary. -
Page 31: Electrical Connections
Electrical connection 8.2 Electrical connections W575N Heating alternative Main voltage Heating power Total power Recommended fuse Electric heated 200V 3 ~ 50/60 220–240V 1 ~ 50/60 1.7–2.0 2.0–2.3 220–240V 1 ~ 2.5–3.0 2.9–3.3 50/60 220–240V 1 ~ 50/60 3.7–4.3 4.0–4.7 220–240V 1 ~... - Page 32 Electrical connection W585N Heating alternative Main voltage Heating power Total power Recommended fuse Electric heated 200V 3 ~ 50/60 220–240V 1 ~ 50/60 1.7–2.0 2.0–2.3 220–240V 1 ~ 50/60 2.5–3.0 2.9–3.3 220–240V 1 ~ 50/60 3.7–4.3 4.0–4.7 220–240V 1 ~ 50/60 4.5–5.4 4.9–5.7...
- Page 33 Electrical connection W5105N Heating alternative Main voltage Heating power Total power Recommended fuse Electric heated 200V 3 ~ 50/60 200V 3 ~ 50/60 220–240V 1 ~ 50/60 2.5–3.0 3.0–3.5 220–240V 1 ~ 50/60 4.4–5.2 4.8–5.7 220–240V 1 ~ 50/60 6.3–7.5 6.8–8.0 220–240V 1 ~ 8.4–10.0...
- Page 34 Electrical connection W5130N Heating alternative Main voltage Heating power Total power Recommended fuse Electric heated 200V 3 ~ 50/60 200V 3 ~ 50/60 220–240V 1 ~ 50/60 2.5–3.0 3.0–3.5 220–240V 1 ~ 50/60 4.4–5.2 4.8–5.7 220–240V 1 ~ 50/60 6.3–7.5 6.8–8.0 220–240V 1 ~ 8.4–10.0...
- Page 35 Electrical connection W5250N Heating alternative Main voltage Heating power Total power Recommended fuse Electric heated 200V 3 ~ 50/60 12.5 13.3 220–240V 3 ~ 50/60 9.1–10.8 9.8–11.6 220–240V 3 ~ 50/60 15.1–18.0 15.9–18.8 380–415V 3 ~ 50/60 9.0–10.8 9.8–11.5 380–415V 3 ~ 50/60 15.0–17.9 15.8–18.7...
-
Page 36: Machine Connection
Electrical connection 8.3 Machine connection 8.3.1 Single-phase connection Connect the earth and other two wires as shown. 1NAC... -
Page 37: Three-Phase Connection
Electrical connection 8.3.2 Three-phase connection Connect the earth, neutral and phase wires as shown. 3N AC 3N AC... -
Page 38: Functions For I/O-Cards
Electrical connection 8.4 Functions for I/O-cards The electrical schematic can be one of the following: 8.4.1 External coin meter/Central payment (2A) The signal received from external coin meters must be a pulse between 300–3000 ms (500 ms is recommended) with a minimum pause of 300 ms (500 ms is recommended) between two pulses. fig.6606A... -
Page 39: Central Payment (2B)
Electrical connection 8.4.2 Central payment (2B) To start the machine from a central payment system, the payment system must transmit a start pulse to the machine. The start pulse can be either 230V or 24V. In order to receive a feedback signal once the machine has started, 230V or 24V must be connected to connection 19. -
Page 40: Central Payment (2C)
Electrical connection 8.4.3 Central payment (2C) The central payment or booking system shall transmit an active (high) signal to the machine once permission has been granted to start the machine. The signal must remain active (high) until the machine starts. A feedback signal will be present on connection 18 and remain active (high) whilst the machine door is closed but the program has not started. -
Page 41: Outputs For Detergent Signals And Inputs For Pause Signals, "Empty" Signal And Price Reduction (2D)
Electrical connection 8.4.4 Outputs for detergent signals and inputs for pause signals, "empty" signal and price reduction (2D) The figure shows standard function addressing for machines with the coin program package. By maintaining an active (high) signal on connection 5 ("Price red"), the price of the program can be reduced. -
Page 42: Central Booking/Payment (2F)
Electrical connection 8.4.5 Central booking/payment (2F) The central payment or booking system shall provide an active (high) signal to the machine once permission has been granted to start the machine. The signal must remain active (high) until the machine starts. A feedback signal will be present on connection 18 and remain active (high) whilst the program is running. -
Page 43: Machines With I/O Module Type 3
Electrical connection 8.4.6 Machines with I/O module type 3 By maintaining an active (high) signal on connection 3 "Price reduction”, the price of the program can be reduced. This function has a number of uses, including providing reductions during a specific period of the day. -
Page 44: Steam Connection
Steam connection 9 Steam connection Inlet pipes connected to the machine must be equipped with a manual shut-off valve to facilitate installation and servicing. The connection hose must be of type ISO/1307- 1983 or equivalent. Connection size at filter:DN 15 (BSP 1/2"). Demount the top panel (A). - Page 45 Steam connection Mount the hose with wires between steam valve and machine. Connect wires in the steam valve. Connect ground cable to the terminal ground connection. Connect the ”HEAT” cable connector to the ”HEAT” terminal on the I/O board. ”HEAT” fig.6604 Steam pressure required: •...
-
Page 46: Selection Of Language
Selection of language 10 Selection of language When the installation is complete and the power is connected for the first time you will be forced to select language for the machine. Select language from the list on the display. This will be the language that all display messages, program names etc will be presented in. For more information about changing language and other functions please refer to the programming and configuration manual. -
Page 47: Function Check
Function check 11 Function check May only be carried out by qualified personnel. A function check must be made when the installation is finished and before the machine can be ready to be used. Open the manual water valves. Add detergent in the compartment for main wash and start a program. •... - Page 48 Electrolux Laundry Systems Sweden AB 341 80 Ljungby, Sweden www.electrolux.com/laundrysystems Share more of our thinking at www.electrolux.com...
Need help?
Do you have a question about the W575N and is the answer not in the manual?
Questions and answers
Does? The w 585 n have shipping bolts?