Advertisement
Advertisement
Table of Contents

Related Manuals for Pride Mobility PATHRIDER 140 XL


Summary of Contents for Pride Mobility PATHRIDER 140 XL
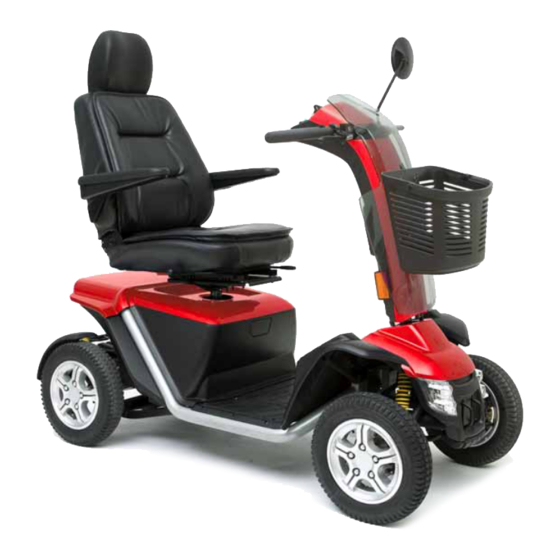
- Page 1 PATHRIDER 140 XL...
- Page 2 The latest/current version of this manual is available on our website. This product is manufactured by: Pride Mobility Products Corporation 182 Susquehanna Avenue Exeter, PA 18643-2694 Copyright © 2010 Pride Mobility Products Australia Pty. Ltd. 088 609 661 INFMANU3939/Rev B/July 2010...
-
Page 3: Table Of Contents
III. YOUR SCOOTER ........................19 IV. BATTERIES AND CHARGING ..................24 OPERATION ..........................30 VI. COMFORT ADJUSTMENTS ....................32 VII. BASIC TROUBLESHOOTING ................... 35 VIII.CARE AND MAINTENANCE ..................... 37 IX. WARRANTY ..........................41 APPENDIX I - SPECIFICATIONS ....................42 Pathrider 140 XL www.pridemobility.com... -
Page 4: Introduction
I . I N T R O D U C T I O N SAFETY Welcome to Pride Mobility Products (Pride). The product you have purchased combines state-of-the-art components with safety, comfort, and styling in mind. We are confident the design features will provide you with the conveniences you expect during your daily activities. - Page 5 Corrosive chemicals contained in battery. EMI-RFI - This product has been tested and passed at an immunity level of 20 V/m. Explosive conditions exist! Read and follow the information in the owner’s manual. Maximum seating weight. Pathrider 140 XL www.pridemobility.com...
- Page 6 Avoid exposure to rain, snow, ice, salt, or standing water whenever possible. Maintain and store in a clean and dry condition. Removal of grounding prong can create electrical hazard. If necessary, properly install an approved 3-pronged adapter to an electrical outlet having 2-pronged plug access. www.pridemobility.com Pathrider 140 XL...
- Page 7 Do not use batteries with different amp-hour (Ah) capacities. Do not mix old and new batteries. Always replace both batteries at the same time. Do not place the scooter in freewheel mode when on an incline or decline. Battery charger for indoor use only. Pathrider 140 XL www.pridemobility.com...
- Page 8 Connect Red wires to Red Positive (+) Terminal Post Connect Black wire to Black Negative (-) Terminal Posts Scooter information label. Scooter does not conform to ISO 7176-19 for transport of an occupied scooter in a motor vehicle. Indicates tie-down points on the scooter. www.pridemobility.com Pathrider 140 XL...
- Page 9 PRE-RIDE SAFETY CHECK Get to know the feel of your scooter and its capabilities. Pride recommends that you perform a safety check before each use to make sure your scooter operates smoothly and safely. Pathrider 140 XL www.pridemobility.com...
- Page 10 When driving down a ramp, keep the scooter’s speed adjustment set to the slowest speed setting to ensure a safely controlled descent. Avoid sudden stops and starts. www.pridemobility.com Pathrider 140 XL...
- Page 11 WARNING! Never carry an oxygen tank weighing more than 6.8 kg (15 lbs.). Never fill the front or rear basket with contents exceeding 6.8 kg (15 lbs.). 181 kg (400 lbs.) 17.6% (10°) Figure 1. Maximum Recommended Incline Angle Pathrider 140 XL www.pridemobility.com...
- Page 12 Disc Park Brake: Activates mechanically after regenerative braking slows the vehicle to near stop, or when power is removed from the system for any reason. Handbrake: This lever provides you with emergency stopping power. See III. “Your Scooter.” www.pridemobility.com Pathrider 140 XL...
- Page 13 Obey all local pedestrian traffic rules. Wait until your path is clear of traffic, and then proceed with extreme caution. Pathrider 140 XL www.pridemobility.com...
- Page 14 Exercise caution when using your scooter in extremely hot or cold conditions or when exposing your scooter to direct sunlight for prolonged periods of time. www.pridemobility.com Pathrider 140 XL...
-
Page 15: Your Scooter
NOTE: If your scooter’s turning radius is greater than 152.4 cm (60 in.) it may be difficult to maneuvre in lifts and building entrances. Use caution when attempting to turn or maneuvre your scooter in small spaces, and avoid areas that might pose a problem. Pathrider 140 XL www.pridemobility.com... - Page 16 PREVENTING UNINTENDED MOVEMENT WARNING! If you anticipate being seated in a stationary position for an extended period of time, turn off the power. This will prevent unexpected motion from inadvertent throttle control lever contact. www.pridemobility.com Pathrider 140 XL...
- Page 17 Your authorised Pride Provider, therapist(s), and other healthcare professionals are responsible for deter- mining your requirement for a positioning belt in order to operate your scooter safely. WARNING! If you require a positioning belt to safely operate your scooter, make sure it is fastened securely. Pathrider 140 XL www.pridemobility.com...
- Page 18 NOTE: For further information on EMI/RFI, visit the Resource Center on www.pridemobility.com. If unintended motion or brake release occurs, turn your scooter off as soon as it is safe to do so. Contact your authorised Pride Provider to report the incident. www.pridemobility.com Pathrider 140 XL...
- Page 19 Battery Condition Meter When the key is fully inserted and turned clockwise to power up your scooter, this meter indicates the approximate battery voltage strength. For further information on battery charging, see IV. “Batteries and Charging.” Pathrider 140 XL www.pridemobility.com...
- Page 20 Release the throttle control lever and allow your scooter to come to a complete stop before engaging the other side of the lever. When the throttle control lever is completely released, it automatically returns to the centre “stop” position and engages your scooter’s brakes. www.pridemobility.com Pathrider 140 XL...
- Page 21 See figure 7. KEY SWITCH NOTE: Keep all electrical areas clean and free of LOWER HEADLIGHT moisture and foreign material. REAR TAIL LIGHTS LEFT TURN INDICATOR RIGHT TURN INDICATOR Figure 7. Tiller Console Fuses Pathrider 140 XL www.pridemobility.com...
- Page 22 NOTE: If the scooter is placed in freewheel mode (manual freewheel lever forward) while the key is in the “on” position, the scooter will not run until the manual freewheel lever is pushed backward and the key is turned to the “off” position, then back to the “on” position. www.pridemobility.com Pathrider 140 XL...
- Page 23 REAR SECUREMENT POINTS FRONT SECUREMENT POINTS Figure 10A. Rear Section Figure 10. Front Section Pathrider 140 XL www.pridemobility.com...
-
Page 24: Batteries And Charging
Refer to the manual sup- plied with the battery charger for more information. www.pridemobility.com Pathrider 140 XL... - Page 25 Ensure both ends of the charger power lead are inserted fully. How often must I charge the batteries? Two major factors must be considered when deciding how often to charge your scooter’s batteries: All day scooter use on a daily basis. Infrequent or sporadic scooter use. Pathrider 140 XL www.pridemobility.com...
- Page 26 Do not use wet-cell batteries, which have removable caps. WARNING! Corrosive chemicals are contained in batteries. Use only AGM or Gel- Cell batteries to reduce the risk of leakage or explosive conditions. NOTE: Sealed batteries are not serviceable. Do not remove the caps. www.pridemobility.com Pathrider 140 XL...
- Page 27 2. Remove the rear shroud by lifting it straight up and off the scooter. The shroud is secured to the scooter with resuable fasteners amd two thumbscrews. See figure 13. THUMBSCREW BATTERY TERMINALS LOCATED REAR SHROUD UNDER TERMINAL BOOTS THUMBSCREW BATTERY SHROUD Figure 13. Shroud Removal/Installation Figure 14. Battery Removal/Replacement Pathrider 140 XL www.pridemobility.com...
- Page 28 More importantly, it takes a few charging cycles (partial draining followed by full recharging) to establish the critical chemical balance that is essential to a deep-cycle battery’s peak performance and long life. www.pridemobility.com Pathrider 140 XL...
- Page 29 What about public transport? If you intend to use public transportation with your scooter, you must contact the transportation provider in advance to determine their specific requirements. Pathrider 140 XL www.pridemobility.com...
-
Page 30: Operation
The electromechanical disc park brake automatically disengages and the scooter accelerates smoothly to the speed you preselected with the speed adjustment dial. Pull on the left handgrip to steer your scooter to the left. Pull on the right handgrip to steer your scooter to the right. www.pridemobility.com Pathrider 140 XL... - Page 31 Although the controller is shut down, power will still be supplied to the scooter’s lighting system. If the power down timer feature takes effect, perform the following steps to resume normal operation: 1. Remove the key from the key switch. 2. Reinsert the key and power up your scooter. Pathrider 140 XL www.pridemobility.com...
-
Page 32: Comfort Adjustments
SEATBACK forward or rearward to adjust the seatback angle. ADJUSTMENT LEVER 2. Release the seatback adjustment lever once the seat is in a comfortable riding position. Figure 17. Seatback Adjustment www.pridemobility.com Pathrider 140 XL... - Page 33 5. Insert the seat height adjustment bolt through the locating holes of both the upper and lower seat posts. 6. Reinstall the nut onto the seat height adjustment bolt and tighten. 7. Reinstall the rear shroud and the seat. Pathrider 140 XL www.pridemobility.com...
- Page 34 MANDATORY! Inspect the positioning belt for loose or damaged parts before each use of the scooter. If you discover a problem, contact your authorised Pride Provider for main- tenance and repair. www.pridemobility.com Pathrider 140 XL...
-
Page 35: Basic Troubleshooting
Push in the main circuit breaker reset button. See III. “Your Scooter.” Make certain that both battery harnesses and the front-to-rear harness are firmly connected. Be sure the power down timer feature has not been activated. See V. “Operation.” Pathrider 140 XL www.pridemobility.com... - Page 36 See the previous troubleshooting question for load testing the batteries yourself. If you experience any problems with your scooter that you are not able to solve, immediately contact your authorised Pride Provider for information, maintenance, and service. www.pridemobility.com Pathrider 140 XL...
- Page 37 WARNING! Do not pull on electrical harnesses directly to detach them from the scooter. Always grasp the connector itself when disconnecting the harness to pre- vent wire damage. Pathrider 140 XL www.pridemobility.com...
- Page 38 Figure. 22. Drive Wheel Assembly 8. Reassemble the rim halves. See figure 22. 9. Slide the wheel back onto the axle. 10. Reinstall the lug nuts and ensure they are tightened properly. 11. Remove the blocks from beneath the scooter. www.pridemobility.com Pathrider 140 XL...
- Page 39 Nylon insert lock nuts should not be reused as it may cause damage to the nylon insert, resulting in a less secure fit. Replacement nylon insert lock nuts are available at local hardware stores or through your authorised Pride Provider. Pathrider 140 XL www.pridemobility.com...
- Page 40 Your scooter must be disposed of according to applicable local and national statutory regulations. Contact your local waste disposal agency or authorised Pride Provider for information on proper disposal of packaging, metal frame components, plastic components, electronics, batteries, neoprene, silicone, and polyurethane materials. www.pridemobility.com Pathrider 140 XL...
-
Page 41: Warranty
REPLACEMENT UNITS The availability of replacement units and/or spare parts is subject to the discretion of the provider, not the manufacturer. For more information regarding replacement units and/or spare parts, contact your autho- rised Pride Provider. Pathrider 140 XL www.pridemobility.com... -
Page 42: Appendix I - Specifications
Test conducted at maximum weight capacity. Inludes standard seat. Battery weight may vary based on manufacturer. NOTE: This product conforms to all applicable ANSI/RESNA testing requirements and ISO 7176 series EN12184 standards. All specifications subject to change without notice. www.pridemobility.com Pathrider 140 XL... - Page 43 53.34 - 57.15 cm (21 - 22.5 in.) 13.33 cm (5.25 in.) 142.8 cm (56.25 in.) Turning Radius Left Turning Radius Right 208.3 cm 210.8 cm (82 in.) (83 in.) 69.2 cm (27.25 in.) Figure 24. Dimensions Pathrider 140 XL www.pridemobility.com...
- Page 44 N O T E S www.pridemobility.com Pathrider 140 XL...
- Page 45 N O T E S Pathrider 140 XL www.pridemobility.com...
- Page 46 N O T E S www.pridemobility.com Pathrider 140 XL...
- Page 47 *INFMANU3939*...
Need help?
Do you have a question about the PATHRIDER 140 XL and is the answer not in the manual?
Questions and answers
blue light on dash
I have a Pride Pathrider 140XL & have lost the battery charger. I think it was 8 AMP but not sure. I would like that verified & would like to know where to buy one.
How is the seat removed from the Pathrider 140 XL? The manual only tells to remove the seat but does not show how.