Table of Contents
Advertisement
Quick Links
Advertisement
Table of Contents

Related Manuals for Epson PR9


Summary of Contents for Epson PR9
- Page 1 User’s Manual Of PR9...
- Page 2 Acknowledgements EPSON is a Trademark of Seiko Epson Corporation. IBM is a Trademark of International Business Machines Corporation. ProPrinter is a Trademark of International Business Machines Corporation. Oki is a Trademark of Oki Electric Industry Co., Ltd. Olivetti is a Trademark of Olivetti S.p.A..
-
Page 3: Safety Regulations
Safety Regulations The printer PR9 fulfill the safety regulations according to DIN EN 60950-1 for computer systems. The mains cable must be connected to a ground protected wall-socket. The selected voltage of the printer needs to fit to the local voltage. - Page 4 Safety Regulations Locating the Machine - The printer must be installed on a flat, vibration free surface. - Do not position the machine near air conditioning systems, heat sources or in direct sunlight. - Do not obstruct the printer's ventilation slots. - If the printer is installed in a cabinet, make sure that it has good ventilation so as to avoid overheating.
-
Page 5: Table Of Contents
TABLE OF CONTENTS Preface ............. . XII About this manual . - Page 6 Table of Contents 3.4.5 Option Horizontal Magnetic Stripe Reader / Writer Configure ... . 3-14 3.4.6 Oki Configure ..........3-15 3.4.7 IBM Configure .
- Page 7 Table of Contents 6. Technical Data ........... . . 6-1 Technical Specification .
- Page 8 Appendix D Epson LQ Emulation ........
-
Page 9: Preface
Preface About this Manual This manual covers the printer in combination with an interface module. The interface is an integral part of the printer, and the type of interface used significantly influences the behaviour or operation of the printer. The structure of this manual is such that the operator is led step-by-step through the various procedures. - Page 10 Quick reference for Oki Printer Emulation. C. IBM ProPrinter Emulation Commands Quick reference for IBM ProPrinter X24 and IBM ProPrinter II Emulation. D. EPSON LQ Emulation Commands Quick reference for EPSOM LQ Emulation. E. OLIVETTI Emulation Commands Quick reference for Olivetti Emulation.
-
Page 11: Getting Started
1. Getting Started 1.1 Unpacking Check each item against the check list detailed below. Contact your supplier immediately if any item is missing or damaged. 1.1.1 Delivery Contents Printer PR 9 Check each item against the check list detailed below. Contact your supplier immediately if any item is missing or damaged. -
Page 12: Requirements To The Location Of The Printer
Getting Started Requirements to the location of the printer Environmental Conditions This printer is designed to be installed in a typical office environment. We claim that customer must follow these operation explanation as below for printer’s well working status and safety of operator: S Install the printer in an area away from any heat source, air conditioner, or strong airflow. -
Page 13: A First Look At The Printer
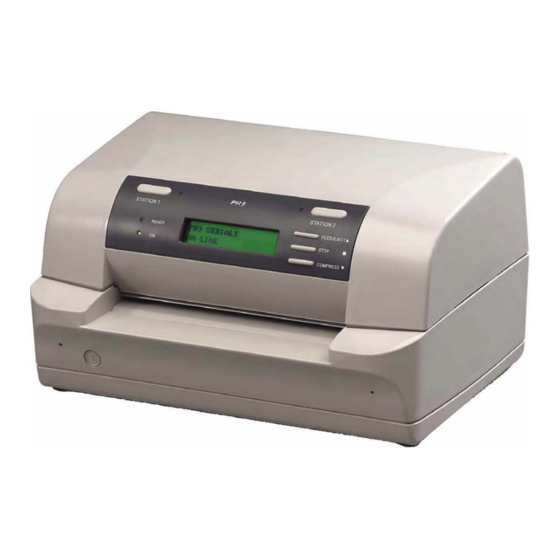
Getting Started 1.3 A First Look at the Printer 1.3.1 Front View - Top Cover (1) - Operator Panel (2) - Display (3) - Front Paper Feeding Platform (4) - Power Switch (5) - Bottom Frame (6) 1.3.2 Rear View - Serial Interface Connector (7) - Option Interface Board Slot (8) for detail see chapter 5 Options - Rear Paper Feeding Path (9) -
Page 14: Remove Transport Lock
Getting Started Remove Transport Lock Note: Please do not connect the printer s power cord at this moment, otherwise the printer may be damaged permanently. S Open the top cover (1) first. S Remove the black iron clip (2) and yellow label, from the print head carriage. S Take out the four foam-rubber cushions (3) which on the both sides of carriage. -
Page 15: Ribbon Installation
Getting Started 1.5 Ribbon Installation Take out the ribbon Cassette (1) from plastic wrapping bag. Installing: Power the printer on. - Remove the Ribbon Guide (6) by sliding down from the Ribbon Cassette (1). - Open top cover. - Swivel the green print unit lift handle (9) backwards to lift the print unit entirely. - Move print head (10) to the centre. - Page 16 Getting Started - Insert ribbon guide (6) into print head (10) and press it up to make sure that the two taps (12) on the ribbon guide (6) have been fixed. - Move the print head (10) to the right and left side until the ribbon is tight. - Swivel the green print unit lift handle (9) to let print unit back to its normal Position.
-
Page 17: Mains Connection And Power On
Getting Started 1.6 Mains Connection and Power On Before plug the power cord into the electrical wall outlet and power on the WARNING: printer, voltage rating indicated on the electrical data plate must be checked to correspond to the local mains. Power switch (3) must be in off position. - Page 18 Only ON indicator will be light after initialization has been finished. Any printing medium in the printer paper path will be ejected. Note: The display shows the message: PR9 SERIAL1 OLIVETTI *) ON-LINE *) The emulation (hear OLIVETTI) is dependent on your order.
-
Page 19: Print Test
MENU PRINTING PRINTING; WAITING... [STATION 2] MENU PRINTING FINISH; PRESS STAT2 [STATION 2] OFF-LINE MODE MENU PRINTING [STATION 2] and [COMPRESS PR9 SERIAL1 OLIVETTI (synchronously) ON-LINE Note: A sample of the Menu Printing you will find on the next page. -
Page 20: Selftest Printing Contents
Getting Started 1.7.2 Selftest Printing Contents For different menu setup configuration, there will be different printed out selftest printing contents. Concerning your printer’s menu configuration please refer to printer packing enclosed sheet. 1-10... -
Page 21: Dr. Grauert (Print A Letter)
If printing finished, printer will eject paper. PRINTING TEST FINISH, PRESS STAT2 [STATION 2] PRINTING TEST Dr. Grauert [STATION 2] and [COMPRESS PR9 SERIAL1 OLIVETTI (synchronously) ON-LINE Eilzustellung Norddeutsche Farbwerke KG Herrn Dr. Grauert Große Elbstraße 64 2000 Hamburg 4 Org. -
Page 22: Connection To The System
Getting Started 1.8 Connection to the System 1.8.1 Serial/Parallel Interface Switch the printer and the computer OFF. Connect the interface cable coming from the computer to the printer's standard RS232 C serial (1) port or to the optional Centronics Parallel (2) port. The following values are default settings, see chapter 1.7.2 Selftest Printing Contents. -
Page 23: Printer Operation
2. Printer Operation 2.1 Operator Panel The Operator Panel controls the set-up for communication with the host computer; - controls various parameter settings; - allows manual control of the paper handling; - gives information about the printer's status. 1 Two lines Liquid Crystal Display (LCD) Display The LCD Display (1) indicates the current status of the Printer. -
Page 24: Function Keys
Printer Operation Function Keys The five function keys operate differently in the on line or off line mode. Please refer to the following table for details when pressing the function keys. If the Printer is powered on, the display shows in line two ON-LINE and the green LED (2) lights. - Page 25 Printer Operation Function Key On-line Off-line Menu-Mode S stop printing and S change to On-line S O.k. or confirm the [STOP ] change to Off-line Mode and continue actual item Mode printing Menu-Mode = ACCEPT S activates or cancels S select the following [COMPRESS compression item in the highest...
-
Page 26: Liquid Crystal Display (Lcd)
Printer Operation Liquid Crystal Display (LCD) The LCD indicator gives information about the status of the Printer. In general it can be distinguished between: S ONLINE messages S OFFLINE messages S Menu Information The LCD has two lines with 20 characters per line. After power on the display shows for example: S in the upper line: the head line with the Printer name, the actual Interface, and the... -
Page 27: Load Print Medium
Printer Operation Load Print Medium The Printer can deal with single sheet, cheque, multi copy carbon paper, passbook and credit card. The Printer will start inserting the sheet automatically when the operator puts the print medium into paper feeding path. Users needn’t bother aligning the print medium with the left or right border of the Printer. -
Page 28: To Confirm A Macro Selection And Save The Settings
S After the saving procedure the Printer changed to the On-line Mode. 2.6 The PR 9 Emulations The printer PR 9 will be delivered with four different Emulations S OKI Emulation S EPSON LQ-1600k Emulation S IBM ProPrinter X24 Emulation S P.P.II Emulation Note: Depending on the selected Emulation you must also select the corresponding Printer Driver. -
Page 29: Configuring The Printer
Configuring the Printer Main Functions and Entry Points into the Menu The following Main Functions are available: S Menu Setup With this function you are able to modify the parameters of the printer configuration. For a detail information look at paragraph 3.4. S Menu Printing Printout of the Printer ID, a Needle Test and the parameter setting of the three Macros. - Page 30 OFF-LINE MODE MENU PRINTING [STOP # ] MENU PRINTING INSERT A4 SHEET Insert the paper MENU PRINTING PRINTING; WAITING... [STATION 2] MENU PRINTING FINISH; PRESS STAT2 [STATION 2] OFF-LINE MODE MENU PRINTING [STATION 2] and [COMPRESS PR9 SERIAL1 OLIVETTI (synchronously) ON-LINE...
-
Page 31: Standard Configuration
PMS #2002K: PMS #2003K: PMS #2004K: 205mm 205mm 205mm PMS #2005K: ERROR IGNORED IGNORED OLIVETTI CONFIGURE EMULATION: PR9 PR9 PR9 TOF PR40 LIKE: NO NO NO PRINTING MODE: CHINESE UNICODE UNICODE ASCII CHARACTER SET: OPTION 1 OPTION 1 OPTION 1... -
Page 32: Menu Structure
Configuring the Printer 3.2.1 Explanation of the printout on the previous pages In the headline behind the term VER2 the revision level of the printer's firmware can be found. Then, following the Printer Identification and in the next line a needle test. The next part of the printout is a list of the MACRO settings. -
Page 33: How To Use The Key In The Menu Mode
Configuring the Printer 3.3.1 How to use the Key in the Menu Mode If you want to enter a menu setup, you should press down [STATION 2] and [COMPRESS ] key simultaneously in on-line mode, entering the off-line mode and then selecting MENU SETUP (see also Paragraph 2.2 Function Keys). -
Page 34: Select Current Macro
Configuring the Printer 3.4.1 SELECT CURRENT MACRO The printer stores up to three user settings in MACRO 1 up to MACRO 3. Use the [STOP # ] key to activate this function. The active macro is displayed first. Press the [COMPRESS ] key until you find the macro for your application and selected it with the [STOP # ] key. - Page 35 Configuring the Printer CONFIGURE Parameter Option Explanation Note MODIFY RS1 CONFIG If YES configure also Baud Rate, bits/character, parity and stop bit. NO not used with CX EMULATION . BAUD RATE (RS1) 2400 Controls the speed of the Only displayed if 4800 data transfer.
- Page 36 Configuring the Printer CONFIGURE Parameter Option Explanation Note SPECIAL FORMS YES reduce the speed of paper handling, and add some special management to support special forms, e.g. thin paper, paper with different thickness. BIM DIRECTION UNIDIRECTION Select printing direction for BIDIRECTION graphics.
-
Page 37: Olivetti Configure
Configuring the Printer CONFIGURE Parameter Option Explanation Note PNS #2001K Digital filter (CX STB) Only displayed if PNS selectable: 200 SELECTION up to 1000 in is set to YES steps of 100 PNS #2002K reserved Only displayed if PNS SELECTION is set to YES PNS #2003K reserved... - Page 38 Configuring the Printer OLIVETTI CONFIGURE Parameter Option Explanation Note PRINTING MODE CHINESE Select the printing mode LATIN BIG-5 UNICODE HIGH SPEED PRINTING Selecting high speed printing mode. A4 SHEET NO = no draft mode. FANFOLD A4 SHEET = always draft PAPER mode when the paper is A4 Sheet.
- Page 39 Configuring the Printer OLIVETTI CONFIGURE Parameter Option Explanation Note PC CHARACTER SET 437(INT) Selecting your code page of Only displayed if PC in 210(GR) the PC character set. IBM Character Set is 220(E) selected. 850(LATIN 1) 851(GREEK) 852(LATIN 2) 855(CYRILLIC) 857(LATIN 5) 858(LATIN EURO) 860(P)
- Page 40 Configuring the Printer OLIVETTI CONFIGURE Parameter Option Explanation Note OLI CHARACTER SET ST15CND Selecting your code page of Only displayed if ST15CIBC the OLIVETTI character OLIVETTI in ST15DK/N set. Character Set is ST15IL selected. ST15F ST15UK ST15D ST15GR ST15INT ST15ITA ST15P ST15USSR ST15SDC...
- Page 41 PNS7015K of PR2E. right for the bottom limit, but the feed paper value exceed the bottom limit. And PR9 report ESC r X see Control Codes when it receive the command ESC j. PNS #2023K Selecting the special...
-
Page 42: Option Horizontal Magnetic Stripe Reader / Writer Configure
CONFIGURE OPTION HOR. MSRW CONFIGURE Parameter Option Explanation Note END SENTINEL Selecting the end control of Only for PR9/K with the magnetic record the version 1.07 or higher. DISPLACEMENT STANDARD Selecting the position Only for PR9/K with displacement of the the version 1.07 or... -
Page 43: Oki Configure
Configuring the Printer 3.4.6 OKI CONFIGURE The following items can be modified according to the OKI parameters. Note: In the different emulations the items shown are not equal. The option’s which are printed in bold indicate the actual setting. OKI CONFIGURE Parameter Option Explanation... - Page 44 Configuring the Printer OKI CONFIGURE Parameter Option Explanation Note CHARACTER DEFINITIONS DRAFT Select printing in draft or LQ mode. LR+CR YES: LF = LF + CR NO: LF = LF CR+LF NO: CR = CR YES: CR = CR + LF LEFT MARG.
-
Page 45: Ibm Configure
Configuring the Printer 3.4.7 IBM CONFIGURE The following items can be modified according to the IBM parameters. Note: In the different emulations the items shown are not equal. The option’s which are printed in bold indicate the actual setting. IBM CONFIGURE Parameter Option Explanation... - Page 46 Configuring the Printer IBM CONFIGURE Parameter Option Explanation Note IBM CHARACTER SET Select PC character set or PC continued with PC ISO character set. CHARACTER SET; ISO continued with ISO CHARACTER SET. PC CHARACTER SET 437(INT) Select the code page of the Only displayed if IBM 210(GR) PC character set.
- Page 47 10 CPI. INSERT MODE DIRECT Selecting the paper insert PR2 LIKE mode. DIRECT = PR9 insert paper directly when paper alignment. PR2 LIKE = PR9 insert paper when printing data is received, it is same procedure as PR2.
-
Page 48: Lq Configure
Configuring the Printer 3.4.8 LQ CONFIGURE The following items can be modified according to the LQ parameters. Note: In the different emulations the items shown are not equal. The option’s which are printed in bold indicate the actual setting. LQ CONFIGURE Parameter Option Explanation... - Page 49 Configuring the Printer LQ CONFIGURE Parameter Option Explanation Note CPI OF CHINESE FONT Select CPI of Chinese character. CPI OF WEST FONT Select CPI of ASCII character. CHARACTER SET Select PC character set or PC continued with PC ISO character set. CHARACTER SET;...
- Page 50 Configuring the Printer LQ CONFIGURE Parameter Option Explanation Note CR+LF YES: CR = LF + CR NO: CR = CR LEFT MARG. (1/60") To adjust the left margin -6 up to +6 more to left or right in units of 1/60" inch (about 4 mm). TOP MARG.
-
Page 51: Ibm 9068 Configure
Configuring the Printer 3.4.9 IBM 9068 CONFIGURE The following items can be modified according to the IBM 9006 parameters. Note: In the different emulations the items shown are not equal. The option’s which are printed in bold indicate the actual setting. IBM 9068 CONFIGURE Parameter Option... - Page 52 Configuring the Printer IBM 9068 CONFIGURE Parameter Option Explanation Note CPI OF COMPRESS 17.1 Setting CPI in condensed mode which command SI set. 17.1 = 17.1 CPI 18 = 18 CPI Defines the number of characters printed per inch. LINE LENGTH 82.5 Setting the line length in unit of character of 10 CPI.
-
Page 53: Language
Configuring the Printer 3.4.10 LANGUAGE The operator panel may display its messages in two languages. Select one out of the following: ENGLISH or CHINESE. 3.4.11 SAVE PARAMETERS Any desired changes to the default settings can be saved here. After power on the new settings are activated. -
Page 54: User S Guide
Configuring the Printer PRINTING TEST There are five test printouts available: S User s Guide S Chinese Characters S Ascii Character Set S Character Attributes S Dr. Grauert (print a letter) 3.5.1 USER S GUIDE In the User s Guide you will find detail information. So it is possible to print out the User s Guide by your self. -
Page 55: Adjustment
Configuring the Printer ADJUSTMENT Adjustment can be used to adjust and check some built-in parameters of the printer. It may enhance the print performance. Sometimes, it’s possible to improve the rationality of the page layout according to the practical environment. The printer has been adjusted corresponding to factory standard before it is delivered. -
Page 56: Left Margin
Configuring the Printer Key or action Two line display [STATION 2] OFF-LINE MODE Note: The adjustment is only active during power on. ADJUSTMENT [STATION 2] and [COMPRESS ] together SAVE PARAMETERS to leave the off-line mode ACCEPT ST2 = IGNORE The new values of adjustment to be default settings can be saved now or ignore the new values. -
Page 57: Top Margin
Configuring the Printer 3.6.3 TOP MARGIN The [FEED/EJECT ] key reduce the current value (top margin is moving upwards) and the [COMPRESS ] key enlarge the current value (moving downwards). After entering adjustment, you have to do the following steps: Key or action Two line display ADJUSTMENT... -
Page 58: Bidirectional Alignment Adjustment
If you want to leave the off-line mode press [STATION 2] and SAVE PARAMETERS [COMPRESS ] together. ACCEPT ST2 = IGNORE PR9 SERIAL1 OLIVETTI *) Because the parameters are saved, press [STATION 2] to ignore. ON-LINE *) The displayed line is depending on the selected Emulation. 3-30... -
Page 59: Print Photo Values
If you want to leave the off-line mode press [STATION 2] and SAVE PARAMETERS [COMPRESS ] together. ACCEPT ST2 = IGNORE PR9 SERIAL1 OLIVETTI *) Press [STATION 2] to ignore. ON-LINE *) The displayed line is depending on the selected Emulation. Sample of the Print Photo Values:... -
Page 60: Inquire Photo Values
Configuring the Printer 3.6.7 INQUIRE PHOTO VALUES The inquiry of the photosensor can be classified into S Photo Value-set and S Photo Value-actual. For both selections you can inquire 7 class photosensor values S Paper Intro1 S Paper Intro2 S Paper Alline 1 S Paper Alline 2 S Paper Alline 3 S Paper Alline 4... -
Page 61: Resume Hardware Parameters
If you want to leave the off-line mode press [STATION 2] and SAVE PARAMETERS [COMPRESS ] together. ACCEPT ST2 = IGNORE PR9 SERIAL1 OLIVETTI *) Press [STATION 2] to ignore. ON-LINE *) The displayed line is depending on the selected Emulation. DEBUG / TEST The Debug / Test parameter defines the execution of control sequences when Hex- printing has been activated. -
Page 62: Data Backup Mode
If you want to leave the off-line mode press [STATION 2] and [COMPRESS ] together. ACCEPT ST2 = IGNORE PR9 SERIAL1 OLIVETTI *) Press [STATION 2] to ignore. ON-LINE *) The displayed line is depending on the selected Emulation. 3.7.2 PRINTING SAVED DATA All before in the buffer of the printer saved data can be printed in HEX format with this function. -
Page 63: Printing Last Data
Configuring the Printer 3.7.3 PRINTING LAST DATA All last used and in the buffer of the printer saved data can be printed in HEX format with this function. Key or action Two line display DEBUG/TEST Select Debug / Test HEX PRINTING [COMPRESS HEX PRINTING PRINTING LAST DATA... -
Page 64: Directly Dump
Configuring the Printer 3.7.5 DIRECTLY DUMP The receiving data from the host will not stored first in the buffer of the printer. They will be printed directly after being received by the printer. Note: The directly printed data are printed without the two bytes first. So there is no indication of the length of the printed data. -
Page 65: Magnetic Test
Configuring the Printer 3.7.6 MAGNETIC TEST The Magnetic Test is for the optional Magnetic Stripe Reader / Writer. It works only for the PR 9/K with the firmware version 1.07 or higher. Note: The optional Magnetic Stripe Reader / Writer in a special version and not used in Europe. -
Page 66: Maintenance
Maintenance Preferred Material The following materials and cleaning lubricants are recommended when maintaining the printer: S Lint-free soft cloth S Light vacuum cleaner. Cleaning Surrounding Areas The user should clean the printer every six months. If you experience paper feed problems or if the print head carriage movement is hampered, cleaning should be carried out more often. -
Page 67: Remove The Ribbon
Maintenance 4.1.1 Remove the Ribbon - Power the printer on. - Open the top cover; the print head (2) is moving to the centre. - Step 1: swivel the green print unit lift handle (1) backwards to lift the print unit entirely. -
Page 68: Remove The Alignment Unit
Maintenance 4.1.2 Remove the Alignment Unit S Power the printer off S Open the Top Cover S Swivel the green print unit lift handle (see the photo on the page before) backwards to lift the print unit entirely. S Press both Levers (2) to the outside of the printer S Swivel the Alignment Unit up to about 45 . -
Page 69: Cleaning Procedure
Maintenance 4.1.3 Cleaning Procedure S Thoroughly brush and vacuum all accessible areas to any paper flock and dust. S Clean the black platen’s surface, the transport rollers. S Clean also the rollers on the lower side of the Alignment Unit. S Clean the covers and operator panel with damp, lint-free cloth. -
Page 70: Options
5. Options 5.1 Tractor Unit for Printer PR 9 One of the options for the printer PR 9 is a special Tractor Unit. With this unit the printer controls fanfold paper. 5.1.1 Assembly To use the PR 9 Tractor Unit, please make sure that the hard ware of PR 9, which you use, supports a Tractor Unit. - Page 71 Options 5.1.2 Disassembly S To unload a Tractor Unit from PR 9, first turn off the PR 9. S Press down each of the two levers (1) of the Tractor Unit. S Draw the Tractor Unit backward to get free the Tractor Unit from Printer PR 9. 5.1.3 Loading Paper S Roughly adjust the right tractor (2) to the paper width.
- Page 72 Options 5.1.4 Tear Off Edge and Park Position - In front of the Printer PR 9 you will find the Tear Off Edge (1). - The Park Position (2) of the PR 9 is at the rear.
-
Page 73: Key Functions
Options 5.1.5 Key Functions You can select PR 9 working mode as normal mode or as tractor working mode by pressing the keys if there is a Tractor Unit connected to the PR 9. Function Key On-line Mode Off-line Mode Normal Mode Tractor Mode Tractor Mode... -
Page 74: Function Key
Options Function Key On-line Mode Off-line Mode Normal Mode Tractor Mode Tractor Mode [FEED/EJECT the PR 9 ejects If there is no paper in the printer, In case fanfold paper paper then the PR 9 will try to insert positive-direction vertical paper once. -
Page 75: Corresponding Menu Setting
Options 5.1.6 Corresponding Menu Setting up Auto choose tractor working mode for each port (RS1 or CX). There are three items under CONFIGURE menus set: S MANUAL S TRACTOR S NORMAL 5.1.7 Configure Option Tractor OPTION TRACTOR Parameter Option Explanation TRACTOR MODE (RS1) TRACTOR TRACTOR: when this item is selected, PR 9 switches to... - Page 76 Options Optional Devices Following optional devices can be provided: S Serial interface port 2 S USB interface (in preparation) Add the second interface port Printer has basic configuration of one standard serial and parallel communication interface. At the rear of printer there is a second interface installation slot, this slot is be used in the standard Version by the parallel interface.
-
Page 77: Technical Data
Technical Data Technical Specification Printhead: S Number of needles: 24 S Needle Diameter: 0.25 mm S Needle Material: tungsten carbide S Needle alignment: staggered two lines, 12+12 S Matrix form: diamond-shaped S Multi-copy print: S Thermal protection: S Life of print head: >600 million dots/needle Font: S Latin character: HSD, Draft, Roman, Sans Serif, Italic, OCR-A, OCR-B, E13B. - Page 78 Technical Data Graphics Dot Matrix Density: S 9 needles: 60 DPI, 72 DPI, 80 DPI, 96 DPI, 120 DPI, 240 DPI S 24 needles: 60 DPI, 120 DPI, 180 DPI, 240 DPI, 360 DPI Machine ID: each machine has an unique ID Number. Diagnose: S Self-diagnose, S Hex print,...
-
Page 79: Document Specification And Technical Instructions
Technical Data Document Specification and Technical Instruction Disposable Form: S Single sheet or multi-copy paper S Bill (card) S Horizontal or vertical passbook Caution: If the print media do not accord to the above character, you have to discriminate it carefully before you use it. Printing Media Character: S Input media handwork... - Page 80 Technical Data Document S Single and multi-copy Sheet: S Max width 245 mm S Min width 80 mm S Suggested max length 297 mm S Permitted max length 450 mm S Single sheet weight: 45 g - 160 g/m² (when you set the SPECIAL FORM to YES, it can print thin paper with above 35 g/m²) S Thickness of single sheet...
-
Page 81: Interface Description
Interface Description Serial Interface Standard PR 9 has one asynchronous V24 RS232C serial interface with 9 cores connected to the host. Technical Character: The following parameters can be modified in SET-UP: S BAUD RATE: 2400, 4800, 9600, 19200 (bit/s) S BITS/CHARACTER: 7 or 8 bits S STOP BITS: 1 or 2 bits... -
Page 82: Parallel Interface
Interface Description Parallel Interface The PR 9 parallel interface according to IEEE 1284-1994 standard, support SPP, nibble, byte protocol. Instruction of parallel interface as follows: Technical Character: S Compatibility: CENTRONICS S Logic circuit: S Data format: 7 or 8 bits S Logic level: 0 - 5 V S Connector:... -
Page 83: Firmware Update
Firmware Update You will be advised to update the printer’s firmware irregularly to strengthen PR 9’s functions and will offer the necessary firmware file to users (usually the firmware file is named flash.mot). To update PR 9’s firmware please follow the steps below: S Copy the firmware file flash.mot to a Personal Computer. - Page 84 Firmware Update S Now the downloading process will begin. UPDATE BUSY S During the downloading process PR 9’s LCD will display how many bytes the printer has received. PROGRAMMING 13BB0 S The whole downloading process will last about three minutes. After updating is finished successfully, LCD shows: UPDATE O.K.
-
Page 85: Troubleshooting
Troubleshooting How to Use This Section There are some examples, which will help you to solve the printer troubles that may occur during use. Warning: If there are mechanical or electrical troubles, don’t repair by yourself. Ask your service centre for help. If you cannot find the troubles in the following pages, please contact your local service office for technical support. -
Page 86: Ribbon Or Carriage-Related Problems
Troubleshooting Ribbon or Carriage-related Problems S Ribbon Problems S Make sure that the ribbon is: S Stretched correctly; S Not worn thin or dry; S Not torn or damaged in any other way; S Not jammed. S If the ribbon box is damaged, replace it with a new one. S Carriage does not move smoothly S Examine the paper pathway. -
Page 87: Print-Related Problems
Troubleshooting Print-related Problems Note: The PR 9 printer has the function of overheating protection. If overheating protection will be active the printer may slow down printing speed or even stop printing after a long time printing (until printhead’s temperature returns normal). This function can prevent print head from being destroyed if print head is over heated. -
Page 88: No Printout
Troubleshooting No Printout S Self-test printout does not start S Make sure that you have closed the cover. S Check if paper is loaded in the printer. S Check if ribbon cassette is installed correctly on printer. S Printing does not start S Check if the physics and logic connection between printer and host system are correct and at least one LED should be light. -
Page 89: Appendix A Code Pages
Code Pages Appendix A Code page of PR 9 Under OLIVETTI Emulation: set code page by changing menu configuration or command ESC [ nnn on line. OLIVETTI Character IBM/PC Character Set PC Character Set ISO Character Set “000” International “700” PC-437 International “600”... - Page 90 Appendix A Code Pages A.1 Olivetti...
- Page 91 Appendix A Code Pages...
- Page 92 Appendix A Code Pages...
- Page 93 Appendix A Code Pages...
- Page 94 Appendix A Code Pages...
- Page 95 Appendix A Code Pages...
- Page 96 Appendix A Code Pages...
- Page 97 Appendix A Code Pages...
- Page 98 Appendix A Code Pages A-10...
- Page 99 Appendix A Code Pages A-11...
- Page 100 Appendix A Code Pages A-12...
- Page 101 Appendix A Code Pages A-13...
- Page 102 Appendix A Code Pages A-14...
- Page 103 Appendix A Code Pages A-15...
- Page 104 Appendix A Code Pages OLIVETTI CHAR SET ST15 USSR A-16...
- Page 105 Appendix A Code Pages A-17...
- Page 106 Appendix A Code Pages A-18...
- Page 107 Appendix A Code Pages A-19...
- Page 108 Appendix A Code Pages A-20...
- Page 109 Appendix A Code Pages A-21...
- Page 110 Appendix A Code Pages A-22...
- Page 111 Appendix A Code Pages A-23...
-
Page 112: Pc Character Sets
Appendix A Code Pages A.2 PC Character Sets A-24... - Page 113 Appendix A Code Pages A-25...
- Page 114 Appendix A Code Pages A-26...
- Page 115 Appendix A Code Pages A-27...
- Page 116 Appendix A Code Pages A-28...
- Page 117 Appendix A Code Pages A-29...
- Page 118 Appendix A Code Pages A-30...
- Page 119 Appendix A Code Pages A-31...
- Page 120 Appendix A Code Pages A-32...
- Page 121 Appendix A Code Pages A-33...
- Page 122 Appendix A Code Pages A-34...
- Page 123 Appendix A Code Pages A-35...
- Page 124 Appendix A Code Pages A-36...
- Page 125 Appendix A Code Pages A-37...
- Page 126 Appendix A Code Pages A-38...
- Page 127 Appendix A Code Pages A-39...
- Page 128 Appendix A Code Pages A-40...
- Page 129 Appendix A Code Pages A-41...
- Page 130 Appendix A Code Pages A-42...
- Page 131 Appendix A Code Pages A-43...
- Page 132 Appendix A Code Pages A-44...
- Page 133 Appendix A Code Pages A-45...
- Page 134 Appendix A Code Pages A-46...
-
Page 135: Iso Character Sets
Appendix A Code Pages A.3 ISO Character Sets A-47... - Page 136 Appendix A Code Pages A-48...
- Page 137 Appendix A Code Pages A-49...
- Page 138 Appendix A Code Pages A-50...
- Page 139 Appendix A Code Pages A-51...
- Page 140 Appendix A Code Pages A-52...
- Page 141 Appendix A Code Pages A-53...
- Page 142 Appendix A Code Pages A-54...
- Page 143 Appendix A Code Pages A-55...
-
Page 144: Ocr-A Character Sets
Appendix A Code Pages A.4 OCR-A Character Sets A-56... - Page 145 Appendix A Code Pages A-57...
-
Page 146: Ocr-B Character Sets
Appendix A Code Pages A.5 OCR-B Character Sets A-58... - Page 147 Appendix A Code Pages A-59...
- Page 148 OKI-Emulation Commands Appendix B Characters used in control functions appear in monospaced type. The table below explains some of the conventions used. A pair of numbers separated by a slash ( / ) character indicates Column/Row notation. This notation refers to the location of a character in a standard code table, such as ASCII. (example: 1/B = 1B is the hex-code for Escape) Spaces appear between characters in sequence for clarity;...
-
Page 149: Command Index
Appendix B OKI-Emulation Commands B.1 Command Index (By Hex Code) NOP in column Desription means the command P will be ignored. That means, all Note: bytes of this command are discarded. FS commands are valid only in Chinese mode. ASCII Code Hex Code Description Backspace... - Page 150 Appendix B OKI-Emulation Commands ASCII Code Hex Code Description ESC ' 1B 27 Set ANK Mode to Katakana Mode ESC ( n1 n2 1B 28 n1 n2 Set Left Margin ESC ( H 1B 28 48 Reset CHINA Working Mode ESC ) n1 n2 1B 29 n1 n2 Set Right Margin...
- Page 151 Appendix B OKI-Emulation Commands ASCII Code Hex Code Description ESC T 1B 54 Set Eject direction of single Document ESC U 1B 55 Set Double Width Print Mode ESC V 1B 56 ESC X 1B 58 Set Underline Print ESC Y 1B 59 Reset Underline Print ESC [...
- Page 152 Appendix B OKI-Emulation Commands ASCII Code Hex Code Description FS N 1C 4E Set Superscript Mode FS O 1C 4F Reset Superscript Mode FS P 1C 50 Set Subscript Mode FS Q 1C 51 Reset Subscript Mode FS R 1C 52 Set Superscript/ Subscript Mode FS S 1C 53...
-
Page 153: Command Description
Appendix B OKI-Emulation Commands B.2 Command Description (by function) When you select the EMULATION: IBM ProPrinter II or IBM ProPrinter X24 parameter in the setup, the machine interprets all the commands of the IBM ProPrinter ' s, grouped by their functions, as follows: S Basic Operations S Margins S Line Feed... - Page 154 Appendix B OKI-Emulation Commands Carriage Return This command causes the current line buffer to print and position the Print head to the left margin. Hex: (0D)H Decimal: (13)D Octal: (15)O DLE B Printer Soft Reset This command code sets all the parameters to the default conditions. (10 42)H Decimal (16 66)D...
-
Page 155: Margins
Appendix B OKI-Emulation Commands B.2.2 Margins S ESC F n ... : Set page length S ESC 5: Set Top of Form S ESC ( n : Set Left Margin S ESC ) n : Set Right Margin ESC F n1 n2 Set Page Length This command code specifies page length to (n1 &... -
Page 156: Line Feed
Appendix B OKI-Emulation Commands B.2.3 Line Feed S ESC T n : Set eject direction of single document S ESC VT n ... : Line feed lines S ESC % 9 n ... : Set line spacing as n/120 inch S LF : Line feed S SO :... - Page 157 Appendix B OKI-Emulation Commands Line Feed Line feed to next print line (0A)H Decimal (10)D Octal (12) This command code causes the current characters in print buffer to print and causes the presentation position to move vertically to the next printing line. The default line pitch is determined by menu and also line pitch can be changed by follow command codes: ESC 6, ESC 8 and ESC % 9 n1 n2.
-
Page 158: Print Position
Appendix B OKI-Emulation Commands B.2.4 Print Position S ESC % 3 n1 n2 : Forward horizontal skip S ESC % 4 n1 n2 : Backward horizontal skip S ESC % 5 n : Forward vertical skip S ESC % 8 n : Backward vertical skip ESC % 3 n1 n2 Forward Horizontal Skip... - Page 159 Appendix B OKI-Emulation Commands ESC % 6 n1 n2 CR to a Specified Position This command code specified the presentation position to (n1 * 256 + n2)/180 inch. (1B 25 36 n1 n2)H Decimal (27 37 54 n1 n2)D Octal (33 45 66 n1 n2)O (n1 * 256 + n2)/180 right margin...
-
Page 160: Print Pitches
Appendix B OKI-Emulation Commands B.2.5 Print Pitches S ESC k : Set Shift JIS working mode S ESC 6 : Set Line Pitch to 6 LPI S ESC 8 : Set Line Pitch to 8 LPI S ESC < : Set character 50% condense S ESC >... - Page 161 Appendix B OKI-Emulation Commands ESC < Set Character 50% Condense This command code sets characters 50% condense, all printable characters after this code will be compressed 50% and horizontal skip steps will be halved. This compression will keep valid before horizontal extension command code or code ESC > received. (1B 3C)H Decimal (27 60)D...
-
Page 162: Print Attributes
Appendix B OKI-Emulation Commands B.2.6 Print Attributes S ESC B : Set Elite high speed ANK mode S ESC D : Set high speed mode S ESC E : Set Elite high density ANK mode S ESC H : Set Pica high density ANK mode S ESC I : Set high density print mode S ESC N :... - Page 163 Appendix B OKI-Emulation Commands ESC E Set Elite High Density ANK Mode This command code sets a sub mode, Elite high density print mode. This sub mode is only valid when working mode is WESTERN. Under this sub mode all western characters will be printed with the pitch of 12 CPI and the quality of NLQ.
- Page 164 Appendix B OKI-Emulation Commands ESC O Set Low Noise Print Mode This command code specifies the print quality to draft. (1B 4F)H Decimal (27 79)D Octal (33 117)O ESC R Reset Double Width Print Mode This command code resets double width print mode. (1B 52)H Decimal (27 82)D...
- Page 165 Appendix B OKI-Emulation Commands ESC Y Reset Underline Print This command code resets underline printing. (1B 59)H Decimal (27 89)D Octal (33 131)O ESC e Set Triple Height Print Mode This command code sets triple heigh print mode. Code ESC f can reset this mode. (1B 65)H Decimal (27 101)D...
- Page 166 Appendix B OKI-Emulation Commands ESC I Set Emphasized Print Mode This command code starts emphasized print mode. (1B 69)H Decimal (27 105)D Octal (33 151)O ESC j Reset Emphasized Print Mode This command code resets the emphasized print mode. (1B 6A)H Decimal (27 106)D Octal...
- Page 167 Appendix B OKI-Emulation Commands ESC % U Set Unidirectional Print Mode This command code sets print mode to unidirectional print, code ESC % B can change this mode. (1B 25 55)H Decimal (27 37 85)D Octal (33 45 125)O ESC [ Set Double Height Print Mode This command code sets double height print mode.
-
Page 168: Tabulation
Appendix B OKI-Emulation Commands B.2.7 Tabulation S ESC L : Set horizontal tab stops S DC4 : Set Vertical Tabulation S HT : Horizontal tabulation ESC L Set Horizontal Tab Set horizontal tab stops (1B 4C)H Decimal (27 76)D Octal (33 114)O ……... -
Page 169: Graphics
Appendix B OKI-Emulation Commands D.2.8 Graphics S ESC % 1 n1 n2 ... : 180 DPI BIM print S ESC % 2 n1 n2 ... : 90 DPI BIM print ESC % 1 n1 n2 180 DPI BIM Print This command code specifies 180 DPI, 24 dot/column BIM print. (1B 25 31 n1 n2)H Decimal (27 37 49 n1 n2)D... -
Page 170: Bar Code Mode
Appendix B OKI-Emulation Commands B.2.9 Bar Code Mode S ESC x n ... : Set Bar Code mode S ESC y ... NUL NUL: Bar Code print S ESC z n : Set / reset E13B code ESC x n1 n2 n3 n4 n5 n6 n7 Set Bar Code Parameters This code sets parameters for bar code printing. - Page 171 Appendix B OKI-Emulation Commands ESC z n Set/Reset E13B Code This command code can set and reset E13B Code mode. (1B 7A)H Decimal (27 122)D Octal (33 172)O E13B Code mode is only valid when working mode is SHIFT JIS mode; Note: while E13B Code mode is valid, two byte code 0xa6 0xa1, 0xa6 0xa2, 0xa6 0xa3, 0xa6 0xa4, 0xa6 0xa5, 0xa6 0xa6, 0xa6 0xa7, 0xa6 0xa8, 0xa6 0xa9,...
-
Page 172: Other Functions
Appendix B OKI-Emulation Commands B.2.10 Other Functions S CAN : Clear print buffer S ESC I : Set Western working mode S ESC & : Set ANK mode to Hiragana mode S ESC ' : Set ANK mode to Katakana mode S ESC ( H : Reset CHINA working mode S ESC $ @ :... - Page 173 Appendix B OKI-Emulation Commands ESC ' Set ANK Mode to Katakana Mode This command code sets the ANK sub mode to katakana mode,. Command code ESC & can change this mode. (1B 27)H Decimal (27 39)D Octal (33 47)O ANK mode is only valid when working mode is WESTERN mode. Note: Katakana mode is the default ANK sub mode! ESC ( H...
- Page 174 Appendix B OKI-Emulation Commands ESC $ @ Set CHINA Mode This command code sets printer working mode to CHINA mode. (1B 24 40)H Decimal (27 36 64)D Octal (33 44 100)O Code ESC ( H and ESC k can change this working mode. In this mode all characters, except single byte command codes, will be regarded as two byte code.
- Page 175 This command code causes the current characters in print buffer to print and changes current emulation. (1B 5E n)H Decimal (27 94 n)D Octal (33 136 n)O n = 0 : Change to IBM Emulation n = 1 : Change to OLIVETTI Emulation n = 2 : Change to EPSON LQ Emulation B-28...
-
Page 176: Ignored Commands
Appendix B OKI-Emulation Commands B.2.11 Ignored Commands S DC1 On line S DC3 Off line S ESC A : S ESC G n ... : S ESC M : S ESC S : S ESC V : S ESC b : S VT Vertical Tabulation On Line... - Page 177 Appendix B OKI-Emulation Commands ESC M This command code does nothing in PR 9. (1B 4D)H Decimal (27 77)D Octal (33 115)O ESC S This command code does nothing in PR 9. (1B 53)H Decimal (27 83)D Octal (33 123)O ESC V This command code does nothing in PR 9.
-
Page 178: Chinese Mode
Appendix B OKI-Emulation Commands D.2.12 Chinese Mode S FS $ n : Set Chinese Character’s Spacing S FS 2 n1 n2 User Defined Character Download S FS B n Set / Reset OCR Character Print mode S FS J Set Character Left Rotate 90 degree Print S FS K Reset Character Left Rotate 90 degree Print S FS N... - Page 179 Appendix B OKI-Emulation Commands FS B n Set / Reset OCR Character Print mode This code can set or reset OCR Character print mode. This command code is a new code and is only valid in PR 9. Note: (1C 42 n)H Decimal (28 66 n)D Octal...
- Page 180 Appendix B OKI-Emulation Commands Position (16) Characters Position (16) Characters Byte1 Byte2 Byte1 Byte2 ‡ ƒ ÷ „ ² ƒ l „ I Position (16) Characters Position (16) Characters Byte1 Byte2 Byte1 Byte2 < > Position (16) Characters Position (16) Characters <...
- Page 181 Appendix B OKI-Emulation Commands FS N Set Superscript Mode This command code sets superscript mode. (1C 4E)H Decimal (28 78)D Octal (34 116)O This mode is valid when working mode is SHIFT JIS mode or when working Note: mode is CHINA mode. FS O Reset Superscript Mode This command code resets superscript mode.
- Page 182 Appendix B OKI-Emulation Commands FS R Set Superscript / Subscript Mode This command code sets superscript/subscript mode. (1C 52)H Decimal (28 82)D Octal (34 122)O This mode is valid when working mode is SHIFT JIS mode or when working Note: mode is CHINA mode.
- Page 183 Appendix B OKI-Emulation Commands FS p Set Chinese Character Double Width Mode This command code sets Chinese character double width mode. (1C 70)H Decimal (28 112)D Octal (34 160)O This mode is valid when working mode is SHIFT JIS mode or when working Note: mode is CHINA mode.
- Page 184 Appendix B OKI-Emulation Commands FS t Set Half Corner Character Rotation Forbidden This command code clears the Half Corner character’s rotational attribute, which made by code FS J. So after this code no Half Corner character is allowed to rotate, until the printer encounter code FS u.
-
Page 185: Ignored Commands In Chinese Mode
Appendix B OKI-Emulation Commands D.2.13 Ignored Commands in Chinese Mode S FS % n : S FS 0 n1 n2 S FS g S FS h S FS v FS % n This command code does nothing in PR 9. (1C 25 n)H Decimal (28 37 n)D... - Page 186 Appendix B OKI-Emulation Commands FS v This command code does nothing in PR 9. (1C 76 n1)H Decimal (28 118 n1)D Octal (34 166 n1)O B-39...
-
Page 187: Hex - Decimal Conversion Table
Appendix B OKI-Emulation Commands Hex - Decimal Conversion Table 96 112 128 144 160 176 192 208 224 240 97 113 129 145 161 177 193 209 225 241 98 114 130 146 162 178 194 210 226 242 99 115 131 147 163 179 195 211 227 243 84 100 116 132 148 164 180 196 212 228 244 85 101 117 133 149 165 181 197 213 229 245 86 102 118 134 150 166 182 198 214 230 246... - Page 188 IBM ProPrinter X24 and IBM ProPrinter II Commands Appendix C Characters used in control functions appear in monospaced type. The table below explains some of the conventions used. A pair of numbers separated by a slash ( / ) character indicates Column/Row notation. This notation refers to the location of a character in a standard code table, such as ASCII.
-
Page 189: Command Index
Appendix C IBM ProPrinter X24 and IBM ProPrinter II Commands C.1 Command Index This table shows the IBM ProPrinter X24 and IBM ProPrinter II Emulation commands classified by Hex Code. Mnemonic Hex Code Function Backspace Horizontal tabulation Line feed forward Vertical tabulation Form feed Carriage return... - Page 190 Appendix C IBM ProPrinter X24 and IBM ProPrinter II Commands Mnemonic Hex Code Function ESC D 1B 44 ... Horizontal tabulation program ESC E 1B 45 Bold face ESC F 1B 46 Cancel bold face ESC G 1B 47 Double-pass printing ESC H 1B 48 Cancel double-pass printing...
-
Page 191: Basic Operations
Appendix C IBM ProPrinter X24 and IBM ProPrinter II Commands C.2 Command Description (by function) When you select the EMULATION: IBM Proprinter X24 or IBM ProPrinter II parameter in the setup, the machine interprets all the commands of the IBM ProPrinter X24 and IBM ProPrinter II printer, grouped according to their codes, as follows: S Basic Operations S Margins... -
Page 192: Line Feed
Appendix C IBM ProPrinter X24 and IBM ProPrinter II Commands Form Feed Hexadecimal code: 0C Prints the current line and advances the document to the next page. If the length of form is not long enough, ejects the form from the front feeder. If the parameter LF + CR = YES has been selected from the Set-Up, the printing position is set at the left margin. -
Page 193: C.2.2 Margins
Appendix C IBM ProPrinter X24 and IBM ProPrinter II Commands C.2.2 Margins S ESC 4 : Top of form S ESC C n : Form length as no. of lines S ESC C NUL n : Form length in inches S ESC N n : Bottom of form S ESC O :... - Page 194 Appendix C IBM ProPrinter X24 and IBM ProPrinter II Commands ESC N n Bottom of Form Hexadecimal code: 1B 4E n n = 0 - 255 Defines the number of line feeds (of the current value) not to be printed (to be skipped) between the end of the current page and the start of the next (bottom margin + top of form).
-
Page 195: C.2.3 Line Feed
Appendix C IBM ProPrinter X24 and IBM ProPrinter II Commands C.2.3 Line feed S ESC 0 : Line feed = 1/8" S ESC 1 : Line feed = 7/72" S ESC 2 : Line feed = 1/6" or Activate ESC A n S ESC 3 n : Line feed = n/216"... - Page 196 Appendix C IBM ProPrinter X24 and IBM ProPrinter II Commands ESC 3 n (IBM ProPrinter II) Line Feed - n/216" Hexadecimal code: 1B 33 n n = 1 - 255 Sets the n/216" (0,1176 x n mm) line feed. This is the line feed recommended for graphic printing (BIM). If programmed to 24/216", it ensures that the various lines in 8-needle graphic printing meet perfectly.
- Page 197 Appendix C IBM ProPrinter X24 and IBM ProPrinter II Commands ESC J n (IBM ProPrinter X24) One Line Feed of n/216" or n/180" Hexadecimal code: 1B 4A n n = 1 - 255 Prints the buffer and feeds the paper line feed.If the parameter AGM : NO has been selected in the SETUP , the paper line feed by n/216";...
-
Page 198: C.2.4 Print Pitches
Appendix C IBM ProPrinter X24 and IBM ProPrinter II Commands C.2.4 Print Pitches S DC2 : 10 cpi (Pica) S ESC : : 12 cpi (Elite) S ESC P n: Proportional spacing S FS S n1 n2 : Adjust characters space S SI: 16.6/17.1 cpi (Condensed) 10 cpi (Pica) - Page 199 Appendix C IBM ProPrinter X24 and IBM ProPrinter II Commands FS S n1 n2 Adjust characters space Hexadecimal code: 1B 50 n1 n2 n1n2 = 00 - 23 The command adjust the characters space to the current characters pitch starting from the current position.
-
Page 200: C.2.5 Print Attributes
Appendix C IBM ProPrinter X24 and IBM ProPrinter II Commands C.2.5 Print Attributes S DC4 : Cancel double width (one line) S ESC E : Bold face S ESC F : Cancel bold face S ESC G : Double-pass printing S ESC H : Cancel double-pass printing S ESC I n :... - Page 201 Appendix C IBM ProPrinter X24 and IBM ProPrinter II Commands ESC H Cancel Double-Pass Printing Hexadecimal code: 1B 48 Cancels printing selected by ESC G. ESC I n (IBM ProPrinter X24) Select Print Mode Hexadecimal code: 1B 49 n Selects the print mode and character set, according to the decimal value of parameter n: Print Mode Draft 10 cpi sans-serif (standard) Draft 12 cpi (derived from Draft 10 cpi)
- Page 202 Appendix C IBM ProPrinter X24 and IBM ProPrinter II Commands ESC S n Superscript/Subscript Hexadecimal code: 1B 53 n Sets the printing of small characters in the current pitch. It is obtained by a single printing pass. Superscript is printed using the top five needles of the print head and subscript with the bottom five needles of the normal character matrix.
- Page 203 Appendix C IBM ProPrinter X24 and IBM ProPrinter II Commands ESC - n Underline Hexadecimal code: 1B 2D n Activate/deactivate underline. n = 1 (1 or 49)D: activate n = 0 (0 or 48)D: deactivate Underline also the SPACE character, but not horizontal tabulations. Semigraphic characters cannot be underlined.
- Page 204 Appendix C IBM ProPrinter X24 and IBM ProPrinter II Commands ESC [ @ n1 n2 m1 m2 m3 m4 Double Height/Width Hexadecimal code: 1B 5B 40 04 00 00 00 m3 m4 Sets double height and / or double width for the characters printed, with or without changing the line feed.
- Page 205 Appendix C IBM ProPrinter X24 and IBM ProPrinter II Commands ESC [ A n1 n2 m1 m2 m3 m4 Triple Height/Width Hexadecimal code: 1B 5B 41 04 00 00 00 m3 m4 Sets Triple height and/or double width for the characters printed, with or without changing the line feed.
-
Page 206: Tabulation
Appendix C IBM ProPrinter X24 and IBM ProPrinter II Commands C.2.6 Tabulation S ESC B ... : Vertical tabulation program S ESC D ... : Horizontal tabulation program S ESC d ... : Relative Forward Horizontal Movement S ESC R : Cancel tabulation stops ESC B n1..n254 k1..k64 NUL Vertical Tabulation Program... - Page 207 Appendix C IBM ProPrinter X24 and IBM ProPrinter II Commands ESC d n1 n2 Relative Forward Horizontal Movement Hexadecimal code: 1B 64 n1 n2 where n1 = 00 - FF n2 = 00 - FF Moves the current horizontal position to the right at a distance specified in the n1 and n2 parameters.
-
Page 208: Graphics
Appendix C IBM ProPrinter X24 and IBM ProPrinter II Commands C.2.7 Graphics The printer can operate in Bit Image Mode (bit map printing), to create illustrations and diagrams. In this way, the image is created by printing each byte received as a vertical line of 8 dots. - Page 209 Appendix C IBM ProPrinter X24 and IBM ProPrinter II Commands Calculation of the parameters for the BIM data As the printer cannot recognize ANY command in the BIM data, before printing the graphics, you must define exactly the number of BIM data items that will follow. The graphic commands do this by means of two parameters, which can be calculated in the same way for all resolutions.
- Page 210 Appendix C IBM ProPrinter X24 and IBM ProPrinter II Commands ESC Y n1 n2 ... Double Resolution BIM Hexadecimal code: 1B 59 n1 n2 .. Sets double resolution graphics (120 dots per inch), at normal speed, for a data string the length of which is defined by parameters n1 and n2.
-
Page 211: Alternate Graphics Mode (Agm
(ProPrinter X24) As well as the graphic modes described in the previous section, the printer can also print Epson LQ-800/LQ-1000 compatible graphics, using the Alternate Graphics Mode (AGM) feature. When the Alternate Graphics Mode feature is selected during the SETUP (AGM : YES), the values of command codes ESC 3, ESC J, and ESC A are altered with respect to their standard functions, and the command code ESC * is activated. - Page 212 Appendix C IBM ProPrinter X24 and IBM ProPrinter II Commands ESC J n (IBM ProPrinter X24) One line feed of n/180" (for graphics) Hexadecimal code: 1B 4A n n = 1 - 255 Prints the buffer and feeds the paper line feed.If the parameter AGM : NO has been selected in the SETUP , the paper line feed by n/216";...
-
Page 213: Downloading Customized Characters (Dll
Appendix C IBM ProPrinter X24 and IBM ProPrinter II Commands C.2.8 Downloading Customized Characters (DLL) If you like, you can create "your own" set of characters, and use it in place of the printer's character set. You can redesign all 256 characters, or just some of them, and load them into the printer's memory (DLL = Down Line Loading) using the command ESC = ... - Page 214 Appendix C IBM ProPrinter X24 and IBM ProPrinter II Commands The other parameters define the attributes of the new character and the arrangement of the dots in the character matrix. They must be repeated for each DLL character. The sequence ESC = NUL NUL (or print power-off) clears all DLL characters from the printer's memory and restores the standard character set.
- Page 215 Appendix C IBM ProPrinter X24 and IBM ProPrinter II Commands Parameters n1 and n2 These two parameters indicate the total number of bytes that will follow in the sequence. They are calculated as follows: n2 = whole number of (t divided by 256) n1 = remainder of (t divided by 256) where t = (number_of_characters x 13) + 2 Example:...
- Page 216 Appendix C IBM ProPrinter X24 and IBM ProPrinter II Commands Parameter b indicates whether proportional spacing is used or not. The values of the bits of parameter b select the following features: Value Function ignored Binary number indicates the column number of the matrix where the 6 - 4 variable character starts (max value = 7).
- Page 217 Appendix C IBM ProPrinter X24 and IBM ProPrinter II Commands The customized character (up arrow) is loaded into the printer's memory by the following escape sequence: (27)D; (61)D; (15)D; (0)D; (20)D; (64)D; (128)D; (0)D; (32)D; (0)D; (64)D; (0)D; (255)D; (0)D; (64)D; (0)D; (32)D; (0)D; (0)D . DLL in NLQ DLL characters can also be defined in NLQ SANS SERIF font.
-
Page 218: Other Functions
Appendix C IBM ProPrinter X24 and IBM ProPrinter II Commands C.2.9 Other Functions CAN : Clear print buffer DC1 : Activate printer-system connection DC3 : Deactivate printer-system connection ESC 5 n : Automatic line feed after CR ESC 6 : Table 2 of character set ESC 7 : Table 1 of character set... - Page 219 Appendix C IBM ProPrinter X24 and IBM ProPrinter II Commands ESC 6 Table 2 of Character Set Hexadecimal code: 1B 36 Selects table 2 of the character set with the complete set of national characters (default setting). It takes priority over the setting made in the SET-UP. ESC 7 Table 1 of Character Set Hexadecimal code: 1B 37...
- Page 220 Appendix C IBM ProPrinter X24 and IBM ProPrinter II Commands ESC BEL E n Change Emulation Hexadecimal code: 1B 07 45 n With n=08 (Hex), change to Olivetti emulation (PR2 or PR40+) previously set in setup. With n=09 (Hex), change to OKI emulation. With n=0A (Hex), change to LQ emulation.
-
Page 221: Hex - Decimal Conversion Table
Appendix C IBM ProPrinter X24 and IBM ProPrinter II Commands C.3 Hex - Decimal Conversion Table 96 112 128 144 160 176 192 208 224 240 97 113 129 145 161 177 193 209 225 241 98 114 130 146 162 178 194 210 226 242 99 115 131 147 163 179 195 211 227 243 84 100 116 132 148 164 180 196 212 228 244 85 101 117 133 149 165 181 197 213 229 245... - Page 222 EPSON LQ-Emulation Commands Appendix D Characters used in control functions appear in monospaced type. The table below explains some of the conventions used. A pair of numbers separated by a slash ( / ) character indicates Column/Row notation. This notation refers to the location of a character in a standard code table, such as ASCII.
-
Page 223: D.1 Command Index
Appendix D EPSON LQ-Emulation Commands D.1 Command Index (By Code) Ignored in column FUNCTION means the command is treated as NOP, that means, Note: according to defined command format all bytes of this command are discarded. FS extension commands are valid only in Chinese mode. - Page 224 Enable printing of upper control codes (Ignored) ESC 7 1B 37 Enable upper control codes (Ignored, upper control codes are always enabled in PR9) ESC : n1 n2 n3 1B 3A n1 n2 n3 Copy ROM to RAM (Ignored) ESC <...
- Page 225 Appendix D EPSON LQ-Emulation Commands COMMAND HEX VALUE FUNCTION ESC @ 1B 40 Initialize printer ( without HW movement) ESC A n 1B 41 n Set n/60-inch line spacing ESC B n …n 1B 42 n …n Set vertical tabs...
- Page 226 Appendix D EPSON LQ-Emulation Commands COMMAND HEX VALUE FUNCTION ESC c n1 n2 1B 63 n1 n2 Ignored ESC g 1B 67 Select 15-cpi for ASCII ESC j n 1B 6A n Reverse paper feed ESC k n 1B 6B n...
- Page 227 Appendix D EPSON LQ-Emulation Commands COMMAND HEX VALUE FUNCTION FS b n 1C 62 n Ignored FS c n1 n2 1C 63 n1 n2 Ignored FS k n 1C 6B n Ignored FS r n 1C 72 n Set/reset super/subscript of Chinese...
-
Page 228: Basic Operations
Appendix D EPSON LQ-Emulation Commands D.2 Command Description (by function) When you select the EMULATION: IBM ProPrinter II or IBM ProPrinter X24 parameter in the setup, the machine interprets all the commands of the IBM ProPrinter ' s, grouped by... - Page 229 Appendix D EPSON LQ-Emulation Commands Carriage Return This command causes the current line buffer to print and position the Print head to the left margin. Hex: (0D)H Decimal: (13)D Octal: (15)O Form Feed ( Eject) This command causes the current line buffer to print and eject paper (for cut form) or executes a form feed (for fanfold paper ).
-
Page 230: Margins
Appendix D EPSON LQ-Emulation Commands D.2.2 Margins S ESC ( C ... : Set page length S ESC C NUL n : Set page length in inches S ESC C n: Set page length as n lines S ESC l n :... - Page 231 Appendix D EPSON LQ-Emulation Commands ESC l n Set Left Margin Sets the left margin to n columns in the current character pitch. Hex: (1B 5C n)H Decimal: (27 108 n)D Octal: (33 154 n)O ESC N n Set Bottom Margin as n Lines...
-
Page 232: Line Feed
Appendix D EPSON LQ-Emulation Commands D.2.3 Line Feed S ESC 0 : Line feed = 1/8" S ESC 2 : Line feed = 1/6" S ESC 3 n : Set line spacing as n/180 inch S ESC A n :... - Page 233 Appendix D EPSON LQ-Emulation Commands ESC J n Advance n / 180 inch vertically Advances the vertical print position Hex: (1B 4A n)H Decimal: (27 74 n)D Octal: (33 112 n)O Advances the vertical print position n / 180 inch The value of n should be 01H - FFH (1D - 255D).
-
Page 234: Print Position
Appendix D EPSON LQ-Emulation Commands D.2.4 Print Position S ESC ( V ... : Set absolute vertical print position S ESC ( v ... : Set relative vertical print position S ESC $ ... : Set absolute vertical print position... - Page 235 Appendix D EPSON LQ-Emulation Commands ESC \ n1 n2 Set Relative Horizontal Printing Position Set relative horizontal printing position Hex: (1B 5C n1 n2)H Decimal: (27 92 n1 n2)D Octal: (33 134 n1 n2)O The defined unit will be different according to print quality and PNS item in menu:...
-
Page 236: D.2.5 Print Pitches
Appendix D EPSON LQ-Emulation Commands D.2.5 Print Pitches S DC2: Cancel condensed printing for ASCII S ESC M : Set western character to be 12 CPI S ESC P : Set western character to be 10 CPI S ESC SI :... - Page 237 Appendix D EPSON LQ-Emulation Commands ESC g Set Western Character to 15 CPI Set 15 CPI for western character Hex: (1B-67)H Decimal: (27-103)D Octal: (33-147)O Set western character condensed printing This command causes to print western character as condensed (60% width).
-
Page 238: D.2.6 Print Attributes
Appendix D EPSON LQ-Emulation Commands D.2.6 Print Attributes S DC4 : Reset double width printing (one line) S ESC E : Set bold font S ESC F : Reset bold font S ESC G : Set double strike printing S ESC H :... - Page 239 Appendix D EPSON LQ-Emulation Commands ESC F Reset bold font Reset bold font Hex: (1B 46)H Decimal: (27 70)D Octal: (33 106)O Reset bold font ESC G Set double strike printing Set double strike printing Hex: (1B 47)H Decimal: (27 71)D...
- Page 240 Appendix D EPSON LQ-Emulation Commands ESC S n Set subscript/superscript in western character Set subscript/superscript in western character Hex: (1B 53 n)H Decimal: (27 83 n)D Octal: (33 123 n)O n = 0: Set superscript in western character n = 1:...
- Page 241 Appendix D EPSON LQ-Emulation Commands ESC U n Set unidirectional / bidirectional printing Set unidirectional / bidirectional printing. Hex: (1B 55 n)H Decimal: (27 85 n)D Octal: (33 125 n)O n = 0: Set bidirectional printing n = 1: Set unidirectional printing...
- Page 242 Appendix D EPSON LQ-Emulation Commands ESC w n Set / Reset Double Height Printing Set / Reset double height printing Hex: (1B 77 n)H Decimal: (27 119 n)D Octal: (33 167 n)O n = 0: Reset double height printing n = 1:...
- Page 243 Appendix D EPSON LQ-Emulation Commands ESC ! n Set general attributes of western character Set general attributes of western character. Hex: (1B 21 n)H Decimal: (27 33 n)D Octal: (33 41 n)O The general attributes of western character according to the value of n :...
- Page 244 Appendix D EPSON LQ-Emulation Commands ESC ( - nL nH m d1 d2 Set underline Set underline Hex: (1B 28 2D nL nH m d1 d2)H Decimal: (27 40 45 nL nH m d1 d2)D Octal: (33 50 55 nL nH m d1 d2)O (nH * 256 + nL) defines the number of following data in this command.
-
Page 245: Tabulation
Appendix D EPSON LQ-Emulation Commands D.2.7 Tabulation S ESC B ... : Set vertical tab stops of tab set S ESC D ... : Set horizontal tab stops S ESC b ... : Set vertical tab stops in tab set... - Page 246 Appendix D EPSON LQ-Emulation Commands ESC b n m1 … mk NUL Set Vertical Tab in Tab Set n Sets vertical tab stops at the lines specified by m1 to mk (in the current line spacing) in tab set n as measured from the top-of-form position. The tab stops must be in ascending order.
-
Page 247: Graphics
Appendix D EPSON LQ-Emulation Commands D.2.8 Graphics S ESC K n1 n2 ... : Normal resolution graphic printing mode S ESC L n1 n2 ... : Double resolution graphic printing mode S ESC Y n1 n2 ... : Double resolution graphic printing mode S ESC Z n1 n2 .. - Page 248 Appendix D EPSON LQ-Emulation Commands ESC Z n1 n2 ..data .. Set 240 DPI 8 Needles Graphic Printing Set quadruple resolution. Prints bit image graphics in 8-dot columns, 240 DPI. Hex: (1B 5A n1 n2 ..)H Decimal: (27 90 n1 n2 ..)D Octal: (33 132 n1 n2 ..)O...
-
Page 249: Other Functions
Appendix D EPSON LQ-Emulation Commands D.2.9 Other Functions S CAN : Clear print buffer S DLE B : Soft initialization S ESC BEL n : Change Emulation S ESC R n : Select code table S ESC @ Clear buffer... - Page 250 Appendix D EPSON LQ-Emulation Commands ESC R n Select Code Table Select country character set in western Code Table according to the value of n. Hex: (1B-52-n)H Decimal: (27-82-n)D Octal: (33-122-n)O Western character set Western character set America Norway France...
-
Page 251: Ignored Commands
Appendix D EPSON LQ-Emulation Commands D.2.10 Ignored Commands S DC1 On line S DC3 Off line S ESC EM ... : Set form feed controller S ESC X ... : S ESC a ... : Set Justification S ESC c ... : S ESC k ... - Page 252 Appendix D EPSON LQ-Emulation Commands ESC X n1 n2 n3 Hex: (1B 58 n1 n2 n3)H Decimal: (27 88 n1 n2 n3)D Octal: (33 130 n1 n2 n3)O ESC a n Set Justification Hex: (1B 61 n)H Decimal: (27 97 n)D...
- Page 253 Appendix D EPSON LQ-Emulation Commands ESC ( c nL nH Set the top and bottom blank of paper Hex: (1B 28 63 nL nH)H Decimal: (27 40 99 nL nH)D Octal: (33 50 143 nL nH)O ESC ( ^ n1 n2...
- Page 254 Appendix D EPSON LQ-Emulation Commands ESC 6 Set printable character Hex: (1B 36)H Decimal: (27 54)D Octal: (33 66)O ESC 7 Reset printable character Hex: (1B 37)H Decimal: (27 55)D Octal: (33 67)O D-33...
-
Page 255: Chinese Mode
Appendix D EPSON LQ-Emulation Commands D.2.11 Chinese Mode S FS D Set combined printing S FS DC2 : Reset compressed printing for Chinese character S FS DC4 : Reset double width printing for Chinese character (one line) S FS J... - Page 256 Appendix D EPSON LQ-Emulation Commands FS DC4 Reset Double Width Printing for Chinese Character (on one) Reset double width printing for Chinese character (one line) Hex: (1C 14)H Decimal: (28 20)D Octal: (34 24)O FS J Set Rotation printing In Chinese mode this command set rotation printing, it is valid until command FS K is...
- Page 257 Appendix D EPSON LQ-Emulation Commands FS SO Set Double Width Printing in Chinese character (one line) This command causes to print characters following this command on the same line as horizontally enlarged (double width) in Chinese mode. Hex: (1C 0E)H...
- Page 258 Appendix D EPSON LQ-Emulation Commands FS W n Set / Reset double height and double width printing Set / Reset double-height and double width printing of Chinese character. Hex: (1C 57 n)H Decimal: (28 87 n)D Octal: (34 127 n)O n = 0: Reset double-height and double-width printing of Chinese character.
- Page 259 Appendix D EPSON LQ-Emulation Commands FS r n Set superscript / subscript of Chinese character Set superscript / subscript of Chinese character Hex: (1C 72 n)H Decimal: (28 114 n)D Octal: (34 162 n)O n = 0: Set superscript of Chinese character...
- Page 260 Appendix D EPSON LQ-Emulation Commands FS ! n Set General Attributes of Chinese character Hex: (1C 21 n)H Decimal: (28 33 n)D Octal: (34 41 n)O Set general attributes of Chinese character according to n, as follows: Bit of n...
- Page 261 Appendix D EPSON LQ-Emulation Commands FS 2 n1 n2 d1 d2 … d72 Load character defined by user This command downloads the dot matrix and codes of a user defined character(double byte character) into printer’s RAM, the dot matrix is 24x24, that is 72bytes for dot matrix .
-
Page 262: Hex - Decimal Conversion Table
Appendix D EPSON LQ-Emulation Commands Hex - Decimal Conversion Table 96 112 128 144 160 176 192 208 224 240 97 113 129 145 161 177 193 209 225 241 98 114 130 146 162 178 194 210 226 242... -
Page 263: Appendix E Olivetti Emulation
OLIVETTI Emulation Commands Appendix E Characters used in control functions appear in monospaced type. The table below explains some of the conventions used. A pair of numbers separated by a slash ( / ) character indicates Column/Row notation. This notation refers to the location of a character in a standard code table, such as ASCII. (example: 1/B = 1B is the hex-code for Escape) Spaces appear between characters in sequence for clarity;... -
Page 264: Control Commands
Appendix E OLIVETTI Emulation Commands Control Commands E.1.1 Chinese Mode Control Commands Command Hex Code Explanation FS & 1C 26 Set Chinese mode FS . 1C 2E Set Western mode (Reset Chinese mode) FS k 1C 6B Set full corner ASCII code FS g 1C 67 Set half corner ASCII code (Reset full corner ASCII... -
Page 265: Character Attribute Commands
Appendix E OLIVETTI Emulation Commands E.1.4 Character Attribute Commands Command HEX CODE Explanation ESC R nnn 1B 52 n n n character quality and style select ESC 3 1B 33 Set double width typing ESC 4 1B 34 Reset double width typing FS h 1C 68 Set treble width typing... -
Page 266: Typing Control Commands
Appendix E OLIVETTI Emulation Commands E.1.5 Typing Control Commands Command Hex Code Explanation ESC S 5 1B 53 35 Set printer to normal state ESC S 1 1B 53 31 Set printer to journal printer state?clean the print buffer?no initial commands required? Line feed Form feed Carriage return... -
Page 267: User Defined Character Commands
Appendix E OLIVETTI Emulation Commands E.1.7 User Defined Character Commands Command Hex Code Explanation ESC h 0 n m d0 d1 d2 D1 1B 68 30 nn mm d0 d1 d2 Customer ' s character D2... Dm D1 D2 ... Dm download ESC h 0 n m d1 d2 d3 ... -
Page 268: Magnetic Stripe And Bar Code Control Commands
Appendix E OLIVETTI Emulation Commands Command Hex Code Explanation ESC r x 1B 72 x Operator state require return ESC . 1B 2E Set automatic operation ESC - 1B 5F Set manual operation E.1.9 Magnetic Stripe and Bar Code Control Commands E.1.9.1 Bar Code Control Commands Command Hex Code... -
Page 269: Hex - Decimal Conversion Table
Appendix E OLIVETTI Emulation Commands Hex - Decimal Conversion Table 96 112 128 144 160 176 192 208 224 240 97 113 129 145 161 177 193 209 225 241 98 114 130 146 162 178 194 210 226 242 99 115 131 147 163 179 195 211 227 243 84 100 116 132 148 164 180 196 212 228 244 85 101 117 133 149 165 181 197 213 229 245...
Need help?
Do you have a question about the PR9 and is the answer not in the manual?
Questions and answers