Table of Contents
Advertisement
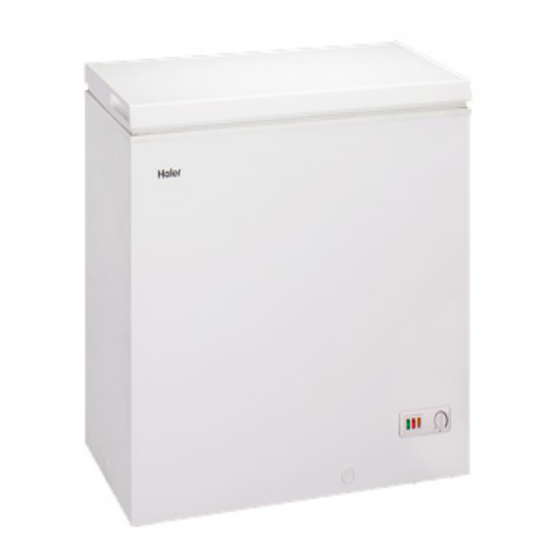
Chest Freezer
SERVICE MANUAL
Features:
1.Deep and quick freezing.
2.
Square cabinet and square lid.
3.
Mechanical temperature control with power indicator.
4.
High pressure foam cover for efficient Temperature preservation.
5.
Eximious water disposal device.
6.
Wide climate zone design.
CAUTION
READ THIS MANUAL CAREFULLY TO
DIAGNOSE TROUBLE CORRECTLY
BEFORE OFFERING SERVICE .
MODEL: BD-103GC
Haier Group
Advertisement
Table of Contents

Related Manuals for Haier BD-103GC


Summary of Contents for Haier BD-103GC
-
Page 1: Chest Freezer
READ THIS MANUAL CAREFULLY TO DIAGNOSE TROUBLE CORRECTLY BEFORE OFFERING SERVICE . Chest Freezer SERVICE MANUAL MODEL: BD-103GC Features: 1.Deep and quick freezing. Square cabinet and square lid. Mechanical temperature control with power indicator. High pressure foam cover for efficient Temperature preservation. -
Page 2: Table Of Contents
CONTENTS CONTENTS…………………………………………………………………………………….. SAFTY PRECAUTIONS………………………………………………………………………. SPECIFICATIONS……………………………………………………………………………… INATALLATION AND ACCESSORY PARTS…………………………………………… PARTS IDENTIFICATIONS……………………………………………………………………. DISASSEMBLY………………………………………………………………………………… FUNCTION SCHEDULE……………………………………………………………… SYSTEM FLOW CHART……………………………………………………………………….. SYSTEM FLOW SCENOGRAPH……………………………………………………. CIRCUIT DIAGRAM…………………………………………………………………………… 1.Brief principle diagram…………………………………………………………………… 2.Connect diagram………………………………………………………………………….. NORMAL PROBLEMS ……………………………………………………………… TROUBLE SHOOTING…………………………………………………………………………... 1.Compressor doesn’t start………………………………………………………………….. 2.Poor cooling……………………………………………………………………………….. -
Page 3: Safty Precautions
SAFTY RECAUTIONS Read all of the instructions before using this appliance. When using this appliance, always exercise basic safety precautions, including the following: 1. Use this appliance only for its intended purpose as described in this uses and care guide. 2. - Page 4 Cabinet. It is designed for freestanding installation only 8. Do not operate your freezer in the presence of explosive fumes. 9. Do not refreeze foods, which have been thawed completely. 9. Do not use any electrical device or any sharp instrument in defrosting your freezer.
-
Page 5: Specifications
Hi-temp indicator. castors. External controls. 0%HFC, 0%CFC. Comply with RoHS. Type Model BD-103GC Commercial brand Haier Product description Chest Freezer Type of appliance (FS=free standing / BI= built-in) Energy efficiency class Climate class (N=16-32℃... - Page 6 Aesthetics Door Flat Chest straight edges Colours: Cabinet white white Door glass Door frame white Fascia panel / Handle (w/b/g/s) white/white(pocket) Inside door/-drawers (W=white T=transparent) Equipment & accessories Product classification (Super eco/Eco/Standard) Standard (Number/Handle/Lock) 1/●(pocket)/- Type of lid (Hinge/Counter balanced/Sliding) Hinge(plastic ) Inside walls (Stainless steel/Aluminium/Synthethic...
-
Page 7: Inatallation And Accessory Parts
INATALLATION AND ACCESSORY PARTS Unpacking Your Freezer 1.Remove all packaging material; this includes the foam base and all adhesive tape holding the freezer accessories inside and outside. 2.Inspect and remove any remains of packing, tape or printed materials before powering on the freezer. Adjusting Your Freezer 1.Your freezer is designed for freestanding installation only. - Page 8 Do not over fill freezer for proper internal air circulation. Electrical Requirement ake sure there is a suitable power Outlet with proper grounding to power the freezer. Avoid the use of cutting off the third grounding , this is a dangerous practice since it provides no effective grounding for the freezer and may result in shock hazard.
- Page 9 Minutes before plugging it back in. (Note: If the freezer has been placed in a horizontal or tilted position for any period of time wait 24 hours before plugging the unit in.) Food Storage Basket Your Freezer has 1 or 2 removable basket. It allows you to store food more accessibly or you can remove it if not needed.
-
Page 10: Parts Identifications
PARTS IDENTIFICATIONS... -
Page 11: Disassembly
DISASSEMBLY ① Assembly and disassembly should be done after the plug is pull out of the socket ② It should be down as instructed in the Explosive Review. ③ Disassemble the Compartment grill: With the crossed screwdriver to turn the screw in a anticlockwise manner, it could be disassembled easily. - Page 12 ⑥Disassemble the thermostat: take off the knob of the thermostat, and turn the nut anticlockwise with a pinchers or clamp ,then it could be moved. ⑦Disassemble the hinge assembly and the hinge cover: screw off the two screws on the hinge cover, take away the cover, then screw off the eight screws on the bottom hinge, so the whole hinge could be moved.
- Page 13 ⑧Move away the compressor: First take off the compressor cover, and the wire cord. Open the pipe with the plier to let out the coolant, then pull out the discharge and the suction after heated by gas jointing. ⑨Disassemble the compressor sole plate: turn off the four screws of the compressor sole plate with a cross screw anticlockwise, then take away the plate from the sideway...
-
Page 14: Function Schedule
Function Schedule Adjustable temperature dial: Your freezer will automatically maintain the temperature level you select. The temperature level you select. Min is the warmest, Max is the coldest. We recommend a medium setting Do not adjust your freezer frequently green = CONTROL The green control light must always be on when the is very important to pay attention to this, because in the appliance is connected to the mains and switched on. - Page 15 namely: First start-up of appliance Restart after defrosting Filling freezer with fresh food In these cases it is normal that the red indicator-light goes on. It goes off automatically when the interior temperature reaches approximately –15°C. yellow = SUPER FREEZE SWITCH The compressor continues cooling until the SUPER FREEZE switch is turned off again.
-
Page 16: System Flow Chart
SYSTEM FLOW CHART The refrigeration system of direct cooling single-system freezers belongs to the category of a single-temperature and single-control refrigerating system with only one evaporator and is controlled by a single temperature control. -
Page 17: System Flow Scenograph
SYSTEM FLOW SCENOGRAPH... -
Page 18: Circuit Diagram
CIRCUIT DIAGRAM Brief principle diagram Brief description of principle about Thermostat: When the temperature in the freezer is higher and reaches the value for starting the machine, the thermostat will be closed, the compressor will run; When the temperature in the freezer is lower and reaches the value for closing the machine, the thermostat will be open, thus the compressor will be stop running. -
Page 19: Connect Diagram
CIRCUIT DIAGRAM 2. Connect diagram Red light Green light Yellow light Thermostat compressor Notice: BN-brown BU-Blue BK-Black GNYE-Kelly RED-Red... -
Page 20: Normal Problems
Normal problems Problems Reasons Removing methods 1. Check if there is short circuit 1. Fuse is broken and solve it, if not, change 2. The contact of plug, socket, and cable capable fuse is not good. Cable broken. 2. Check and connect tightly, or 3. - Page 21 runs without been set to “over cooling” position. moderate. stop, 2.The contacting point of temperature 2. Repair or change. temperature controller is adhered. in freezer is 3.The temperature sensing probe of 3. Adjust to suitable position, too low controller is not placed well, and causes normally contact tightly with maladjustment evaporator cover.
- Page 22 not full 3. Refrigeration quantity of compressor 2Clean the capillary and filter. is reduced. 3.Change compressor. Evaporator frosts too 1. Please let or make food dry rapid, frost 1. Food put into freezer contains water. after cleaning, then store it. layer too thick 2.
-
Page 23: Trouble Shooting
TROUBLE SHOOTING 1.Compressor doesn’t start... -
Page 24: Poor Cooling
TROUBLE SHOOTING 2. Poor cooling Poor cooling Check the diaplay temperature Change to lower nomber whether it is setted at 18°C Whether the rear side and the top is too close to the wall Avoid these Whether the cellar is under matters which sunlight directly will affect heat...
Need help?
Do you have a question about the BD-103GC and is the answer not in the manual?
Questions and answers