
Related Manuals for Fondital AL-ADVANCE


Summary of Contents for Fondital AL-ADVANCE
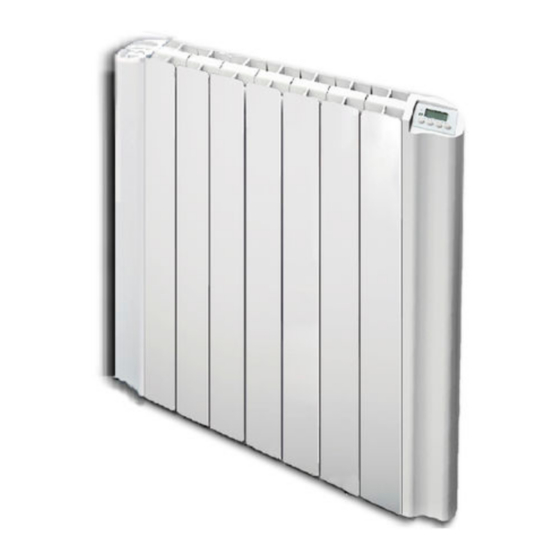
- Page 1 IST 03 F 047 - 01 INSTALLATION AND MAINTENANCE MANUAL AL-ADVANCE Inertia oil-free electric radiators...
-
Page 2: Table Of Contents
Dear customer, Thank you for choosing our product. Read this manual carefully before installing your radiator, as it provides useful information for installation, use and proper maintenance of the appliance. Remember that this manual must accompany the radiator should it be moved to a different installation location. THE PACKAGE INCLUDES: Aluminium radiator fitted with a thermostat with electronic regulation, kit made up of three mounting brackets with wall plugs and instruction manual. -
Page 3: Characteristics
On the left-hand side there is a receptacle for distilled water used to humidify the environment. This receptacle can be removed when filling. NB: All Fondital radiators are manufactured with an identifying label which guarantees their traceability. This label certifies that the appliance complies with European directives and electrical standards. -
Page 4: Warnings
3. WARNINGS A label on the side of the radiator contains the symbol shown here. The meaning of this symbol is: In order to avoid overheating the appliance, DO NOT COVER THE RADIATOR with clothing, pieces of cloth or other objects. IMPORTANT: in stand-by mode the electrical supply of the radiator is on and the display shows four segments The radiator must never be: - partially or totally covered... - Page 5 4.1 Mounting the radiator to the wall The radiator can be mounted on the wall using the mounting brackets included with the appliance. The mounting system consists of: axe central du radiateur axe central du radiateur 800 W, 1500 W, 2000 W 1000 W 3.
- Page 6 5) Screw the two brackets equipped with the locking elements 6) Place the radiator onto the brackets. previously secured to the bracket using only one of the two screws. 7) Tighten the second screw of the brackets locking elements in order to completely secure the radiator.
-
Page 7: Electrical Connections
5. ELECTRICAL CONNECTIONS IMPORTANT During installation, maintenance and cleaning, the appliance must be disconnected from the power supply. The electronic thermostat must be connected to a 23.0 VAC power supply only. Follow the colours indicated: Brown Phase Blue or grey Neutral Black Pilot Wire... -
Page 8: Regulation And Programming
6. REGULATION AND PROGRAMMING 6.1 Turning the radiator on The appliance is regulated using four keys, as shown in the figure. When the appliance is in stand-by mode the display shows four segments. To turn the radiator on, press the ‘on/off’ key, as shown in the following figure: The radiator has various operating modes, as shown in the table on page 12. - Page 9 6.3 Programming TH and TL temperatures It is possible to programme two separate temperature levels: TH is the desired ambient temperature during operation in Comfort and Pilot Wire mode or when programming; TL is the ambient temperature in Night-time Reduction mode. These two temperature levels can be programmed using the plus and minus keys.
- Page 10 PROGRAMME DAY PROGRAMME HOUR PROGRAMME MIN. You can now assign a programme to each day of the week. When a segment appears between two times on the programming bar (at the bottom of the screen), this indicates that the TH temperature level has been selected for this period. The absence of a segment indicates that during this period, the radiator will keep the temperature at the TL level.
- Page 11 6.5 Child lock The appliance can be locked to prevent improper or accidental use, to protect children, for example. In order to activate the lock, press and hold the plus and minus keys at the same time for three seconds: the keypad will be locked. THE ICON SHOWS THAT THE KEYPAD IS LOCKED In order to unlock the keypad, press and hold both the plus and minus keys again for three seconds...
-
Page 12: Cleaning The Radiator
6.6.4 Night-time mode When this operating mode is selected, the radiator will keep the ambient temperature at the programmed TL temperature. The desired TL temperature is programmed as follows: 1. Press the ‘mode’ key until the screen displays the icon 2. -
Page 13: Troubleshooting
8. TROUBLESHOOTING If the appliance stops working, do not use it: disconnect from the power supply and contact only a qualified technician who is authorized to work on this type of product. If the power cord is damaged, it must be replaced by the Manufacturer, after sale service or similarly qualified personnel in order to avoid any hazard. -
Page 14: Declaration Of Conformity
ELECTRIC RADIATORS Model AL-ADVANCE manufactured by FONDITAL S.p.A. are manufactured in accordance with European directives - DIRECTIVE 2006/95/CE of 12 December 2006 on the harmonisation of the laws of Member States relating to Electrical Equipment designed for use within certain voltage limits (low voltage) - DIRECTIVE 2004/108/CE, for electromagnetic compatibility - DIRECTIVE 2002/96/CE of 27 January 2003. - Page 15 otes...
- Page 16 Tel. +3.9 03.65/878.3.1 - Fax. +3.9 03.65/878.576 e mail: info@fondital.it - www.fondital.com The manufacturer reserves the right to modify the products as it deems necessary and useful, without affecting their basic features. Uff. Pubblicità Fondital IST 03. F 047 - 01 Settembre 2013. (09/2013.)
Need help?
Do you have a question about the AL-ADVANCE and is the answer not in the manual?
Questions and answers