Advertisement
Advertisement
Table of Contents

Related Manuals for Yada BT54358-2


Summary of Contents for Yada BT54358-2
-
Page 2: Table Of Contents
TABLE OF CONTENTS 1. Introduction ....................................1 2. Package Contents ...................................2 3. Product Specifications ................................3 4. Installation Guide ..................................3 5. Settings and Operation ................................6 6. Safety Information ................................10 7. Maintenance & Warranty ..............................13 8. General Information ................................17... -
Page 3: Introduction
1. INTrOduCTION Please read all of the installation instructions carefully before installing the product. Improper installation will void manufacturer’s warranty. The installation instructions do not apply to all types of vehicles, and are written as guidelines to assist in installing the system. Consult an experienced technician if you are not comfortable installing the product. -
Page 4: Package Contents
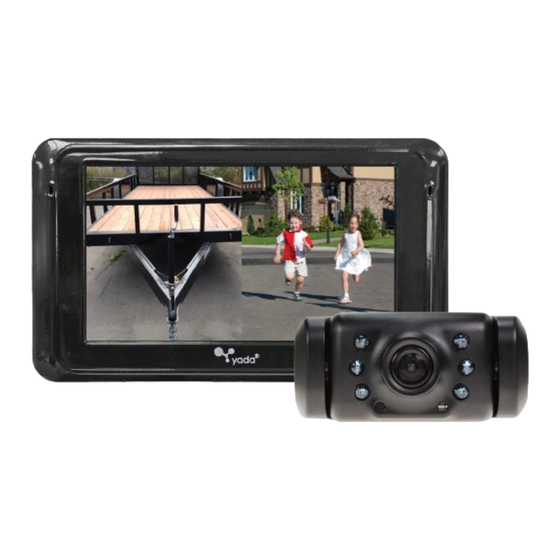
2. PACkAgE CONTENTS 1. 5” Dash Monitor 2. 1 Backup Camera 3. 12V/24V Power Adapter for Monitor 4. Hardwire Cable for Monitor 5. Suction Cup Mount for Monitor 6. Install Kit 7. User’s Manual 8. Quick Install Guide... -
Page 5: Product Specifications
Monitor. Run cable to fuse box and connect to fused accessory power source. Refer to your vehicle owner manual for location of available accessory fuses. 5. At this time, the Yada Dash Monitor is ready to be automatically powered on when the vehicle engine starts. - Page 6 also watch some common installation videos at www.letsyada.com for more information. Caution: This unit is designed to operate on a 12V/24V DC NEGATIVE GROUND electrical system. Connecting to other types of electrical systems will cause damage to your vehicle. Please contact the manufacturer if you are unaware of the system type in your vehicle.
- Page 7 10. Use the provided Zip ties to secure wires neatly within your car. 11. Replace the light socket back into the reverse light housing. 12. Replace any interior panels that may have been removed to access the taillight and close your trunk or rear hatch.
-
Page 8: Settings And Operation
• In addition to the Backup Camera, this System can pair with ONE Yada Add-On Camera. The Yada Add-On Camera is designated Camera 2 when paired to the system. To view, toggle the Channel Button once to switch camera views and again to see a split view. - Page 9 BRightnESS AnD COntRASt You can adjust the contrast and brightness of the Monitor according to your desired level. Note: Contrast and Brightness setting ONLY works while the camera image is on the screen. TO AdjuST BrIghTNESS 1. Press “MENU” 2. Go to “Brightness” by pressing “– “ 3.
- Page 10 If no camera is found, then the display will show “Pair Fail”. If you receive a “Pair Fail” message, please call our technical support to assist in troubleshooting. Camera 2 is designated for a Yada Add-On Camera. To pair a Yada Add-On Camera to your existing system: 1.
- Page 11 • In addition to the Backup Camera, this System can pair with ONE Yada Add-On Camera. The Yada Add-On Camera would be designated Camera 2 when paired to the system.
-
Page 12: Safety Information
tO ChAngE YOuR DEFAuLt CAMERA: 1. Press “MENU” 2. Go to “Set Default” by pressing “ – “ 3. Press “Parking Aid Line” to enter 4. Press “+ “ or “– “ to select Camera 1 or Camera 2 5. Press “Parking Aid Line” to confirm and exit 6. - Page 13 opposite than when viewed in the rear view and outside mirrors. Use the inside mirror or glance over your shoulder to properly judge distances to other objects. • The Backup Camera “night vision” feature is an aid to a driver but is limited. Always use your own eyes to confirm the vehicle’s surroundings, as the displayed image may be faint or dark, distorted, or not entirely visible.
- Page 14 • Do not submerge Camera in water, which can cause internal damage to the Camera. • If the temperature changes rapidly, such as when hot water is poured on the vehicle in cold weather, the system may not operate normally. The Digital Camera can withstand the effects of rain, snow, and inclement weather.
-
Page 15: Maintenance & Warranty
7. mAINTENANCE & WArrANTy CLEAning • If dirt, rain or snow attaches to the Camera, the monitor may not clearly display objects. If water droplets, snow or mud adhere to the Camera lens, rinse with water and wipe with a dry cloth. •... - Page 16 due to normal wear and tear. 5. Repair or replacement parts supplied by Winplus North America under this warranty are protected only for the unexpired portion of the original warranty. 6. This is a “repair or replace” warranty only, and does not cover the costs incurred for the installation, removal or reinstallation of the product, or damage to any mobile phone device or vehicle.
- Page 17 Winplus North America and/or its affiliates do not guarantee or promise that the user of Backup Camera Expandable System will not be in an accident or otherwise not collide with an object and/or person. Our Backup Camera Expandable System is not intended in any way to be a substitute for careful and cautious driving or for the consistent adherence to all applicable traffic laws and motor vehicle safety regulations.
- Page 18 WinpLuS AuStRALiA/hOng kOng LImITEd WArrANTy This Yada product is warranted against faulty workmanship for a period of 2 years from date of purchase. Liability is limited to replacement of the product and claims for associated or consequential loss or damage will not be accepted. Warranty is void and does not apply if the product has been damaged or rendered faulty by accident, abuse, misuse, incorrect application or if the product has been modified or tampered with.
-
Page 19: General Information
8. gENErAL INFOrmATION CuStOMER SERViCE/COntACt For questions or issues regarding the product, please visit www.letsyada.com or contact Winplus in your area/region to speak to our customer service representative: Winplus North America Tel.: 866-294-9244 Tel.: 909-752-3074 Winplus Europe Tel.: 44-1440-7138888 Winplus Australia Tel.: 61-3-9720-4143 Winplus New Zealand Tel.: 64-9-5254575... -
Page 20: Important Note
• Connect the equipment into an outlet on a circuit different from that to which the receiver is connected • Consult the dealer or an experienced radio/TV technician for help This device complies with Part 15 of the FCC Rules. Operation is subject to the following two conditions: (1) This device may not cause harmful interference, and (2) This device must accept any interference received, including interference that may cause undesired operation. - Page 21 iMpORtAnt nOtE: IC radiation Exposure Statements: This equipment complies with IC radiation exposure limits set forth for an uncontrolled environment. End users must follow the specific operating instructions for satisfying RF exposure compliance. This transmitter must not be co-located or operating in conjunction with any other antenna or transmitter.
- Page 22 11 On Lai Street, Shatin, N.T., Hong Kong www.winplus.com www.letsyada.com © 2014 Winplus North America Inc. All Rights Reserved. Winplus, the logo design, and Yada are trademarks or registered trademarks of Winplus North America Inc. The Bluetooth word mark and logos are owned by the ®...
Need help?
Do you have a question about the BT54358-2 and is the answer not in the manual?
Questions and answers