Table of Contents
Advertisement
CONTENTS
1.
Describing the espresso machine
2.
Description of the control panel: touch keys
3.
Safety instructions
4.
Instructions for the first use of the machine
5.
Accessories
6.
Drawer (optional)
7.
Coffee
8.
Hot water
9.
Steam
10. Programming the quantity of ground coffee
11. Programming the quantity of coffee poured in the cup
12. Programming the quantity of hot water
13. Recipes
14. Cleaning
15. Installation
16. What to do if ...
17. Technical specifications
18. After-sales Service, spare parts and guarantee
Downloaded from CoffeeMachineManual.com Manuals
ENGLISH
1
Advertisement
Table of Contents

Related Manuals for AEG PE-8038M


Summary of Contents for AEG PE-8038M
- Page 1 ENGLISH CONTENTS Describing the espresso machine Description of the control panel: touch keys Safety instructions Instructions for the first use of the machine Accessories Drawer (optional) Coffee Hot water Steam 10. Programming the quantity of ground coffee 11. Programming the quantity of coffee poured in the cup 12.
-
Page 2: Description Of The Espresso Machine
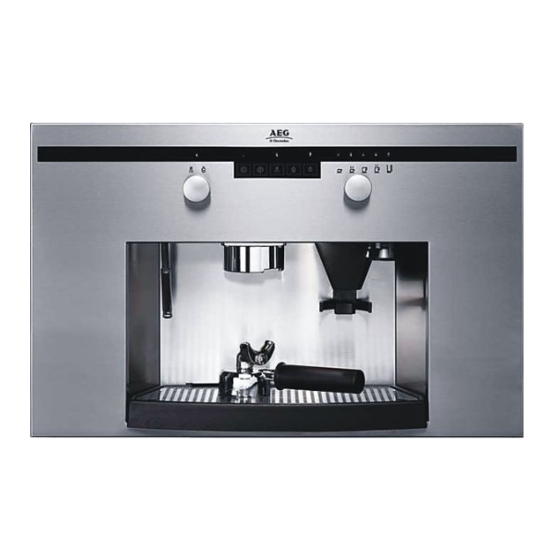
1. DESCRIPTION OF THE ESPRESSO MACHINE 1. Locking nut of filter holder 2. Steam/water pipe 3. Coffee pressing tool 4. Grinder button 5. Coffee measuring device 6. Adjusting knob for grinding 7. Container of coffee beans 8. Water reservoir 9. Drip tray 10. -
Page 3: Description Of The Control Panel: Touch Keys
2. DESCRIPTION OF THE CONTROL PANEL: TOUCH KEYS Water temperature indicator ON/stand-by indicator Coffee indicator Water indicator Steam indicator Spotlight indicator LEDs of coffee measures (strong coffee, weak coffee, 2 cups of strong coffee, 2 cups of weak coffee) No-water indicator Steam knob 10. -
Page 4: Safety Instructions
3. SAFETY INSTRUCTIONS Using this machine is very easy. However, please read this instruction manual carefully and thoroughly before installing and operating this machine for the first time, so that any wrong operation can be avoided, the best and safest performance can be ensured, and environment will be protected. - Page 5 FOR INSTALLATION AND SERVICING − This machine must be installed and connected to the mains by a SKILLFUL ENGINEER. Make sure that the machine is DISCONNECTED from the power supply before any servicing operation. − After unpacking the machine make sure that the product has not suffered any damage and that the power cord is in perfect conditions.
-
Page 6: Instructions For The First Use Of The Machine
4. INSTRUCTIONS FOR THE FIRST USE OF THE MACHINE FILLING UP THE WATER RESERVOIR − Press the unlocking levers available under the drip tray and pull the machine as it is shown in the figure. − Extract the espresso machine out of the cabinet sliding on the special slides. - Page 7 Hardness of water: − Before filling up the water reservoir, make sure that the decalcifying Brita filter has been soaked in cold water for at least 30 min. (however follow the instructions printed on the filter package). After this operation insert the filter into its proper seat inside the reservoir as it is shown in the figure.
- Page 8 − Insert the machine into the cabinet pushing slightly until “CLIK!” can be heard: this is the signal that the machine has been locked. FILLING UP THE CONTAINER OF COFFEE BEANS − Press unlocking levers available under the drip tray and pull the machine as it is shown in the figure.
- Page 9 − Pour approximately 200 g of coffee beans into the container availabe on the right side of the machine − Insert the machine into the cabinet pushing slightly until “CLIK!” can be heard: this is the signal that the machine has been locked.
- Page 10 PRELIMINARY STARTING: FIRST USE − After filling up the water reservoir, open the steam/water cock as it is shown in the figure. − Switch the espresso machine on by keeping the on-off/stand-by button pressed until the red LED stops flashing and is kept on. This indicator will signal the operating condition of the machine (flashing: STAND-BY;...
-
Page 11: Resetting Standard Values
− After the water has flowed out (if necessary, repeat the draining operation several times), close the knob again. − As soon as the heating LED goes out, the machine has reached the right temperature and it is ready to make coffee. Only the on-off indicator is kept on. RESETTING STANDARD VALUES −... - Page 12 − A faint flashing of all the LEDs will signal that the factory values have been reset. N.B.: The standard values only concern the quantity of water required for each cup of coffee. Then the measures of ground coffee will not vary. CAUTION –...
- Page 13 − Extract the espresso machine out of the cabinet sliding on the special slides. − Turning the proper adjusting knob (A-10) will modify the grounding level. Turning the knob in clockwise direction will lead to a fine grinding for a stronger coffee.
-
Page 14: Standby Mode
STAND-BY MODE − Once powered and inserted into the cabinet, the machine is in stand-by mode: this will be signaled by the on/off LED blinking. − Keep the on/off button pressed as it is shown in the figure. − As soon as the machine is ready to operate, the LED will be kept on as it is shown in the figure. -
Page 15: Using Coffee Beans
6. DRAWER (OPTIONAL) − This machine can also be provided with an optional well-equipped drawer mod. PES 8036-m, with front panel of stainless steel. This drawer has a lot of useful compartments: a large compartment for cups and saucers a basin for coffee grounds a compartment for all accessories (filters, measuring spoon) a tray 7. - Page 16 − Insert the filter holder under the coffee measuring device pressing the proper button slightly: thus the right quantity of ground coffee will automatically fall into the filter. − When the filter has been filled with the desired quantity, press the ground coffee with the pressing tool −...
- Page 17 − Lock the filter holder perfectly turning its handle from left to right. − When preparing an espresso, use the proper grille inserting its feet into the four special holes − Lay the grille firmly checking its stability. Position the cup/s under the nozzle and make sure that the red LED of water temperature is out, or wait until it goes out.
- Page 18 − Press the coffee button and the quantity of coffee in the cup will be that selected and recorded before. Remove the filter holder from the nut and eliminate the ground coffee already used. − When the two-cup nozzle is used, the two cups od coffee are not always filled at the same level.
- Page 19 − This machine is also prearranged to operate with paper pods, that is throwaway portions of roasted coffee (for only one cup of coffee). − Carry out the same operations like in the case of ground coffee; after coffee has been poured into the cup, remove the filter holder from the locking nut and eliminate the used pod.
-
Page 20: Hot Water
8. HOT WATER − The steam/water pipe is of foldaway type: extract by rotating as it is shown in the figure.. − Place a container under the steam/water nozzle; then turn the steam/water knob in anticlockwise direction. − Press the button of hot water and the nozzle will spray the quantity of water stored before;... -
Page 21: Heating Liquids
− Close the steam/water knob again. 9. STEAM HEATING LIQUIDS − Press the steam button once. Both the LEDs of steam and water temperature will be ON. Wait until both these LEDs go out. Pressing the steam button again will stop generating steam. −... - Page 22 − Place a pot with the liquid to be heated under the steam nozzle and turn the steam knob in anticlockwise direction. − Wait until the liquid warms up and then close the steam knob. − Attention: when preparing milk for cappuccino, shake the milk jug a little to improve the result.
-
Page 23: Programming The Quantity Of Ground Coffee
10. PROGRAMMING THE QUANTITY OF GROUND COFFEE − This espresso machine has already been calibrated in factory to dispense the ideal measure of ground coffee for one cup of espresso. − However this quantity of ground coffee can be increased or reduced, then the selected measure is stored. -
Page 24: Programming The Quantity Of Coffee Poured In The Cup
11. PROGRAMMING THE QUANTITY OF COFFEE POURED IN THE CUP − The quantity of coffee being poured can be adjusted as desired. Turn the coffee measuring knob onto the LED of the required “coffee measure” and grind a measure of coffee in the filter holder. Insert the filter holder in the locking nut, then put one or two cups under the filter holder according to the selected programme. -
Page 25: Programming The Quantity Of Hot Water
− Once obtained the desired quantity of coffee press the button again and this coffee measure will be stored automatically. 12. PROGRAMMING THE QUANTITY OF HOT WATER − Place a pot under the steam/water nozzle and turn the steam/water knob anticlockwise. -
Page 26: Italian Cappuccino
− Release the button when the water starts flowing out; then, once obtained the desired quantity of water press the button again and this measure will be stored automatically. − Then close the steam/water knob again. 13. RECIPES ITALIAN CAPPUCCINO This is a normal espresso with steam-heated milk giving the coffee a milder flavour and a rich, delicious frothy topping. -
Page 27: Outer Parts
COLD ESPRESSO SHAKE Frothy and extremely refreshing, this drink is delicious on hot days. Prepare an espresso, add sugar and pour into a shaker with large ice cubes. Shake for few seconds. Serve in a tumbler or flûte. IRISH COFFE Energy-giving and invigorating drink. - Page 28 DRIP TRAY − Remove the drip tray from the machine as it is shown in the figures above. − Make sure that the drip tray is periodically drained to prevent any liquid from seeping out and dirtying/damaging the underlying furniture. Drip tray and relevant grille can be washed in a dishwasher.
-
Page 29: Water Reservoir
− The steam nozzle should be periodically cleaned. Preparing milk for cappuccinos could dirty the inside of this nozzle. Therefore remove it as it is shown in the figures above and wash with a sponge in warm water. Attention: Before cleaning the steam nozzle, always switch the machine off and wait for at least 20 minutes so that the steam pipe can cool down. -
Page 30: Electrical Connection
COMPONENTS FOR INSTALLING THE MACHINE This espresso machine will be installed into cabinets with height of 380 mm and width ranging from 560 mm to 568 mm. The machine is equipped with the following components for the installation: 1 fixing base 13 self-threading screws 3.9X19 4 screws M4X16 1 cable clamp... - Page 31 − Unscrew the cable clap available on the machine. − Fix the power cord onto the machine as it is shown in the figure. − Connect the power cord as it is shown figure. This machine is prearranged to be powered with single-phase...
- Page 32 INSTALLING THE MACHINE WITHOUT DRAWER − Lay the fixing base of the machine equipment on the shelf of the cabinet. − Insert side plates compensating for any space. The width of the compartment housing the espresso machine depends on the thickness of the cabinet’s sides.
- Page 33 − Fix the base plate inserting 4 self- threading screws into the 4 fore holes of the same plate. Then assemble the 2 slides with the remaining 8 self-threading screws. − Insert the machine by coupling its slides with the supports mounted onto the cabinet’s sides.
- Page 34 INSTALLING THE ALIGNING BAR − When this espresso machine is assembled in a composition of electric household appliances, it could be installed beside a oven 10 mm higher. Align the assembly fixing the proper bar under the frontal panel with the four screws M4x16, as it is shown in the figure.
- Page 35 INSTALLING MACHINE + DRAWER − Lay the fixing base of the drawer onto the proper shelf of the cabinet. − Insert the side plates of the drawer for compensating for any space. width compartment housing the drawer depends on the thickness of the cabinet’s sides.
- Page 36 − Fix the base plate inserting 4 self- threading screws into the 4 fore holes of the plate. Then assemble the 2 slides with the remaining 10 self-threading screws. All these screws are supplied together with the drawer. − Position fixing base machine laying onto the fixing base of...
- Page 37 − Four side plates (two being 2 mm thick and two 1 mm thick) are provided together with machine, to compensate for the different possible measures. They should be used to compensate for internal width compartment, leading to a width of 562/560 mm.
-
Page 38: What To Do If
− Insert the machine coupling its slides with those already mounted onto the cabinet’s sides and slide it into the cabinet to the stops until the safety locks close. 16. WHAT TO DO IF... If this machine does not work, please make sure that the fault is not due to: no power no water in the reservoir. -
Page 39: Technical Specifications
17. TECHNICAL SPECIFICATIONS As regards the general dimensions of the machine, please see the fig. D − Width 594 mm − Depth 260 mm − Height 378 mm − Capacity of water reservoir 2.5 l − Net weight 17 kg −... - Page 40 FUSES F1: Fuse Ø 5 x 20 mm - Vn = 250 V - In=10 A F2: Fuse Ø 5 x 20 mm – Vn = 250 V – In = 0.5 A Downloaded from CoffeeMachineManual.com Manuals...
-
Page 41: Declaration Of Guarantee Terms
CUSTOMER CARE For general enquiries concerning your AEG appliance or for further information on AEG products please contact our Customer Care Department by letter or telephone at the address below or visit our website at www.aeg.co.uk... -
Page 42: Guarantee Conditions
GUARANTEE CONDITIONS AEG offer the following guarantee to the first purchaser of this appliance. 1. The guarantee is valid for 12 months commencing when the appliance is handed over to the first retail purchaser, which must be verified by purchase invoice or similar documentation.
Need help?
Do you have a question about the PE-8038M and is the answer not in the manual?
Questions and answers