Table of Contents
Advertisement
Advertisement
Table of Contents

Summary of Contents for AEG PE 8036-M
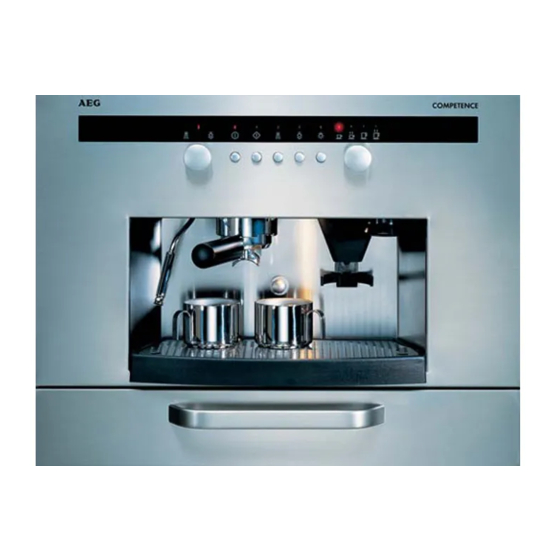
- Page 1 PE 8036-M Espresso coffee machine Operating and Installation Instructions...
-
Page 10: Description Of The Control Panel
INDEX 1. Description of the Coffee machine 2. Description of the control panel 3. Recommendations 4. Instructions for the first use 5. Accessories (already included) Coffee drawer (optional) 7. Coffee 8. Hot water 9. Steam 10. Recipes 11. Cleaning and servicing 12. -
Page 11: Old Appliances
This appliance must be used only · by adults. Make sure that the appliance will be out of the reach of children. Do not attempt to modify this · appliance in any way. Always keep the appliance · clean. The external parts of this ·... -
Page 12: First Use
with the appliance’s functions and with the recommendations given. This appliance is in accordance with the directive BT 73/23 Electricity safety norms EN 60335- § 1 (August 1995 - Safety for electrical household and similar – General Norm) and EN 60335-2-15 (April 1996 – Specific Norms concerning heating liquids appliances). -
Page 13: Regulation Of The Ground Coffee
comes out (repeat this operation as many times as necessary) and then set the knob to the off position (B-18). Meanwhile the water temperature · indicator lights up indicates water process in the boiler. When the light goes out it means that the machine has reached the right temperature and is ready for coffee. - Page 14 programme the coffee measure. Once the required ground coffee measure been (recommended measure corresponding to 6 seconds of grinding) just release the grinder button (A-4) and the measure will be automatically memorised. Useful Advice: be careful to use · the right filter suitable for the required ground coffee measure (A-12/13).
- Page 15 PES 8036-m. The drawer has a lot of useful compartments: One large compartment for cups and saucers A basin for coffee-grounds A compartment for all accessories (filters, measure). A tray 7. COFFEE USE OF COFFEE Set the coffee knob (B-19) to the ·...
-
Page 16: Hot Water
HOW TO PREPARE AN EXCELLENT ESPRESSO To obtain an excellent espresso, a · clean coffee machine and the right temperature are the most important elements. Make sure that filter, filter-holder · and ring nut are always clean. Except when the machine will not ·... -
Page 17: Italian Cappuccino
Turn steam knob · clockwise (B-18) Wait until the liquid becomes · warm. Close the steam knob (B-18) · Attention: never make coffee · when the steam is ready to come out, if this is the case, reset the water level in the boiler as explained in the next point. -
Page 18: Cleaning And Servicing
COLD ESPRESSO SHAKE Frothy and extremely refreshing, this makes a pleasant drink on hot days. Prepare an espresso coffee, add sugar and pour into a cocktail shaker with large ice cubes. Shake for a few seconds. Serve in a tumbler or flûte. IRISH COFFE Any energy-giving tonic. -
Page 19: Water Reservoir
Every month wash the filter and · filter holder in the dishwasher. The steam nozzle (A-2) should be · periodically cleaned. become dirty inside by making cappuccinos. should removed (N/1,N/2) and washed with a sponge in warm water. Attention: Before cleaning the steam pipe, always turn the machine off and wait at least 20 minutes after use to allow... -
Page 20: Electrical Connection
COMPONENTS FOR THE INSTALLATION The coffee machine is equipped with the following components for the installation (C): 2 side-plates 1mm 4 side-plates 2mm 2 telescopic runners 1 mains terminal block 1 cabinet lock tongue 1 cabinet locking bar 2 L brackets 2 rectangular washers 1 mains power cable 10. -
Page 21: Water Connection
INSTALLATION WITH SUPPORT Put the suitable plates (P/1,P/2) · on both sides of the cabinet sides, fixing them with the double- sticker strips (R/1) Pay attention to the position of the bevel which indicates right position plates. Release the telescopic runners ·... -
Page 22: Technical Specifications
14.TECHNICAL SPECIFICATIONS For the general measurement of the coffee machine see pictures. Width · Depth · Height · Capacity · Net Weight · Gross Weight · Mains Voltage 230 - 240 V · Total nominal power · Heating element input ·... -
Page 23: Declaration Of Guarantee Terms
15. DECLARATION OF GUARANTEE TERMS SERVICE & SPARE PARTS If you wish to purchase spare parts or require an engineer, contact your local AEG Service Force Centre by telephoning: 08705 929 929 Your telephone call automatically routed to the Service Centre covering your post code area. -
Page 24: Guarantee Conditions
GUARANTEE CONDITIONS AEG offer the following guarantee to the first purchaser of this appliance. 1. The guarantee is valid for 12 months commencing when the appliance is handed over to the first retail purchaser, which must be verified by purchase invoice or similar documentation. -
Page 30: Vertical Adjustment
INDEX 1. Description drawer 2. Installation 3. Adjustment of the front panel 1. DESCRIPTION OF THE COFFEE DRAWER (PICTURE A) This drawer is optional coffee machine. It can be helpful for the user in making coffees or cappuccinos. It can contain all coffee machine’s accessories and also basin... -
Page 31: Horizontal Adjustment
HORIZONTAL ADJUSTMENT To adjust horizontally the front panel of the drawer release the 2 screws (Y- C2); after the adjustments screw down the 2 screws again (C2). FIXING THE FRONT PANEL After having made the adjustments, the front panel has to be finally fixed, using the 3 screws (7) that the drawer is equipped with (C3). - Page 32 AEG Hausgeräte GmbH Postfach 1036 D-90327 Nürnberg http://www.aeg.hausgeraete.de © Copyright by AEG...


Need help?
Do you have a question about the PE 8036-M and is the answer not in the manual?
Questions and answers