Table of Contents
Advertisement
Quick Links
Advertisement
Table of Contents

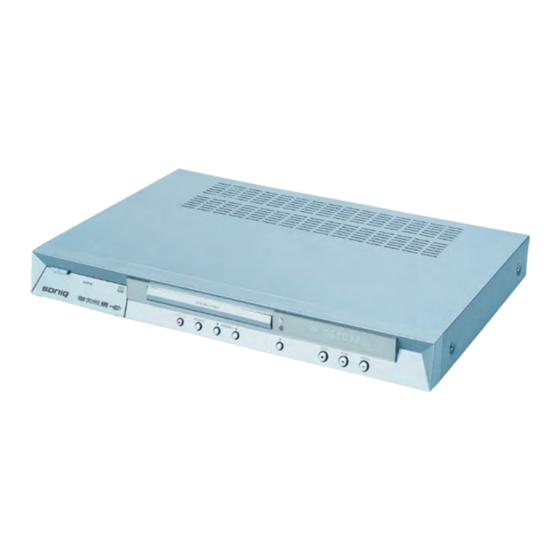
Summary of Contents for SONIQ DVR150
-
Page 2: Safety Precautions
SAFETY PRECAUTIONS WARNING - TO PREVENT FIRE OR SHOCK HAZARD, DO NOT USE THIS PLUG WITH AN EXTENSION CORD, RECEPTACLE OR OTHER OUTLET UNLESS THE BLADES CAN BE FULLY INSERTED TO PRESENT BLADE EXPOSURE. - TO PREVENT FIRE OR SHOCK HAZARD. DO NOT EXPOSE THIS APPLIANCE TO RAIN OR MOISTURE. - TO PREVENT ELECTRICAL SHOCK, MATCH WIDE BLADE PLUG TO WIDE SLOT FULLY INSERT. - Page 3 SAFETY PRECAUTIONS...
-
Page 4: Table Of Contents
CONTENTS BASIC INFORMATION Introduction Terms IIIustration of the Front Panel IIIustration of the Rear Panel IIIustration of the Vacuum Fluorescent Display IIIustration of the Remote Control How to Install and Use the Remote Control Accessories Basic Operations SYSTEM CONNECTIONS Connecting to the TV set Connecting to the Ordinary Audio System Connecting to the Amplifier with DTS or Dolby Digital Decoders Connecting to the Amplifier with 5.1CH Audio Input... - Page 5 CONTENTS Exiting the Chapter Editing Mode EDITING A DISC OF A DVD R or DVD RW ± ± Summarization Entering the Disc Operation Mode Operations Exiting the Operation mode NORMAL PLAYBACK MODE Entering the Playback Mode Playback from the Menu Displayed Playback from the Title Displayed Ending Playback Program and shuffle playback...
-
Page 6: Basic Information
BASIC INFORMATION INTRODUCTION Welcome! Your DVD recorder is ready to record DVD RW/DVD R and to play prerecorded DVD disc. ± ± It is capable of recording great mass of AV input signals, such as TV programs, ordinary VCD or DVD player’s signals, DV camcorder recordings, etc. -
Page 7: Terms
BASIC INFORMATION TERMS Recording quality Depending on the compression degree, there are four recording qualities to DVD R/RW discs with ± 4.7GB (12CM single side) SLP: general definition, a single-side DVD disc can record about six hours program. EP: good definition, a single-side DVD disc can record about four hours program. SP: better definition, a single-side DVD disc can record about two hours program. -
Page 8: Regional Code
BASIC INFORMATION TERMS (CONTINUED) Multiple camera angles function Certain DVD discs offer multiple camera angles function, When using such function, press the ANGLE button to view the scenes at different camera angles. Multiple dubbing languages function V a r i o u s d u b b i n g l a n g u a g e s a r e r e c o r d e d i n s o m e D V D d i s c s . Multiple subtitles function Multiple language subtitles are recorded in some DVD discs. -
Page 9: Iiiustration Of The Front Panel
BASIC INFORMATION IIIustration of the Front Panel DVD RECORDER STOP PLAY PAUSE RECORD SOURCE CHANNEL S-VIDEO VIDEO AUDIO LEFT RIGHT DV IN 16 17 1. Power switch button 7. Channel down button 13. DV input terminal 2. Disc tray 8. Channel up button 14. -
Page 10: Iiiustration Of The Vacuum Fluorescent Display
BASIC INFORMATION IIIustration of the Vacuum Fluorescent Display TV TS REC Below are the lighting VFD items and their corresponding definitions. These items may light up accordingly depending on condition. Lighting Remarks Light on condition VFD items SVCD When playing a disc of such type Depending on disc type When playing When pausing... -
Page 11: Iiiustration Of The Remote Control
BASIC INFORMATION IIIustration of the Remote Control 1. Power button 2. Mute button 3. I/P button 4. Number (0~9) button MUTE POWER EJECT 5. Audio button 6. Subtitle button 7. Setup button 8. Enter button button 10. Source button 11. Return button GOTO CLEAR/ADD 12. -
Page 12: How To Install And Use The Remote Control
BASIC INFORMATION How to install and use the remote control Battery Installation Insert the batteries while observing the positive (+) and Negative (-) polarities. Service life of batteries The batteries normally last for a year although this depends on the operation and how often the remote control is used. -
Page 13: Basic Operations
BASIC INFORMATION Basic operations Mainly use the remote control to operate this unit. The function buttons on the front panel may also fulfill part of the operations. The feedback information of the system is mainly displayed on the TV screen, and part of the information is displayed on the VFD on the front panel. The operating functions for this unit are classified into six modes: PLAYBACK MODE, RECORDING MODE, EDITING MODE, DISC OPERATION MODE, SETUP MODE and TIMER TASK SETTING MODE. -
Page 14: System Connections
SYSTEM CONNECTIONS Note Note Make sure that the player and other equipments are unplugged before connecting. Connecting to the TV set Scart /RGB input Component Video Input AUDIO CENTER VIDEO VIDEO SCART IN SCART OUT OPTICAL S-VIDEO S-VIDEO COAXIAL SUBWOOFER INPUT VIDEO OUTPUT DIGITAL OUT... -
Page 15: Connecting To The Ordinary Audio System
SYSTEM CONNECTIONS Connecting to the Ordinarty Audio System Illustration of the Rear Panel AUDIO CENTER VIDEO VIDEO SCART IN SCART OUT S-VIDEO S-VIDEO COAXIAL OPTICAL SUBWOOFER INPUT VIDEO OUTPUT DIGITAL OUT 5.1CH SURROUND AUDIO OUT Audio In Scart /RGB input Video In Amplifier... -
Page 16: Connecting To The Amplifier With Dts Or Dolby Digital Decoders
SYSTEM CONNECTIONS Connecting to the Amplifier with DTS or Dolby Digital Decorders Illustration of the Rear Panel AUDIO CENTER VIDEO VIDEO SCART IN SCART OUT OPTICAL S-VIDEO S-VIDEO COAXIAL SUBWOOFER INPUT VIDEO OUTPUT DIGITAL OUT 5.1CH SURROUND AUDIO OUT Coaxial in optical in Scart /RGB input Video In Amplifier with Dolby Digital... -
Page 17: Connecting To The Amplifier With 5.1Ch Audio Input
SYSTEM CONNECTIONS Connecting to the Amplifier with 5.1CH Audio Input The Rear Panel of this Unit AUDIO CENTER VIDEO VIDEO OPTICAL S-VIDEO S-VIDEO COAXIAL SUBWOOFER INPUT VIDEO OUTPUT DIGITAL OUT 5.1CH SURROUND AUDIO OUT SUBWOOFER FRONT SURROUND Video In CENTER Amplifier with 5.1CH Audio Input This unit is equipped with built-in Dolby Digital decoder (Dolby AC-3 decoder). -
Page 18: System Connection Of Recording External Signals
SYSTEM CONNECTIONS System Connection of Recording External Signals Connection of using rear panel input trminals S-VIDEO S-VIDEO Connect One of the Two Cables Yellow White 21 pin Scart connector to 21 pin Scart input on Television(option) The Rear Panel of this Unit AUDIO CENTER VIDEO... -
Page 19: Connection Of Using Front Panel Input Terminals
SYSTEM CONNECTIONS System Connection of Recording External Signals Connection of using front panel input terminals S-VIDEO S-VIDEO Connect One of the Two Cables Yellow White The Front Panel of the Unit DVD RECORDER S-VIDEO VIDEO AUDIO LEFT RIGHT DV IN STOP PLAY PAUSE... -
Page 20: Quick Start Recording Guide
QUICK START RECORDING GUIDE Summarization This unit has various external input signal terminals including S-video input, composite video input, TV tuner input, DVD input, and stereo audio input. You may record using any of these video and audio input signals. Recordable discs compatible with this unit are DVD RW and DVD R. -
Page 21: How To Receive The Tv Program
QUICK START RECORDING GUIDE How to Receive the TV Program According to the figure shown in section “System Connections- Connecting to TV set”, connect the system. Connect the power plugs of the TV and this unit to the outlet. Turn on this unit by pressing the [POWER] button, and switch the TV set to AV mode. Press the [SETUP] button to enter the System Setup mode, and then perform the Channel Scanning and Channel Fine Tuning according to the steps introduced in chapter “System Setup-Channel Turning”... -
Page 22: One Touch Recording (Otr)
QUICK START RECORDING GUIDE Manual Recording(CONTINUED) SOURCE Front CVBS : Front panel composite video and audio inputs * SOURCE Front S-VIDEO: Front panel S-video and audio inputs * SOURCE Rear CVBS : Rear panel composite video and audio inputs * SOURCE * SOURCE Rear S-VIDEO : Rear panel S-video and audio inputs DV : Front panel DVD input... -
Page 23: Exiting Recording Mode
QUICK START RECORDING GUIDE To Control the DV Camera Recorder by this Unit (CONTINUED) Pressing the [PLAY] button does not influence the unit, but to make the DV switch to normal playback. When pressing [PAUSE] button, if this unit is in recording mode, the recording will pause and the DV can not be influenced;... -
Page 24: Manual Recording
MANUAL RECORDING Summarization This function can make this unit record automatically according to the preset requirements when the preset time is coming. And it will resume the original mode after finishing the recording. To carry out this function. You should set down a record schedule first and then finish the configuring of the system according to the requirements on the schedule. -
Page 25: Timer Task Setting Mode
MANUAL RECORDING Operation Steps (CONTINUED) Setting the recording quality: Highlight “Quality” item by [ ], [ ] buttons, press [ENTER] Item Editor button to display the drop down list, select the right value Source Front CVBS from the list, then press [ENTER] button to confirm. Quality Mode As for the recording quality, please refer to “Basic Information-... - Page 26 MANUAL RECORDING Operation Steps (CONTINUED) Item Editor If you select “Weekly”, after confirming by [ENTER] button, Source Front CVBS press [ENTER] button again to display the weekday list. Quality Mode Weekly Date Setting the start time of recording Weedy Once Start S e l e c t t h e “...
-
Page 27: Edit A Title Recorded
EDITING A TITLE RECORDED After finish recording a DVD RW disc, you may play it with this unit. When loading disc, the TV screen ± will display the following picture. Each little icon in the picture stands for a title, the words and numbers indicate information of the title. -
Page 28: Rename Title
EDITING A TITLE RECORDED Rename title Play title Edit title Highlight a title icon you want to rename in the Rename title Erase title Title List and press [ ] button, then a menu will Overwrite title pop up as shown in the right figure. Overwrite disc Highlight “Rename title”... -
Page 29: Summarization
EDITING A TITLE RECORDED Empty title Property SLP capability is 4:13:19 EP capability is 2:47:59 SP capability is 1:27:31 Record a new title DVD RW ± HQ capability is 0:43:15 Property Press [ ]button, then a menu will pop up ad shown in the top figure. 1.Select the “Record a new title”,and press [ENTER] button, the TV will turn to input mode and waiting for recording. -
Page 30: Operation Steps
EDITING A TITLE RECORDED Operation Steps selecting the Title/Chapter to be Edited Enter the editing mode. Select the Title/Chapter item by using [ ], [ ] buttons in the editing control menu. Selecting the Title/Chapter to be Edited (CONTINUED) EDIT MODE Press [ENTER] button to make the Title: 01/05 Title/Chapter item in input mode. -
Page 31: Changing The Index Picture
EDITING A TITLE RECORDED Changing the Index picture When entering the DVD title menu (Press the [ENTER] button when playing), the title index will be shown on the screen as a little icon, standing for a title (Please refer to “Playback Mode”). The method of changing the title index is introduced in the following. -
Page 32: Editing A Disc Of A Dvd R Or Dvd Rw
Summarization Disc operations refer to certain functions about the disc in the loader, including viewing disc information, finalizing a disc, erasing disc content, erasing the title, lock/unlock the disc and so on. Entering Disc Operation Mode If you load unfinalizing DVD R or DVD RW disc, you can enter this mode. There are two ways to enter this mode. ±... -
Page 33: Normal Playback Mode
NORMAL PLAYBACK MODE Entering the Playback Mode In the playback mode, this unit is works the same as a regular DVD player. The way to enter the playback mode is as follows: Connect this unit with the TV set (Refer to “System Connection” for details), turn on the TV set and switch it to the AV input mode. -
Page 34: Ending Playback
NORMAL PLAYBACK MODE Ending Playback Press the [STOP] button. This unit enters the pre-stop mode. In this pre-stop mode, this unit automatically memorizes the pre-stop point. If you press [PLAY] button, this unit will resume the playback from the pre-stop point (Playback starts from the beginning of the pre-stopped track for MP3). -
Page 35: Playback Process Control
NORMAL PLAYBACK MODE Program and Shuffle Playback (CONTINUED) You can control the two list windows by the following points. * Move the cursor between left window and right window by [ ] , [ ]buttons. * Move the cursor up and down in one of the windows by [ ] , [ ] buttons. * Highlighting an item in left window, then pressing [CLEAR/ADD] button can added the item to right list window. -
Page 36: Audio/Subtitle Selection
NORMAL PLAYBACK MODE Audio/ Subtitle Selection Set A- MODE P r e s s [ D I S P L AY ] b u t t o n t w i c e t o o p e n t h e m a i n Play TRICK c o n t r o l m e n u . -
Page 37: The Operations Of Function Buttons
NORMAL PLAYBACK MODE The operations of Function Buttons Most of the operations in playing mode can be done by menu or function buttons, some operations only can be done by menu, and other operations only can be done by function buttons. REPEAT button Repeat playback Press [REPEAT] button repeatedly, and the playing mode will be circularly switched in the following... -
Page 38: To Start Playing And Select Content To Play From Program List
NORMAL PLAYBACK MODE Playing JPEG/MP3/CD Disc When loading audio/file disc, the TV screen will display the disc content list and favourite/program list windows as shown in the following figure. From this you can do selection playback or program playback. Move the cursor to the left window by [ ] button. File Play Stop 0:00:00-0:00:00 Highlight your desired file or directory by [ ], [ ] FILE &... -
Page 39: Menu Index For Initial Setup
MENU INDEX FOR INITIAL SETUP Operation Interface and General Steps This section introduces the operation interface and general steps of the system setup. Press [SETUP] button to enter system setup mode. Then the TV screen displays the system setup control menu, which is shown in the following: If the system displays , it means the SYSTEM SETUP - GENERAL... -
Page 40: Progressive/Interlace Setup
MENU INDEX FOR INITIAL SETUP Screen Saver Setup (CONTINUED) Move the cursor up and down to select “ON” or “OFF” by [ ], [ ] buttons. Press [ENTER] button to turn on or off the screen saver function. Pressing any button can exit the screen saver mode after the screen saver picture appears. Progressive / Interlace Setup In the general setup menu, use [ ], [ ] buttons to select “Progressive / Interlace”... -
Page 41: Restore Factory Settings
MENU INDEX FOR INITIAL SETUP Restore Factory Setting Restore factory settings System will reset all the setup Select “Restore factory settings” by [ ], [ items to the default value, OK to confirm, Cancel to exit. buttons in the general setup menu, then press [ENTER] button, and the TV screen displays: Cancel Highlight “OK”... -
Page 42: Speaker Setting
MENU INDEX FOR INITIAL SETUP Speaker setting In the playback setup menu, select “ Speaker setting” by [ ], [ ] buttons, and press [ENTER] button, then the following screen will appear. Speaker Setting Front speaker Distance 4.5 M Small Center speaker Distance 4.5 M Small... -
Page 43: Digital Audio Output Setup
MENU INDEX FOR INITIAL SETUP Rating Level Setup (CONTINUED) To change the password, please highlight the “New Password” in the figure below and press [ENTER] button. New Password New password Confirm password Cancel Select “New password” using the cursor buttons and input the new password by number buttons. Select “Confirm password”... -
Page 44: Record Setup
MENU INDEX FOR INITIAL SETUP Record Setup After setting, when recording, the values you set will become the default values of the corresponding items. In the system setup control menu, select item “ ” by [ ], [ ] buttons and then press [ENTER] button to enter record setup menu. -
Page 45: Default Input Signal Sources Selection
MENU INDEX FOR INITIAL SETUP Default Input Signal Sources Selection In the record setup menu, select “Default source” by [ ], [ ] buttons and press [ENTER] button, then a pop-up menu will appear. Select the desired value by [ ], [ ] buttons and then press [ENTER] button. SYSTEM SETUP - GENERAL Auto chapter marker Default source... -
Page 46: Language Settings
MENU INDEX FOR INITIAL SETUP Language Settings This unit is equipped with various operation interface languages for your selection. Enter the system setup mode. In the system setup control bar, move the cursor up and down by [ ], [ ] buttons. -
Page 47: Dvd Subtitle Language Setup
MENU INDEX FOR INITIAL SETUP DVD Subtitle Language Setup Some DVD discs have various subtitle languages and this setup is used to set the default DVD subtitle language. In the language setup menu, select item “Subtite language” by [ ], [ ] buttons, and press [ENTER] button, then a list will pop up, which is shown as the following figure. -
Page 48: Channel Tuning
MENU INDEX FOR INITIAL SETUP Channel Tuning This unit is equipped with a TV tuner, by which you can receive TV signals. Before receiving TV signals, you must proceed tuning operation. The result of the operation will be saved and will not be lost after this unit is switched off. - Page 49 MENU INDEX FOR INITIAL SETUP Modify Channel Information(CONTINUED) Change the Channel name: Highlight the “Name” item, press [ENTER] button, and then the right window of the same line will become input status shown as the following figure. Move the cursor to a character by [ ], [ ] buttons, and then change the character by [...
-
Page 50: Sort Channel Order
MENU INDEX FOR INITIAL SETUP Modify channel Information (CONTINUED) Pressing [ ] button once to decrease the frequency. Pressing [ ] button once to increase the frequency. Sort Channel Order CHANNEL SORT Highlight item “Sort channel order”, and press [ENTER] button, then a corresponding menu P000 Ch000 Unskip P001 Ch001 Unskip P002 Ch002 Unskip... -
Page 51: System Clock Setup
MNAU INDEX FOR INITIAL SETUP System Clock Setup Enter the system setup mode. In the system setup control menu, move the SYSTEM SETUP -CLOCK cursor to select item “ ” by [ Date(mm/dd/yy) 01/01/00 buttons, and then press [ENTER] button, Time(hh:mm:ss) 12:17:14 so the TV screen will display the time setup... -
Page 52: Appendix
APPENDIX TROUBLE SHOOTING GUIDE When having problems with this unit, please check the chart below for a possible solution before requesting servicing. SYMPTOM CAUSE REMEDY 1. The power plug not connected 1.Connect the power plug into the wall outlet securely No power 2. -
Page 53: Specifications
APPENDIX SPECIFICATIONS ± DVD, DVD R/RW, SVCD, VCD, CD, MP3, JPEG Playable discs ± Recordable discs DVD, DVD R/RW Recording formats DVD (MPEG II) SLP (Standard Long Play), SP(Standard Play) Recording quality EP(Extend Play), HQ(Perfect Quality). Composite video input S-video input(Y/C) Input DV camera jack input(IEEE1394, I-Link) R input... -
Page 54: Credits
APPENDIX CREDITS Manufactured under license from Dolby Laboratories. “Dolby” and the double D symbol are trademarks of Dolby Laboratories. Confidential unpublished works. 1992-1997 Dolby Laboratories, Inc. All rights reserved. This product incorporates copyright protection technology that is by protected method claims of certain U.S. Patents and other intellectual property rights owned by Macrovision Corporation and other rights owners.
Need help?
Do you have a question about the DVR150 and is the answer not in the manual?
Questions and answers