Table of Contents
Advertisement
Available languages
Available languages
Quick Links
INSTALLER: LEAVE THIS MANUAL WITH THE APPLIANCE.
CONSUMER: RETAIN THIS MANUAL FOR FUTURE REFERENCE.
NEVER LEAVE CHILDREN OR OTHER AT RISK INDIVIDUALS ALONE WITH THE APPLIANCE.
CERTIFIED UNDER CANADIAN AND AMERICAN NATIONAL STANDARDS: CSA C22.2 No-46 / UL 2021
SAFETY INFORMATION
WARNING
!
If the information in these instructions are
not followed exactly, a fi re or explosion
may result causing property damage,
personal injury or loss of life.
- Do not store or use gasoline or other fl ammable
vapors and liquids in the vicinity of this or any
other appliance.
Phone (705)721-1212 • Fax (705)722-6031 • www.napoleonfi replaces.com • ask@napoleonproducts.com
$10.00
INSTALLATION AND
OPERATING INSTRUCTIONS
NEFV38H
ELECTRIC FIREPLACE
Wolf Steel Ltd., 24 Napoleon Rd., Barrie, ON, L4M 0G8 Canada /
103 Miller Drive, Crittenden, Kentucky, USA, 41030
1.16C
W415-1352 / 08.19.14
EN
FR
PG
25
Advertisement
Chapters
Table of Contents

Related Manuals for Napoleon NEFV38H


Summary of Contents for Napoleon NEFV38H
- Page 1 Wolf Steel Ltd., 24 Napoleon Rd., Barrie, ON, L4M 0G8 Canada / 103 Miller Drive, Crittenden, Kentucky, USA, 41030 Phone (705)721-1212 • Fax (705)722-6031 • www.napoleonfi replaces.com • ask@napoleonproducts.com 1.16C...
-
Page 2: Table Of Contents
TABLE OF CONTENTS INTRODUCTION DIMENSIONS LISTING APPROVALS GENERAL INSTRUCTIONS PARTS SUPPLIED LOCATING APPLIANCE UNPACKING AND TESTING APPLIANCE GROUNDING APPLIANCE INSTALLATION MINIMUM CLEARANCE TO COMBUSTIBLES INSTALLING THE APPLIANCE - WALL MOUNT RECESSING INSTALLATION 3.4.1 BUILT-IN FRAMING 3.4.2 MOUNTING BRACKET INSTALLATION HARD WIRING INSTALLATION FINISHING GLASS FRONT REMOVAL CRYSTAL EMBER INSTALLATION... -
Page 3: Introduction
1.0 INTRODUCTION WARNING • THIS APPLIANCE IS HOT WHEN OPERATED AND CAN CAUSE SEVERE BURNS IF CONTACTED. • Do not operate appliance before reading and understanding operating instructions. Failure to operate appliance according to operating instructions could cause fi re or injury. •... -
Page 4: Dimensions
This appliance has been tested in accordance with the CSA Standards for fi xed and location-dedicated electric room appliances in the United States and Canada. If you need assistance during installation, please contact your local dealer. Model Number NEFV38H NOTE: This appliance must be electrically wired and grounded Description Wall-Mount... -
Page 5: General Instructions
GENERAL INSTRUCTIONS WARNING READ THESE INSTRUCTIONS COMPLETELY BEFORE BEGINNING INSTALLATION. FAILURE TO FOLLOW THEM COULD CAUSE AN APPLIANCE MALFUNCTION RESULTING IN SERIOUS INJURY AND/OR PROPERTY DAMAGE. ALL ELECTRIC APPLIANCES HAVE HOT AND ARCING OR SPARKING PARTS INSIDE. DO NOT USE IT IN AREAS WHERE GASOLINE, PAINT OR FLAMMABLE LIQUIDS ARE PRESENT. -
Page 6: Parts Supplied
PARTS SUPPLIED DESCRIPTION ILLUSTRATION QUANTITY APPLIANCE REMOTE & CR2032 BATTERY CR2032 CRYSTAL PEBBLES WALL PLUG SCREW CORD COVER JUNCTION BOX COVER PLATE COUPLING FLAT ELBOW W415-1352 / 08.19.14... -
Page 7: Locating Appliance
2.0 LOCATING APPLIANCE WARNING DUE TO HIGH TEMPERATURES, THIS ELECTRIC APPLIANCE SHOULD BE LOCATED OUT OF TRAFFIC. KEEP COMBUSTIBLE MATERIALS SUCH AS FURNITURE, PILLOWS, BEDDING, PAPERS, CLOTHES AND CURTAINS AT LEAST 36" FROM THE FRONT OF THE APPLIANCE. NEVER LOCATE THIS ELECTRIC APPLIANCE WHERE IT MAY FALL INTO A BATHTUB OR OTHER WATER CONTAINER. -
Page 8: Installation
HEATER VENTS ON THE ELECTRIC APPLIANCE CANNOT, IN ANY WAY, BE COVERED AS IT MAY CREATE A FIRE HAZARD. 68.5 Your NEFV38H is a built-in and wall-mounted appliance. Select a suitable location that is not susceptible to moisture and is away from drapes, furniture and high traffi c areas. NOTE: Follow all National and local electrical codes. -
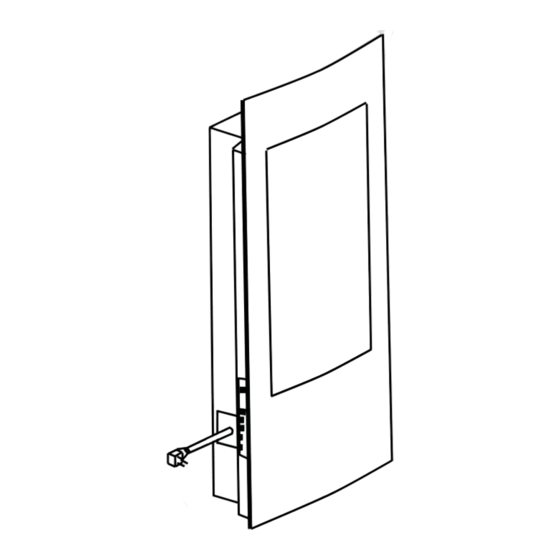
Page 9: Installing The Appliance - Wall Mount
INSTALLING THE APPLIANCE - WALL MOUNT FIG. 1 Select a location that is not prone to moisture and is located at least 36" (914mm) away from combustible materials such as curtain drapes, 6" [152mm] 6" [152mm] furniture, bedding, paper, etc. Before installing the appliance, remove the front glass. -
Page 10: Recessing Installation
RECESSING INSTALLATION The appliance can be recessed into the wall by 2 1/2" (63mm). Select a location that is not prone to moisture and is located at least 36" (914mm) away from combustible materials such as curtain drapes, furniture, bedding, paper etc. 3.4.1 BUILT-IN FRAMING Finishing Material 33"... -
Page 11: Mounting Bracket Installation
3.4.2 MOUNTING BRACKET INSTALLATION Remove the glass front, refer to "GLASS FRONT REMOVAL" section for removal instructions. Remove the crystals from the appliance prior to installing the mounting brackets. Remove the 4 screws from the top and bottom brackets, refer to Figure 1. Re-arrange the top and bottom brackets so the top bracket is on the bottom and vice versa. -
Page 12: Hard Wiring Installation
HARD WIRING INSTALLATION WARNING TURN OFF THE APPLIANCE COMPLETELY AND LET COOL BEFORE SERVICING. ONLY A QUALIFIED SERVICE PERSON SHOULD SERVICE AND REPAIR THIS ELECTRIC APPLIANCE. HARD WIRING CONNECTION If it is necessary to hard wire this appliance, a qualifi ed electrician must remove the cord connection, and wire the appliance directly to the house hold wiring. -
Page 13: Finishing
4.0 FINISHING WARNING POWER SUPPLY SERVICE MUST BE COMPLETED PRIOR TO FINISHING TO AVOID RECONSTRUCTION. HEAT VENTS AND AIR OPENINGS CANNOT BE COVERED IN ANY CIRCUMSTANCES. GLASS FRONT REMOVAL WARNING GLASS MAY BE HOT, DO NOT TOUCH GLASS UNTIL COOLED. FACING AND/OR FINISHING MATERIALS MUST NOT INTERFERE WITH AIR FLOW THROUGH AIR OPENINGS, LOUVRES OPENINGS, OPERATION OF LOUVRES OR DOORS OR ACCESS FOR SERVICE. -
Page 14: Operating Instructions
5.0 OPERATING INSTRUCTIONS Once the appliance has been plugged into a grounded electrical outlet, it is ready to operate. NOTE: Ensure the house circuit breakers for the power supply are turned on. The power supply must be 120 Volts/ 60Hz, 15 Amps. MAIN POWER SWITCH &... -
Page 15: Maintenance
6.0 MAINTENANCE PCB (CONTROL BOARD) WARNING PREPARATION FOR MAINTENANCE ALWAYS DISCONNECT THE POWER AND ALLOW THE ELECTRIC APPLIANCE TO COOL BEFORE PERFORMING ANY CLEANING, MAINTENANCE OR RELOCATION OF THIS ELECTRIC APPLIANCE. TURN CONTROLS TO OFF AND REMOVE PLUG FROM OUTLET OR TURN OFF THE HOUSE CIRCUIT BREAKER TO ELECTRIC APPLIANCE RECEPTACLE. -
Page 16: Wiring Diagram
7.0 WIRING DIAGRAM WARNING TURN OFF THE APPLIANCE COMPLETELY AND LET COOL BEFORE SERVICING. ONLY A QUALIFIED SERVICE PERSON SHOULD SERVICE AND REPAIR THIS ELECTRIC APPLIANCE. W415-1352 / 08.19.14... -
Page 17: Replacement Parts
8.0 REPLACEMENT PARTS Contact your dealer or the factory for questions concerning prices and policies on replacement parts. Normally all parts can be ordered through your Authorized dealer / distributor. WARNING FOR WARRANTY REPLACEMENT PARTS, A PHOTOCOPY OF THE ORIGINAL INVOICE WILL BE REQUIRED TO HONOUR THE CLAIM. FAILURE TO POSITION THE PARTS IN ACCORDANCE WITH THIS When ordering replacement parts always give the following information:... - Page 18 ITEMS MAY NOT APPEAR EXACTLY AS ILLUSTRATED REF. # PART # DESCRIPTION REMOTE CONTROL W190-0074 W135-0587 LOG & CRYSTAL GLASS (PLASTIC) FLAME LIGHT LED W405-0020 W405-0021 LOG LIGHT LED BLOWER C/W HEATER W062-0060 MAIN PCB W190-0076 W190-0075 CONTROL PANEL PCB W405-0022 DECORATIVE LED W435-0073...
-
Page 19: Troubleshooting
9.0 TROUBLESHOOTING WARNING TURN OFF THE APPLIANCE COMPLETELY AND LET COOL BEFORE SERVICING. ONLY A QUALIFIED SERVICE PERSON SHOULD SERVICE AND REPAIR THIS ELECTRIC APPLIANCE. SYMPTOM PROBLEM TEST SOLUTION Dim or no fl ame Flame LED’s are burnt out Inspect the LED’s and replace them if necessary. Ember bed is not Ember LED’s are burnt out Inspect the ember bed LED’s and replace them if necessary. -
Page 20: Warranty
NAPOLEON® warrants its products against manufacturing defects to the original purchaser only. Registering your warranty is not necessary. Simply provide your proof of purchase along with the model and serial number to make a warranty claim. NAPOLEON® reserves the right to have its representative inspect any product or part thereof prior to honouring any warranty claim. -
Page 21: Service Warranty
11.0 SERVICE WARRANTY 43.1 W415-1352 / 08.19.14... -
Page 22: Notes
12.0 NOTES 44.1 W415-1352 / 08.19.14... - Page 23 44.1 W415-1352 / 08.19.14...
- Page 24 Fireplace Inserts • Charcoal Grills • Gas Fireplaces • Waterfalls • Wood Stoves Heating & Cooling • Electric Fireplaces • Outdoor Fireplaces • Gourmet Grills 24 Napoleon Road, Barrie, Ontario, Canada L4M 0G8 214 Bayview Drive, Barrie, Ontario, Canada L4N 4Y8...
- Page 25 N° DE MODÈLE Wolf Steel Ltd., 24 Napoleon Rd., Barrie, ON, L4M 0G8 Canada / 103 Miller Drive, Crittenden, Kentucky , USA, 41030 Téléphone 705-721-1212 • Télécopieur 705-722-6031 • www.napoleonfoyers.com • ask@napoleonproducts.com 10,00 $ 1.16D...
- Page 26 TABLE DES MATIÈRES INTRODUCTION DIMENSIONS HOMOLOGATIONS INSTRUCTIONS GÉNÉRALES PIÈCES FOURNIES EMPLACEMENT DE L'APPAREIL DÉBALLAGE ET VÉRIFICATION DE L'APPAREIL MISE À LA TERRE DE L'APPAREIL INSTALLATION DÉGAGEMENTS MINIMAUX AUX MATÉRIAUX COMBUSTIBLES INSTALLATION DE L'APPAREIL - FIXATION MURALE INSTALLATION ENCASTRÉ 3.4.1 DÉGAGEMENT MINIMUM AUX COMBUSTIBLES 3.4.2 OSSATURE - ENCASTRÉ...
-
Page 27: Introduction
1.0 INTRODUCTION AVERTISSEMENT • CET APPAREIL EST CHAUD LORSQU’IL FONCTIONNE ET PEUT CAUSER DE GRAVES BRÛLURES EN CAS DE CONTACT. • Ne faites pas fonctionner l’appareil avant d’avoir lu et compris les instructions d’utilisation. Ne pas respecter les instructions pourrait causer un incendie ou des blessures corporelles. •... -
Page 28: Dimensions
Cet appareil a été testé selon les normes CSA pour foyers électriques installés de façon permanente aux États-Unis et au Canada. Si vous avez besoin d'assistance durant l'installation, veuillez contacter votre détaillant local. NEFV38H Numéro de NOTE: Cet appareil doit être raccordé... -
Page 29: Instructions Générales
INSTRUCTIONS GÉNÉRALES AVERTISSEMENT VEUILLEZ LIRE LE MANUEL D’INSTRUCTIONS EN ENTIER AVANT DE COMMENCER L’INSTALLATION. OMETTRE DE SUIVRE CES INSTRUCTIONS POURRAIT CAUSER UN MAUVAIS FONCTIONNEMENT DE L’APPAREIL ET ENTRAÎNER DES BLESSURES GRAVES ET/OU DES DOMMAGES MATÉRIELS. TOUS LES APPAREILS ÉLECTRIQUES CONTIENNENT DES COMPOSANTS INTERNES QUI DEVIENNENT CHAUDS ET QUI PRODUISENT DES ÉTINCELLES. -
Page 30: Pièces Fournies
PIÈCES FOURNIES DESCRIPTION ILLUSTRATION APPAREIL TÉLÉCOMMANDE ET PILE CR2032 CR2032 VERRE CONCASSÉ CONNECTEUR MURAL CORDON DE COUVRE PLAQUE DE RECOUVREMENT BOÎTE DE JONCTION COUPLING PLAT DU COUDE W415-1352 / 08.20.14... -
Page 31: Emplacement De L'appareil
2.0 EMPLACEMENT DE L'APPAREIL AVERTISSEMENT EN RAISON DES TEMPÉRATURES ÉLEVÉES, L'APPAREIL DEVRAIT ÊTRE PLACÉ LOIN DES ENDROITS PASSANTS. GARDEZ TOUS LES ARTICLES COMBUSTIBLES TELS QUE LES MEUBLES, LES OREILLERS, LA LITERIE, LE PAPIER, LES VÊTEMENTS ET LES RIDEAUX À UNE DISTANCE D’AU MOINS 3 PIEDS (0,9 MÈTRE) DE LA FAÇADE DE L'APPAREIL. -
Page 32: Installation
AFIN DE RÉDUIRE LE RISQUE D'INCENDIE. 68.5 Votre appareil NEFV38H est fi xé au mur. Choisir un emplacement convenable qui n'est pas susceptible à l'humidité et est loin des tentures, les meubles et les hauts secteurs de circulation. NOTE: Suivre tous les codes électrique national et locaux. -
Page 33: Installation De L'appareil - Fixation Murale
INSTALLATION DE L'APPAREIL - FIXATION MURALE FIG. 1 Choisissez un endroit non sujet à l’humidité et situé à au moins 36" (914mm) des articles combustibles, tels que les rideaux, meubles, literie, papier, etc. 6" [152mm] 6" [152mm] Avant d'installer l'appareil, enlevez le vitre avant. Enlevez l'inférieur vis sur l'appareil. -
Page 34: Installation Encastré
INSTALLATION ENCASTRÉ L'appareil peut être encastré dans le mur par 2 1/2" (63mm). Choisissez un endroit non sujet à l’humidité et situé à au moins 36 pouces (914mm) des articles combustibles, tels que les rideaux, meubles, literie, papier, etc. 3.4.1 DÉGAGEMENT MINIMUM AUX COMBUSTIBLES Les mesures sont prises du corps Côtés, l'arrière et le sommet 0"... -
Page 35: Installation Du Support De Fixation
3.4.3 INSTALLATION DU SUPPORT DE FIXATION Enlever le verre du devant de l'appareil, se référer à la section «INSTALLATION DE LA FAÇADE VITRÉE ». Enlever le médias de verre de l'appareil, avant d'installer les support de fi xation. Enlevez les 4 vis des supports supérieur et inférieur, voir le Figure 1. remplacer le supérieure et inférieur supports de sorte que le support supérieur est sur l'inférieur et inversement. -
Page 36: Branchement Par Cable
BRANCHEMENT PAR CABLE AVERTISSEMENT COUPEZ L’ALIMENTATION ÉLECTRIQUE À L’APPAREIL ET LAISSEZ-LE REFROIDIR AVANT D’EFFECTUER UN ENTRETIEN. SEUL UN TECHNICIEN DE SERVICE QUALIFIÉ PEUT EFFECTUER L’ENTRETIEN OU LA RÉPARATION DE CET APPAREIL ÉLECTRIQUE. Si c'est nécessaire de faire un branchement par câble, un électricien qualifi é peut retirer le cordon d’alimentation de l'appareil et brancher ce dernier directement au câblage de la maison. -
Page 37: Finitions
4.0 FINITIONS AVERTISSEMENT LE RACCORDEMENT PAR CÂBLE DOIT ÊTRE COMPLÉTÉ AVANT LA FINITION AFIN D'ÉVITER TOUTE RECONSTRUCTION. LES ENTRÉES D'AIR ET LES SORTIES D'AIR DE L'APPAREIL NE DOIVENT JAMAIS ÊTRE COUVERTES. L'ENLÈVEMENT DU PORTE VITRÉE AVERTISSEMENT LA VITRE PEUT ÊTRE CHAUDE, NE TOUCHEZ PAS LA VITRE JUSQU’À CE QU’ELLE AIT REFROIDI. LES LOQUETS DE PORTE FONT PARTIE D'UN DISPOSITIF DE SÉCURITÉ... -
Page 38: Instructions De Fonctionnement
5.0 INSTRUCTIONS DE FONCTIONNEMENT L'appareil est prêt à fonctionner dès qu'il est correctement branché dans une prise de courant mise à la terre. NOTE : Assurez-vous que les disjoncteurs de la maison pour ce circuit soient allumés. À la source d’alimentation électrique doit être 120 Volts/ 60Hz, 15 Amps. -
Page 39: Entretien
6.0 ENTRETIEN CARTE DE CIRCUIT IMPRIMÉ AVERTISSEMENT PRÉPARATION POUR L'ENTRETIEN DÉBRANCHEZ TOUJOURS L'ALIMENTATION ÉLECTRIQUE ET LAISSEZ L'APPAREIL REFROIDIR AVANT DE LE NETTOYER, DE PROCÉDER À SON ENTRETIEN OU DE LE RELOCALISER. TOURNEZ LES CONTRÔLES À « OFF » ET RETIREZ LA FICHE DE LA PRISE DE COURANT OU FERMEZ LE DISJONCTEUR DU CIRCUIT DE VOTRE APPAREIL. -
Page 40: Schéma De Câblage
7.0 SCHÉMA DE CÂBLAGE AVERTISSEMENT COUPEZ L’ALIMENTATION ÉLECTRIQUE À L’APPAREIL ET LAISSEZ-LE REFROIDIR AVANT D’EFFECTUER UN ENTRETIEN. SEUL UN TECHNICIEN DE SERVICE QUALIFIÉ PEUT EFFECTUER L’ENTRETIEN OU LA RÉPARATION DE CET APPAREIL ÉLECTRIQUE. W415-1352 / 08.20.14... -
Page 41: Rechanges
8.0 RECHANGES Contactez votre détaillant ou le fabricant pour les questions concernant les prix et la disponibilité des pièces de rechange. Normalement, toutes les pièces peuvent être commandées chez votre détaillant autorisé. POUR UN REMPLACEMENT DE PIÈCE SOUS GARANTIE, UNE PHOTOCOPIE DE LA FACTURE ORIGI- NALE SERA REQUISE AFIN DE POUVOIR HONORER LA DEMANDE. - Page 42 CES ARTICLES PEUT DIFFÉRER DE CELLE ILLUSTRÉ ITEMS MAY NOT APPEAR EXACTLY AS ILLUSTRATED REF. # PART # DESCRIPTION TÉLÉCOMMANDE MANUELLE W190-0074 W135-0587 BÛCHES & VERRE CONCASSÉ (PLASTIQUE) DEL DU FLAMME W405-0020 W405-0021 DEL DU BÛCHES SOUFFLERIE AVEC CHAUFFERETTE W062-0060 CARTE DE CIRCUIT IMPRIMÉ...
-
Page 43: Guide De Dépannage
9.0 GUIDE DE DÉPANNAGE AVERTISSEMENT COUPEZ L’ALIMENTATION ÉLECTRIQUE À L’APPAREIL ET LAISSEZ-LE REFROIDIR AVANT D’EFFECTUER UN ENTRETIEN. SEUL UN TECHNICIEN DE SERVICE QUALIFIÉ PEUT EFFECTUER L’ENTRETIEN OU LA RÉPARATION DE CET APPAREIL. SYMPTÔME PROBLÈME SOLUTIONS La luminosité du Cylindre DEL sont brûlées Vérifi... -
Page 44: Garantie
10.0 GARANTIE Les foyers électriques NAPOLÉON® sont fabriqués conformément aux normes strictes du Certifi cat d’assurance de qualité mondialement reconnu ISO 9001 : 2008. Les produits NAPOLÉON® sont conçus avec des composants et des matériaux de qualité supérieure, assemblés par des artisans qualifi... -
Page 45: Historique D'entretien
11.0 HISTORIQUE D'ENTRETIEN 43.1 W415-1352 / 08.20.14... -
Page 46: Notes
12.0 NOTES 44.1 W415-1352 / 08.20.14... - Page 47 44.1 W415-1352 / 08.20.14...
- Page 48 Poêles à bois • Produits HVAC • Foyers électriques • Foyers extérieurs • Grils à gaz de qualité 7200, Route Transcanadienne, Montréal, Québec H4T 1A3 24 Napoleon Road, Barrie, Ontario, Canada L4M 0G8 214 Bayview Drive, Barrie, Ontario, Canada L4N 4Y8...
Need help?
Do you have a question about the NEFV38H and is the answer not in the manual?
Questions and answers