Table of Contents
Advertisement
Quick Links
Advertisement
Table of Contents

Related Manuals for Eneo Almira R-01


Summary of Contents for Eneo Almira R-01
- Page 1 Installation and Operating Instructions Digital Video Recorder, Almira R-01...
- Page 2 © Copyright 2005. All rights reserved. All other trademarks and copyrights referred to herein are the property of their respective holders. No part of this documentation may be reproduced in any form or by any means or used to make any derivative work, without written permission from the copyright holder, details of whom can be obtained from Videor Technical.
- Page 3 Electromagnetic Compatibility (EMC) Warning This is a Class A product. In a domestic environment this product may cause radio interference, in which case the user may be required to take adequate measures. Manufacturer’s Declaration Of Conformance A Declaration of Conformity in accordance with the following EU standards has been made and is kept on file at the address shown on the last page.
- Page 4 NTENDED Use this product only for the purpose for which it was designed, as described in this manual and in the Eneo Almira user manual. NVIRONMENTAL ONDITIONS Storage: –10° to +60°C, 14 to 140°F. The recorder should be allowed to acclimatize to its operational temperature range before power is supplied.
-
Page 5: Table Of Contents
ONTENTS ....................... 6 REFACE .................. 6 BOUT THIS MANUAL ............6 ONVENTIONS USED IN THIS MANUAL ..................... 6 RADEMARKS ......................7 NSTALLATION ..................7 EQUIREMENTS ............7 EFORE INSTALLING THE RECORDER ............8 ECORDER INSTALLATION CHECKLIST ................ 9 NSTALLING THE RECORDER 2.4.1 Wiring and installing the recorder............ -
Page 6: Preface
REFACE 1.1 A BOUT THIS MANUAL This manual includes safety and installation instructions for installers, and should be used in conjunction with the separate user manual supplied with the camera. This document is intended to provide accurate information. However, the information it contains is subject to change without notice. -
Page 7: Installation
NSTALLATION This chapter gives you a step-by-step guide to installing the recorder. 2.1 R EQUIREMENTS Operation requirements The recorder is designed to work in tandem with a “recorder-ready” camera. Cable requirements The recorder requires a power cable and a dedicated interconnection cable (which is supplied with the unit). -
Page 8: Recorder Installation Checklist
2.3 R ECORDER INSTALLATION CHECKLIST Inside the box you will find: Quantity Item Recorder Plastic support bracket M5 x 6mm/0.24” Pan Head Pozidriv screws (for support bracket) M5 shakeproof washers Plastic connector cover M3 x 6mm/0.24” Pan Head Pozidriv screws (for the connector cover) 3m/9ft 10”... -
Page 9: Installing The Recorder
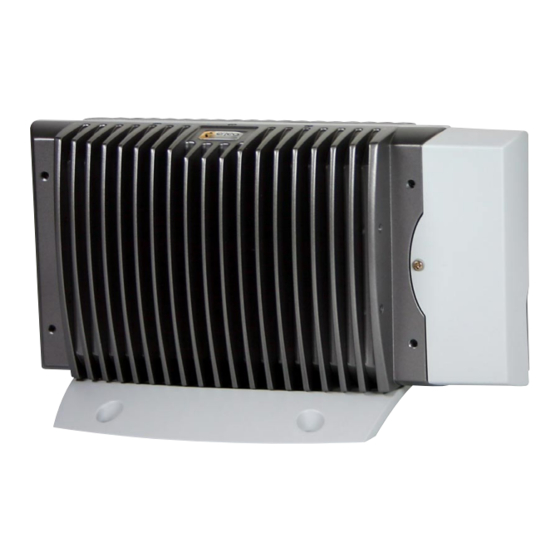
2.4 I NSTALLING THE RECORDER CAUTION: Recorder Orientation The recorder must be installed vertically upright on a surface adequate to bear its full weight. Failure to comply with these instructions will invalidate the warranty. CAUTION: Ventilation Clearance Ensure recorder has sufficient clearance when installed. Refer to Fig. 2.1) Fig. - Page 10 Use screws or other suitable fastenings to fix the recorder in its final position through the four holes in the plastic support bracket. To prevent ground loops and resulting picture interference, we recommend that you ground the recorder to a suitable building earth point. CAUTION: Ensure the recorder is stable in its final position, and that the unit itself stands vertically upright.
-
Page 11: Disconnecting The Recorder
Turn on the power supply to the recorder, and check the LED display. The Power LED should light up immediately. After an interval of approximately one minute, when the recorder has successfully started up and completed its self-test, the second LED (marked with a heart symbol) will begin to flash. -
Page 12: Recorder Specification
ECORDER SPECIFICATION Features Retrospective Pan and Tilt Yes – see a full 360° after the fact Retrospective Optical Yes – approx. 4x zoom after the fact Equivalent Zoom Retrospective VMD Yes – carry out motion detection and tracking after the fact Retrospective Scene Analysis Yes (as demo) –... - Page 13 Auto Record on Power Up Recording Speeds 1, 2 or 4 frames per second Recording Failure Detection Yes – on screen and/or via alarm output Recording Tamper Detection Yes – 384 bit hash proprietary authentication signature Record Pre- / Post-Alarm Yes –...
- Page 14 Dimensions 105mm / 4.13” 40mm 40mm Diameter / 1.575” / 1.575” 5.8mm / 0.23” 3 x tapped M5 thread 120mm / 4.75” 261mm / 10.30” 78mm / 3.07” 192.1mm / 7.563” 78mm / 3.07” Safety lanyard locating hole 4 x tapped 4 x tapped M5 thread M5 thread...
- Page 15 Videor Technical E. Hartig GmbH ® Exclusive distribution through specialised trade channels only. VIDEOR TECHNICAL E. Hartig GmbH Technical changes reserved. Carl-Zeiss-Straße 8 · 63322 Rödermark/Germany Tel. +49 (0) 60 74 / 888-0 · Fax +49 (0) 60 74 / 888-100 Almira Manual V3.14...
Need help?
Do you have a question about the Almira R-01 and is the answer not in the manual?
Questions and answers