Table of Contents
Advertisement
Quick Links
Download this manual
See also:
User Manual
Advertisement
Table of Contents
Troubleshooting

Subscribe to Our Youtube Channel
Related Manuals for COBHAM Explorer 510


Summary of Contents for COBHAM Explorer 510
- Page 1 EXPLORER 510 User manual...
- Page 2 Manuals issued by Thrane & Thrane A/S are periodically revised and updated. Anyone relying on this information should acquire the most current version e.g. from www.cobham.com/satcom, Service and support, or from the distributor.
-
Page 3: Safety Summary
Failure to comply with these precautions or with specific warnings elsewhere in this manual violates safety standards of design, manufacture and intended use of the equipment. Cobham SATCOM assumes no liability for the customer's failure to comply with these requirements. - Page 4 Antenna safety instructions Antenna safety instructions Use only manufacturer supplied antennas. Antenna minimum safe distance: 0.6 m Antenna gain Directional, with maximum gain of 11 dBi (with reference to isotropic). The Federal Communications Commission has adopted a safety standard for human exposure to RF (Radio Frequency) energy which is below the OSHA (Occupational Safety and Health Act) limits.
- Page 5 About this manual Intended readers This manual is a user manual for the EXPLORER 510. The manual is intended for anyone who is using or intends to use the EXPLORER 510. No specific skills are required to operate the EXPLORER 510. However, it is important that you observe all safety requirements listed in the Safety summary in the beginning of this manual, and operate the EXPLORER 510 according to the guidelines in this manual.
-
Page 6: Table Of Contents
Your EXPLORER 510 terminal ..................3 Chapter 2 To get started To unpack and assemble the EXPLORER 510 ..........5 To switch the EXPLORER 510 on or off ..............7 To connect your WLAN-enabled device ............... 8 To connect to LAN ........................ - Page 7 Advanced settings ........................55 Optional: To set up cellular network for data ..........64 Chapter 5 Maintenance and troubleshooting Support ...............................66 Software update ........................67 Restore the settings of the EXPLORER 510 ............69 Maintenance ..........................70 Troubleshooting ........................71 Log files ..............................80 App. A Technical specifications General specifications ......................82...
- Page 8 Contents App. B Conformity CE (R&TTE) ............................89 ................................89 .................................89 Japanese Radio Law and Japanese Telecommunications Business Law Compliance.........................90 Glossary ..................................92 Index ..................................95 98-143082-A viii...
-
Page 9: Chapter 1 Introduction To Explorer
USB interface is also available, with possible connection of LAN using a USB to LAN Converter Cable (included). The EXPLORER 510 provides access to up to 464 kbps Standard data and 32, 64 and 128 kbps Streaming data and may be used for: •... -
Page 10: Features And Interfaces Of The Explorer 510
Chapter 1: Introduction to EXPLORER 510 The EXPLORER 510 can withstand severe environmental conditions such as humidity, dust, extreme weather and changing temperatures. It is small in size and fits easily into a backpack or similar. Features and interfaces of the EXPLORER 510 Features ... -
Page 11: Your Explorer 510 Terminal
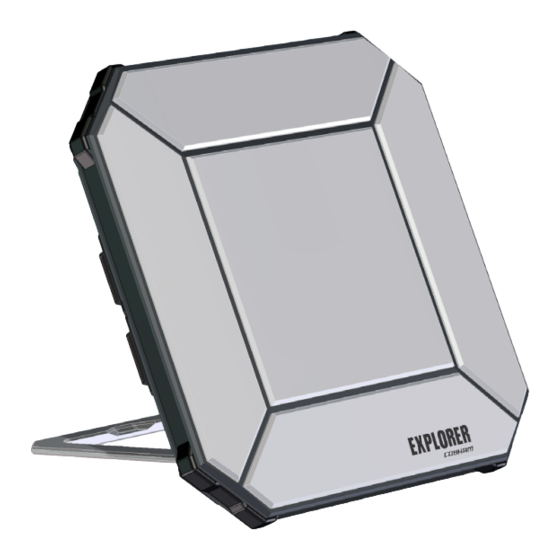
Chapter 1: Introduction to EXPLORER 510 Your EXPLORER 510 terminal EXPLORER 510 overview The EXPLORER 510 is a compact unit comprising transceiver and antenna in one unit. Antenna for BGAN, GNSS and Wireless LAN SIM card Status LEDs USB connector... -
Page 12: Sim Card
Recharge the battery regularly. SIM card The EXPLORER 510 requires a SIM card to go online. Without a SIM card you can still configure the terminal and you may be able to make emergency calls if the network allows it, but you cannot make normal calls nor access the internet. -
Page 13: Chapter 2 To Get Started
Chapter 2 To get started This chapter describes: • To unpack and assemble the EXPLORER 510 • To switch the EXPLORER 510 on or off • To connect your WLAN-enabled device • To connect to LAN • To access the web interface •... - Page 14 Getting started booklet The EXPLORER Connect app If you want to use your smartphone with the EXPLORER 510, install the EXPLORER Connect app, which is available for iPhone at the Apple Store and for Android phones at Google Play. The EXPLORER Connect app provides the following options:...
-
Page 15: To Switch The Explorer 510 On Or Off
Status for use. indicator At this point you may hear a sound from the EXPLORER 510, indicating that it is Note ready to be pointed towards the satellite (see on page 9). -
Page 16: To Connect Your Wlan-Enabled Device
46. To connect to LAN The EXPLORER 510 does not have a LAN connector, but you can use the USB to LAN Converter Cable supplied with your EXPLORER 510 to connect your computer. The USB charge current must be set to 1.0 A. This is the default setting. See... -
Page 17: To Access The Web Interface
BGAN or cellular network The EXPLORER 510 is a BGAN terminal. However, you have the option of connecting an EXPLORER Cellular Modem to the USB interface of the EXPLORER 510, making it possible to use the cellular network when it is available. See Optional: To set up cellular network for data page 64. - Page 18 Chapter 2: To get started Pointing (BGAN) You can choose to cancel pointing from the pointing page in the EXPLORER Connect Note app or the web interface. In this case you cannot communicate on the BGAN network, but you can access all terminal settings. Before pointing the antenna you can use the coverage map below to find your approximate location in relation to the satellites.
- Page 19 Alternatively you can switch the EXPLORER 510 off and on again. 3. Use the pointing sound and/or the Pointing page to find the highest possible signal strength, while slowly rotating and tilting the EXPLORER 510 in the direction of the satellite.
- Page 20 Ready (or other status information): • Ready means the EXPLORER 510 is registered on the network and is ready to go online. If there is any other status information to show, e.g. if a call or data session is active or there is a warning, the status field will show that instead.
-
Page 21: To Start And Stop Data Connections
47. To set up the connection mode To start and stop data connections on your EXPLORER 510, do as follows: 1. On your smartphone, start the EXPLORER Connect app and select Terminal access, or on the connected device, open your browser and type the IP address of the terminal (default IP address: 192.168.0.1) in the address bar to access the web interface. - Page 22 Chapter 2: To get started Default data connection types By default, the following connections are available: Name Type of connection Standard data Several users can share the data connection. This type of connection is ideal for TCP/IP traffic such as e-mail, file transfer, and Internet/intranet access.
-
Page 23: To Make Phone Calls Over Bgan
EXPLORER 510. You can also find other SIP applications on the Internet. To connect your smartphone for making calls To use your phone to make calls through the EXPLORER 510 using WLAN, do as follows: 1. Start up the EXPLORER 510 terminal. - Page 24 If you do not have the EXPLORER Connect app and it is the first time you connect your phone to the EXPLORER 510 for making calls, you must first set up the SIP server details in your phone. For information how, see the user documentation for your phone and for the SIP application.
-
Page 25: External Power
The default behaviour of the EXPLORER 510 is to power up automatically when you connect external power. If you wish, you can change this power up mode, so that the EXPLORER 510 is only powered if the Power button is pressed. -
Page 26: Semi-Fixed Installation
EXPLORER 510 has a 1/4 - 20 UNC thread that should fit most standard camera tripods. Do as follows: 1. Mount the EXPLORER 510 on a tripod using a 1/4 - 20 UNC bolt or thumb screw. The bolt or thumb screw must penetrate maximum 7 mm into the thread in the Note EXPLORER 510. -
Page 27: Chapter 3 Operation
BGAN or cellular network The EXPLORER 510 is a BGAN terminal. However, you have the option of connecting an EXPLORER Cellular Modem to the USB interface of the EXPLORER 510, making it possible to use the cellular network when it is available. See Optional: To set up cellular network for data page 64. -
Page 28: Data Connection
To set up the connection mode on page 47. To start and stop data connections on your EXPLORER 510, do as follows: 1. On your smartphone, start the EXPLORER Connect app and select Terminal access, or on the connected device, open your browser and type the IP address of the terminal (default IP address: 192.168.0.1) in the address bar to access the web interface. - Page 29 You cannot see in the EXPLORER Connect app nor in the web interface if a PPPoE Note connection is active! Overview You can establish a PPPoE connection to the BGAN network using the EXPLORER 510 system. Use PPPoE if you want to control your connection independently of the web interface. Possible applications are: •...
- Page 30 Chapter 3: Operation To configure the connected equipment for PPPoE How to configure your equipment depends on the type of equipment. Refer to the user documentation of the equipment. As a minimum, you need to configure the following parameters in your equipment in order to make PPPoE work with the terminal: •...
- Page 31 2. On the connected computer, start a Telnet session. 3. Select TCP/IP and type in the IP address and port number. • For local connection, use the local IP address of the EXPLORER 510 (default 192.168.0.1) and port number 5454.
- Page 32 Chapter 3: Operation To activate a data connection with an SMS To be able to activate a data connection on the terminal from a remote location, the terminal must be set up as described in Remote access with SMS on page 62. Send an SMS to the mobile number of the terminal.
-
Page 33: Phone Calls
To receive a call By default, all phones connected to the EXPLORER 510 will ring when one of the mobile numbers is called. Note however, that this depends on the call type settings. See Call types page 25. -
Page 34: Alerts
To make a call to the EXPLORER 510 To make a call to a phone connected to the EXPLORER 510, dial + <Mobile number> + is the prefix used in front of the country code for international calls. This is 00 when •... -
Page 35: Status Of The Explorer 510
Tracking The EXPLORER 510 can be used for tracking purposes. You can set up the terminal to report its position to a server at certain time intervals. To use the tracking feature you must either set up a tracking server or get a tracking solution from your service provider. -
Page 36: Chapter 4 Configuration
Chapter 4 Configuration This chapter describes how to use the web interface or the Terminal Access part of the EXPLORER Connect app to operate, set up and configure your system. It has the following sections: • The EXPLORER Connect app •... -
Page 37: The Explorer Connect App
1. Start up the terminal. For details, see on page 7. To switch the EXPLORER 510 on or off 2. Connect your computer to the terminal. 3. Open your browser and enter the IP address of the terminal in the address bar. - Page 38 Chapter 4: Configuration To change the language When you have access to the web interface, if you want to display a different language than English, do as follows: 1. Select the Control panel in the top-right corner. 2. Select Terminal settings. 3.
- Page 39 Chapter 4: Configuration Icons in the icon bars The icon bars are always available at the top and bottom of the web interface. Some of the icons are permanent while others are temporary. Icon Explanation Power status. The icon changes according to status. Click to see detailed battery status.
-
Page 40: To Point The Antenna (Bgan)
Chapter 4: Configuration To point the antenna (BGAN) Before you can use the BGAN network, you must point the antenna in the direction of the satellite and find the best possible signal strength. For detailed information on the pointing procedure, see on page 9. -
Page 41: To Enter The Sim Pin In The Web Interface
Chapter 4: Configuration To enter the SIM PIN in the web interface Whether you are using the BGAN network or a cellular network, you need a SIM card Note to access the network. If you are using BGAN, the SIM is inserted in the terminal and if you are using the EXPLORER Cellular Modem the SIM card is inserted in the modem. -
Page 42: To Control Data Connections From Web Interface (Bgan)
BGAN network. Otherwise you cannot start data connections. To start and stop data connections on your EXPLORER 510, do as follows: 1. In the opening page, locate the connection package you want to start. -
Page 43: Status Information
Chapter 4: Configuration Default data connection types By default, the following connections are available: Name Type of connection Standard data Several users can share the data connection. This type of connection is ideal for TCP/IP traffic such as e-mail, file transfer, and Internet/intranet access. The user pays for the amount of data sent and received. -
Page 44: The Control Panel
Chapter 4: Configuration The Control panel The Control panel is used for accessing the settings and functions of your EXPLORER 510. To open the Control panel, click from the bottom right corner of the web interface. 98-143082-A The Control panel... -
Page 45: Data Log
Chapter 4: Configuration To use the logs To access the logs and select Logs from the menu. The Logs page contains: To access the Logs, select Call log: A list of all incoming, outgoing and missed calls since the log was last cleared. •... -
Page 46: Battery Status Information
Note remaining time will be shorter if the terminal is used a heavily (more interfaces in use and more calls and data sessions active). For more information on the EXPLORER 510 batteries, see • Normal use of the battery on page 70 •... -
Page 47: To Set Up The Interfaces
, click the WLAN tile. 2. To enable the WLAN interface, select Enable. If you disable WLAN you may not be able to access the EXPLORER 510. Important Before disabling the WLAN interface, make sure you have a working LAN connection with the USB to LAN Converter Cable. - Page 48 3. Select Active to activate the port forwarding. 4. Type in the Incoming port start and the Incoming port end. This is the range of port numbers on the EXPLORER 510 for which incoming traffic to the EXPLORER 510 will be forwarded.
- Page 49 Chapter 4: Configuration USB interface setup Note that the USB interface is a Host interface, primarily used for charging devices such as tablets or smartphones and for recovery software upload. To configure the USB interface, do as follows: 1. In the Control panel , click the USB tile.
-
Page 50: To Manage Smartphones
9. In the smartphone or IP handset, enter the local number and the password you just entered in the EXPLORER 510. See the documentation for your handset for details. The user name is also the local number for the handset. -
Page 51: Support Features
Chapter 4: Configuration Support features (Control panel) > Support. To open the Support page, select To view the Alerts When an alert is registered, the web interface shows a warning icon in the icon bar as long as the alert is active. The Alerts list only shows alerts that are currently active. ... - Page 52 The Extended Status page shows information such as IAI-2 status, IMSI number and IMEI number. 1. You can download the software from the “Self Service Centre” at cobham.com, select SATCOM > Service and Support > AVIATOR, EXPLORER, SAILOR Service and Support and then 24-7 Self Service Centre / Technical Downloads.
- Page 53 To enable the administrator password on page 55. About The About page shows the Serial number and software version of your EXPLORER 510 and legal information. It also shows your Help desk information, if it has been entered under Advanced > Help desk.
-
Page 54: Terminal Settings
Chapter 4: Configuration Terminal settings (Control panel) > Terminal settings. To configure the terminal settings, select 98-143082-A Terminal settings... - Page 55 Optional: To set up cellular network for data on page 64. To set up which network you want to use when starting up the EXPLORER 510, do as follows: 1. In the Terminal settings page, locate Connection. 2. At Startup mode, select from the drop-down list which mode you want the EXPLORER 510 to start up in.
- Page 56 Chapter 4: Configuration • Cellular if available: The EXPLORER 510 uses cellular network if it is available at startup (that is if the EXPLORER Cellular Modem is inserted and the cellular network is found) • User selection: Every time the EXPLORER 510 starts up you must select which network you want to use.
- Page 57 • Select Router mode if one or more computers are connected and the EXPLORER 510 should act as a router. When Router mode is selected, the EXPLORER 510 uses the built- in NAT module for making the necessary address translations.
- Page 58 8. Click Save. To enable or disable the pointing sound The EXPLORER 510 can make a sound to guide you through the pointing procedure (default enabled). To enable or disable the pointing sound, do as follows: 1. In the Terminal settings page, locate the Audio indication section.
-
Page 59: To Set Up Your Data Connection Packages (Bgan)
Chapter 4: Configuration To set up your data connection packages (BGAN) To change a connection package To change a connection package, click in the right side of the tile with the connection package that you want to change. If you want to Do as follows Click Properties, type in the new name and click Change the name of the connection... - Page 60 Chapter 4: Configuration 3. Click Click here to create connections. 4. Select the connection type you want for your new connection package. 5. Click Save package. The new package should now appear as a new tile on the startup page. To change the APN for a connection package By default a connection package is set to use no IP Header compression and to use the APN (Access Point Name) from the SIM card.
-
Page 61: To Set Up Tracking
Chapter 4: Configuration To set up tracking You can set up the EXPLORER 510 to report to a server at certain time intervals. To set up tracking, do as follows: , select Tracking. 1. From the Control panel 2. To enable tracking of the EXPLORER 510, select Enable tracking. - Page 62 • User defined: APNs are provided from the Airtime Provider. Type in the APN next to User defined name. 6. Type in the Report interval in hours (h) and minutes (m). Example: If you type in 1 h 30 m, the EXPLORER 510 will send a report for every 1½ hour. 7. Click Save.
-
Page 63: Advanced Settings
Advanced settings First time use The first time you access the EXPLORER 510 web interface the administrator password is disabled, so you have access to all settings. If you want to use an administrator password, you can enable it as described in the next section. - Page 64 AT commands. AT commands are low-level commands used to control modems, in this case the EXPLORER 510. They are typically used during service and maintenance or when troubleshooting the terminal. 4. Under Allow user accounts:, select Service user account if you want to enable the use of a service user account.
- Page 65 To restore factory settings To restore the factory settings of the EXPLORER 510, do as follows: 1. Under Advanced, select Factory reset. All configuration will be lost and the EXPLORER 510 will return to the default Important configuration. 2. Click OK.
- Page 66 Configuration files can only be exchanged between terminals with the same software Note version! To save a configuration to a file To save the current configuration of your EXPLORER 510 to a file on your computer, do as follows: 5. In the Advanced page, click Load/save configuration. 6. Click Save configuration.
- Page 67 Data limits You can set a limit for the use of data services with the EXPLORER 510 system. If you have entered the call charges in the menu Call charges, the system automatically calculates and displays the maximum charges for your data sessions.
- Page 68 4. Select Enable. 5. Click Save to save the settings. Call charges Cobham SATCOM does not take responsibility for the correctness of the estimated Note charges. This calculation is only a rough estimate of the charge, based on the tariff entered by the user.
- Page 69 Chapter 4: Configuration Remote management You can set up the terminal so that it can be controlled from a remote location. To set up the terminal for remote management, select Advanced > Remote management from the Control panel. 98-143082-A Advanced settings...
- Page 70 If you want to receive an SMS with the IP address of the terminal after Important sending an activation SMS, you must select Send SMS confirmation. 3. Select Enable access to AT commands, if you want to enable the EXPLORER 510 to receive AT commands via SMS for remote management. 98-143082-A...
- Page 71 Remote control of tracking When you are using the tracking function of the EXPLORER 510, you can set up the terminal so that the tracking server can access the EXPLORER 510 e.g. to start or stop tracking or to change reporting intervals.
-
Page 72: Optional: To Set Up Cellular Network For Data
Optional: To set up cellular network for data The EXPLORER 510 is a BGAN terminal by default. However, if you are within coverage of a cellular network, you may want to acquire an EXPLORER Cellular Modem as an alternative to the BGAN network. - Page 73 33. You can now access the Internet through the cellular network from a device connected to the EXPLORER 510. Note that you cannot use the BGAN network as long as EXPLORER Cellular Modem is selected. You cannot make calls on the cellular network through the EXPLORER 510. Only data...
-
Page 74: Chapter 5 Maintenance And Troubleshooting
Cobham SATCOM Self Service Center web- portal, which may help you solve the problem. Your dealer, installer or Cobham SATCOM partner will assist you whether the need is user training, technical support, arranging on-site repair or sending the product for repair. -
Page 75: Software Update
7. Click OK. The EXPLORER 510 now reboots and starts up with the new software version. You can check the software version under Control panel > Support > About. If, for some reason, you cannot upload software using the web interface, you can also use the USB interface. - Page 76 41 for details on how to enable the USB interface. 1. Insert the USB memory stick with the new software into the EXPLORER 510 USB connector. The EXPLORER 510 reads the software image from the USB memory stick and starts the software update process.
-
Page 77: Restore The Settings Of The Explorer 510
Restore the settings of the EXPLORER 510 The EXPLORER 510 has a restore button that has three functions: To restore all settings to factory settings, to restore WLAN settings only or to put the EXPLORER 510 into safe mode for recovery software upload. -
Page 78: Maintenance
Never leave the EXPLORER 510 fully discharged for a longer period of time. If the EXPLORER 510 is not to be used for a shorter period of time (1 month), charge the battery to minimum 20 to 30%. If the EXPLORER 510 is stored for more than a month, charge the battery to 50%. -
Page 79: Troubleshooting
The Power button was not When you switch off the cannot be switched off. held long enough. EXPLORER 510, hold the power button until the light indicator flashes rapidly yellow. In rare cases, it may take up to 10 seconds to switch off the EXPLORER 510. - Page 80 SIM card on page 6. The web interface The EXPLORER 510 is unable Make sure the view to the GNSS shows to register on the network, satellites is not blocked.
- Page 81 GNSS. If the EXPLORER 510 has not To help the EXPLORER 510 obtain been used recently within the position fix, it should be placed same location, it can take up...
- Page 82 PUK code to unlock the enter the PUK code from this SIM. However, the PUK code other device. When the SIM is cannot be entered using the unlocked you can put it back into EXPLORER 510. the EXPLORER 510. 98-143082-A Troubleshooting...
-
Page 83: Status Signalling
Chapter 5: Maintenance and troubleshooting Status signalling Means of signalling The EXPLORER 510 system provides two methods for signalling the status of the system. Light indicators next to the SIM slot • Messages shown in the web interface. • Light indicators The EXPLORER 510 has two light indicators showing status and WLAN. - Page 84 69. Not active – power off / starting up / closing down Event messages and status messages In the web interface of the EXPLORER 510 you can see status messages and alerts that are currently active. When a warning or error event is active, the web interface shows a warning symbol .
- Page 85 Chapter 5: Maintenance and troubleshooting Displayed text Explanation Remedy The data connection is closed Restart the connection e.g. Connection closed. because a data limit defined from the Dashboard in the Data or time limit in the web interface is web interface. See To start exceeded.
- Page 86 Chapter 5: Maintenance and troubleshooting Displayed text Explanation Remedy The terminal is not registered You can only make a Not registered to on the satellite network. connection if the terminal is the network registered on the satellite network. Make sure that: •...
- Page 87 Chapter 5: Maintenance and troubleshooting Displayed text Explanation Remedy The system no longer Make sure the antenna has a Satellite signal receives a signal from the clear view to the satellite. lost satellite. The SIM card is not accepted Enter the PIN and wait for SOS calls only by the network.
-
Page 88: Log Files
7. Choose a location for the file and save it. Call log and data log The log holds detailed information on each call or data session to and from the EXPLORER 510, including date and time, phone numbers, duration, amount of data transferred etc. - Page 89 55. Help desk Under Help desk you can enter the contact information you want for your EXPLORER 510. The Help desk contact information is empty by default. You must provide the contact information, e.g. the phone number for your Airtime Provider under Advanced > Help desk. For details on...
-
Page 90: Technical Specifications
Appendix A Technical specifications General specifications Item Specification Type EXPLORER 510, BGAN Class 2 terminal Max. IP data rate, Rx/Tx 464 kbps/464 kbps (simultaneously) Streaming data 32, 64, and 128 kbps Voice Standard voice 4 kbps Premium voice 3.1 kHz audio, 64 kbps... -
Page 91: Battery Specifications (Internal Battery)
Appendix A: Technical specifications Battery specifications (internal battery) Item Specification Battery type Lithium Ion, rechargeable Time between recharging Stand-by 24 h (0 to 55°C/ 32 to 131°F) Tx time, max 2 h 25 m @ 128 kbps (25°C / 77°F) Rx time, max 4 h 40 m @ 128 kbps (25°C / 77°F) Charge time without precharging... -
Page 92: Specifications
Appendix A: Technical specifications WLAN access point Item Specification Standard IEEE 802.11 b/g Antenna Built-in Frequencies 2.4 GHz ISM band USB (Host) interface Connector pin-out Function VBUS Specifications Item Specification Version USB v2.0 Host Connector type Type A Charge current available 0.5 A or 1.0 A, user selectable Max. -
Page 93: Built-In Bgan Antenna
Appendix A: Technical specifications Built-in BGAN antenna Item Specification Type Directional patch array, manually adjustable Polarization RHCP, Right-hand circular polarization for both tx and rx Frequencies Inmarsat I-4 Transmit 1626,5 MHz - 1660,5 MHz Receive 1525 MHz - 1559 MHz Inmarsat Alphasat (EMEA) Extended L-band (XL) Transmit... -
Page 94: Outline Drawing
Appendix A: Technical specifications Outline drawing 98-143082-A Outline drawing... - Page 95 Appendix A: Technical specifications 98-143082-A Outline drawing...
-
Page 96: Satellite Coverage
Appendix A: Technical specifications Satellite coverage The EXPLORER 510 uses the Inmarsat I-4 satellites and the Alphasat satellite for satellite communication. The drawings below show the coverage areas for these satellites. Inmarsat I-4 coverage 90° 80° 70° 60° 50° 40°... -
Page 97: Ce (R&Tte)
Conformity CE (R&TTE) The EXPLORER 510 is CE certified (R&TTE directive). The “Declaration of Conformity with R&TTE Directive” will be enclosed in electronic copy at the end of this appendix when ready. The WLAN interface is CE certified through the manufacturer of the WLAN card. -
Page 98: Japanese Radio Law And Japanese Telecommunications Business Law Compliance
(2) this device must accept any interference received, including interference that may cause undesired operation. NOTICE: Changes or modifications made to this equipment not expressly approved by Cobham SATCOM may void the FCC authorization to operate this equipment. Japanese Radio Law and Japanese Telecommunications Business Law Compliance. - Page 99 The “Declaration of Conformity with R&TTE Directive” will be inserted here when ready...
-
Page 100: Glossary
Glossary Glossary Access Point Name. The Access Point Name is used by the terminal operator to establish the connection to the required destination network. BGAN Broadband Global Area Network. A satellite network based on geostationary satellites, delivering broadband data and telephony to virtually any part of the earth, with full UMTS (3G) compatibility. - Page 101 Glossary Industry Canada (French: Industrie Canada) is the department of the Government of Canada with a mandate of fostering a growing, competitive, knowledge-based Canadian economy. ICMP Internet Control Message Protocol. An Internet protocol mostly used for diagnostics. IMSI International Mobile Subscriber Identity. A number used to identify the user of a cellular network.
- Page 102 Glossary connection between them and then securely transport data packets over the connection. Radio Frequency. Electromagnetic wave frequencies between about 3 kHz and about 300 GHz including the frequencies used for communications signals (radio, television, cell-phone and satellite transmissions) or radar signals. Subscriber Identity Module.
-
Page 103: Index
55 set up, 64 log out, 56 startup mode, 47 reset, 45, 81 charge advanced settings, 55 EXPLORER 510 battery, 70 alerts smartphone or tablet, 27 view in web interface, 26, 43 charges for calls Alphasat estimating, 60... - Page 104 Index IC compliance, 89 IMEI number, 44, 80 data IMSI number, 44, 80 limits, set, 59 included items, 6 log, 37 indicator, Status LED, 75 Standard, definition, 20 indicator, WLAN, 76 Streaming definition, 20 initial inspection, 5 total usage, 38 insert SIM card, 6 data connections internet connection mode...
- Page 105 Index network restore factory settings, 57 cellular or BGAN, 9 rights for users select startup mode, 47 in web interface, 56 router mode, 49 password change, 56 safety summary, iii disable, 55 save configuration, 58 enable, 55 semi-fixed installation, 18 log in, 55 settings log out, 56...
- Page 106 Index update software, 44, 67 USB, 67 usage calls and data, 38 charge smartphone or tablet, 27 configure, 41 connector, 84 update software, 67 user permissions setting up in web interface, 56 warning messages, 26, 43 warranty, 66 web interface accessing, 29 change language, 50 definition, 29...
- Page 107 98-143082-A www.cobham.com/satcom...
Need help?
Do you have a question about the Explorer 510 and is the answer not in the manual?
Questions and answers