Bresser WEATHER CENTER Instruction Manual
Hide thumbs
Also See for WEATHER CENTER:
- Instruction manual (37 pages) ,
- Instruction manual (200 pages)
Table of Contents
Advertisement
Advertisement
Table of Contents

Related Manuals for Bresser WEATHER CENTER


Summary of Contents for Bresser WEATHER CENTER
-
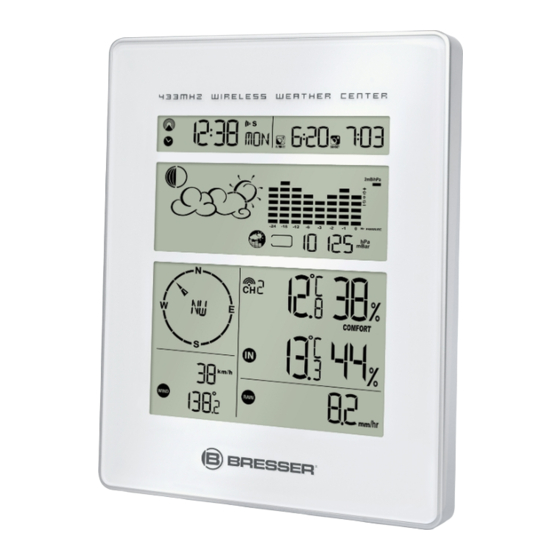
Page 1: Weather Center
WEATHER CENTER INSTRUCTION MANUAL... - Page 2 Introduction Congratulations on your purchase of the BRESSER Weather Center. The weather center consists of a main console unit with a remote control, as well as an assortment of remote sensors which collect and transmit a wide range of weather data, including outdoor temperature, humidity, wind speed and direction, rain amount and rain rate.
-
Page 3: Weather Forecast
All data collected by the sensors are transmitted to the main console unit by wireless RF, with a range up to 100 meters (open area). The weather center supports a maximum of 5 thermo-hygrometers, allowing 5 channels of temperature/humidity display. -
Page 4: Comfort Level Indicator
Clock and Calendar (12 hr/ 24 hr) (month/day or day/month) - Different combinations of clock and calendar displays - 6 languages for day of week (English/ German/ French/ Italian/ Spanish/ Dutch) Alarms - Single alarm: activated once at specified time - Weekday alarm: activated everyday from Monday to Friday at specified time - Pre-alarm: activated ahead of single or weekday alarm if channel 1 temperature falling to +2ºC or below (fixed 30 minutes) - Programmable snooze function (1-15 minutes) Sunrise Time and Sunset Time... - Page 5 Contents of Complete Weather Center Kit Before installing your weather center, please check that the following are complete: Hardware Fittings Components Main Console Unit Thermo-Hygro Sensor Rain Sensor: 4 screws for - Funnel shaped lid securing unit to with battery hatch...
-
Page 6: Setting Up The Remote Weather Sensors
Installing your Weather Center Setting up the Remote Weather Sensors Before starting up the main console unit, setup all the remote sensors first. When placing the sensors, make sure that they are within receiving range of the console unit. Ideally, they should be within the line of sight of the console unit. Transmission range may be affected by trees, metal structures and electronic appliances. -
Page 7: Setting Up The Anemometer (Wind Sensor)
Placement Tips: - The rain sensor should be placed in an open area away from walls, fences, trees and other coverings which may either reduce the amount of rainfall into the sensor, deflect the entry of wind- blown rain, or create extra precipitation runoff. Trees and rooftops may also be sources of pollen and debris. - To avoid rain shadow effects, place the sensor at a horizontal distance corresponding to two to four times the height of any nearby obstruction. -
Page 8: Setting Up The Main Console Unit
Transmission range may be affected by trees, metal structures and electronic appliances. Test reception before permanently mounting your weather center. The console unit measures indoor temperature, humidity, pressure and receives signals from all remote sensors and radio-clock broadcasts. -
Page 9: Buttons And Controls
Using your Weather Center Buttons and Controls The following controls are available on the main console unit: - Switches to next mode in anti-clockwise direction - Increment for setting parameters - Switches to next mode in clockwise direction DOWN - Decrement for setting parameters... -
Page 10: Navigating Between Different Modes
Navigating between Different Modes There are 7 modes available on the main console unit, and each one displays a different category of data. When display is in a certain mode, its corresponding icon will start flashing. To navigate between the different modes from the main console unit, press UP to cycle through the modes in a clockwise direction or DOWN to cycle through the modes in an anti-clockwise direction. -
Page 11: Rain Mode
Sunrise/Sunset Mode - Sunrise and sunset times - Longitude and latitude of local area Sunrise time/ Sunset time/ Longitude Latitude Sunrise/ Sunset Icon Temperature and Humidity Mode - Temperature and humidity trend and readings for indoor and selected channel - Comfort level - Dew point - Temperature alerts Channel temperature... - Page 12 Temperature at sensor Sensor Battery Status Customizing your Weather Center To fully customize the weather center to your local settings and personal preferences, the following settings are required. Please refer to the appropriate sections for detailed instructions. Required: - Setting Pressure Parameters during Initial Start-Up (Pressure and Weather Forecast Mode)
-
Page 13: Using The Different Weather Modes
Using the Different Weather Modes Pressure and Weather Forecast Mode This part of the display indicates the current pressure, sea level pressure, weather forecast, moon phase and pressure trend. A number of historical statistics can also be viewed, such as the sea-level pressure values for the last 24 hours, moon phase for the previous and next 39 days, as well as a pressure/ temperature/ humidity history bar-chart. -
Page 14: Setting The Sea-Level Pressure
Setting the Sea-Level Pressure 1. In Pressure and Weather Forecast Mode, press SET until the sea-level pressure is displayed. 2. Press and hold SET. The Sea-Level Pressure display should be flashing. 3. Set Sea-Level Pressure: Press UP or DOWN to adjust value. Press and hold either button for fast advance. Press SET to confirm your selection. -
Page 15: Understanding The Weather Forecast Display
Understanding the Weather Forecast Display Display Weather Forecast Status Sunny Partly Cloudy Cloudy Rain Heavy Rain Unstable Weather Snow NOTE: 1. The accuracy of a general pressure-based weather forecast is about 70%. 2. The weather forecasts may not necessarily reflect the current situation. 3. -
Page 16: Clock And Alarm Mode
Clock and Alarm Mode The main console unit can be configured to display the time, calendar or UTC time. There are three time alarms available on the console unit: Single alarm: activated once at specified time Weekday alarm: activated everyday from Monday to Friday at specified time Pre-alarm: activated at specified time interval (30 min) ahead of weekday alarm, if channel 1 temperature falling to +2 ºC or below. The snooze duration for the above alarms can also be programmed (0-15 min). Accessing Clock and Alarm Mode From the main console unit: Press UP or DOWN until the clock icon beside the time/date display starts flashing. - Page 17 Rotating between Different Clock/Calendar Displays In Clock and Alarm Mode, each press of SET rotates clock display between: - Hour: Minute: Weekday - Hour: Minute for UTC (Coordinated Universal Time) - Hour: Minute: City - Hour: Minute: Second - Month: Day: Year (or Day: Month: Year depending on settings) Activating/Deactivating the Time Alarms 1.
-
Page 18: Sunrise/Sunset Mode
Disabling/Entering Snooze when Time Alarms are Activated To Enter Snooze: Press SNOOZE to enable snooze function. Note: Alarm will automatically enter snooze mode if no key is pressed after the alarm sounds for 2 minutes. This will occur for a maximum of three times. To Disable Alarm(s): Press ALARM/CHART to disable the alarm(s). - Page 19 Accessing Sunrise/Sunset Mode From the main console unit: Press UP or DOWN until the sunrise and sunset icons the display start flashing. Setting up the Location Data 1. In Sunrise/Sunset Mode, press and hold SET to enter location data setup. 2. The city code in the Time and Alarm Display should start flashing. Set City Info: Press UP or DOWN to select city code for your local area.
-
Page 20: Temperature And Humidity Mode
No sunset for the whole day Temperature and Humidity Mode The weather center supports up to 5 remote thermo-hygro sensors, each sensor corresponding to a separate channel for the temperature and relative humidity display. The temperature may be shown in degrees Celsius ºC or degrees Fahrenheit ºF. The trend (rising, steady or falling) of all values is also indicated on the display. - Page 21 Activating/Deactivating the Temperature Alerts 1. In Temperature and Humidity Mode, each press of ALARM/CHART rotates channel temperature display between: - Current Temperature for corresponding channel - Upper Temperature Alert (displays OFF if deactivated): icon displayed - Lower Temperature Alert (displays OFF if deactivated): icon displayed 2.
-
Page 22: Rain Mode
Activating Main Console Unit to Search for All Remote Sensor Signals The main console unit may be manually activated to search for signals from all remote sensors. Press and hold DOWN to enforce a search. Rain Mode The main console unit records the total amount of rainfall for the last hour, last 24 hours, yesterday, last week and last month. -
Page 23: Wind Mode
Disabling when Daily Rainfall Alert is Activated To disable Rainfall Alert: Press ALARM/CHART to disable the alert. Wind Mode The wind direction is shown by an animated compass display. Its angle can be displayed as compass points (i.e. NW) or in bearings from the north (i.e. 22.5º). The lower left of the wind display can be set to indicate the temperature at the anemometer or the temperature adjusted with a wind chill factor. - Page 24 Activating/Deactivating Wind Alerts 1. In Wind Mode, each press of ALARM/CHART rotates wind speed display between: - Current wind speed - Wind speed alert (“ALARM HI” displayed) - Gust alert (“GUST ALARM HI” displayed) If the alert is deactivated, “OFF” will be shown, otherwise the alert value is shown. 2.
-
Page 25: Maintenance
Maintenance Changing Batteries The battery statuses of the sensors are checked every hour. If the low battery indicators light up, replace the batteries for the corresponding unit immediately. Changing Batteries for the Main Console Unit 1. To avoid losing data and records, connect the AC/DC adaptor to the main unit first. 2. Remove the latch at the back and replace all batteries. Do not mix old and new batteries. 3. -
Page 26: Troubleshooting
Troubleshooting The display shows dashes “---” for weather parameter(s) The display will show “---” when the wireless link with the remote is lost sensor for the following periods: Thermo-hygro Sensor – 15 minutes Anemometer (Wind Sensor) – 15 minutes Rain Sensor –... -
Page 27: Ec Declaration Of Conformity
They have, however, no effect whatsoever on the operation of the device. EC-DECLARATION OF CONFORMITY Product : BRESSER Weather Center This product contains the approved transmitter and complies with the essential requirements of Article 3 of the R&TTE 1999/5/EC Directives, if used for its... -
Page 28: Dst Definition
Power Main unit : use 4 pcs UM-3 or ”AA” 1.5 V battery Remote Thermo-hygro unit : use 2 pcs UM-3 or “AA” 1.5 V battery Remote Anemometer unit : use 2 pcs UM-3 or “AA” 1.5 V battery Remote Rain gauge unit : use 2 pcs UM-3 or “AA”... - Page 29 World Cities City Code Zone City Code Zone Offset Offset Addis Ababa, Ethiopia Cairo, Egypt Adelaide, Australia Calcutta, India (as Kolkata) Algiers, Algeria Cape Town, South Africa Amsterdam, Netherlands Caracas, Venezuela Ankara, Turkey Chihuahua, Mexico Asunción, Paraguay Copenhagen, Denmark Athens, Greece Córdoba, Argentina Bangkok, Thailand Dakar, Senegal...
-
Page 30: Technical Specifications
Technical Specifications Weather Center Receivers Receiver (Supply=6.0V, Ta=23°C) Sensor unit (Supply=3.0V, Ta=23°C ) RF Transmission Frequency 434 MHz RF Reception Range 100 meters Maximum ( Line of Sight ) Barometric Pressure Range 500 hpa to 1100hpa ( 14.75 inHg to 32.44 inHg ), (At sea level ) ( 374.5 mmHg to 823.8 mmHg )
Need help?
Do you have a question about the WEATHER CENTER and is the answer not in the manual?
Questions and answers