Advertisement
Table of Contents
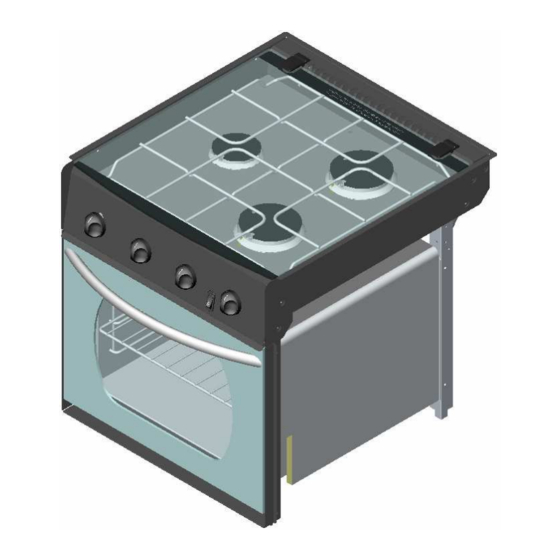
BUILD IN APPLIANCES
FOR USE WITH LIQUIFIED PETROLEUM GAS
MODELS
S~OH70000 S~OH76000 (LPG)
S~OH71000 S~OH77000 (DUAL FUEL)
USER AND INSTALLATION INSTRUCTIONS
WARNING
•
Read the instructions before use
•
Only use appliance in a well ventilated area
•
Install the appliance in accordance with the regulations in force
For use in
GB NL DE FR ES PT IT SE NO DK SI SK
THETFORD LIMITED
UNIT 19 Oakham Drive, Parkwood Industrial Estate
Rutland Road, Sheffield S3 9QY, ENGLAND.
TEL: + 44 (0) 114 273 8157
FAX: + 44 (0) 114 275 3094
Advertisement
Table of Contents

Related Manuals for Thetford S-OH70000


Summary of Contents for Thetford S-OH70000
- Page 1 Install the appliance in accordance with the regulations in force For use in GB NL DE FR ES PT IT SE NO DK SI SK THETFORD LIMITED UNIT 19 Oakham Drive, Parkwood Industrial Estate Rutland Road, Sheffield S3 9QY, ENGLAND.
- Page 2 WARNINGS • Appliance and accessible parts become hot during use. • Avoid touching heating elements. • Children less than 8 years of age shall be kept away unless continuously supervised. • This appliance can be used by children aged from 8 years and above, persons with reduced physical, sensory or mental capabilities and/or lack of experience and knowledge only if they have been given supervision or instruction...
- Page 3 TRIPLEX COOKER RANGE TRIPLEX TRIPLEX ‘WIDE’ S~OH70000 and S~OH71000 S~OH76000 and S~OH77000 + 2.0 + 2.0 W = 445mm W = 496mm -0.0 -0.0 #1 = Side battons (optional) 15x40x330 #1 = Side battons (optional) 15x40x330 #2 = Worktop Cutout 493mm #2 = Worktop Cutout 493mm...
-
Page 4: Wiring Diagram
MINIMUM DISTANCE TO COMBUSTIBLE MATERIAL • Recommended minimum dimensions to combustible material • Installers should verify with furniture manufacturer suitability of materials T ≥ 10mm V ≥ 400mm X ≥ 200mm Y & Z ≥ 500mm WIRING DIAGRAM GREEN & YELLOW BLUE BROWN BLACK... -
Page 5: Specification
SPECIFICATION... -
Page 6: Operation
INTRODUCTION This appliance must be installed in accordance with the local, national and European regulations in force. Particular attention shall be given to the requirements regarding ventilation. Read the instructions before installing or using the appliance The appliance is designed for either high or low level installations. Failure to install the appliance correctly could invalidate any warranty or liability claims and lead to prosecution. - Page 7 OPERATION Gas Burners (1) Ensure gas supply is connected and turned on. (2) Push in the control knob and turn anticlockwise to full rate – large flame ( ). (3) Continue depressing the knob whilst holding a lighted match to the burner. (4) After the burner is lit continue depressing the knob for approximately 10 - 15 seconds.
- Page 8 OPERATION • The control tap on this appliance operates both the Grill and Oven burner. To ensure safe operation it is not possible to operate both burners at the same time. • The grill must only be used with the door open •...
- Page 9 OPERATION Using The Oven (1) Ensure gas cylinder/supply is connected and turned on. (2) Open door, push in the control knob and turn to full rate (Gas Mark 9, 240° C). (3) Continue depressing the knob whilst holding a lighted match to the burner. (4) After the burner is lit continue depressing the knob for approximately 10 - 15 seconds.
- Page 10 OPERATION Temperature Dish Mark (Centre of Oven) ¼ - ½ 265-275ºF 130-135ºC Very cool Meringues Cool Stewed fruit Cool Rich fruit cake, rice pudding Warm Baked custard, shortbread fingers Moderate Victoria sandwich Fairly hot Whisked sponges, ginger nuts Short crust pastry Bread, scones, flaky pastry Very hot Puff pastry...
-
Page 11: Installation
INSTALLATION Regulations And Standards In your own interest of safety, it is law that all gas appliances are installed and serviced by an approved competent person, in accordance with the local and National/European standards in force. Failure to install the appliance correctly could invalidate any warranty or liability claims and lead to prosecution. - Page 12 INSTALLATION The performance of this appliance meets the requirements of the European Standard for Domestic Cooking Appliances (EN30) which specifies a maximum allowable temperature rise of the furniture into which the appliance is installed of 65 C above the ambient temperature. The installer should verify all furniture materials are suitable – ie plastic materials may have a softening point lower than specified above.
-
Page 13: Maintenance
INSTALLATION To ensure correct operation and prevent changes in air pressure affecting oven performance we recommend the following installation requirements:- • Built into self contained cabinet which is not connected to externally vented chambers in adjacent furniture, other than correct size gas dropouts. - Page 14 SERVICING 1. Disconnect from gas supply Lift and remove the bottom plinth to gain access, then disconnect the gas supply. If the appliance is Dual Fuel, disconnect/isolate the electric supply. 2. Remove hob surface Disconnect from gas supply (1) and electric supply if Dual Fuel. Lift off the Panrest and remove the two screws securing each burner spreader.
- Page 15 SERVICING Spark Ignition Continued ……… 12v Spark Generator replacement - Located at the rear of appliance. Remove all electrode wires, unscrew the two retaining screws and lift off the unit. 7. Grill burner injector (No62) Disconnect from gas supply (1). Remove appliance from housing (2). Release the locking screw on the injector holder, disengage the grill pipe from the control and remove the injector.
Need help?
Do you have a question about the S-OH70000 and is the answer not in the manual?
Questions and answers