
Related Manuals for HP Pavilion x2 10-k0XX


Summary of Contents for HP Pavilion x2 10-k0XX
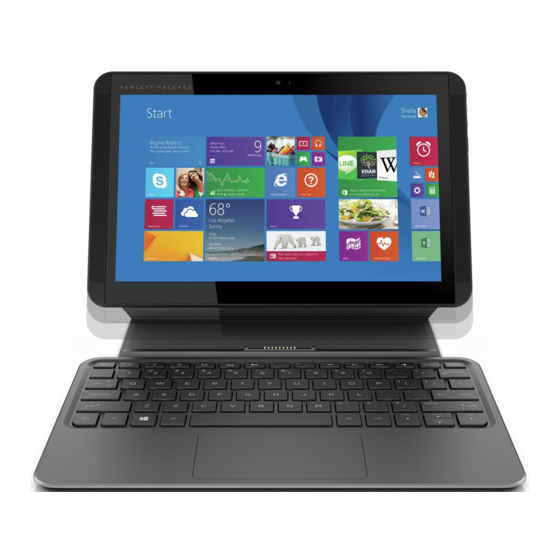
- Page 1 HP Pavilion x2 Detachable PC (model number 10-k0XX) Maintenance and Service Guide IMPORTANT! This document is intended for HP authorized service providers only.
- Page 2 HP End User License Agreement (EULA). If you do not accept these license terms, your sole remedy is to return the...
- Page 3 Safety warning notice WARNING! To reduce the possibility of heat-related injuries or of overheating the device, do not place the device directly on your lap or obstruct the device air vents. Use the device only on a hard, flat surface. Do not allow another hard surface, such as an adjoining optional printer, or a soft surface, such as pillows or rugs or clothing, to block airflow.
- Page 4 Safety warning notice...
-
Page 5: Table Of Contents
Table of contents 1 Product description ............................1 2 External component identification ......................... 3 Finding your hardware and software information ....................3 Locating hardware ..........................3 Locating software ..........................3 Display ................................... 4 Top edge ................................5 Bottom edge ................................5 Left edge ................................ - Page 6 Speakers ................................30 Middle frame ................................ 32 Power/volume button board ..........................33 6 Using Setup Utility (BIOS) and HP PC Hardware Diagnostics (UEFI) ..............35 Starting Setup Utility (BIOS) ..........................35 Updating the BIOS ..............................35 Determining the BIOS version ......................35 Downloading a BIOS update ......................
-
Page 7: Product Description
Product description Category Description Product Name HP Pavilion x2 Detachable PC (model number 10-k0XX) Processor Intel® Atom Z3736F 1.33-GHz quad core processor soldered-on-circuit (SoC) Panel 10.1-in (1280×800), Antiglare (AG), light-emitting diode (LED), WXGA, TouchScreen display panel Graphics Internal graphics: Intel 7th generation graphics and media encode/decode engine 2D/ 3D graphics Supports DX11, OpenGL 3.0 (OGL 3.0), OpenCL 1.2 (OCL 1.2), and OpenGLES 2.0 (OGLES 2.0) - Page 8 Category Description Multitouch gestures enabled for clickpad Power requirements Supports a 2-cell, 35-Wh battery (non-removable), USB charging Supports a 15-W AC adapter with DC plug and localized cable plug support Operating system Preinstalled: Microsoft® Windows® 8.1 Update Bing 32-bit Wimboot Serviceability End user replaceable part: AC adapter and keyboard Chapter 1 Product description...
-
Page 9: External Component Identification
External component identification Finding your hardware and software information Locating hardware To find out what hardware is installed on your tablet: From the Start screen, type control panel, and then select Control Panel. ‒ or – From the Windows desktop, right-click the Start button, and then select Control Panel. Select System and Security, select System, and then click Device Manager in the left column. -
Page 10: Display
Display Item Component Description Speakers (2) Produce sound. Webcam Records video and captures photographs. Some models allow you to video conference and chat online using streaming video. To use the webcam, from the Start screen, type camera, and then select Camera from the list of applications. Webcam light On: The webcam is in use. -
Page 11: Top Edge
Top edge Item Component Description Internal microphones (2) Record sound. ● Power button When the tablet is off, press the button to turn on the tablet. ● When the tablet is on, press the button briefly to initiate Sleep. ● When the tablet is in the Sleep state, press the button briefly to exit Sleep. -
Page 12: Left Edge
For additional safety information, refer to the Regulatory, Safety, and Environmental Notices. To access this guide, from the Start screen, type support, and then select the HP Support Assistant app. NOTE: When a device is connected to the jack, the tablet speakers are disabled. -
Page 13: Right Edge
Right edge Item Component Description Power connector Connects an AC adapter. USB 3.0 port Connects an optional USB device, such as a keyboard, mouse, external drive, printer, scanner or USB hub. HDMI port Connects an optional video or audio device, such as a highdefinition television, any compatible digital or audio component, or a high-speed HDMI device. -
Page 14: Illustrated Parts Catalog
NOTE: HP continually improves and changes product parts. For complete and current information on supported parts for your computer, go to http://partsurfer.hp.com, select your country or region, and then follow the on-screen instructions. Locating the product number and serial number The tablet product number (1) and serial number (2) are located on the tablet bottom edge. -
Page 15: Tablet Major Components
Tablet major components Item Component Spare part number Back cover 792587-001 Docking port board (includes cable double-sided adhesive) 784418-001 Audio jack board (includes cable and double-sided adhesive) 784416-001 Display panel cable 784414-001 Battery, 2-cell, 35-Wh, (includes cable and double-sided adhesive) 789609-001 Speaker Kit (includes left and right speakers and cables) 784422-001... -
Page 16: Miscellaneous Parts
Item Component Spare part number (10) Middle frame 789647-001 (11) Display panel assembly, 10.1-in (1280×800), AG, LED, WXGA, TouchScreen (includes bezel 784420-001 and TouchScreen cable) Miscellaneous parts Component Spare part number 15-W AC adapter (includes USB extension cable) 791102-001 Duck head adapter: For use in Argentina 791079-001 For use in Brazil... - Page 17 Component Spare part number In pale lavender finish: For use in Brazil 788479-201 For use in Canada 788479-DB1 For use in Germany 788479-041 For use in Latin America 788479-161 For use in the Netherlands 788479-B31 For use in Russia 788479-251 For use in Saudi Arabia 788479-171 For use in Turkey...
-
Page 18: Sequential Part Number Listing
Sequential part number listing Spare part number Description 651046-001 Thermal Material Kit (includes replacement thermal material) 784414-001 Display panel cable 784415-001 Keyboard with TouchPad in moonstone gray finish for use in the United States 784415-031 Keyboard with TouchPad in moonstone gray finish for use in the United Kingdom 784415-041 Keyboard with TouchPad in moonstone gray finish for use in Germany 784415-051... - Page 19 Spare part number Description 788478-131 Keyboard with TouchPad in tiffany blue finish for use in Portugal 788478-141 Keyboard with TouchPad in tiffany blue finish for use in Turkey 788478-161 Keyboard with TouchPad in tiffany blue finish for use in Latin America 788478-171 Keyboard with TouchPad in tiffany blue finish for use in Saudi Arabia 788478-201...
- Page 20 Spare part number Description 791079-003 Duck head adapter for use in the United Kingdom 791079-008 Duck head adapter for use in North America 791079-009 Duck head adapter for use in Europe and South Korea 791079-012 Duck head adapter for use in Brazil 791102-001 15-W AC adapter with USB extension cable 792587-001...
-
Page 21: Removal And Replacement Preliminary Requirements
Removal and replacement preliminary requirements Tools required You will need the following tools to complete the removal and replacement procedures: ● Magnetic screw driver ● Phillips P0 screw driver ● Plastic case utility tool Service considerations The following sections include some of the considerations that you must keep in mind during disassembly and assembly procedures. -
Page 22: Grounding Guidelines
Grounding guidelines Electrostatic discharge damage Electronic components are sensitive to electrostatic discharge (ESD). Circuitry design and structure determine the degree of sensitivity. Networks built into many integrated circuits provide some protection, but in many cases, ESD contains enough power to alter device parameters or melt silicon junctions. A discharge of static electricity from a finger or other conductor can destroy static-sensitive devices or microcircuitry. -
Page 23: Packaging And Transporting Guidelines
Packaging and transporting guidelines Follow these grounding guidelines when packaging and transporting equipment: ● To avoid hand contact, transport products in static-safe tubes, bags, or boxes. ● Protect ESD-sensitive parts and assemblies with conductive or approved containers or packaging. ● Keep ESD-sensitive parts in their containers until the parts arrive at static-free workstations. - Page 24 Equipment guidelines Grounding equipment must include either a wrist strap or a foot strap at a grounded workstation. ● When seated, wear a wrist strap connected to a grounded system. Wrist straps are flexible straps with a minimum of one megohm ±10% resistance in the ground cords. To provide proper ground, wear a strap snugly against the skin at all times.
-
Page 25: Removal And Replacement Procedures
Accessing these parts can damage the tablet and void the warranty. NOTE: HP continually improves and changes product parts. For complete and current information on supported parts for your computer, go to http://partsurfer.hp.com, select your country or region, and then follow the on-screen instructions. Tablet component replacement procedures There are as many as 20 screws that must be removed, replaced, and/or loosened when servicing the tablet. - Page 26 Remove the back cover (4). Reverse this procedure to install the back cover. Chapter 5 Removal and replacement procedures...
-
Page 27: Docking Port Board
Docking port board NOTE: The microphone spare part kit includes the cable. Description Spare part number Docking port board (includes cable) 784418-001 Before removing the docking port board, follow these steps: Turn off the tablet. If you are unsure whether the tablet is off or in Hibernation, turn the tablet on, and then shut it down through the operating system. -
Page 28: Battery
WARNING! To reduce potential safety issues, use only the battery provided with the tablet, a replacement battery provided by HP, or a compatible battery purchased from HP. CAUTION: Removing a battery that is the sole power source for the tablet can cause loss of information. To prevent loss of information, save your work or shut down the tablet through Windows before removing the battery. - Page 29 Detach the battery (2) from the display panel assembly. (The battery is attached to the display panel assembly with double-sided adhesive.) Remove the battery. Reverse this procedure to install the battery. Battery...
-
Page 30: Display Panel Cable
Display panel cable Description Spare part number Display panel cable 784414-001 Before removing the display panel cable, follow these steps: Turn off the tablet. If you are unsure whether the tablet is off or in Hibernation, turn the tablet on, and then shut it down through the operating system. -
Page 31: Audio Jack Board
Audio jack board Description Spare part number Audio jack board (includes cable and double-sided adhesive) 784416-001 Before removing the audio jack board, follow these steps: Turn off the tablet. If you are unsure whether the tablet is off or in Hibernation, turn the tablet on, and then shut it down through the operating system. -
Page 32: System Board
Reverse this procedure to install the audio jack board and cable. System board Description Spare part number System board equipped with an Intel Atom Z3736F 1.33-GHz quad core processor (SoC), a graphics subsystem with UMA memory, and 2.0-GB of DDR3L system memory (includes replacement thermal material) Equipped with a 64-GB eMMC hard drive (SoC) and the Windows 8 Standard operating system 789311-501 Equipped with a 64-GB eMMC hard drive (SoC) and a non-Windows 8 operating system... - Page 33 Remove the four Phillips PM1.5×3.3 screws (1) and the Phillips PM1.9×3.3 screw (2) that secure the system board to the display panel assembly. Remove the system board (3). System board...
- Page 34 NOTE: The thermal material must be thoroughly cleaned from the surfaces of the display panel assembly and the system board components each time the system board is removed. Replacement thermal material is included with the system board and system board spare part kits. Replacement thermal material is also included in the Thermal Material Kit, spare part number 651046-001.
-
Page 35: Webcam Module
Webcam module Description Spare part number Webcam module (includes cable and double-sided adhesive) 784425-001 Before removing the webcam module, follow these steps: Turn off the tablet. If you are unsure whether the tablet is off or in Hibernation, turn the tablet on, and then shut it down through the operating system. -
Page 36: Speakers
Remove the webcam module (4). NOTE: When removing the webcam module, the microphone rubber covers (5) may be inadvertently removed. Reinstall the rubber covers if they are removed. Remove the webcam module and cable. Reverse this procedure to install the webcam module. Speakers Description Spare part number... - Page 37 Disconnect the speaker cable (1) from the system board. Release the ground tape (2) that secures the speaker cable to the display panel assembly. Release the speaker cable from the clips (3) and routing channel built into display panel assembly. Remove the four Phillips PM1.9×4.7 screws (4) that secure the speakers to the display panel assembly.
-
Page 38: Middle Frame
Middle frame Description Spare part number Middle frame 789647-001 Before removing the middle frame, follow these steps: Turn off the tablet. If you are unsure whether the tablet is off or in Hibernation, turn the tablet on, and then shut it down through the operating system. Disconnect the power from the tablet by unplugging the power cord from the tablet. -
Page 39: Power/Volume Button Board
Power/volume button board Description Spare part number Power/volume button board (includes cable) 784417-001 Before removing the power/volume button board, follow these steps: Turn off the tablet. If you are unsure whether the tablet is off or in Hibernation, turn the tablet on, and then shut it down through the operating system. - Page 40 Remove the power/volume button board (3) and cable. Reverse this procedure to install the power/volume button board. Chapter 5 Removal and replacement procedures...
-
Page 41: Using Setup Utility (Bios) And Hp Pc Hardware Diagnostics (Uefi)
Updating the BIOS Updated versions of the BIOS may be available on the HP website. Updated versions of the BIOS may be available on the HP website. Some download packages contain a file named Readme.txt, which contains information regarding installing and troubleshooting the file. -
Page 42: Downloading A Bios Update
Do not shut down the tablet or initiate Sleep. Do not insert, remove, connect, or disconnect any device, cable, or cord. From the Start screen, type support, and then select the HP Support Assistant app. Click Updates and tune-ups, and then click Check for HP updates now. -
Page 43: Using Hp Pc Hardware Diagnostics (Uefi)
Using HP PC Hardware Diagnostics (UEFI) HP PC Hardware Diagnostics is a Unified Extensible Firmware Interface (UEFI) that allows you to run diagnostic tests to determine whether the tablet hardware is functioning properly. The tool runs outside the operating system so that it can isolate hardware failures from issues that are caused by the operating system or other software components. -
Page 44: Specifications
Specifications Metric U.S. Dimensions (landscape orientation) Width 26.40 cm 10.4 in Depth 17.00 cm 6.7 in Height 0.97 cm 0.38 in Weight (lowest weight configuration) 598 g 1.32 lb Input power 5 V dc @ 3A - 15W NOTE: This product is designed for IT power systems in Norway with phase-to-phase voltage not exceeding 240 V rms. NOTE: The tablet operating voltage and current can be found on the system regulatory label. -
Page 45: Backing Up, Restoring, And Recovering
Creating recovery media and backups After you successfully set up the tablet, create HP Recovery media. This step creates a backup of the HP Recovery partition on the tablet. The backup can be used to reinstall the original operating system in cases where the hard drive is corrupted or has been replaced. -
Page 46: Restore And Recovery
Creating HP Recovery media on page ● If you have replaced the hard drive, you can use the Factory Reset option of HP Recovery media to restore the factory image to the replacement drive. For more information, see Recovering using HP... -
Page 47: Recovering Using Hp Recovery Manager
Recovering using HP Recovery Manager HP Recovery Manager software allows you to recover the tablet to its original factory state by using the HP Recovery media that you created or by using the HP Recovery partition (select models only). If you have not... -
Page 48: Using Hp Recovery Media To Recover
Using HP Recovery media to recover You can use HP Recovery media to recover the original system. This method can be used if your system does not have an HP Recovery partition or if the hard drive is not working properly. -
Page 49: Power Cord Set Requirements
Power cord set requirements The wide-range input feature of the tablet permits it to operate from any line voltage from 100 to 120 volts AC, or from 220 to 240 volts AC. The 3-conductor power cord set included with the tablet meets the requirements for use in the country or region where the equipment is purchased. - Page 50 Country/region Accredited agency Applicable note number Sweden CEMKO Switzerland Taiwan BSMI The United Kingdom The United States The flexible cord must be Type HO5VV-F, 3-conductor, 1.0-mm² conductor size. Power cord set fittings (appliance coupler and wall plug) must bear the certification mark of the agency responsible for evaluation in the country or region where it will be used.
-
Page 51: 10 Recycling
Follow the local laws and regulations in your area for battery disposal. HP encourages customers to recycle used electronic hardware, HP original print cartridges, and rechargeable batteries. For more information about recycling programs, see the HP Web site at http://www.hp.com/... -
Page 52: Index
Index middle frame AC adapter, spare part number 10, electrostatic discharge 16 removal 32 equipment guidelines 18 spare part number 10, 13, 32 ambient light sensor 4 external expansion, product model name 1 audio jack board description 1 removal 25 operating system, product spare part number 9, 12, 25 graphics, product description 1... - Page 53 Screw Kit, spare part number 11, 12 sensor, product description 1 service considerations cables 15 connectors 15 plastic parts 15 serviceability, product description 2 Speaker Kit, spare part number 9, 12, 30 speakers location 4 removal 30 spare part number 9, 12, 30 system board removal 26 spare part numbers 9, 13, 26...
Need help?
Do you have a question about the Pavilion x2 10-k0XX and is the answer not in the manual?
Questions and answers