Summary of Contents for Intellinet 524629
-
Page 1: Kvm Switch
8-Port / 16-Port rackmount kVm Switch uSer manual Models 524629 & 524643 Shown: 16-Port, Model 524643 INT-524629/524643-UM-0309-01 524629_524643_01_man.indd 1 3/9/09 9:22:10 AM... - Page 2 524629_524643_01_man.indd 2 3/9/09 9:22:10 AM...
-
Page 3: Fcc Statement
(up to 64 units for Model 524629 and up to 256 units for Model 524643), and perfect keyboard/mouse emulation provides high compatibility with PCs, servers and various operating systems. -
Page 4: Front Panel
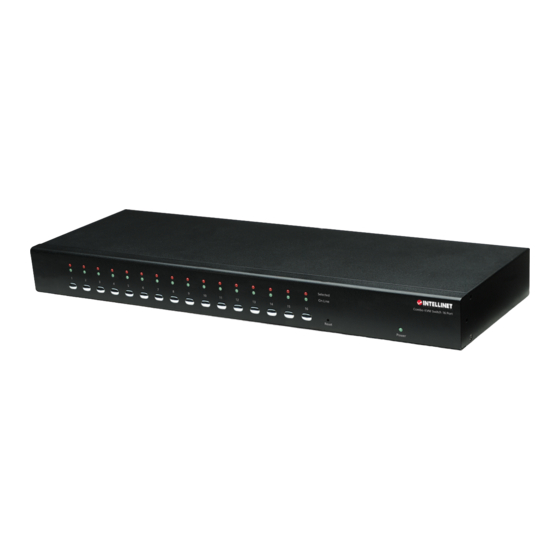
Online LED — Lighted green indicates the corresponding PC (or cascaded switch) is ready (connected but not selected). Buttons — Press any button (1-8 for Model 524629, 1-16 for Model 524643) to select — or switch to — the corresponding port/channel for operation. NOTE: see the operation section for hotkey and osd alternatives to pressing a button if the front panel is out of reach or is otherwise not easily accessible. - Page 5 Single-Stage Installation When you’re creating a switch system using only a single KVM switch, it can be connected to the computer(s) three ways. CAUTION: As noted above, before connecting to the KVM switch, all computers should be powered off; otherwise, the switch system might not be properly set up.
-
Page 6: Operation
(osd) selection. Push Buttons The front-panel buttons (1-8 for Model 524629, 1-16 for Model 524643) give you direct control over KVM switch operation. simply press a button to switch to its corresponding port, or “channel.”... - Page 7 OSD Menu To view the main menu of the OSD on the console monitor, press <Scroll Lock> + <Scroll Lock> + <Enter>. All of the KVM switch’s parameters — plus some KVM functions — can be set up in osd mode. Leading Hotkey Selection By default, the leading key in a hotkey sequence is Scroll Lock (pressed twice).
-
Page 8: Console Lock
Buzzer To enable/disable the buzzer (actually, a beeping sound) and to toggle between the two settings, press <Scroll Lock> + <Scroll Lock> + <B> + <Enter>. By default, the buzzer is on. Auto-Scan To automatically scan through all the connected ports in the switch system and display them on the console monitor, press <Scroll Lock>... - Page 9 Logged-In Username — The system allows the designation of one administrator and three users for security management (see Security: <F5>). The current login is displayed beneath the top information bar (shown as “admin” in the image above). Buzzer — The speaker icon to the right of the Logged-In Username indicates the buzzer is enabled;...
- Page 10 The system will remain locked until an authorized user logs in. IMPORTANT: If you forget the password, the only way to disable the security function is to key in a universal password to unlock the KVM and re-start the system. Contact INTellINeT NeTWoRK solUTIoNs to get the universal password.
-
Page 11: Firmware Upgrades
Authorized User Setup — To change the username and/or password for any of the three authorized users who are allowed to manage the KVM switch system in addition to the designated administrator, highlight “User Name 1,” “User Name 2” or “User Name 3” on the security main menu screen (above), then press the left or Right arrow key to display the username/ password setup screen. - Page 12 2. Use the included external adapter to connect the KVM switch to an A/C power outlet. Confirm that the front-panel Power led is lit. 3. Go to www.intellinet-network.com to download, then run, the firmware update utility “Prog182S.EXE.” 4. Use a mini-USB cable to connect the KVM firmware update port and the USB port of the computer running the firmware update utility.
- Page 13 5. Select “USB Console,” “PS/2 Console” or “OSD,” then click the file browsing button to the right of the “Filename” text field to select the firmware file you want to update. 6. Select the firmware file for updating. 7. Click “Program” to start the firmware program. 8.
-
Page 14: Troubleshooting
trouBleShooting If one or more of the following problems occur during the opertion of your Rackmount KVM switch, try the recommended action before contacting tech support. Problem Possible Cause Recommended Action Keyboard and/or mouse not Keyboard and/or mouse need disconnect from the console working. -
Page 15: Specifications
- Model 524643: 16 • Console connections: 1 • PC port connectors: - Model 524629: 8 x HD15 female connections for use with 4-in-1 connection cables (505727, 505734, 505840) - Model 524643: 16 x HD15 female connections for use with 4-in-1 connection cables (505727, 505734, 505840) •... - Page 16 Ask your local computer dealer for more information or visit www.intellinet-network.com. Copyright © INTELLINET NETWORK SOLUTIONS All products mentioned are trademarks or registered trademarks of their respective owners. 524629_524643_01_man.indd 16 3/9/09 9:22:19 AM...


Need help?
Do you have a question about the 524629 and is the answer not in the manual?
Questions and answers