Table of Contents
Advertisement
Quick Links
Please read this manual first to ensure correct installation and operation. This manual should be retained for
future reference. The information in this manual was current when published. The manufacturer reserves the right
to revise and improve its products. All specifications are therefore subject to change without notice.
PRECAUTIONS
1.
Do not install the camera near electric or magnetic fields.
Install the camera away from TV/radio transmitters, magnets, electric motors, transformers and audio
speakers, because the electromagnetic fields generated by these devices may distort the video image or
otherwise interfere with camera functions.
2.
Never disassemble the camera beyond the recommendations in this manual, nor apply materials to it
other than those recommended herein.
Improper disassembly or introduction of corrosive materials may result in equipment failure or other damage.
3.
Try to avoid pointing the camera toward the sun.
In some circumstances, direct sunlight may cause permanent damage to the sensor and/or internal circuits.
It may also create unbalanced illumination that may be beyond the camera's ability to compensate.
4.
Keep the power cable away from water and other liquids. Never touch the power cable with wet
hands.
Touching a wet power cable with your hands or touching the power cable with wet hands may result in
electric shock.
5.
Never install the camera in areas exposed to oil, gas or solvents.
Oil, gas or solvents may cause equipment failure, electric shock or, in extreme cases, fire.
6.
Cleaning
For cameras with interchangeable lenses, do not touch the surface of the sensor directly with your hands.
Use lens tissue or a cotton tipped applicator and ethanol to clean the sensor and the camera lens. Use a
damp soft cloth to remove any dirt from the camera body. Do not use complex solvents, or corrosive or
abrasive agents to clean any part of the camera.
EVERFOCUS
Model No. EHD630s
700TVL Super Low Light
D-WDR & 3-Axis Gimbal Mechanism
Vandal Proof & Weather Resistant
Outdoor IR Dome Camera
Operating Instructions
Advertisement
Table of Contents

Related Manuals for EverFocus EHD630s


Summary of Contents for EverFocus EHD630s
-
Page 1: Operating Instructions
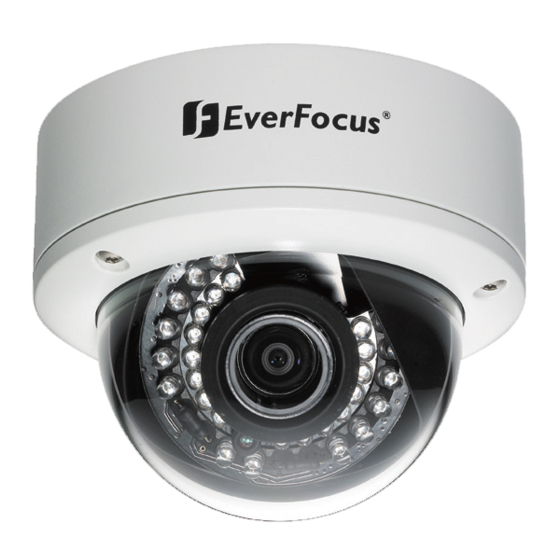
EVERFOCUS Model No. EHD630s 700TVL Super Low Light D-WDR & 3-Axis Gimbal Mechanism Vandal Proof & Weather Resistant Outdoor IR Dome Camera Operating Instructions Please read this manual first to ensure correct installation and operation. This manual should be retained for future reference. - Page 2 1. INTRODUCTION The EverFocus Polestar III-series EHD630s dome camera features amazing 700TVL color low light sensitivity of 0.03 lux, delivered by a 1/3” Sony EXview HAD CCD II 960H sensor. It also features the added benefits of advanced Effio-S DSP technology to enhance image quality.
-
Page 3: Package Contents
1.2 PACKAGE CONTENTS 1 x EHD630s Camera with pigtail 1 x EHD630s User Manual 1 x Accessory pack with screws 1 x Mounting template 1 x Lens-cleaning cloth 1.3 SPECIFICATIONS Pickup Device 1/3" Sony 960H EXview HAD CCD II... -
Page 4: Camera Overview
2. CAMERA OVERVIEW 2.1 Description of Camera Parts ①. FAR/NEAR Adjuster Use this to adjust the lens to focus near or far. ②. WIDE/TELE Adjuster Use this to adjust the lens angle for wide or telescope (zoom) view. ③. OSD Control Buttons ENTER button UP &... -
Page 5: On-Screen Display (Osd) Controls
2.2 Dimensions 3. On-Screen Display (OSD) Controls 3.1 OSD Control Stick ① ENTER Press this button (by pressing straight down on the stick) to display the OSD’s main menu on the monitor you have connected directly or indirectly to the camera’s video connector. - Page 6 ③ L (LEFT) Press this button (by pressing the control stick to the left) to move the cursor to the left to select items or to adjust the level/intensity of a selected function. The level/intensity decreases when this button is pressed. ④...
- Page 7 4. Open submenus Right-hand items (or “modes”) with a “ ” symbol at the end contain submenus. For <┘ adjusting submenu items, select the desired menu item with the and buttons, then select the desired submenu title (or “mode”) to the right of the menu item with the ...
- Page 8 ** MAIN MENU ** ** EXPOSURE ** ┘ LENS AUTO < MODE AUTO IRIS ┘ EXPOSURE < BRIGHTNESS |||||||||||| 030 SHUT 1/50 (S) ┘ WHITE BALANCE < SHUT MAX ┘ 2DNR & 3DNR < LOW LUX BRIGHT. x1.0 ┘ DAY/NIGHT AUTO <...
- Page 9 4.3 WDR 1. When the main menu is displayed on the screen, use the UP and DOWN buttons to scroll to the “WDR” menu item. ** MAIN MENU ** ┘ LENS AUTO < ┘ EXPOSURE < ┘ WHITE BALANCE < ┘...
-
Page 10: White Balance
** BLC ** MODE AUTO AREA MANUAL LEVEL AUTO LEVEL |||||||||| ||||| The BLC modes are AUTO and MANUAL. RETURN<┘ Submenu of the WDR > BLC mode. s Menu - AUTO Select AUTO to adjust the BLC automatically. The range is 000~015. - MANUAL LEVEL Selecting MANUAL lets you select the AREA and MANUAL LEVEL, to adjust the BLC value manually. - Page 11 3200K Select this mode when the color temperature is around 3200°K (when surrounded by sodium lights). Press ENTER if you want to access the setting options. 6300K Select this mode when the color temperature is around 6300°K. Press ENTER if you want to access the setting options.
- Page 12 Camera performance improves when digital “video noise” levels are reduced. When recording digitally, the image file size can also be lessened with noise reduction. The higher the 2DNR and 3DNR settings (options are from Low to High), the more noise is filtered out.
- Page 13 switch from DAY mode to NIGHT mode. Selectable values are 0~63. •NIGHT DAY: When the camera detects the current light level is higher than this value, it’ll switch from NIGHT mode to DAY mode. Selectable values are 0~63. NOTE: 1.
- Page 14 SHARPNESS Level: 000~015. The contour of the video image becomes cleaner and more distinguished as the level of SHARPNESS increases. If the level goes up very much, it may affect the video image and cause noise. SHARP. SUP. (SHARPNESS SUPPRESSION) Level: 000~015.
- Page 15 MOTION DETECTION ** MOTION DET ** If you want your camera to detect motion, set this submenu DETECT SENSE ||||||||||| ||||||||| 115 BLOCK DISP item to ON and click ENTER to open its settings submenu. ┘ DETECT AREA < ┘ MONITOR AREA <...
- Page 16 - AREA SEL Up to 15 areas can be masked. Use your LEFT and RIGHT buttons to select the number of the mask you want to switch on/off or edit. By default, all 15 mask areas will be activated and displayed on the screen, in five different-colored columns. To switch them off, or to tweak their shapes and colors, follow the instructions below.
-
Page 17: Camera Title
HLC (High Light Compensation) ** HLC ** MODE CLIP LEVEL |||||||||||||||||| 010 SCALE ||||||| ||||||||||||| 010 RETURN<┘ - MODE Toggle between OFF, ON, and AUTO. - CLIP LEVEL Select the value of the HLC clip level – from 000 to 255. - SCALE Select the value of the HLC scale –... -
Page 18: Everfocus Electronics Corp
Select NO to exit, or select YES to restore all the settings to the default values. NOTE: The following items will not be restored: CAM ID, PROTOCOL, BAUD RATE and LANGUAGE. 4.10 EXIT Selecting EXIT will AUTOMATICALLY SAVE your settings and close the OSD screen. EverFocus Electronics Corp. - Page 19 EverFocus USA - California: EverFocus USA - New York: 1801 Highland Avenue, Unit A, Duarte, CA 91010, 415 Oser Avenue, Unit S, Hauppauge, NY 11788, USA TEL: +1 631 436 5070 TEL: +1 626 844 8888...
Need help?
Do you have a question about the EHD630s and is the answer not in the manual?
Questions and answers