Table of Contents
Advertisement
Quick Links
The lightning flash with an arrowhead symbol, within an equilateral
triangle is intended to alert the user to the presence of uninsulated
dangerous voltage within the product's enclosure that may be of
sufficient magnitude to constitute a risk of electric shock to persons.
The exclamation point within an equilateral triangle is intended to alert
the user to the presence of important operating and maintenance
(servicing) instructions in the literature accompanying the appliance.
INFORMATION - This equipment has been tested and found to comply with
limits for a Class A digital device, pursuant to part 15 of the FCC Rules & CE Rules.
These limits are designed to provide reasonable protection against harmful
interference when the equipment is operated in a commercial environment.
This equipment generates, uses, and can radiate radio frequency energy and, if
not installed and used in accordance with the instruction manual, may cause
harmful interference to radio communications.
Operation of this equipment in a residential area is likely to cause harmful
interference in which case the user will be required to correct the interference at
his own expense.
WARNING - Changes or modifications not expressly approved by the
manufacturer could void the user's authority to operate the equipment.
CAUTION : To prevent electric shock and risk of fire hazards:
¡ß Do NOT use power sources other than those specified.
¡ß Do NOT expose this appliance to rain or moisture.
This installation should be made by a qualified service person and
should conform to all local codes.
1
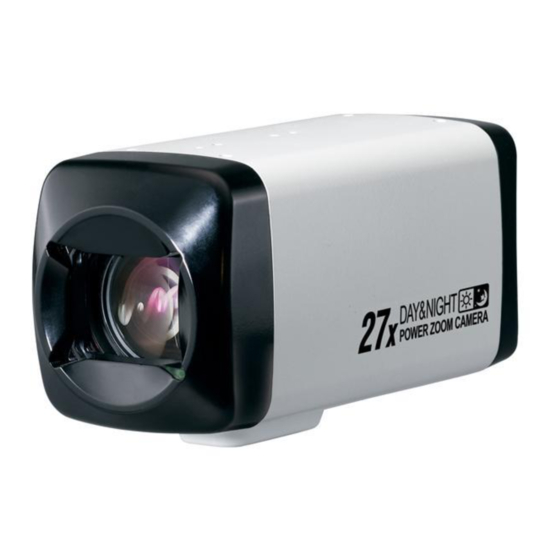
High Sensitivity Day&Night Power Zoom Camera
Advertisement
Table of Contents

Related Manuals for Genie DNR2700Z


Summary of Contents for Genie DNR2700Z
- Page 1 The lightning flash with an arrowhead symbol, within an equilateral triangle is intended to alert the user to the presence of uninsulated dangerous voltage within the product's enclosure that may be of sufficient magnitude to constitute a risk of electric shock to persons. The exclamation point within an equilateral triangle is intended to alert the user to the presence of important operating and maintenance (servicing) instructions in the literature accompanying the appliance.
-
Page 2: Table Of Contents
¡á Contents Features Operating Your Camera ¡á Menu Configuration Warning ¡á How to Set up the Functions Precautions ¤ýWhite Balance (White Bal.) Components and Accessories ¤ýBACKLIGHT ¤ýMotion Detection Overview ¤ýFOCUS ¡á Front View ¤ýEXPOSURE ¡á Bottom View ¤ýSPECIAL ¡á Rear View ¤ýRESET Connection ¤ýEXIT... -
Page 3: Features
¡á Features Warning ¡á The camera requires periodic inspection. 27x / 33x / 37x Optical Zoom DIS (Digital Image Stabilizer) Contact an authorised technician to carry out the inspection. The built-in optical zoom lens is a highly The DIS function compensates for any camera movement, to produce more stable pictures. -
Page 4: Precautions
¡á Precautions Do not drop the camera and protect Never keep the camera pointed Do not install the camera in Do not install or use the camera in an it from physical shocks. directly at strong light. extreme temperature conditions. environment where the humidity is high. -
Page 5: Components And Accessories
■ Components and Accessories Overview ■ Front View 1. ZOOM COLOUR CAMERA ① 2. INSTRUCTION GUIDE ① Zoom Lens 3. REMOTE CONTROLLER (OPTION ITEM) High Sensitivity Day&Night Power Zoom Camera High Sensitivity Day&Night Power Zoom Camera... -
Page 6: Bottom View
¡á Overview Overview ¡á Bottom View Rear View ¨ë ¨é ¨ì ¨í ¨î ¨ê ¨ï Key Buttons ¨é ¤ýFollowing buttons control zoom, focus, and auto focus functions. W (¡å) button : To widen the view. (ZOOM OUT) T (¡ã) button : To close in on a far object. (ZOOM IN) ¨è... -
Page 7: Connection
¡á Overview Connection ¡á External Control Connector ¤ýSet the 75¥Ø/ Hi-Z selection switch as shown below if you have an ¨ê Zoom and focus functions can be controlled using external siganals. intermediate device. CCD Camera Power LED ¨ë Intermediate End monitor Illuminates when power is supplied. -
Page 8: Connecting To Connection
■ Connection Connection ■ Connecting to Connection Communication Control Connector The camera can be controlled by using an external controller equipped External Control Connector with RS-485 communications. To control using a DVR or keyboard controller Connect the RS-485 cable (TRX+, TRX-) to the connection port of the 485 control board in the DVR or controller. -
Page 9: Operating Your Camera
¡á Operating Your Camera Menu Configuration How to Set up the Functions Use the five buttons on back of the camera. Main Setup Menu UP button MANUAL AWC¡æSET • • • SET button WHITE BAL OUTDOOR INDOOR • • LEFT button BACKLIGHT •... -
Page 10: Ýwhite Balance (White Bal.)
¡á Operating Your Camera ¡ØSelect one of the following 5 modes, as appropriate for your purpose. MAIN SETUP Select the desired menu WHITE BAL Modes can be changed ¡Ü ATW : Sel ect this when the colour temperature is between 1800¢ª K item by using the UP and using the LEFT and BACKLIGHT... - Page 11 ¡á Operating Your Camera BACKLIGHT ¡Ü OFF : Deactivates the BACKLIGHT function. This camera is designed so that it delivers a distinctive subject and background 3. Select a desired mode using the Left and Right at The same time, even when the subject is in backlight, unlike conventional button and press the SET button.
-
Page 12: Motion Detection
¡á Operating Your Camera Motion Detection ¤ýSTART ZOOM : Use the left or right button in the 'START ZOOM' item to select the zoom position from 1x to 27x / 33x / 37x to be returned This product has a feature that allows you to observe movements of objects after the 'SMART ZOOM' action is over. - Page 13 ¡á Operating Your Camera 1. Press the SET button to access the main setup manu and then position ¤ýMANUAL : Select 'MANUAL' and press the the indicator over FOCUS using the UP or DOWN button. SET buttonto confirm. Increase or decrease ZOOM/FOCUS POS SETUP optical zoom (ZOOM) or digital zoom (D-ZOOM) 2.
- Page 14 ¡á Operating Your Camera ¡Ü D-ZOOM : Configure magnification limit from x2~x12 using this feature. Note Position the indicator over 'D-ZOOM' using the UP or DOWN button. Set 'D-ZOOM' to 'ON' and press the SET button • The zoom postion is saved after 5 seconds when you set zoom function. to confirm.
- Page 15 ¡á Operating Your Camera LENS INIT : Us e the left or right button in the 'Lens initialization' item 1. Press the SET button to access the main setup menu and then position ¡Ü to select 'Automatic' or 'Manual' and press the SET button to set up the indicator over 'EXPOSURE' using the UP or DOWN button.
- Page 16 ¡á Operating Your Camera ¡Ü SHUTTER : Control image brightness by adjusting shutter speed. ¡Ü AGC (Auto Gain Control) : For brighter images. ¨ç Position the indicator over 'SHUTTER' using the UP or DOWN button. ¨ç Position the indicator over 'AGC' using the UP or DOWN button. Then select the desired shutter mode (A.FLK, ESC, MANUAL) using ¨è...
- Page 17 ¡á Operating Your Camera SPECIAL Note • Changing 'AGC' setting from LOW to HIGH results in greater sensitivity, MAIN SETUP as well as on screen noise. WHITE BAL • Setting 'AGC' to OFF locks 'SSNR' configuration. BACKLIGHT MOTION DET ¡Ü SENS-UP : This feature ensures clear images at night or under low FOCUS lighting conditions.
- Page 18 ¡á Operating Your Camera ¤ýMASK TONE : Determine the transparency of selected area as ¤ýEXT : This mode allows you to apply a desired filter to external signals. controlling number from 0 to 3. Note ¤ýEND : Select this to save the PRIVACY menu settings and return •...
- Page 19 ¡á Operating Your Camera ¤ýProtocol : Select the communication PROTOCOL. Note (PELCO-D/PELCO-P) • If Camera is controlled by the Vicon Controller,function button may ¤ýBAUD RATE : You can select 2400/4800/9600/19200/38400/ not work properly. 57600/115200 bps. ¤ýUART MODE : You can select NONE, EVEN or ODD for the parity bits. ¡Ü...
- Page 20 ¡á Operating Your Camera ¤ýCOLOUR : Adjusting this value affects the chroma level only; ¨é Press SET button. the burst level is unaffected. CAMERA TITLE SETUP ABCDEFGHIJKLM ¤ýEND : evert back to the USER PRESET menu. NOPQRSTUVWXYZ 0123456789 ( ) ¡Ü...
- Page 21 ¡á Operating Your Camera Troubleshooting ¡á If you have trouble operating your camera, refer to the following table. ¤ýLANGUAGE : You ca n select the menu language according to If the guidelines do not enable you to solve the problem, contact an your requirements (Korean, ESPANOL, FRANCAIS, authorized technician.
-
Page 22: Troubleshooting
Troubleshooting Specifications ¡á ¡á ITEM NTSC Problem Solution DC12V Only (Max.420mA) Power Consumption AC24V / DC12V (Max.333mA / Max.500mA) The Motion Detection • Check that MOTION DET in the SPECIAL SETUP 1/4 Inch, Super HAD colour CCD Size 811(H) x 508(V) 795(H) x 596(V) function does not is not set to 'OFF'. - Page 23 MEMO...
-
Page 24: High Sensitivity Day&Night Power Zoom Camera
High Sensitivity Day&Night Power Zoom Camera Instruction Guide High Sensitivity Day&Night Power Zoom Camera Printed in KOREA Edition. June 2010...