Luvion SUPREME CONNECT Instruction Manual
Hide thumbs
Also See for SUPREME CONNECT:
- Instruction manual (20 pages) ,
- Instruction manual (266 pages)
Table of Contents
Advertisement
Available languages
Available languages
Advertisement
Chapters
Table of Contents

Subscribe to Our Youtube Channel
Related Manuals for Luvion SUPREME CONNECT


Summary of Contents for Luvion SUPREME CONNECT
- Page 1 LUVION Premium Baby products SUPREME CONNECT HANDLEIDING INSTRUCTION MANUAL...
-
Page 2: Table Of Contents
TECHNICAL SPECIFICATIONS INTRODUCTIE Hartelijk dank voor uw aanschaf van de Luvion Supreme Connect. Vanaf nu kunt u uw baby horen én zien, zelfs tot 4 camera’s tegelijk. Zorg ervoor dat u altijd uw originele aankoopbewijs bewaart. Voor garantiegevallen zal u altijd gevraagd worden om een kopie van uw aankoopbewijs te tonen. -
Page 3: Inhoud Van Dit Pakket
Baby Unit (Camera) Ouder Unit (Monitor) Adapters Pluggen, schroeven & montageframe ACCESSOIRES De volgende accessoires zijn teven beschikbaar voor de Luvion Supreme Connect: WI-FI BRIDGE* EXTRA CAMERA’S De Luvion Supreme Connect De Luvion Supreme Connect WIFI Bridge geeft u de... -
Page 4: Overzicht Ouder Unit (Monitor)
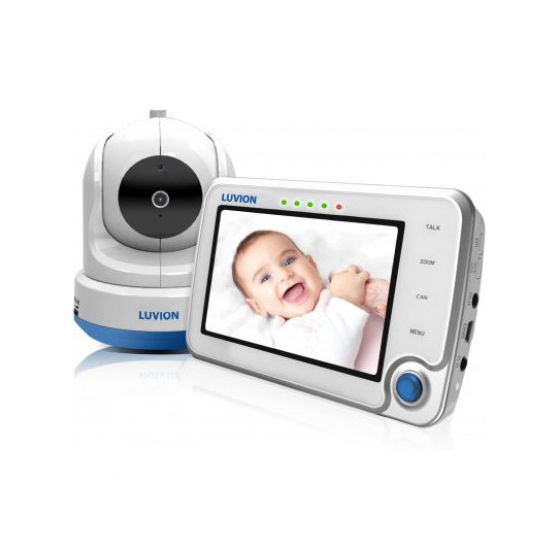
OVERZICHT OUDER UNIT (MONITOR) TALK ZOOM MENU VOORAANZICHT ACHTERAANZICHT... - Page 5 LUVION Premium Baby products 1. Power LED - Geeft aan of de monitor stroom krijgt. Indien de unit aan is, zal deze groen zijn. De LED zal gaan knipperen wanneer de batterijen bijna op zijn. Gebruik de bijgeleverde adapter om de monitor weer op te laden.
- Page 6 10. Batterijcompartement - U mag de batterij alleen vervangen met een offi ciele Luvion Supreme Connect batterij. Uw garantie komt te vervallen als u een andere batterij gebruikt. 11. Speaker - Verzorgt het geluid dat wordt ontvangen van de babyunit. Gebruik de volumeknoppen (27) om het volume te veranderen.
-
Page 7: Overzicht Baby Unit (Camera)
24. Service-Port - Verbindt de ouder unit met uw computer via een USB-kabel voor eventuele fi rmware updates. 25. Power input - Input voor de bijgeleverde Luvion adapter 5V-1.5A. 26. Oplader LED - Wordt rood wanneer de batterij opgeladen wordt. Wanneer deze opgeladen is, zal hij naar groen springen. - Page 8 PAIR SIDE VIEW BOTTOM VIEW 10. On/Off knop - Houd deze knop ingedrukt om de baby unit aan of uit te zetten. 11. Power LED (Groen) - Geeft aan of de camera aan staat. 12. Mounting frame connectoren - Verbindt de baby unit met de bijgeleverde mounting frame welke bevestigd kan worden aan muur of plafond.
-
Page 9: Klaarmaken Voor Gebruik
Laad de ouder unit bij het eerste gebruik volledig op. : Laad de ouder unit volledig op bij eerste gebruik. ET OP Houd de aan/uit knop ingedrukt. Het scherm zal nu het Luvion logo weergeven. LUVION BABY UNIT (CAMERA) Bepaal eerst goed waar u de baby unit plaatst voordat u de unit gaat gebruiken. - Page 10 Muurbevestiging Plafondbevestiging Plafondbevestiging (Op zijn kop) : Als u de baby unit op zijn kop aan het plafond wilt monteren, gebruik dan eerst het plafond switch ET OP aan de onderkant van de camera om het beeld te corrigeren. Verbind de adapter met de powerinput van de baby unit. Houd de aan/uit knop ingedrukt.
- Page 11 LUVION Premium Baby products GEBRUIK Het beeld van de baby unit wordt weergeven als beiden aan staan. De iconen op het scherm worden hier beneden uitgelegd. 1. Signaalindicator signaalindicator geeft aan hoe sterk het ontvangen signaal is dat wordt ontvangen van de baby unit. Een of...
- Page 12 13. Tijdsklokindicator Zal verschijnen wanneer er een timer is ingesteld. 14. Alarmtijd Laat de tijd zien totdat het alarm afgaat (in minuten). 15. Slotindicator Zal verschijnen wanneer de slotfunctie is ingeschakeld, dit zorgt ervoor dat de touch buttons op de voorkant van de ouderunit uitgeschakeld zijn. BUITEN BEREIK Wanneer de baby unit zich te ver van de ouder unit bevindt dan zal de...
-
Page 13: Menu
LUVION Premium Baby products MENU Open het menu van de Luvion Supreme Connect om apparaatinstellingen te veranderen. > Raak de menu knop aan op de ouderunit om toegang tot het menu te krijgen. > Beweeg met de joystick om te navigeren bin- nen het menu. - Page 14 alarm uit te zetten, navigeer naar ‘Uit’ en druk om te bevestigen. > > TIMER MENU ALARM U kunt ook een timer zetten op de ouder unit om u te herinneren aan uw baby’s slaap- en voedingstijden. Stel de timer in als volgt: >...
- Page 15 LUVION Premium Baby products > > VIDEO KWALITEIT MENU OPNEMEN In dit menu kunt u de resolutie van de video- opname instellen; TV of monitor kwaliteit. Kies voor monitor kwaliteit tenzij de unit aan een HD-televisie is aangesloten. > Beweeg de joystick op en neer om een selectie maken.
- Page 16 > > PAIRING MENU SETUP U kunt de pairing functie gebruiken om een nieuwe verbinding te maken of te herstellen tussen monitor en camera. Deze functie maakt het tevens mogelijk om tot 4 baby units te verbinden met uw ouder unit. N.B.
- Page 17 LUVION Premium Baby products > > AV-UIT MENU INSTELLINGEN Gebruik de AV-kabel om uw ouder unit (monitor) te verbinden met uw TV. In dit menu kunt het juiste beeld format kiezen; NTSC (Noord-Amerika) of PAL (Europa). > Beweeg de joystick op en neer om het goede format te kiezen.
- Page 18 > Druk op de joystick om selectie te bevestigen. > > TAAL MENU INSTELLINGEN De standaard taal van de Luvion Supreme Connect is Engels. Naast Nederlands is tevens Frans beschikbaar. > Beweeg de joystick op en neer om een taal te selecteren.
-
Page 19: Pairing
LED op de knop groen oplicht. Houd de Aan/Uit Knop ingedrukt om de ouderunit aan te zetten. Wacht totdat het Luvion-logo verdwenen is. LUVION Druk vervolgens op de knop MENU Beweeg de joystick naar rechts of links om naar set. - Page 20 Beweeg de joystick op of neer om naar ‘Pairing’ te navigeren. Druk op de joystick om het pairing menu te openen. Beweeg de joystick op of neer om het kanaal van uw voorkeur te selecteren. U kunt maar 1 camera per kanaal pairen. Bovendien kan een camera maar aan één monitor gepairt zijn.
-
Page 21: Playback
LUVION Premium Baby products PLAYBACK OM UW BESTANDEN TE BEKIJKEN. > Druk op de joystick om het Playback menu te openen. > Beweeg de joystick op en neer om video of foto te selecteren (zie I.) Alle opgenomen videos zijn te vinden in de VIDEO map. -
Page 22: Probleem & Oplossing
PROBLEEM & OPLOSSING Mocht u tegen problemen aanlopen met de Luvion Supreme Connect dan is er vaak een snelle, simpele oplossing beschikbaar: Probleem Oplossing Er is geen beeld op de Controleer de adapter van de baby unit. Controleer of de stekker ouder unit. -
Page 23: Technical Specifications
LUVION Premium Baby products TECHNICAL SPECIFICATIONS Technische Specifi caties Frequentiebereik 2.400 MHz ~ 2.483,5 MHz Zendvermogen 15 dBm Max Ontvangst gevoeligheid -81 dBm Type Spread Spectrum FHSS 39 Channels Type Modulatie GSFK Data Snelheid 2 Mbps Bereik 300 m (Line of Sight) - Page 24 Parent unit (monitor) LCD Schermgrootte 4,3“ / 10,9 cm LCD Resolutie H: 480 px, V: 272 px Kijkhoek H: 150° V: 130° A/V Out Resolution CCIR656 YUV640 Voedingsspanning 5 Vdc 1.5A +/- 5 % Vebruik 360mA Gebruikstemperatuur - 10° ~ 40° Luchtvochtigheid 0% ~ 85%...
- Page 25 LUVION Premium Baby products...
-
Page 26: Introduction
TECHNICAL SPECIFICATIONS INTRODUCTION Thank you for purchasing the Luvion Supreme Connect. Now, you will be able to see and hear your baby (or even more babies/children by using up to three additional camera’s) in and around the house. Please keep the original dated sales receipt for your administration and proof of warranty. For service and warranty issues, you will always be asked for a copy. -
Page 27: Contents Of Package
Parent Unit (Monitor) Power Adapters RCA Cable Plugs, Screws & Mounting Frame ACCESSORIES The following accessories are available for the Luvion Supreme Connect: WI-FI BRIDGE* ADDITIONAL CAMERAS The Luvion Supreme Connect The Luvion Supreme Connect WIFI Bridge enables you to supports the use of up to connect it to the internet. -
Page 28: Overview Of Parent Unit (Monitor)
OVERVIEW OF PARENT UNIT (MONITOR) TALK ZOOM MENU FRONT VIEW BACK VIEW... - Page 29 LUVION Premium Baby products 1. Power LED - This LED indicates whether the parent unit is switched on. When the parent unit is switched on, the Power LED will turn green. This LED will start blinking when the battery of the parent unit is running low.
- Page 30 10. Battery compartment - Only replace the battery of your monitor with an authorized Luvion Supreme Connect battery. Using a diff erent battery will cause you to void your warranty. 11. Speaker - Produces the sound received from the connected baby unit. Use the volume buttons (27) to decrease/increase the sound level.
-
Page 31: Overview Of Baby Unit (Camera)
24. Service-Port - Connects the parent unit to your computer with an USB cable for fi rmware updates. 25. Power input - Input for the included Luvion power adapter 5V 1.5A. 26. Charging LED - Becomes red to indicate when the built-in battery is being charged. Once fully charged, the LED will turn green. - Page 32 PAIR SIDE VIEW BOTTOM VIEW function only aff ects the baby unit, e.g. the svolume of playing lullabies or the talk back function. 10. On/Off button - Press and hold to switch the baby unit on/off . 11. Power LED (Green) - Indicates whether the baby unit is operational. 12.
-
Page 33: Getting Started
During fi rst use, please allow the unit to completely charge to ensure optimal battery capacity. : Charge the parent unit completely before fi rst use. NOTE Press and hold the on/off button. The screen will now show the Luvion introduction screen. LUVION INSTALLING THE BABY UNIT (CAMERA) Before you install the baby unit (camera), carefully plan where and how you want to position it. - Page 34 Wall mounted Ceiling mounted Wall mounted (upside down) : If you mount the baby unit on the ceiling (upside down), use the Ceiling mounting switch at the NOTE bottom of the camera to fl ip the video image of the camera. Connect the power adapter to the baby unit and a power socket.
- Page 35 LUVION Premium Baby products USING THE SYSTEM The video of the baby unit will be displayed on the screen of the parent unit when both are switched on. The icons on the screen are explained below. 1. Signal indicator The signal indicator shows the strength of the connection between units.
-
Page 36: Out Of Range Warning
13. Time alarm indicator Will appear on the screen when the timer is activated. 14. Alarm time Displays the remaining time (in minutes) until alarm sounds 15. Lock indicator Will appear on the screen when the lock button is pressed to deactivate the touch buttons at the front of the parent unit. -
Page 37: Menu
LUVION Premium Baby products MENU Open the menu of the Luvion Supreme Connect to change device settings. > Press the menu button on the parent unit to open the menu. > Move the joystick to the left/right to select a submenu. - Page 38 > > TIMER MENU ALARM You can set a timer on the parent unit to help you remind baby nap and feeding times. To set the timer: > Move the joystick to the left or right to select hours or minutes. >...
- Page 39 LUVION Premium Baby products > > VIDEO QUALITY MENU RECORDING You can set the resolution of the recorded videos in this menu. There are two options: For TV and For Baby Monitor. Unless connected to an HD, refrain to the ‘For Baby Monitor’-option.
- Page 40 > > PAIRING MENU SETUP You can use the pairing function to restore the connection/or make a new connection between the baby unit and parent unit. It also enables you to connect additional baby units to the parent unit. For more info see page 19. >...
- Page 41 LUVION Premium Baby products > > AV OUTPUT MENU SETTINGS Use the AV cable to connect the parent unit (monitor) to your TV. In this menu you can select the right format for your TV system. You can choose between NTSC (North America) and PAL (Europe).
- Page 42 > > DATE & TIME MENU SETTINGS The Date & Time are used to name recorded videos. > Move the joystick left and right to select an input fi eld. > Move the joystick up and down to change the value of the input fi eld.
-
Page 43: Pairing
LUVION Premium Baby products PAIRING Use the Pairing function to connect a baby unit (camera) to the parent unit (monitor). Up to 4 baby units can be connected to the monitor. They need to be paired on a diff erent channel. - Page 44 Move the joystick up or down to select pairing. Press the joystick to open the pairing menu. Move the joystick up or down to select the desired pairing channel. Press the joystick to confi rm your selection. A countdown will be displayed on the screen. PLEASE PRESS Briefl y press the baby unit (camera) pair PAIR KEY...
-
Page 45: Playback
LUVION Premium Baby products PLAYBACK TO VIEW YOUR FILES > Press the joystick to enter the Playback menu > Move the joystick up/down to select the VIDEO or PICTURE folders. (img. I) All recorded videos are stored in the VIDEO folder. -
Page 46: Troubleshooting
TROUBLESHOOTING If you have any problems with the Luvion Supreme Connect, there is often a quick and simple solution. Please try the following: Problem Solution No video from the baby Check the power supply of the baby unit. Make sure the power unit adapter is plugged in and the green power LED is switched on. -
Page 47: Technical Specifications
LUVION Premium Baby products TECHNICAL SPECIFICATIONS General Specifi cations Operating Frequency Range 2.400 MHz ~ 2.483,5 MHz Transmitting Power 15 dBm Max Receiving Sensitivity -81 dBm Type of Spread Spectrum FHSS 39 Channels Type of Modulation GSFK Data Rate 2 Mbps... - Page 48 Parent unit (monitor) LCD Panel Size 4,3“ / 10,9 cm LCD Resolution H: 480 px, V: 272 px Viewing Angle H: 150° V: 130° A/V Out Resolution CCIR656 YUV640 Power Requirement 5 Vdc 1.5A +/- 5 % Power Consumption 360mA Operating Temperature - 10°...
- Page 49 LUVION Premium Baby products...
- Page 50 Luvion Premium Babyproducts Visit us at: www. Luvion.com...
Need help?
Do you have a question about the SUPREME CONNECT and is the answer not in the manual?
Questions and answers