Table of Contents
Advertisement
Advertisement
Table of Contents

Related Manuals for Pinell Supersound II


Summary of Contents for Pinell Supersound II
- Page 1 Pinell Supersound II DAB+/DAB/FM/Internet Radio Instruction Menu...
- Page 2 Safety Information 9. Do not defeat the safety purpose of the polarized or grounding - type plug. a polarized plug has two blades with one wider than the other. A grounding type plug has two blades and a third grounding prong.
-
Page 3: Fcc Information
FCC Information FCC part 15.19 This device complies with Part 15 of the FCC Rules, Operation is subject to the following two conditions: (1) this device may not cause harmful interference, and (2) this device must accept any interference received, including interference that may cause undesired operation. FCC part 15.21 Warning: Changes or modifications to this unit not expressly approved by the party responsible for compliance could void the user’s authority to operate the equipment. -
Page 4: Table Of Contents
Contents Safety Information Package Content Internet Radio Quick start Guide What you need before you can use your Internet Radio ............3 Controls Overview (a) ......................4 Controls Overview (b) ......................5 Setup Wizard ........................6 Select a station through Podcasts .................. -
Page 5: Safety Information
Package Content Main unit Instruction Manual... -
Page 6: Internet Radio Quick Start Guide
Internet Radio Quick start Guide What you need before you can use your Internet Radio Thanks for your buying! Before use it, you need to know followings: Wireless LAN Setting: A broadband Internet connection. A wireless access point (Wi-Fi) connected to your broadband Internet, preferably via a router. ... -
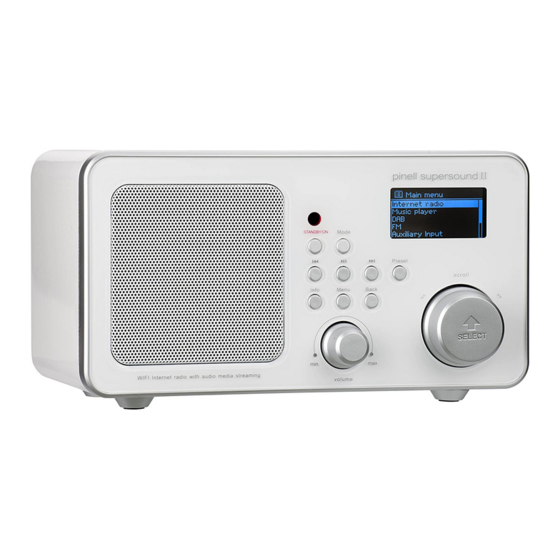
Page 7: Controls Overview (A)
Controls Overview (a) Unit Front Overview Control Internet DAB + Media Player AUN in STANDBY/ON Press to turn on/off Radio When alarm is coming, press to turn it off. MODE Press to convert among Internet, Music player, DAB (DAB+), FM and AUX IN mode in turn. ... -
Page 8: Controls Overview (B)
Controls Overview (b) Unit Back Overview A 3.5mm Headphone Socket is provided for use with either headphones or an Earphone earpiece. socket: Inserting a plug automatically mutes the internal loudspeaker. AUX IN Connects to the external audio device socket:... -
Page 9: Setup Wizard
Setup Wizard Step 1 - Power up 1. Connect to your Internet Radio adapter and ensure the power LED is lighting up. 2. In use, it can be switched on or off by pressing STANDBY/ON. For initial use, it will ask you ‘Setup wizard’. - Page 10 Turn the SCROLL knob choose ‘Daylight saving’ status, and then press it to confirm. 5. Turn the SCROLL knob to your local ‘Wlan region’, and then press it to confirm. Turn the SCROLL knob to your prefer ‘SSID’, press it to confirm. Radio will save it in memory. ...
- Page 11 Turn the SCROLL knob to cycle through the alpha-numeric character list, press it to select an appointed character. Note: WEP/WPA pass codes are case-sensitive. If you make a mistake while entering your password, select ‘ ’ to delete this character.
-
Page 12: Access Wireless Network
Access wireless network 1. After successfully ‘Setup wizard’, press the SCROLL knob to enter ‘Internet radio’ mode. Note: Or, you may also press MODE repeatedly until ‘Internet radio’ shows up, then stop pressing. Later, it will say: 2. -
Page 13: Local Stations
Local stations Note: make sure your radio already connected to network. 1. While cursor point to < Station list >, press the SCROLL knob to confirm. 2. Turn the SCROLL knob to < Local China >, and then press it to confirm. ... -
Page 14: Choosing A Station
Choosing a station Note: ensure your radio has already connected to network. 1. While cursor point to < Station list >, press the SCROLL knob to confirm. 2. Turn the SCROLL knob to < Stations >, and then press it to confirm. ... - Page 15 GENRE’ enables you to choose radio stations according to their content, for example Classic Rock, Sport, News, etc. a. Turn the SCROLL knob to < Genre >, press it to confirm. b. Turn the SCROLL knob to your favorite type of content, press it to confirm. c.
-
Page 16: Connecting To Wired Network
Connecting to wired network Step 2 – Enter Internet Radio mode 1. Press MENU, then turn the SCROLL knob to ’Main menu’, press it to confirm 2. While cursor point to ‘Internet radio’, press the SCROLL knob to confirm. Or, press MODE repeatedly until <... - Page 17 How to shift to wireless network Note: to make this order works, you can either do a ‘factory reset’, or follow below steps: 1. Refer ‘choose LAN setting’, which you can find at page 13, and then turn the SCROLL knob to < Wireless >, press it to confirm.
-
Page 18: Select A Station Through Podcasts
Select a station through Podcasts 1. After your radio has successfully connected to network, turn the SCROLL knob to < Podcasts >. 2. Press the SCROLL knob to confirm, and then turn the SCROLL knob to your favorite option. 3. -
Page 19: Add Station To 'My Favourites
Add Station to ‘My favourites’ 1. visit website: http://www.wifiradio-frontier.com 2. Click on the register link. 3. Create account login, you need an Access code to complete it, which refer to page 16. Note: want to a member login? Therefore you need to remember your registered ‘Email address’ and ‘Password’. -
Page 20: Add Station To 'My Added Stations
Add Station to ‘My Added Stations’ 1. Visit website: http://www.wifiradio-frontier.com 2. Login as a member(at previous page, you registered). 3. You will able to take advatage of the various additional features and services offered by the Frontier internet Radio Portal. ... -
Page 21: Changing The Station Information
Changing the Station Information Just need press INFO repeatedly, you can changing the information that is displaying on the second line of the display when listening Internet program. Description of Station This scrolling text information supplied by the Internet station. It may comprise information on music titles or details of the programme which is provided by the broadcaster. -
Page 22: Music Player Mode
Music Player Mode Note: To play this order, read appendix at first, which at following pages is highly recommending! A. PLAY SHARED MEDIA 1. Press MODE repeatedly until < Music player > is showing up. Note: Or, enter < Main menu >, and then turn the SCROLL knob to < Music player >, press it to confirm. 2. -
Page 23: Dab Mode
DAB Mode Getting Started 1. Press MODE repeatedly until < DAB radio > is shows up. For initial use, it will make a full scan and store stations list in memory. Note: a. or press MENU, and then turn the SCROLL knob to < DAB >, press it to access. b. -
Page 24: Manual Tune
Manual Tune: 1. Press MENU, and then turn the SCROLL knob to < Manual tune >, press it to confirm. 2. Turn the SCROLL knob step between the channels and press it to select the current channel. Note: If there is a multiplex corresponding to this channel and frequency, then the display will show a tuning meter with the signal strength and the multiplex name after a few seconds. -
Page 25: To Change Station Order
DRC (Dynamic Range Control) value You can set the level of the compression of stations to eliminate the differences in dynamic range or sound level between radio stations. Note: a. Set DRC to off indicates no compression. b. set DRC to low indicates little compression. c. -
Page 26: Fm Mode
FM Mode A. GENERAL OPERATION Press MODE repeatedly until < FM Radio > is showing up. For initial use, it will start at the beginning of the FM frequency range (87.50MHz). Otherwise, the last listened FM station will be selected. ... - Page 27 C. AUDIO SETTING FM mode, at any step by pressing BACK or MENU to enter it’s setting mode While cursor point to < Audio setting >, press the SCROLL knob to confirm. Turn the SCROLL knob to select ‘YES’ or ‘NO’, and then press it to confirm.
-
Page 28: Setting Station Presets
Setting Station Presets Your radio can store 10 Internet, 10 DAB+ and 10 FM stations preset. To store the current station: 1. Press and hold PRESET, and then turn the SCROLL knob to your purpose one. 2. Press the SCROLL knob to confirm. And then it will return to its normal working condition, and preset icon appeared on display. -
Page 29: Aux In Mode
AUX IN Mode 1. Press MODE repeatedly until < AUX in > is showing up. Note: Or enter ‘MAIN MENU’, and then turn the SCROLL knob to < AUX in >, press it to confirm. 2. Through a cable connection, your radio can be transformed into a high quality digital audio speaker system. -
Page 30: Sleep Function
Sleep Function 1. It can be activated from < Main menu > < Sleep >, press the SCROLL knob to confirm. 2. Turn the SCROLL knob to define the sleep period which between 0 – 60 minutes. 3. When your purpose period is appeared, simply stop turning, and it is done! ... -
Page 31: Setting Clock
Setting Clock Manually setting the Time/Date 1. It can be activated from < Main menu > < System settings > < Time/Date >, press the SCROLL knob to confirm. 2. While cursor point to < Set Time/Date >, press the SCROLL knob, then turn it to set the date. ... -
Page 32: Daylight Savings
Set hour format Turn the SCROLL knob to < Set format >, press it to confirm. 2. Turn the SCROLL knob to your favourable format, press it to confirm. Set timezone 1. Turn the SCROLL knob to < Set timezone >, press it to confirm. ... -
Page 33: Setting Alarm
Setting Alarm Note: Setting Alarm, make sure setting time at first. 1. It can be activated from < Main menu > < Alarms >, press the SCROLL knob to confirm. 2. Turn the SCROLL knob to your purpose one, press it to confirm. 3. - Page 34 8. Turn the SCROLL knob to < Mode: Internet radio > press it to confirm, and then turn this knob to your purpose alarm sound mode. Note: Alternatively, you may also turn the SCROLL knob to < Preset: Last listened > to choice alarm sound. 9.
- Page 35 Turn Alarm off When alarm is coming, you can either press STANDBY/ON to turn it off, or Play Snooze Function Press the SCROLL knob to postpone it, repeatedly press this knob, the SNOONZE can be 5/10/15/30 minutes in turn. ...
-
Page 36: General Operation
General Operation Return to Main Menu Press MENU, and then turn the SCROLL knob to < Main menu >. Or, you can move back to radio’s top-line < Main menu >, at any time by pressing BACK repeatedly. Adjust Volume level ... -
Page 37: System Settings
System settings Equaliser Note: when you want to adjust timbre, this order will help you to achieve it! 1. Press MENU, and then turn the SCROLL knob to ‘Main Menu’, press it to confirm. 2. Turn the SCROLL knob to < System settings >, press it to confirm. ... -
Page 38: Network Setup
Network setup Note: Familiar this order will allows you: If you want it access to another Router, then you need --------- internet wizard If you want get MAC address, Wlan region, IP address etc. then you need ---------- View settings. ... -
Page 39: Factory Reset
Factory reset Note: running this will completely erase your radio’s memory, clearing all WEP/WPA codes and other user settings. It can be activated from < Main menu > < System settings > < Factory reset >. 2. -
Page 40: Software Updates
Software Updates It can be activated from < Main menu > < System settings > < Software update >, press the SCROLL knob to confirm. While cursor point to < Auto- check setting >, press the SCROLL knob to confirm. ... -
Page 41: Enter Setup Wizard
Enter Setup wizard It can be activated from < Main menu > < System settings > < Setup wizard >, press the SCROLL knob to confirm. 2. Then step by step to set it. SW Version and Radio ID 1. -
Page 42: Backlight
Backlight It can be activated from < Main menu > < System settings > < Backlight >, and then press the SCROLL knob to confirm. A. Setting Power-On level 1. While cursor point to < Power On >, press the SCROLL knob to confirm. 2. -
Page 43: Appendix
Appendix Step 1: Set Up Media Sharing in WMP 11 Note: After you download and install Windows Media Player 11 for Windows XP and connect your Radio to the network, you need to set up media sharing so that you can share music with your Radio. The following steps describe how to set up media sharing in Windows Media Player 11. -
Page 44: Step 2: Play Music On The Internet Radio
3. Check the “share my media to” box. In the list, click your Radio *, click Allow, the selected device will now show a green tick and then click OK. If your device does not appear in the list of devices, perform the following steps; a. -
Page 45: Set Up Media Sharing In Mac Os
Set Up Media Sharing in MAC OS Using the Radio with a MAC will require Windows File Sharing. MAC OS 9 and earlier versions of the OS will need extra software to use Windows File Sharing, but MAC OS X 10.2 and later versions have Windows File Sharing built into the OS. -
Page 46: Troubleshooting
Troubleshooting If you experience any trouble with your wireless Internet Radio, then you may find it useful to visit the help section on our webpage: http://www.wifiRadio-frontier.com If you have trouble connecting the Radio to your wireless network, these steps may help to resolve the problem: 1. -
Page 47: Specification
Specification ITEMS DESCRIPTION Specifications: DAB+, DAB, FM and internet radio Audio Output: 6Wrms Speaker: 8 ohm Headphone Jack: 32 ohm Frequency Ranges: FM: 87.5-108MHz DAB+, DAB: 174 – 240MHz LCD Display: High resolution display Power Supply: AC Power Input: 100-230VAC, 50-60Hz Dimension: 249mm x 130mm x 130mm This symbol on the product or in the instructions means that your electrical and electronic equipment... - Page 48 4. Once your iTouch/iPhone/iPad has started downloading the app, a status bar will show up to indicate how long it will take to download. Once it is complete, you can access your Pinell radio anytime via a simply touch 8.12 The Way to Play Your Radio via Apps:...
Need help?
Do you have a question about the Supersound II and is the answer not in the manual?
Questions and answers