
Subscribe to Our Youtube Channel
Related Manuals for Pinell SUPERSOUND 201W


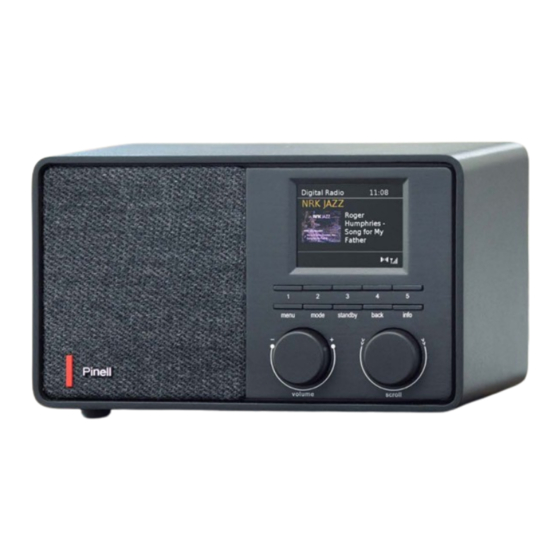
Summary of Contents for Pinell SUPERSOUND 201W
- Page 1 User Manual SUPERSOUND 201W DAB/DAB+ / FM / Internet Radio / Podcasts / Bluetooth / Spotify...
-
Page 2: Important Safety Instructions
Important Safety Instructions • Read these instructions • Keep these Instructions • Heed all Warnings • Follow all instructions • Do not use the speaker near water • Clean only with dry cloth WARNING: DO NOT EXPOSE THIS SPEAKER TO RAIN OR MOISTURE. Do not place unit near any heat source such as radiators, heat registers, stoves, or other apparatus that produce heat. -
Page 3: Table Of Contents
Table of Contents Important Safety Instructions ......................2 Table of Contents ..........................3 Your radio ............................5 Front View ..........................5 Rear View ..........................5 Remote Control View ....................... 6 Getting Started ..........................7 Setup Wizard ..........................8 DAB+ Mode ..........................10 Selecting DAB+ Mode ...................... - Page 4 Factory Reset ........................23 Software Update – Over the network ..................24 Setup Wizard ......................... 24 Viewing System Info ......................24 Privacy Policy Notice ......................24 Setting Backlight ........................25 Troubleshooting ..........................26 Specifications ..........................27 Technical Data - supplied Power Supply ..................28...
-
Page 5: Your Radio
Your radio Front View Speaker BACK button MENU button Press to return to previous menu screen. Press to display or exit menu screen. SCROLL knob VOLUME knob Turn to browse options. Turn to adjust volume level. Press to confirm selection. MODE button Press to activate snooze function when Press to switch between DAB, FM,... -
Page 6: Remote Control View
+)-#%)&.#$%"#/&'()* IH )*, S,&&.* D+#((!] (7)&-'!.*!&'#!+$%).!.+!0,&!)&!&.!(&$*%S; )0. S,&&.* !"# D+#((!] (7)&-'!S#&7##*!8<aJ!6FJ!a3,#&..&'J!<,T!1*J! " !&''( 1*&#+*#&!"$%).J!D.%-$(&( $*% E0.&)N; M.%# ("+ !,-. "'( 23./ +'+0! S,&&.* D+#((!] (#&!<3$+M!I!$*%e.+!L! & )'""3 e!)#&&8"4S,&&.* D+#((!EYBBD!f (#&!(3##0!&)M# 1-$' D+#((!E=@@gB!] $-&)K$&#!(*..`#!7'#*!$3$+M!5.#(!.* 3094:4);$24:40"34S,&&.* cE,0#+(.,*%!ZOId !" 1'3- 1#2& S,&&.* D+#((!] ('.7!(&$&).*!)*N.+M$&).*!(�!S;!(� S,&&.*!ca3,#&..&'d D+#(( ] 0$,(#e03$;!&)&3# S,&&.*!cE,0#+(.,*%!ZOId... -
Page 7: Getting Started
Carefully remove your radio from the box. You may wish to store the packaging for future use. What you can find inside of your package 1x Main unit Supersound 201W 1x Power adapter 1x Remote control and 2x AAA alkaline battery... -
Page 8: Setup Wizard
Setup Wizard For initial use, radio will ask you to choose the language: Turn SCROLL > select language > push SCROLL The “Setup wizard” screen will appear. Press SCROLL knob to confirm “YES” to start setup. Options include the following: Time/Date Set 12 or 24 hour format Auto update... - Page 9 Note: If a password (WEP/WPA) isn’t required by your network, radio will connect to the network automatically. Turn SCROLL knob to cycle through the alphanumeric character list, press SCROLL knob to select an appointed character. Note: WEP/WPA pass codes are case-sensitive. If a wrong operation is being conducted, select to delete designated character.
-
Page 10: Dab+ Mode
DAB+ Mode Selecting DAB+ Mode Press MODE > turn SCROLL knob and select “DAB RADIO” > press SCROLL. For initial use, radio will carry out a full scan and store stations list in memory Once the scanning is completed, the DAB+ stations will be displayed in alphanumeric order. Turn SCROLL knob to select you desired station and then press SCROLL knob to broadcast. -
Page 11: Prune Invalid
→ Note: If there is a multiplex corresponding to channel and frequency, the display will show signal strength and multiplex name after a few seconds. The new station will be added to station list. To play the station, first press BACK button repeatedly to exit manual tune. Prune Invalid You may remove all unavailable stations from the station list. -
Page 12: Viewing Station Information
Viewing Station Information DAB/DAB+ stations broadcast additional information. Press INFO button repeatedly while a program is playing to view information through DLS (Dynamic Label Segment), Ensemble, Program Frequency, Signal Quality, Signal Strength, Bitrate, Codec, Channel and Date. Note: to view station information while the display is playing slide show in full screen, press SCROLL knob to play slide show in small image, and then you can press INFO button repeatedly to view information. -
Page 13: Fm Mode
FM Mode Selecting FM Mode 1. Press MODE > turn SCROLL knob and select “FM RADIO” > press SCROLL. 2. For initial use, it will start at the beginning of the FM frequency range (87.50MHz). Otherwise, the last listened FM station will be selected. 3. -
Page 14: Storing Preset Stations
Storing Preset Stations You can store up to 5 of your favourite FM stations via preset buttons at the front. This will enable you to access your favourite stations quickly and easily. 1. While playing your favourite station, press and hold one of PRESET buttons 1-5 until display shows “Preset stored”. -
Page 15: Internet Radio Mode
Internet Radio Mode Press MODE > turn SCROLL knob and select “WEB RADIO” > press SCROLL. Turn SCROLL knob and then press it to select a station. Stations change according to your current location (e.g. Local country: China). It displays local stations of your current location. Search: Enter all or part of station name to find a station. -
Page 16: Podcasts
Podcasts Press MODE > turn SCROLL knob and select “DAB RADIO” > press SCROLL. Turn SCROLL knob and then press it to select a podcast. Podcasts change according to your current location (e.g. Local country: China). It displays local podcasts of your current location. Popular: List the podcasts that have the most listeners. -
Page 17: Spotify Connect Mode
Spotify Connect Mode Your radio has Spotify Connect built in. Press MODE > turn SCROLL knob and select “SPOTIFY” > press SCROLL. Use your phone, tablet or computer as a remote control for Spotify. Go to spotify.com/connect to learn how. The Spotify software is subject to third party licenses found here: www.spotify.com/connect/third-party-licenses... -
Page 18: Bluetooth Mode
The display will show “Bluetooth discoverable” and flash in repeatedly. Activate your Bluetooth device and look for your radio’s model number “Pinell Supersound 201W” (Bluetooth friendly Name of your radio) in the Bluetooth list. Select it. Display will show “Connected” when connection is successful. -
Page 19: Aux In Mode
Aux in Mode AUX IN allows for quick and easy connection to an MP3 player or other external audio sources. Before connecting to the mains socket, use a 3.5mm audio cable (not supplied) to connect to your external audio device through the AUX IN socket at the rear of unit. Connect power adapter to mains socket, press STANDBY button to switch unit on. -
Page 20: Control Via Smartphone And Octiv App
Control via Smartphone and OCTIV app The free OKTIV app works with all WLAN connected Pinell devices with software V.4.2.4 or higher. Older models can continue to use the UNDOK app, which is also free. Download OKTIV from the Apple Store or Google Play Store. -
Page 21: General Operation
General Operation Setting Sleep This feature enables your radio to switch to standby mode by itself after a set sleep time. Press MENU button > Main menu > Sleep, and then press SCROLL knob to confirm. Turn SCROLL knob to select a sleep time, and then press SCROLL knob to confirm. The sleep icon and sleep time will show on the display. -
Page 22: Setting Equaliser
Setting Equaliser This feature enables you to choose a sound equalization profile. Each of the equalization setting will change the tone of the sound from your radio when selected. Press MENU button > Main menu > System settings > Equaliser, and then press SCROLL knob to confirm. -
Page 23: Setting Time/Date
Setting Time/Date Press MENU button > Main menu > System settings > Time/Date, press SCROLL knob to confirm. Turn SCROLL knob to select options, and then press SCROLL knob to confirm the setting. Set Time/date: Manually set-up both Time and Date “Update from DAB”, “Update from FM”, “Update from Auto update: Network”... -
Page 24: Software Update - Over The Network
Software Update – Over the network From time to time, your radio may make software upgrades available with bug fixes and/or additional features. If your radio detects that newer software is available, it will ask if you want to go ahead with an update. -
Page 25: Setting Backlight
Setting Backlight This radio display has a backlight with adjustable brightness level. Press MENU button > Main menu > System settings > Backlight, press SCROLL knob to confirm. Turn SCROLL knob to select “Power-on mode” or “Standby Mode”, then press SCROLL knob to confirm. -
Page 26: Troubleshooting
Troubleshooting If a problem occurs, it may be due to something very minor. The following table contains various tips. Problem Solution No Power. l Ensure the mains cable is properly connected or battery power is not used up. l Make sure that the unit is turned on. The unit does not respond l The unit may freeze up during use. -
Page 27: Specifications
Specifications PLAYS FUNCTIONS SOUND • DAB/DAB+ • 5 preset butons on main • Speaker: 1x 3”full range • FM (87.5-108MHz PLL) • Output: 3 Watt RMS unit • Internet Radio • 10 preset buttons on • Podcasts remote control DESIGN •... -
Page 28: Technical Data - Supplied Power Supply
TT Micro AS hereby declares that this device is in compliance with the following directives: 2014/53/EU (RED) 2011/65/EU (RoHS) Declaration of conformity: www.pinell.com/certificates Information in this manual is subject to change without notice. Pinell is a label of TT Micro AS (www.ttmicro.no) Olav Helsets vei 5, 0694 Oslo, Norway (Email: Support@pinell.no)
Need help?
Do you have a question about the SUPERSOUND 201W and is the answer not in the manual?
Questions and answers