Table of Contents
Advertisement
Advertisement
Table of Contents

Related Manuals for Pinell Explorer


Summary of Contents for Pinell Explorer
- Page 1 User’s Manual Pinell Explorer DAB+ / DAB / FM / Internet Radio www.pinell.no...
-
Page 2: Table Of Contents
Step 2: Playing music from Media Player using the Internet radio ................ 46 WPS encrypted networks ............................46 Charging batteries ..............................46 Use of rechargeable batteries ........................... 47 Fault-finding ................................47 Frequently Asked Questions ............................ 48 Specifications www.pinell.no Page 2... -
Page 3: Safety Information
If fluid contacts bare skin, rinse with plenty of ONLY REPLACE BATTERIES WITH water; if you get it in your eyes, rinse thoroughly for 10 BATTERIES OF THE SAME BRAND AND SIZE minutes and contact a doctor. www.pinell.no Page 3... -
Page 4: The Contents Of The Package
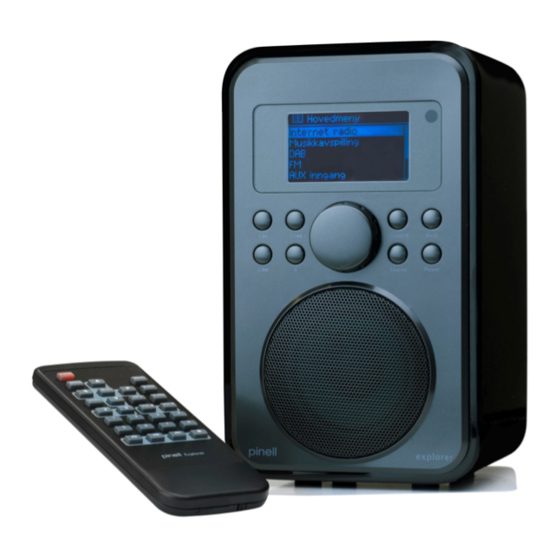
The Contents of the Package Main unit with Remote Control User’s Manual www.pinell.no Page 4... -
Page 5: Internet Radio Quick Start Guide
Wherever you live in the world, you will be able to listen to domestic and foreign radio stations. You may also select genres such as classical music, jazz, and so on. Your Pinell will give you the radio stations you prefer. -
Page 6: This Is What You Need Before You Can Begin To Use Your Internet Radio
Ensure that the wireless access point is switched on and connected to the broadband network, or that the LAN cable is correctly connected, before proceeding. To ensure that this part of the system functions, you are recommended to read the instructions accompanying the wireless access point or LAN connection device. www.pinell.no Page 6... -
Page 7: Overview Of Controls (A)
Press to go forward in the menu system. BACK Press to go backwards in the menu system. a. Rotate to scroll through options, press to confirm selection. b. Press to go to the main menu or change options. c. Rotate to adjust the volume www.pinell.no Page 7... -
Page 8: Remote Control Overview
Remote Control Overview www.pinell.no Page 8... -
Page 9: Overview Of Outputs/Inputs (B)
Overview of outputs/inputs (b) Radio viewed from the back Headphone The radio is equipped with a 3.5 mm headphone jack. jack: When headphones are connected, the internal speaker is automatically muted. AUX IN Used to connect an external audio unit. jack: www.pinell.no Page 9... -
Page 10: Setup Guide
Press to confirm. Here you can choose whether the clock display will have 12 or 24 hour format. Press SELECT to confirm “Update from network”. The radio will now automatically obtain the date and time of day. Rotate the knob or use the arrow keys to highlight your time zone. Press to confirm. www.pinell.no Page 10... - Page 11 If the network has not been configured to request a password (WEP/WPA) the radio will connect to the network and display: If a WEP or WPA key (password) is required, you will be asked to enter this using the following display: www.pinell.no Page 11...
- Page 12 The radio stores the WEP/WPA key you have specified so that you don’t need to provide it again. Press Select to exit. The setting has now been entered. NB: If you are using an encrypted WPS network, refer to Page 51. www.pinell.no Page 12...
-
Page 13: Accessing Wireless Networks And Using The Internet Radio
If the radio shows: when you attempt to connect to the network, you should: Check that the router is functioning correctly. Move the radio to a place where the signal is stronger. Check that you have provided the correct password. www.pinell.no Page 13... -
Page 14: Local Stations
“Local UK” or “Local US”. It is easy to find your local station. 3. Rotate the knob or use the arrow keys to find your favourite, press to confirm and proceed to the desired programme. www.pinell.no Page 14... -
Page 15: Selecting A Station
With the arrow pointing to Location, press SELECT to confirm. b. Rotate the knob or use the arrow keys to highlight the region you want. Press to confirm. c. Use the same method to select country and station. The radio will begin to play. www.pinell.no Page 15... - Page 16 If the radio station is not broadcasting, an error message may be displayed. In that case, return to the station overview to select a different station. b. If the station has content which can be selected, a list will be displayed of previously broadcast programmes (podcasts). www.pinell.no Page 16...
-
Page 17: Connecting To A Network By Means Of Cable
4. Rotate the knob or use the arrow keys to highlight Manual settings. Press to confirm. 5. With the arrow pointing to Wired, press SELECT to confirm. With the arrow pointing to DHCP enable, press SELECT to confirm. www.pinell.no Page 17... - Page 18 Continue with the above-mentioned steps. After a few seconds, the following will be displayed: If this happens, proceed as follows: a. Check that the router is functioning correctly. b. Check that the LAN cable is connected properly and is not damaged. c. Check the cable port. www.pinell.no Page 18...
-
Page 19: Changing To Wireless Network
1. Refer to “Select LAN settings” on Page 19 and rotate the knob or use the arrow keys to highlight Wireless. Press to confirm. 2. With the arrow pointing to DHCP enable, press SELECT to confirm and go through the wireless network configuration step by step. The wireless setup is now complete. www.pinell.no Page 19... -
Page 20: Choosing A Station Via Podcasts
Podcasts. 2. Press SELECT to confirm and then find your favourite. 3. Press SELECT to confirm and then select the preferred programme step by step. www.pinell.no Page 20... -
Page 21: Obtaining An Access Code
Rotate the knob or use the arrow keys to highlight Help. Press to confirm. NB: At this stage you will also be able to refer to the Frequently Asked Questions (FAQ). 2. With the arrow pointing to Get access code, press SELECT to obtain the access code. www.pinell.no Page 21... -
Page 22: Adding A Station To "My Favourites
Rotate the knob or use the arrow keys to highlight your favourite radio station, and press the knob. NB: The stations in My favourites are displayed in the subdirectory under “My favourites”. They will not be deleted even if you restore to the factory default settings. www.pinell.no Page 22... -
Page 23: Add A Station To "My Added Stations
Rotate the knob or use the arrow keys to highlight your favourite station and press to confirm. NB: The stations you have added are displayed in the My added stations subdirectory. They will not be deleted even if you restore to the factory default settings. www.pinell.no Page 23... -
Page 24: Changing Station Information
This shows the digital bit rate and signal mode. Station playback buffer This shows the level of the playback buffer for the station in question. Station date This shows the exact date provided by the broadcaster. www.pinell.no Page 24... -
Page 25: Music Player Mode
Repeat play: Off. Press to toggle between “Off” and “On”. C. Shuffle mode (random playback order) When the music player menu is being displayed, rotate the knob or use the arrow keys to highlight Shuffle play: Off. Press to toggle between “Off” and “On”. www.pinell.no Page 25... -
Page 26: Dab Mode
NB: If no DAB signals are found in your area, you may need to relocate the radio. Dynamic Label Segment (DLS): This is text information provided by the DAB station, which scrolls across the display. The information may include music titles or details of the programme provided by the broadcaster. www.pinell.no Page 26... -
Page 27: Manual Tuning
Prune invalid: (remove channels not broadcasting or operating) 1. In the DAB menu, select Prune invalid to remove channel which are not broadcasting or operating. 2. Rotate the knob or use the arrow keys to highlight YES, and press to confirm. www.pinell.no Page 27... -
Page 28: Dynamic Range Control (Drc) Value
Displays all stations in alphanumeric order. Ensemble Lists active stations (stations broadcasting at this moment) followed by inactive stations. Valid Removes inactive stations from the list. 2. Rotate the knob or use the arrow keys to highlight the desired option. Press to confirm. www.pinell.no Page 28... -
Page 29: Fm Mode
In FM mode you may at any stage press BACK or MENU to enter setting mode. With the arrow pointing to Scan setting, press SELECT to confirm. Rotate the knob or use the arrow keys to highlight YES or NO. Press to confirm. www.pinell.no Page 29... -
Page 30: Specifying Preset Stations
1. Find the station you wish to store under one of the buttons. Press and hold the button until you see the text “preset stored”. Selecting a preset station To select a stored station: 1. Press SOURCE to enter relative mode. 2. Press the numbered button under which you stored the preset channel. www.pinell.no Page 30... -
Page 31: Aux In Mode
4. Adjust the volume on both the source unit and the radio to achieve optimal volume level. NB: AUX IN provides a quick and easy way to connect an MP3 player or other external audio source. www.pinell.no Page 31... -
Page 32: Sleep Function
In this setting, the display shows the sleep icon and how many minutes remain to the end of the set time. 4. When the set time has expired, the radio switches itself to standby mode. 5. Press STANDBY/ON to continue listening to the radio. www.pinell.no Page 32... -
Page 33: Setting The Clock
NB: Select Auto update. Check that the radio is connected to the Internet. It will then obtain the date and time automatically. Rotate the knob or use the arrow keys to highlight Auto update. Press to confirm. www.pinell.no Page 33... -
Page 34: Daylight Saving Time
The clock is now set. Daylight saving time 1. This is activated from MENU System settings Time/Date Daylight savings. Press SELECT to confirm. 2. Rotate the knob or use the arrow keys to highlight ON. Press to confirm. www.pinell.no Page 34... -
Page 35: Setting The Alarm
Rotate the knob or use the arrow keys to highlight Time: 00:00. Press to confirm. Rotate the knob or use the arrow keys to change the hours. Press to confirm. Use the same method to set the minutes. Press to confirm. www.pinell.no Page 35... - Page 36 10. Rotate the knob or use the arrow keys to set the desired volume. Press to confirm. 11. Finally, rotate the knob to highlight Save. Press to confirm. The display shows Alarm Saved for three seconds. The alarm icon is displayed. To check the alarm status, press STANDBY/ON to enter standby mode. www.pinell.no Page 36...
-
Page 37: Using The Snooze Function
Rotate the knob or use the arrow keys to select Off, and press to confirm. d. Rotate the knob or use the arrow keys to highlight Save, and press to confirm. If necessary, reset to the factory default settings. www.pinell.no Page 37... -
Page 38: General Use
Scrolling through station information Information is displayed on the second line of the display while you listen to a programme. To see more information, press INFO several times. NB: This function does not work in AUX IN mode. www.pinell.no Page 38... -
Page 39: System Settings
2. Rotate the knob or use the arrow keys to highlight System settings. Press to confirm. 3. Rotate the knob or use the arrow keys to highlight Equaliser. Press to confirm. 4. Rotate the knob or use the arrow keys to highlight the desired option. The setting is now completed. www.pinell.no Page 39... -
Page 40: Network Setup
2. Rotate the knob or use the arrow keys to highlight the desired option and press to confirm. Language This may be activated from Main menu System settings Language. Press SELECT to confirm. Rotate the knob or use the arrow keys to highlight the desired option and press to confirm. www.pinell.no Page 40... -
Page 41: Resetting To Factory Default Settings
Press SELECT to confirm and then turn the knob to highlight YES. Press SELECT to confirm. : If you do not wish to proceed, you may rotate the knob or use the arrow keys to highlight NO at Step 2, and then press the knob to cancel. www.pinell.no Page 41... -
Page 42: Software Updates
3. Rotate the knob or use the arrow keys to highlight YES. Press to confirm and the display will appear as in Step 2 above. 4. Rotate the knob or use the arrow keys to highlight Check now. Press to confirm. The following display appears: www.pinell.no Page 42... -
Page 43: Running The Setup Wizard
2. Follow the steps to run the wizard. Software version and Radio ID 1. This may be activated from Main menu System settings Info. 2. Press SELECT to confirm. You may be asked for this information when you request technical support. www.pinell.no Page 43... -
Page 44: Appendices
2. Check that the radio is switched on and connected to the same network. 3. In WMP, place the audio files and folders you want to share with the Pinell Explorer in the Media Library (Library > Add to Library…). - Page 45 Select the desired computer. The device will now be displayed in the list. If you want to check that this is your radio, right-click on the device and select “Properties”. The MAC address of the radio will be displayed. www.pinell.no Page 45...
-
Page 46: Step 2: Playing Music From Media Player Using The Internet Radio
Full charge usually takes 8-10 hours, and battery time time is between 6-8 hours dependent of volume and features. Wireless network uses more power then DAB and FM. DAB gives the best battery time. www.pinell.no Page 46... -
Page 47: Use Of Rechargeable Batteries
Fault-finding If you have problems with your Internet radio, you may find it useful to refer to the Help section of our web site: www.pinell.no You will also find useful tips and advice at www.wifiRadio-frontier.com. If you experience difficulty in connecting the radio to a wireless network, the following steps may help to find a solution: 1. -
Page 48: Frequently Asked Questions
Press the “SOURCE” button to obtain access to radio? the Internet radio mode. Then follow the instructions on the screen to select either GENRE or LOCATION. Important: You need ADSL broadband access to use the Internet radio mode. You also need a wireless router/access point for wireless connection. The radio supports WEP, WPA and WPA2 encryption. How do I connect the radio? When you switch on the radio for the first time it will ask you to scan for a network. Scanning will result in a list of available networks from which you may select the network you wish to use. If the selected network is not password protected, you will obtain immediate access. If the network is password protected you will be asked to provide the password (WEP key) for the network. What if the WEP key is not accepted? Remember to distinguish between capital letters and small letters. What if the radio will not connect to If you have difficulty connecting to the network: the network? Check that you are using the correct WEP key or password and remember that this is case‐ sensitive. Check that the router is connected to the Internet. The simplest way to check this is to www.pinell.no Page 48... - Page 49 What if I have mobile broadband You can use a router with a USB port for mobile access? broadband. A mobile USB card is usually plugged into a PC. If it is plugged into the router instead of the PC, you will have mobile broadband access via the mobile network. The radio will operate with this setup. I can view my music list in the radio’s Check that the medium you are trying to access is album list but cannot play it. not copy protected. Our radio will not play Apple files or copy protected files. Does my radio have a memory so that I You can store eight Internet radio stations, eight can store my favourite stations? DAB stations and eight FM stations. Why do I get an error message when I This is because it is not the Radio ID which is register the Radio ID on required, but the access code. To obtain the http:/wifiradio‐frontier.com? access code, start playing a web radio station and press MENU. Rotate the knob or use the arrow keys and highlight Station List. Rotate the knob or use the arrow keys and highlight HELP. Select GET ACCESS CODE. This is the code you must provide at http:/wifiradio‐frontier.com I have provided the IP address, etc. Sometimes it is necessary to disconnect the manually but am unable to get access. power supply from the radio after setting manually. Switch the radio off and on again. www.pinell.no Page 49...
-
Page 50: Specifications
32 ohm FM: 87.5 – 108Mhz DAB+, DAB: 174 – 240MHz Frequency Ranges: Radio: 2412~2472MHz LCD Display: High resolution display Power Supply: AC Power Input: 100-230V AC, 50-6 0Hz Dimension: BxHxD 115mm x 190mm x 114mm, Weight 1.5kg www.pinell.no Page 50... - Page 51 Page 51...
Need help?
Do you have a question about the Explorer and is the answer not in the manual?
Questions and answers