Unitech HT660 Wireless edition Installation And User Manual
Wireless edition
Hide thumbs
Also See for HT660 Wireless edition:
- Programming manual (46 pages) ,
- Specifications (2 pages) ,
- Product reference manual (37 pages)
Table of Contents
Advertisement
Quick Links
Download this manual
See also:
Programming Manual
Advertisement
Table of Contents

Related Manuals for Unitech HT660 Wireless edition


Summary of Contents for Unitech HT660 Wireless edition
- Page 1 Unitech HT660 Wireless Edition Installation and User Manual...
- Page 2 General Store Mobile Solutions Unitech HT660 Installation and User Manual...
-
Page 3: References
General Store Mobile SolutionsUnitech HT660 Installation and User Manual No part of this publication may be reproduced, transmitted, transcribed, stored in a retrieval system, translated into any language in any form or by any means, electronic, mechanical, magnetic, optical, chemical, manual, or otherwise, without prior written permission form: Crichlow Data Sciences, Inc. -
Page 6: Table Of Contents
Align the Screen ........................6 Setting Time Zone/ Date ......................6 Keypad Overview ........................8 Chapter 2 - Connecting the HT660 to Your Wireless Network ......15 Accessing the Summit Client Utility ....................15 Chapter 3 - Software Installation ................21 What’s on the CD ...........................21 Installing the Software ........................21... - Page 7 Receiving ............................51 Collecting, Reviewing, and Sending the Data .................51 Applying the Collected Receiving Data ..................52 Follow these steps to apply the receiving data you collected on the HT660......52 Transfers ............................53 Collecting, Reviewing, and Sending the Data .................53 Applying the Collected Transfer ....................54 Follow these steps to apply the Transfer data you collected on the HT660.
- Page 8 Processing the report......................71 Chapter 7 - Price Changes ..................75 Entering Price Change Data into the HT660 ..................75 Select the Price Change Program on the HT660 ..............75 Entering Price Change Data ....................76 On-Sale Pricing ........................80 Reviewing and Sending Price Change Data ..................81 Applying the Collected Price Change Data in the General Store ...........................81...
-
Page 10: Chapter 1 - Unitech Ht660 Overview And Setup
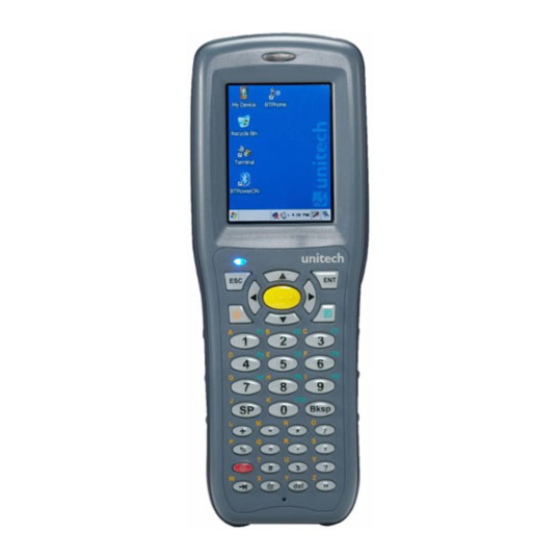
Chapter 1 Unitech HT660 Overview and Setup The General Store now supports the HT660, a rugged, compact and ergo- nomic handheld terminal powered by the WinCE.NET OS. It incorporates an integral barcode scanning laser/CCD device, color LCD with touch screen, keypad, BT and wireless communication interface capability. -
Page 11: Step 1 - Connect The Usb Cradle
The instructions below are provided mainly as a reference if you ever have to install a new battery, or perform a cold boot on your Unitech HT660. Should you need to change the battery, it located in the rear of the HT660... -
Page 12: Installing A New Battery Pack
Fully seat the battery. Charging the Batteries The main and backup batteries are charged by placing the HT660 in the cradle/docking station (fi rst connect the power supply to the Docking Station). First Time to Charge the Main Battery & Backup Battery We would like to propose to charge the battery at least up to 12 hours for the fi... -
Page 13: First Time Use Of The Ht660
WinCE system. Setting Time Zone/ Date Before using the HT660 please take a few minutes to set the time and date so that data can be properly time-stamped. Setting the Time Zone First Follow the steps below to set up your time zone. - Page 14 First Time Use of the HT660 5. Select “Automatically adjust clock for daylight saving” for a Daylight Sav- ings Time zone. Setting Date/Time Tap the Left or Right arrows to scroll the year and month you desire. Or, directly tap location of year or month to change the year or month setting.
-
Page 15: Keypad Overview
[Cursor] The cursor key moves the cursor around the screen. [Alpha] The Alpha key toggles Alpha mode on and off and Caps mode on and off. One press of the Alpha key causes the HT660’s keys to input alpha characters, indicated by a blue LED light. - Page 16 Path: My computer/Windows/RegFuncKey.exe Software Keyboard (Windows CE Keyboard) Besides its hardware keypad, the HT660 provides a touch screen keyboard as an alternative method of character input. This software keyboard repli- cates the layout of a standard PC keyboard.
- Page 17 If for some reason, you need to custom confi gure the barcode scanner, follow these steps. 1. Tap the Start icon in the lower left corner of the HT660 screen. Then select Settings>Control Panel. 2. You will then see the Control Panel Window shown below.
- Page 18 First Time Use of the HT660 3. Now you can set the barcode symbologies as desired. Tap the “+” plus sign next to the “Barcode Symbologies” option to expand the tree. Then scroll to the sym- bology you wish to edit and click the plus sign again, to expand that selection. In the example below, we selected the UPCA symbology.
- Page 19 To save your changes, tap the “Apply” button. 5. You can test the scanner by selecting the “Test” tab. Then scan a barcode 6. That’s it! To exit, simply tap the “OK” button at the top right corner of the screen.
- Page 20 First Time Use of the HT660...
-
Page 22: Chapter 2 Connecting The Ht660 To Your Wireless Network
Accessing the Summit Client Utility Using your stylus, tap the start icon in the lower left corner of the HT660 screen. Then select Programs>Summit>scu, as shown below. You will then see the Summit Client Utility Main tab shown below. - Page 23 Next, tap the Admin Login button, and enter “SUMMIT” (All CAPS) in the password fi eld and tap the OK button.. Now select the Profi le tab at the top of the window. The easiest way to locate your wireless network is to tap the “Scan” button, shown in the above graphic.
- Page 24 Accessing the Summit Client Utility You will see all networks in range. Simply tap the one you want to connect to, and then tap the “Connect” button. Tap the “Yes” button to create the new profi le.
- Page 25 Now, the last step is to set the Encryption type and keys to match that of your wireless router. In our example the encryption type is WPA PSK, and we had to enter the network key (password) by tapping the WEP keys/PSKs button.
- Page 26 Accessing the Summit Client Utility Once you have set your wireless connection settings, tap the “Commit” but- ton at the bottom of the Profi le tab. Then return to the Main tab. Select the profi le you want to use from the “Active Profi le” drop down list. If your settings were entered correctly on the Profi...
-
Page 28: Chapter 3 - Software Installation
IP address as well as the location the General Store application programs. The ITScriptNet Client Loader for the Unitech Ht660. This program is only • used if you have to reload the General Store application programs on the Unitech HT660. - Page 29 2. Then select your install option. In this example we will choose Single User. 3. Then click Install General Store Files. 4. The install process will then begin. The fi rst prompt is to install ActiveSync 4.5. Even if you already have a copy of ActiveSync installed, click “Install”.
- Page 30 Installing the Software nity to abandon the ActiveSync portion of the Install on the next screen. 5. ActiveSync is optional, but recommended. If you select yes, you will be guided through the ActiveSync Install. Once that is completed, you will automatically be moved into the General Store portion of the install.
-
Page 31: Now What
Now that the software has been installed, the General Store database must be confi gured in order for the Unitech HT660 to properly query the General Store data fi les. This is described in the chapter 4, “Adding the General Store... - Page 32 Installing the Software...
-
Page 34: Chapter 4 - Adding The General Store Database
Adding the General Store Database The General Store utilizes the Pervasive database to store and update data. In order for the Unitech HT660 to interface with the General Store, you must provide a gateway to the General Store data fi les through the Pervasive Control Center. - Page 35 4. Click the “+” plus sign next to Engines. Then click the “+” plus sign next to you computer name, which in our example is robc. Then click the “+” plus sign next to Databases (Engine). 5. You will then see a list of the existing databases. Right click on “Data- bases (Engine) and then left click “New”, then “Database”.
- Page 36 6. Enter the name of the new database as “THEGENERALSTORE” as shown below. Also enter the drive letter and directory where your General Store data fi les reside. This is typically “C:\GenStore\TgsData on single user sys- tems and fi le servers, or “G:\TgsData” on network workstations. If you do not know the actual directory name, you can locate it using the Browse button to the right of the directory fi...
- Page 37 You will notice that your new database, “THEGENERALSTORE” has been added to the list. Close the Pervasive Control Center.
-
Page 40: Chapter 5 - Unitech Ht660 Communications
General store data fi les, and send collected data, via ITScriptNet Omni Communication Server, a communications package running on your PC. In short, the ITScriptNet Omni Client on the Unitech HT660 talks to the ITScriptnet Omni Communication Server on your PC, and vice versa. -
Page 41: First Time Use
First Time Use Confi gure the Omni Communication Server To confi gure the Omni Communication Server, click the Unitech Omni Con- fi guration Utility icon on your desktop. You will see the following screen. The Host Settings Section Finding the right IP Address Click the Advanced tab, and then click the “?”... - Page 42 First Time Use Once you have selected an address, click “OK”. You will be returned to the confi guration screen, where you must then click “Apply”. If the Omni Server is already running, you will prompted to update it. Click Yes, and thn click OK.
- Page 43 Match this IP on the Unitech HT660 Now, you must enter the same IP address on the HT660 through ITScriptNet. On the HT660, access the ITScriptNet Main Menu. Then tap the Utilities button, followed by the Confi guration button. Select the Server tab.
- Page 44 First Time Use You will then see the Host IP fi eld at the top of the screen. Now enter the same IP address you selected when you ran the Omni Con- fi guration utility. In our example, this was 10.0.0.21, as shown below. Now tap the OK button to save the change.
-
Page 45: Start The Omni Communication Server
The Programs Section You should see all of the programs listed on your HT660 in the programs section window. These are the programs that the Omni Server will talk to on your HT660. If you do not see a program listed, you can add it by clicking the Add button. - Page 46 The Server will minimize to your systray.
-
Page 48: Chapter 6 - Basic Inventory Functions
Chapter 6 Basic Inventory Functions This chapter will cover the basic inventory functions supported by the HT660 and how they work, including: Purchase Orders • Receiving • Transfers • Adjustments • Bin Locations • Physical Inventory • Sales Orders •... -
Page 49: Accessing The Inventory Programs Menu
Purchase Orders Locate the Purchase Orders program from the Select Program menu. You may have to scroll down by using either the cursor keys on the HT660 or by using your stylus and the scroll bar. Once you have “Purchase Orders”... -
Page 50: Entering Your Employee Number And Password
If you do not have a password, you can simply press the ENT key on the HT660. The system will then check to see if your entries are valid, and that you have rights to changing inventory quantities. If your credentials check... -
Page 51: Collecting Purchase Order Data
Now you can enter a quantity, followed by the ENT key on the HT660. Entering a Vendor Order Number at the Item Number Prompt Again, when prompted for the item number, you can enter a vendor’s order number and the system will fi... -
Page 52: Entering A Base Matrix Number At The Item Number Prompt
You can use the cursor keys to navigate to the item you wish to select and press the ENT key on the HT660, or you can use the stylus and double-tap the item number you wish to select Entering a Base Matrix Number at the Item Number Prompt If you sell apparel items in your store and you utilize the General Store’s ma-... -
Page 53: Reviewing Collected Purchase Order Data
Reviewing Collected Purchase Order Data You can review entries at any time by tapping the “Review” button with the stylus. Here, you can select lines for deletion, and you can send data. To return to the item entry screen, tap the “Back” button with the stylus. -
Page 54: Sending Collected P.o. Data To The Pc
Purchase Orders Sending Collected P.O. Data to the PC There are two ways to send collected purchase order data to from the HT660 to the PC: 1. Via the “Send Data” button on the Review screen. 2. Via the “Send Data” button on the ITScriptNet Menu. -
Page 55: Via The Itscriptnet Omni Menu
Scroll down to Purchase Orders. Notice the “*” symbol circled in red in the above graphic. Whenever there is a data fi le resident on the HT660 for a particular inventory program, you will see the “*” button displayed to the right of the program name. -
Page 56: Applying The Collected P.o. Data
Purchase Orders Applying the Collected P.O. Data Okay. We have collected purchase order data on the HT660, and we have sent it to the PC. Now we have to apply it in the General Store. Follow the steps outlined in the graphic below. - Page 57 5. Click the “Save” icon on the toolbar to save the purchase order. 6. If you wish to print a hardcopy of the purchase order, click the “print” icon on the toolbar. That’s it.
-
Page 58: Receiving
Receiving Receiving Collecting, Reviewing, and Sending the Data These steps are the same as those followed under Purchase Orders. The only differences are that you will be selecting the Receiving program, and the fi le created and sent is named HTRec.DAT. -
Page 59: Applying The Collected Receiving Data
Applying the Collected Receiving Data Follow these steps to apply the receiving data you collected on the HT660. 1. From the General Store main menu click Inventory>Receiving. 2. Click the File folder icon on the toolbar to apply the fi le. -
Page 60: Transfers
Transfers Transfers Collecting, Reviewing, and Sending the Data These steps are the same as those followed under Purchase Orders. The only differences are that you will be selecting the Inventory Transfers program, and the fi le created and sent is named HTXfers.DAT. -
Page 61: Applying The Collected Transfer
Applying the Collected Transfer Follow these steps to apply the Transfer data you collected on the HT660. 1. From the General Store main menu click Inventory>Transfer Items. 2. Select the store number you are sending the items to. 3. Click the File folder icon on the toolbar to apply the fi le. You will be asked if you wish to verify each item, or just let them be applied auto- matically. -
Page 62: Adjustments
Adjustments 4. Save the inventory transfer by clicking the “Save” icon on the toolbar. 5. A transfer report will automatically be printed and archived for you. Adjustments Collecting, Reviewing, and Sending the Data These steps are the same as those followed under Purchase Orders. The only differences are that you will be selecting the Adjustments program, and the fi... -
Page 63: Applying The Collected Adjustment
Applying the Collected Adjustment Follow these steps to apply the Adjustment data you collected on the HT660. 1. From the General Store main menu click Inventory>Maintenance>Adjust ments. 2. Select the adjustment method, Replace or Adjust. 3. Click the File folder icon on the toolbar to apply the fi le. You will be asked if you wish to verify each item, or just let them be applied auto- matically. -
Page 64: Bin Locations
The only differences are that you will be selecting the Change Bin Locations program, and the fi le created and sent is named HTBin.DAT. Entering Bin Locations You will also enter Bin Location data instead of quantities on the HT660. These bin locations can be alphanumeric. -
Page 65: Applying The Collected Adjustment Data In The General Store
General Store Follow these steps to apply the Bin Location Data data you collected on the HT660. 1. From the General Store main menu click Tools>Unitech Bin Changes. 2. Select “Process” and the bin locations changes will be applied for you. -
Page 66: Physical Inventory
Only for a specifi c vendor The General Store can actually determine which items you did not count using the Unitech, and zero those item quantities. All of these adjustments are then printed on the Inventory Adjustments report. Preparing Your Store for Inventory This may seem like a “no-brainer”, but when you are physically counting your... -
Page 67: Collecting, Reviewing, And Sending The Data
Collecting, Reviewing, and Sending the Data These steps are the same as those followed under Purchase Orders. The only differences are that you will be selecting the Physical Inventory program, and the fi le created and sent is named HTPhys.DAT. -
Page 68: Applying The Collected Physical Inventory Data In The General Store
Follow these steps to set the physical inventory data data you collected on the HT660. 1. From the General Store main menu click Tools>Unitech Physical. 2. You will see the following menu. Click the radio button to the left of the “Physical Count w/Match” option. - Page 69 If You Still Have More Items To Count…. If you still have more items to scan/count, answer “No” here, and go back to counting inventory with your HT660. You can repeat steps 1 through 3 for the next round of scanning/count- ing that you need to complete.
- Page 70 Physical Inventory ii. If You Are Taking An Inventory For a Particular Depart- ment, Vendor, etc… Department, Category, Sub-Category Inventory If you are merely counting a department, then you must select the department, category, and subcategory you are counting, by using the drop downs for each. You can select “All”...
-
Page 71: Step 2 - Apply The Physical Inventory Fi Le
Step 2 – Apply the Physical Inventory fi le Now that you have set the physical inventory data fi le, the last step is to ap- ply/process it. Follow these steps to apply the fi le: 1. From the General Store main menu click In ventory>Maintenance>Adjustments. -
Page 72: Sales Orders
Sales Orders Sales Orders Collecting, Reviewing, and Sending the Data These steps are the same as those followed under Purchase Orders. The only differences are that you will be selecting the Sales Orders 01 or 02 programs, and the fi les created and sent are named Orer01.IMP or Order02. IMP. -
Page 73: Processing The Sales Order Files At Pos
Processing the Sales Order Files at POS Now access the point of sale function in the General Store. From the main point of sale screen, select F4 Order, then select the Import Option. If you have multiple order import fi les, you will be prompted to select from a list as shown below. -
Page 74: Price Labels
Price Labels Now, you can add more items and customer information before completing the transaction. Price Labels You can print 2” price labels with the Zebra QL220 Plus printer. Separate setup instructions are provided with the printer at tie of purchase. Printing Labels From the ITScriptNet menu, select Collect Data. - Page 75 Then select the 2” Labels option. Enter your employee number and press the enter button on the handheld. Now select the com port you set when syncing the QL220Plus to your hand- held, and select Next.
- Page 76 Price Labels Now scan the product barcode, or manually enter the item number, order number, or alternate lookup number for the product you wish to print labels for. Enter the number of labels you wish to print and hit the enter key on the handheld.
-
Page 77: Restock
Restock You may want to use the HT600 to create a pick list of items that need re- stocking on your store shelves. This is where the Restock option comes into play. A separate install cd for the Inventory Pull Report. is supplied with the unit. Collecting, Reviewing, and Sending the Data These steps are the same as those followed under Purchase Orders. -
Page 78: Processing The Report
Restock Now we will review and send the data, which will place the fi le HtRstk.csv in our data directory (typically c:\GenStore\TgsData). Processing the report. From The General Store main menu, select Inventory Pull. - Page 79 You will immediately be asked if you wish to rename the data fi le. Do not answer this prompt untl after you have reviewed the report below. The report is split between those items that are in stock and thos items that need to be reordered.
- Page 80 Restock...
-
Page 82: Chapter 7 Price Changes
Entering Price Change Data into the HT660 Select the Price Change Program on the HT660 First, select the price change program on the HT660, following the same steps outlined in chapter 5, Purchase Orders. The fi le created and sent is named HTPchg.DAT. -
Page 83: Entering Price Change Data
Here you can see all current pricing, and you can select which price level you wish to change. In this example, we will change price level B to 3 for $8.99. On the HT660, cursor down to the A-Level Price and press the ENT key on the HT660 keypad. - Page 84 “8.99” ENT • then ENT on the HT660 keypad. • Once the price is entered, the “Change Price” button is highlighted. Simply press the ENT button on the HT660 keypad, you will be returned to the item number entry screen.
- Page 85 You can use the cursor keys to navigate to the item you wish to select and press the ENT key on the HT660, or you can use the stylus and double-tap the item number you wish to select.
- Page 86 Once you select a matrix item, and set the price you wish to change, the HT660 will ask you if you wish to apply the change to all sizes. Answer Yes, and the price you enter will be applied to all sizes. Answer No and the price change will only be applied to the size and color you selected.
-
Page 87: On-Sale Pricing
On-Sale Pricing You can also set on-sale pricing with begin and end dates on the HT660. Here we will set the item on sale at a price of one for $7.96, with sale dates straining on 2/16/2009 and ending after 12:00pm on 2/21/2009. Here are the key strokes on the HT660 keypad. -
Page 88: Reviewing And Sending Price Change Data
From the General store main menu, click Tools>Unitech Price Changes. Select your options for Printing and Price/Shelf labels and click Apply Chang- es. The price changes collected on the HT660 will be applied and an archive will automatically be created for you. - Page 89 If you selected price labels, go to Inventory>Labels. Select you label size and click the “Print Spooled Labels” button.
Need help?
Do you have a question about the HT660 Wireless edition and is the answer not in the manual?
Questions and answers