Table of Contents
Advertisement
Advertisement
Table of Contents

Related Manuals for Avery Weigh-Tronix ZQ375 Checkweigher


Summary of Contents for Avery Weigh-Tronix ZQ375 Checkweigher
-
Page 1: User Instructions
ZQ375 Checkweigher User Instructions AWT35-500812 Issue AC... - Page 2 Full acknowledgment of the source must be given. Avery Weigh-Tronix is a registered trade mark of the Avery Weigh-Tronix, LLC. This publication was correct at the time of going to print however, Avery Weigh-Tronix, LLC reserves the right to alter without notice the specification, design, price or conditions of supply of any product or service at any time.
-
Page 3: Table Of Contents
Gross weighing ......................28 Tare/Net weighing ..................... 28 Using Pushbutton Tare (if enabled) ..............29 Using Preset Tare (if enabled) ................29 Sim375 application ......................31 Checkweighing ......................31 Switching Between Checkweighing and Normal Weighing Mode ....... 31 ZQ375 Checkweigher User Instructions... - Page 4 Date ........................... 52 Site ID ........................53 Seal ........................... 53 About menu ........................54 Boot ........................... 54 Firm and App ......................55 Serial ......................... 55 Option ........................55 Enet ........................... 56 Dload ......................... 57 Audit menu ........................57 ZQ375 Checkweigher User Instructions...
- Page 5 Under segment division ..................80 Over segment division ..................81 Print total ......................81 Total format ......................82 Clear total ......................82 Digits ........................82 Graph ........................83 Stats ........................83 Packrun ....................... 84 Type ........................84 ZQ375 Checkweigher User Instructions...
- Page 6 Supervisor menu for Per375 application ................89 Setpoint ........................90 Tare ........................... 90 Check ........................90 PLU ........................... 90 Battery ........................90 Supervisor menu for the Grad375 application ..............91 Setpoint ........................92 Tare ........................... 92 Grading ........................92 Battery ........................92 ZQ375 Checkweigher User Instructions...
-
Page 7: Chapter 1 General Information And Warnings
Cautions give information about procedures that, if not observed, could result in damage to equipment or corruption to and loss of data. NOTE: This is a Note symbol. Notes give additional and important information, hints and tips that help you to use your product. ZQ375 Checkweigher User Instructions... -
Page 8: Installation
Before use in any NSF / ANSI 3-A food application this scale must be regularly inspected to guarantee cleanliness at all times. Scale needs to be regularly inspected to guarantee there are no loose or missing nuts and that all bolt and knob threads are completely covered. ZQ375 Checkweigher User Instructions... -
Page 9: Cleaning The Machine
1.4 Cleaning the machine 1.4.1 ZQ375 cleaning process The ZQ375 checkweigher has been designed for use within NSF / ANSI 3-A food applications. It has minimum food trap areas to aid fast and efficient cleaning. All versions of the ZQ375 scale, indicator, remote battery pack and external opto22 relay box can be subjected to external high pressure cleaning to IP69K standards. -
Page 10: Indicator
If external USB or Ethernet glands are installed in the indicator, it is essential these be sealed with water tight caps prior to cleaning or when the connectors are not in use. ZQ375 Checkweigher User Instructions... -
Page 11: Cleaning The Rear Of The Column
To avoid the risk of RSI (Repetitive Strain Injury), place the machine on a surface which is ergonomically satisfactory to the user. Take frequent breaks during prolonged usage. ZQ375 Checkweigher User Instructions... -
Page 12: Sharp Objects
Classe A prescrites dans le Règlement sur le brouillage radioélectrique edicté par le ministère des Communications du Canada. European Countries WARNING: This is a Class A product. In a domestic environment, this product may cause radio interference in which the user may be required to take adequate measures. ZQ375 Checkweigher User Instructions... -
Page 13: Declaration Of Conformity
Declaration of Conformity 1.8 Declaration of Conformity ZQ375 Checkweigher User Instructions... -
Page 14: Chapter 2 Introduction
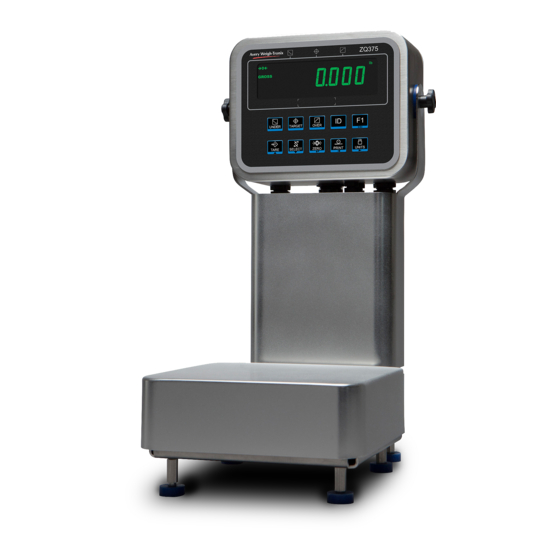
The checkweigher consists of a bench scale, an attached column and the ZQ375 Checkweigher head or indicator. The ZQ375 Checkweigher is a reliable, easy to operate, high speed weighing scale, designed to allow entry of a target weight, along with selected over and under weight limits for the rapid processing of items that must be checked for conformity to a precise weight range. -
Page 15: Front Panel
Weigh / Checkweigh mode - Press UNITS to cycle the displayed unit of measure through all the available units of measure. Menu navigation - Functions as the Right Arrow key. UNITS Numeric / Tolerance Entry - Moves the cursor position to the right in the Numeric Entry Procedure. ZQ375 Checkweigher User Instructions... - Page 16 To clear this, press and hold the TARE key until CLEAr is displayed and then press the ZERO key. The scale should now display gross zero. ZQ375 Checkweigher User Instructions...
-
Page 17: Annunciators
Table 2.1 Circle Annunciator assignments Annunciator Indicates Circle 1 (left most) Network activity Circle 2 Custom unit Circle 5 Transaction counter Gross + Circle 5 Gross total Net + Circle 5 Net total Tare + Circle 5 Transaction total ZQ375 Checkweigher User Instructions... -
Page 18: Tolerance Entry Procedure
Press and hold SELECT() to decrease the value by 0.010s and then by 0.100s, the longer you hold it. When the display show 0.125, or the value you desire, press the ZERO key to enter or accept the value. The screen returns to the previous mode. ZQ375 Checkweigher User Instructions... -
Page 19: Numeric Entry Procedure
ID and press ZERO to accept. The new ID number is now active. If the entry screen times out and disappears, repeat step 1 and try again. You must start the number entry procedure within five seconds. ZQ375 Checkweigher User Instructions... -
Page 20: Powering Up The Zq375
AC to DC power converter. (12 to 36 VDC) Optional ZQ-BAT rechargeable battery 2.7 Battery option The ZQ375 can be operated on battery power by the ZQ-BAT battery option. See Figure 2.6. Figure 2.6 ZQ-BAT battery option installed in the column ZQ375 Checkweigher User Instructions... -
Page 21: Installation
Below these lights is the ON/OFF button. See Figure 2.8. Battery Full Battery Battery Charging Low LED Battery Battery ON LED Fault LED ON/OFF Figure 2.8 Top of ZQ-BAT battery pack ZQ375 Checkweigher User Instructions... -
Page 22: Proper Charging Of The Zq-Bat
Once the battery is fully charged, the CHARGING indicator will shut off and the FULL indicator will turn green. Disconnect the battery from the charger and turn the battery pack OFF. Frequent charging of a battery that is not in a low state will decrease the battery life span. ZQ375 Checkweigher User Instructions... -
Page 23: Charging The Battery Pack Through A Zq375 Indicator
Power Battery Power Notes State Powered ON The battery must be powered on to power an indicator and to be recharged Powered OFF The battery can be powered off to conserve charge when not in use ZQ375 Checkweigher User Instructions... -
Page 24: Checkweigher Operation On Battery Power
The ZQ375 should power up as soon as the battery is turned on. To power down the battery and the ZQ375, press the ON/OFF key … The Battery ON LED light will go out and the ZQ375 will power down. ZQ375 Checkweigher User Instructions... -
Page 25: Light Stack Option
Figure 2.9 Light stack option 2.8.1 Light stack operation The lights function the same way as the bargraph, showing red for under, orange for over and green for accept conditions. ZQ375 Checkweigher User Instructions... -
Page 26: Chapter 3 Checkweighing Applications
“Target” + “Toler-Hi” = “Upper Acceptable Target Limit” or (4+1=5) Therefore all weights above 5 are considered over weight. This would mean all weights above 2 and below 5 would be acceptable as being within target sample tolerances. ZQ375 Checkweigher User Instructions... - Page 27 Halfway between the upper and lower target value limits is the value 4, This is the calculated target value. This would mean all weights above 2 and below 6 would be acceptable as being within the target limits. ZQ375 Checkweigher User Instructions...
-
Page 28: Normal Weighing Procedures
There is also a function called auto tare clear. If this is enabled, after a weighment, when the weight falls into the gross zero band and is steady, any tare is removed from the indicator. No tare remains active between weighments. The two types of tare are explained below. ZQ375 Checkweigher User Instructions... -
Page 29: Using Pushbutton Tare (If Enabled)
Tare register number entry screen appears. Use the Numeric entry procedure on page 19 and key in the preset tare register number and press ZERO … -X is displayed and the NET annunciator lights. X is the recalled tare value. ZQ375 Checkweigher User Instructions... - Page 30 Net weight of material is displayed. Repeatedly press SELECT to view the gross, tare, and net values. Remove all weight from the scale … -X is displayed. Repeat steps until you are finished using that tare weight. ZQ375 Checkweigher User Instructions...
-
Page 31: Sim375 Application
By default the Target segment lights if the weight is within ± the high and low tolerance of the target weight. The over and under segments each represent 1 division. Repeat step for all the other items to be weighed. ZQ375 Checkweigher User Instructions... -
Page 32: View The High And Low Tolerances
ZERO to accept … Display returns to checkweighing mode with the new high tolerance active. The tolerances can be set from 1 division to the capacity of the scale. ZQ375 Checkweigher User Instructions... -
Page 33: Mid375 Application
Target + Tol-Hi = Upper Acceptable Target Limit or (4 + 0.1 = 4.1). Therefore all weights above 4.1 are considered over weight. This would mean all weights above 3.8 and below 4.1 would be acceptable as being within target sample tolerances. ZQ375 Checkweigher User Instructions... -
Page 34: Negative Checkweighing
Press TARE and start the negative checkweigh process by removing material until inside the target zone. Tolerance values work in opposite fashion: Target + Lo Tolerance = Target Lo Target – Hi Tolerance = Target Hi ZQ375 Checkweigher User Instructions... -
Page 35: Sample Mode Checkweighing
The target weight becomes active. Place an item on the scale … The weight will be displayed and OVER, UNDER or ACCEPT segments will light depending on the weight. Clear the scale. Repeat steps and 4. ZQ375 Checkweigher User Instructions... -
Page 36: View The Target Weight And Upper And Lower Tolerances
Press ZERO to accept … Display returns to checkweighing mode with the new upper tolerance active. The tolerances can be set from 1 division to the capacity of the scale. ZQ375 Checkweigher User Instructions... -
Page 37: Transaction Counter
SELECT key until the transaction count display is shown. The counter is incremented every time PRINT is pressed. See example in Figure 3.1. Figure 3.1 Transaction count display If enabled in a password protected menu, press and hold PRINT to clear the transaction count. ZQ375 Checkweigher User Instructions... -
Page 38: Adv375 Application
PLU# = 0, then the over, under, target values will be shown, but the values are only temporary ones since the active PLU#=0. PLU#0 values are not retained during power down or reboot from menu access. ZQ375 Checkweigher User Instructions... -
Page 39: Setting A New Target Weight And Checkweighing
If that PLU number has no values assigned, the display will show cAnt. Place an item on the scale … The scale will show the weight and the bargraph segments will light in accordance with the target and tolerances that are active. ZQ375 Checkweigher User Instructions... -
Page 40: View The Upper And Lower Tolerances
Press ZERO to accept … Display returns to checkweighing mode with the new upper tolerance active. The tolerances can be set from 1 division to the capacity of the scale. ZQ375 Checkweigher User Instructions... -
Page 41: Transaction Counter
ACCEPT: 12.29 lb UNDER: 0.00 lb Printing the report: Press and hold print key for 4 seconds, display will flash “Std-dEv Prn-tot” and the report will be printed, then the samples will be cleared from memory. ZQ375 Checkweigher User Instructions... -
Page 42: Report Example
Two of the last three averages in the queue have an error greater that the limit. 4 of 5 Four of the last five averages have an error greater than the limit. 8 of 8 Eight of eight averages are on the same side of the target weight. ZQ375 Checkweigher User Instructions... -
Page 43: Per375 Application
Add additional weight (for example, by injection) until the target percentage has been reached … When the target percentage is reached, the center Accept segment will light. Clear the scale and place the next item on the scale. Repeat steps and 4. ZQ375 Checkweigher User Instructions... -
Page 44: Choosing A Plu And Checkweighing
If the active PLU# is 0, you can set custom tolerances. Follow these steps: Press UNDER to set the lower or under tolerance … x.x percent is displayed. This is the under tolerance value. The% annunciator is lit and the Under segments also flash. ZQ375 Checkweigher User Instructions... - Page 45 Over segments also flash. Refer to the Tolerance entry procedure on page 18 and key in a new tolerance. Press ZERO to accept … Display returns to checkweighing mode with the new upper tolerance active. ZQ375 Checkweigher User Instructions...
-
Page 46: Grad375 Application
Press SELECT … A numeric entry screen is displayed. Key the first weight point and press ZERO to accept … grAd 1 is displayed. Press UNITS to move to the next weight point … grAd 2 is displayed. ZQ375 Checkweigher User Instructions... -
Page 47: Positive Grading
If Negative grading autoprint is enabled a print will occur when an item is removed from the scale. See the Grading (Format #30) on page 62. If you get out of sequence, start over. With the tote on the scale press the TARE key, then remove an item. ZQ375 Checkweigher User Instructions... -
Page 48: Negative Grading With Autotare Disabled
TARE key. Remove an item … The grade of the removed item is shown. Press the TARE key. Repeat step until all items have been graded. Remove the tote and repeat steps 1 through 4. ZQ375 Checkweigher User Instructions... -
Page 49: Chapter 4 Menus
Enter a number and press ZERO to accept. Right flashing / others off This means you are in a list. Scroll through the choices with the PRINT and UNITS keys and press ZERO to accept. ZQ375 Checkweigher User Instructions... -
Page 50: Exiting The Menus
Figure 4.1 USER level (password 111) menus Under some of the section headings you will see menu items with small arrows ( ). These are reminders of the menu structure and how you got to the menu item. ZQ375 Checkweigher User Instructions... -
Page 51: User Menu
Use this to set the time and clock style. Press SELECT … SEt is displayed. Press SELECT … h- x is displayed, with the x flashing. This is a numeric entry screen for the hour value. ZQ375 Checkweigher User Instructions... -
Page 52: Date
The choice is made and d- x is displayed, with the x flashing. This is a numeric entry screen for the day value. Key in the day value and press ZERO … The choice is made and SEt is displayed. ZQ375 Checkweigher User Instructions... -
Page 53: Site Id
If the unit is sealed, no changes can be made to the configuration of the indicator. Press F1 to return to the SEAL display. To exit the menu, see Exiting the menus on page ZQ375 Checkweigher User Instructions... -
Page 54: About Menu
The 1st half of the bootloader PN is displayed. Press UNITS to view the 2nd half. Press ZERO to return to the PArtno display. Press PRINT or UNITS to move to the other item in this level … VErSion is displayed. ZQ375 Checkweigher User Instructions... -
Page 55: Firm And App
Press UNITS to move to the other item in this level … tYPE is displayed. This stands for the type of option card installed. The four option cards are: Analog, 802.11g wireless, USB-d, and RS-485. ZQ375 Checkweigher User Instructions... -
Page 56: Enet
Press UNITS … Subnet is displayed. Repeat this sequence of key presses for the Subnet, Gateway and MAC addresses. When you are finished, from the menu item, press TARE to return to the Enet menu item. ZQ375 Checkweigher User Instructions... -
Page 57: Dload
4.7 Audit menu The Audit menu is shown in Figure 4.4. SELECT = Audit TARE = Counter Print PRINT = UNITS = Port 1 Port 2 ZERO = F1 = Escape or Config Calib Figure 4.4 Audit menu ZQ375 Checkweigher User Instructions... -
Page 58: Counter
Press PRINT or UNITS to scroll through the choices and press ZERO when your choice is displayed … The audit log is printed through the chosen port and Print is displayed. This completes the Audit menu. To exit the menu, see Exiting the menus on page ZQ375 Checkweigher User Instructions... -
Page 59: Chapter 5 Error Messages
If this message is cycling on the display every 10 - 20 seconds, it indicates that the battery option is enabled but the checkweigher is not using a battery with the built- in power down circuitry ZQ375 Checkweigher User Instructions... -
Page 60: Plu Csv File Import Error Messages
Message Display Failed to get csv file handle Failed to allocate memory for csv file First line of csv file is invalid Failed to read csv file, size didn't match StrRowData too big Field count mismatch ZQ375 Checkweigher User Instructions... -
Page 61: Chapter 6 Communications
6.1 Default print formats Below are examples of the default formats that are available. Any print format can be customized to suit your application needs please contact your Avery Weigh-Tronix representative for assistance. Additional information on print formats can be found in the Service Manual. - Page 62 Communications Tolerance Hi = 0.650 lb Tolerance Lo = 0.150 lb Cnt of Over Wt = 3 Cnt of Under Wt = 6 Standard Deviation (Format #28) Cnt of Target Wt = 3 Mean Net Wt = 0.073 lb Max Net Wt = 0.879 lb Min Net Wt = 0.00 lb SD Net Wt = 0.254 CV Net Wt = 3.464 PCT...
-
Page 63: Chapter 7 Supervisor Menu
Press UNITS/ to move right in a menu Press ZERO/ to accept a value or choice and move up in the menu. Press F1 to escape and move up in the menu ZQ375 Checkweigher User Instructions... -
Page 64: Supervisor Menu For Sim375 Application
Figure 7.1 Sim375 Supervisor menu All numeric values require scroll entry. See Numeric entry procedure on page Follow these steps to use the Supervisor menu: Access the Supervisor menu (password 1793). See Accessing the menus on page ZQ375 Checkweigher User Instructions... -
Page 65: Setpoint
Press SELECT … The current setting is displayed (oFF or on). Press PRINT or UNITS to toggle between the choices and when your choice is displayed, press ZERO to accept … Annun is displayed. ZQ375 Checkweigher User Instructions... -
Page 66: Inputs
ZERO to print the information … Print is displayed after either action. Reset Setpoint Edit Print Reset Press UNITS … rESEt is displayed. Use this to reset the settings under Edit to factory defaults. ZQ375 Checkweigher User Instructions... -
Page 67: Check
From outPutS, press SELECT … The current choice is displayed. Press PRINT or UNITS to toggle between the choices and when your choice is displayed, press ZERO to accept … outPutS is displayed. ZQ375 Checkweigher User Instructions... -
Page 68: Output-Gross Zero Band
You can key in a value from 1 to 1000 divisions per segment. Press SELECT … The current value is displayed. Key in a new value and press ZERO to accept … oSEgdiV is displayed. ZQ375 Checkweigher User Instructions... -
Page 69: Reset
(in minutes). If this time expires with no scale or keypad activity, the battery will be shut off. Enable Battery Enable Press SELECT … EnAbLE is displayed. Choices are OFF (default) and on. Choose OFF to disable battery usage. Choose on to enable battery usage. ZQ375 Checkweigher User Instructions... -
Page 70: Timeout
Numeric entry procedure on page 19 to key an a value, in minutes and press ZERO to accept … tMout is displayed. This completes the Supervisor menu for the Sim375 application. Repeatedly press TARE to return to normal operating mode. ZQ375 Checkweigher User Instructions... -
Page 71: Supervisor Menu For Mid375 Application
Figure 7.2 Mid375 Supervisor menu All numeric values require scroll entry. See Numeric entry procedure on page Follow these steps to use the Supervisor menu: Access the Supervisor menu (password 1793). See Accessing the menus on page ZQ375 Checkweigher User Instructions... -
Page 72: Setpoint
The current value is displayed with a flashing right digit. Press ZERO to accept the displayed value or key in a new value and press ZERO to accept … tArE 1 is displayed. Press UNITS … tArE 2 is displayed. ZQ375 Checkweigher User Instructions... -
Page 73: Printing
Press TARE … tArE is displayed. 7.2.3 Check Super Setpoint Tare Check From tArE press UNITS … chEcK is displayed. This is the checkweighing configuration item. Under this you can: ZQ375 Checkweigher User Instructions... -
Page 74: Outputs
Press SELECT … The current choice is displayed. Press PRINT or UNITS to toggle between the choices and when your choice is displayed, press ZERO to accept … out-gZb is displayed. ZQ375 Checkweigher User Instructions... -
Page 75: Under Segment Division
Press SELECT … The current choice is displayed. Press PRINT or UNITS to toggle between the choices and when your choice is displayed, press ZERO to accept … digitS is displayed. ZQ375 Checkweigher User Instructions... -
Page 76: Graph
This allows you to add items to a box or pallet and auto-tare the weight of each item if it falls in the target range. Press SELECT … The current choice is displayed. ZQ375 Checkweigher User Instructions... -
Page 77: Reset
Super Setpoint Tare Check Battery The Battery menu is the same in all the applications. See Battery on page This completes the Supervisor menu for the Mid375 application. Repeatedly press TARE to return to normal operating mode. ZQ375 Checkweigher User Instructions... -
Page 78: Supervisor Menu For Adv375 Application
Port 2 size Sample Limits Tare 1 Tare 10 Disabled Edit Print Reset Port 1 Port 2 Annun None Print Units Select Tare Zero Target Under Over Accu PrntHld User Figure 7.3 Supervisor menu for Adv375 applications ZQ375 Checkweigher User Instructions... -
Page 79: Setpoint
Choose the number of weighments in a packrun Set the type of checkweighing: Limits or Sample Enable/disable auto tare when target weight is reached Reset all the checkweighing items to factory defaults. Follow the steps below. ZQ375 Checkweigher User Instructions... -
Page 80: Outputs
Choose how many divisions are equal to one segment on the UNDER display bargraph. You can key in a value from 1 to 1000 divisions per segment. 1 is the default value. Press SELECT … The current value is displayed. ZQ375 Checkweigher User Instructions... -
Page 81: Over Segment Division
Choose on (default) to enable and oFF to disable this function. Press SELECT … The current choice is displayed. Press PRINT or UNITS to toggle between the choices and when your choice is displayed, press ZERO to accept … Prt tot is displayed. ZQ375 Checkweigher User Instructions... -
Page 82: Total Format
Use this to turn the weight display on (default) or oFF when in checkweighing mode. When set to oFF the bargraph is the only part of the display that is on. Press SELECT … The current choice is displayed. ZQ375 Checkweigher User Instructions... -
Page 83: Graph
This is the default choice. Press SELECT … The current choice is displayed. Press PRINT or UNITS to toggle between the choices and when your choice is displayed, press ZERO to accept … StAtS is displayed. ZQ375 Checkweigher User Instructions... -
Page 84: Packrun
This allows you to add items to a box or pallet and auto-tare the weight of each item if it falls in the target range. Press SELECT … The current choice is displayed. ZQ375 Checkweigher User Instructions... -
Page 85: Reset
Edit PLU Edit Press SELECT … Edit is displayed. Use this item to setup the PLU list. Press SELECT … A numeric entry screen appears with a flashing 0. ZQ375 Checkweigher User Instructions... - Page 86 A default value appears with a flashing rightmost digit. If this is the tArghi value, the displayed value will be the current net weight on the scale plus one division. If this is the toL-hi value, the displayed value will be the current division size. ZQ375 Checkweigher User Instructions...
-
Page 87: Print
PLU CSV file import error messages on page With iMPort displayed, press SELECT to import the file … buSY and donE are briefly displayed as the .CSV file is imported and the old PLU values are overwritten. iMPort is displayed when finished. ZQ375 Checkweigher User Instructions... -
Page 88: Export
Super Setpoint Tare Check Plu Battery The Battery menu is the same in all the applications. See Battery on page This completes the Supervisor menu for the Adv375 application. Repeatedly press TARE to return to normal operating mode. ZQ375 Checkweigher User Instructions... -
Page 89: Supervisor Menu For Per375 Application
Port 1 Port 2 size Disabled Tare 1 Tare 10 Edit Print Reset Port 1 Port 2 Annun None Print Units Select Tare Zero Target Under Over Accu PrntHld User Figure 7.4 Supervisor menu for Per375 applications ZQ375 Checkweigher User Instructions... -
Page 90: Setpoint
The PLU menu is the same as the PLU menu in the Adv375 application. See PLU on page 7.4.5 Battery Super Setpoint Tare Check Plu Battery The Battery menu is the same in all the applications. See Battery on page ZQ375 Checkweigher User Instructions... -
Page 91: Supervisor Menu For The Grad375 Application
F1 = Escape or None Print Units Select Tare Zero Target Under Over Accu PrntHld User Figure 7.5 Supervisor menu for the Grad375 application All numeric values require scroll entry. See Numeric entry procedure on page ZQ375 Checkweigher User Instructions... -
Page 92: Setpoint
Super Setpoint Tare Grading Battery The Battery menu is the same in all the applications. See Battery on page This completes the Supervisor menu for the Grad375 application. Repeatedly press TARE to return to normal operating mode. ZQ375 Checkweigher User Instructions... - Page 94 Avery Weigh-Tronix USA 1000 Armstrong Dr. Fairmont MN 56031 USA Tel:507-238-4461 Fax:507-238-4195 Email: usinfo@awtxglobal.com www.wtxweb.com Avery Weigh-Tronix UK Foundry Lane, Smethwick, West Midlands, England B66 2LP Tel:+44 (0) 8453 66 77 88 Fax: +44 (0)121 224 8183 Email: info@awtxglobal.com www.averyweigh-tronix.com...
Need help?
Do you have a question about the ZQ375 Checkweigher and is the answer not in the manual?
Questions and answers