Kenmore Elite Use & Care Manual
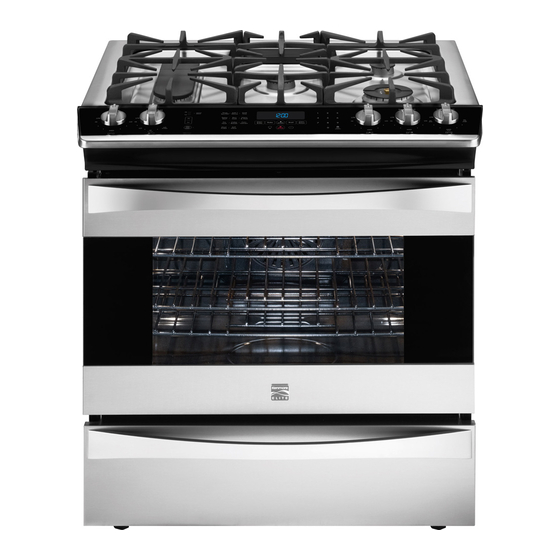
Dual fuel slide-in range
Hide thumbs
Also See for Elite:
- Use & care manual (18 pages) ,
- Owner's manual (24 pages) ,
- Use & care manual (44 pages)

Related Manuals for Kenmore Elite


Summary of Contents for Kenmore Elite
- Page 1 Use & Care Guide English Kenmore Elite ® Dual Fuel Slide-in Range P/N 318205875A (1009) Sears Canada Inc., Toronto, Ontario, Canada M5B 2B8 www.sears.ca...
-
Page 2: Table Of Contents
Table of Contents Kenmore Elite Warranty ............ 2 Oven Control Functions ........... 14 Getting Started ..............15 IMPORTANT SAFETY INSTRUCTIONS ......3-5 Product Record ..............6 Setting Oven Controls ..........16-24 Warmer Drawer ............25-26 Serial Plate Location ............6 Conversion to Liquefi ed Petroleum Gas ......6 User Preferences ...............27... -
Page 3: Important Safety Instructions
IMPORTANT SAFETY INSTRUCTIONS Read all instructions before using this appliance. Save these instructions for future reference. This manual contains important safety symbols and instructions. Please pay attention to these symbols and follow all instructions given. This symbol will help alert you to situations that may cause serious bodily harm, death or property damage. - Page 4 IMPORTANT SAFETY INSTRUCTIONS • Do Not Use Water or Flour on Grease Fires. NEVER cover any slots, holes or Smother the fi re with a pan lid, or use baking passages in the oven bottom or cover an entire soda, a dry chemical or foam-type extinguisher. rack with materials such as aluminum foil.
- Page 5 IMPORTANT SAFETY INSTRUCTIONS • Utensil handles should be turned inward and • Do not use the broiler pan without its insert. The not extend over adjacent surface burners. To broiler pan and grid allow dripping fat to drain reduce the risk of burns, ignition of fl ammable and be kept away from the high heat of the broiler.
-
Page 6: Product Record
Product Record Conversion to Liquefi ed Petroleum Gas (or L.P. Gas) In this space below, record the date of purchase, model and serial number of your product. You will fi nd the model and This natural gas range is designed to allow for conversion to serial number printed on the serial plate. -
Page 7: Features At A Glance
Features at a Glance Your Range includes: Electronic oven control with kitchen timer. Left front burner valve and knob. Left rear bridge burner valve and knob. Warmer drawer control. Center rear burner valve and knob. Right rear burner valve and knob. Right front burner valve and knob. -
Page 8: Before Setting Oven Controls
Before Setting Oven Controls Oven Vent Location Air Circulation in the Oven The oven is vented through its upper front frame. When If using 1 rack, place in center of oven. If using multiple the oven is on, warm air is released through the vent. This racks, stagger cookware as shown. -
Page 9: Surface Cookware Recommendations
Surface Cookware Recommendations Use Proper Cookware Cookware Material types Cookware should have fl at bottoms that make good contact The cookware material determines how evenly and quickly with the cooktop grate. Check for fl atness by rotating a heat is transferred from the surface unit to the pan bottom. ruler across the bottom of the cookware (See Figure 1). -
Page 10: Before Setting Surface Controls
Before Setting Surface Controls Check Burner Cap Placement Before Operating Double Ring Style Burners the Surface Burners The Double Ring burner only operates properly with two burner caps in place. Be sure the burner cap lips are To prevent fl are-ups and avoid creation of harmful by- positioned facing down towards the burner head (Fig. -
Page 11: Setting Surface Controls
Setting Surface Controls Setting the Regular or Simmer Burners Setting Proper Surface Burner Flame Size For most cooking, start on the highest control setting and Place cooking utensil on surface burner. then turn to a lower one to complete the process. Use the 2. - Page 12 Setting Surface Controls Setting the Bridge Burner Important notes: The Bridge Burner should be used with rectangular shaped • DO NOT cook with any of the surface control knobs in cookware. Cookware like a cast-iron Griddle is designed the LITE position (The electronic ignitor will continue to specifi...
- Page 13 Setting Surface Controls Setting the Dual Ring Burner The Dual Ring Burner has two rings of fl ame that you can control for two diff erent heat levels, one for small and one for large cookware. Large Cookware Operation (Figure 1; Zone A & B) Place a large cooking utensil centered over the dual surface Burner...
-
Page 14: Oven Control Functions
Oven Control Functions For satisfactory use of your oven, become familiar with the various features and functions of the oven. Oven Control Keypads 1. Timer - Used to set or cancel Timer. 11. Conv Bake - Used to select the Convection Bake feature. 12. -
Page 15: Getting Started
Getting Started Setting Clock at Power Up Preheat Temperature Display You will be prompted to enter the time of day in the event Once a cooking feature has been started, the control will of a power failure or when you fi rst provide electric power display the actual oven temperature while preheating. -
Page 16: Setting Oven Controls
Setting Oven Controls Preheat Bake For best baking performance use the Preheat feature. The Use the bake feature to cook most food items that require Preheat feature will bring the oven up to the set cooking normal cooking temperatures. temperature. A reminder tone will sound indicating when The following temperature settings apply to the bake the set temperature is reached and to place the food in the feature:... - Page 17 Setting Oven Controls Cook Time Delay Start (with cook time) Adding a cook duration along with a specifi c start time Adding a cook duration when baking is benefi cial when a recipe requires a specifi c temperature and period of time to gives the same benefi...
-
Page 18: Convection Bake
Setting Oven Controls Convection Bake Convection Bake uses a fan to circulate the oven heat evenly The following temperature settings apply to the conv bake and continuously. The improved heat distribution allows for feature: even cooking with excellent results. Multiple rack cooking •... -
Page 19: Convection Convert
Setting Oven Controls Convection Convert The conv convert option allows you to convert any normal See the example below to set conv bake, starting baking recipe using the convection bake feature. The control immediately with the auto-suggest (default) setting of 350°F uses the normal recipe settings and adjusts to a lower (177°C) and adding the conv convert option. - Page 20 Setting Oven Controls Convection Roast Convection roast combines a cook cycle with the convection See example below to set convection roast to start fan and element to rapidly roast meats and poultry. Heated immediately with the auto-suggest (default) setting: air circulates around the meat from all sides, sealing in 1.
- Page 21 Setting Oven Controls Broil Use the broil feature to cook meats that require direct For best results exposure to radiant heat for optimum browning results. • Use the recommended pans and oven rack positions for the type of meat being prepared. The following temperature settings apply to the broil feature: •...
- Page 22 Setting Oven Controls Cakes Breads Warm & Hold The Warm & Hold feature will keep oven baked foods warm The Cakes Breads functions are designed to give optimum for serving up to 3 hours after cooking has fi nished. After 3 baking performance for Cakes or Breads.
- Page 23 Setting Oven Controls Slow Cook Recipe Recall The Slow Cook feature may be used to cook foods more The Recipe Recall feature may be used to record and recall slowly at lower oven temperatures. Slow Cook provides your favorite recipe settings. This feature may store 1 setting cooking results much the same way as a slow cooker or for each of the basic cooking pads.
-
Page 24: Sabbath Mode
Setting Oven Controls Sabbath Mode Setting Sabbath Mode This appliance provides special settings for use when The example below shows setting the oven to observe the observing the Jewish Sabbath/Holidays. This mode will turn Sabbath (and Jewish holidays). off all audible tones or visual display changes normally 1. -
Page 25: Warmer Drawer
Warmer Drawer Warm & Ready Drawer Warmer Drawer Controls The warmer drawer controls are located on the control The purpose of the warmer drawer is to keep hot cooked panel. Use the warmer drawer control keypads to turn foods at serving temperatures. Examples are vegetables, the warmer drawer ON and OFF and make temperature gravies, meats, casseroles, biscuits, rolls and pastries. - Page 26 Warmer Drawer Proof Bread Warmer Drawer Settings The warmer drawer has a Proof Bread feature that may be The recommended warmer drawer food settings are shown used to prepare bread dough. The recommended length in Fig. 3. The settings provided are meant to be used as a of time to keep the bread dough in the warmer drawer is recommendation only.
-
Page 27: User Preferences
User Preferences Setting Clock Changing Between F° or C° See the example below to set the clock to 1:30. Your control has the ability to display and set Fahrenheit or Celsius temperatures. The factory preset temperature display 1. Press is Fahrenheit. 2. -
Page 28: Self-Cleaning Cycle
Self-Cleaning Cycle Before Starting Self-Clean A self-cleaning oven cleans itself with high temperatures that are well above those used for normal cooking. The high During the self-clean cycle, the outside of the appliance can cleaning temperature eliminates soils completely or reduces become very hot to the touch. - Page 29 Self-Cleaning Cycle Flex Clean Cycle The CLEAN pad controls the Self-Cleaning feature. When used with a the Delay Start pad, a delayed Self-Cleaning cycle may also be programmed. The Flex Clean feature • To avoid possible burns use care when opening the oven allows for any Self-Cleaning cycle time from 2 (2:00) to 4 door after the Self-Cleaning cycle.
-
Page 30: Care & Cleaning
Care & Cleaning Before cleaning any part of the oven, be sure all controls are turned OFF and the oven is COOL. REMOVE SPILLOVERS AND HEAVY SOILING AS SOON AS POSSIBLE. REGULAR CLEANINGS NOW WILL REDUCE THE EXTENT AND DIFFICULTY OF MAJOR CLEANING LATER. - Page 31 Care & Cleaning Cleaning the Cooktop and Surface Burners Ignition port Slots To avoid possible burns DO NOT attempt any of the cooktop cleaning instructions provided before turning OFF all of the surface burners and allow them to completely cool. Orifi...
- Page 32 Care & Cleaning Removing and Replacing the Oven Door The oven door is heavy. Be careful when Door Hinge removing and lifting the door. Do not lift the oven door by locations the handle. with oven door fully open Most oven doors contain glass that can IMPORTANT break.
- Page 33 Care & Cleaning Removing and Replacing the Drawer Replacing the Halogen Oven Light The oven lights will automatically turn ON when the oven To Remove the Drawer: door is opened. The oven lights may also be manually Open the drawer to the fully opened position. operated by pressing the pad.
-
Page 34: Oven Baking
Before You Call (Solutions to Common Problems) Oven Baking For best cooking results, heat the oven before baking cookies, breads, cakes, pies or pastries, etc. There is no need to preheat the oven for roasting meat or baking casseroles. The cooking times and temperatures needed to bake a product may vary slightly from your previously owned appliance. Baking Problems and Solutions Chart BAKING CAUSES... -
Page 35: Before You Call
Before You Call (Solutions to Common Problems) Before you call for service, review this list. It may save you time and expense. The list includes common occurrences that are not the result of defective workmanship or materials in this appliance. OCCURRENCE POSSIBLE CAUSE/SOLUTION Oven Control Beeps and... - Page 36 Before You Call (Solutions to Common Problems) OCCURRENCE POSSIBLE CAUSE/SOLUTION Oven smokes excessively Make sure the oven door is closed. Door should be closed during broiling. during broiling. Meat too close to the broiler unit. Reposition the rack to provide more clearance between the meat and the broiler.
-
Page 37: Protection Agreements
PROTECTION AGREEMENTS Master Protection Agreements Contrats de protection principaux Félicitations! Vous avez fait un bon achat. Votre nouvel appareil Kenmore ® Congratulations on making a smart purchase. Your new conçu et fabriqué dans le but de vous offrir plusieurs années d’utilisation sans ®... -
Page 38: Sears Service
Get it fixed, at your home or ours! Your Home For troubleshooting, product manuals and expert advice: www.managemylife.com For repair – in your home – of all major brand appliances, lawn and garden equipment, or heating and cooling systems, no matter who made it, no matter who sold it! For the replacement parts, accessories and owner’s manuals that you need to do-it-yourself.
Need help?
Do you have a question about the Elite and is the answer not in the manual?
Questions and answers
How do I start the self-cleaning option on my Kenmire Elite stove?
To start the self-cleaning option on your Kenmore Elite stove:
1. Make sure the oven is empty, the oven door is closed, and the clock is set to the correct time.
2. Press the CLEAN button.
3. The default self-cleaning time is 3 hours. To change this, press 2 0 0 for 2 hours or 4 0 0 for 4 hours based on the amount of soil.
4. The oven will begin the cleaning cycle automatically.
Note: A smoke eliminator in the oven vent helps reduce visible smoke.
This answer is automatically generated
How to remove the oven door?
To remove the oven door on a Kenmore Elite:
1. Open the oven door completely until it is horizontal with the floor.
2. Pull the hinge locks on both the left and right door hinges down toward the oven door. Use a small flat-blade screwdriver if needed.
3. Firmly grasp both sides of the oven door along the door sides and lift to remove.
This answer is automatically generated
Is there a parts list?