
Related Manuals for AMX ViewPoint


Summary of Contents for AMX ViewPoint
- Page 1 ViewPoint Wireless Touch Panels (NetWave) (Firmware version G3 or higher) Tou c h Pa n els an d A cc e ss o r ie s...
- Page 2 This warranty extends only to products purchased directly from AMX Corporation or an Authorized AMX Dealer. AMX Corporation is not liable for any damages caused by its products or for the failure of its products to perform. This includes any lost profits, lost savings, incidental damages, or consequential damages. AMX Corporation is not liable for any claim made by a third party or by an AMX Dealer for a third party.
-
Page 3: Table Of Contents
Table of Contents Table of Contents Product Information ....................1 ViewPoint Wireless Touch Panel ..................1 Multiple ViewPoints in an installation ..................1 Specifications ........................2 Recharging the Battery...................... 3 Using Connector Ports ...................... 3 Cleaning the Touch Overlay....................4 Designing Touch Panel Pages ................5 Buttons .......................... - Page 4 Viewing the Available Memory on an IR System Device ..........46 Upgrading the Firmware ..................47 Configuration........................47 Downloading the Firmware ..................... 47 VPA-DS ViewPort Docking Station ............... 49 ViewPort Docking Station Specifications ................ 49 ViewPort Product Information ..................49 Battery charging ........................50 ViewPoint Wireless Touch Panels...
-
Page 5: Product Information
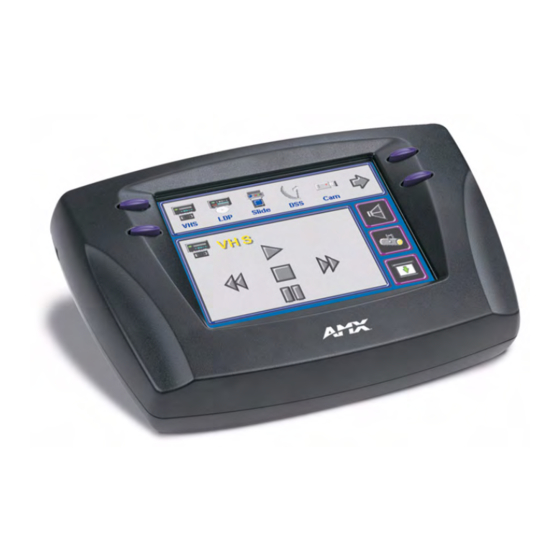
They have programmable firmware via the programming port. TPDesign3 is used to construct the panel pages. Buttons are used throughout the ViewPoint panel for control over external devices. FIG. 1 shows the external jacks and buttons. -
Page 6: Specifications
2.5 mm stereo female conductor jack Memory: 512 KB of SRAM and 2 MB of flash for a total of 2.5 MB IR files 16 KB Buttons 225 KB Bitmaps 1245 KB Icons 262 KB Fonts 262 KB ViewPoint Wireless Touch Panels... -
Page 7: Recharging The Battery
The battery (VPA-BP) can be recharged by connecting the 13.5 VDC power supply to the power jack on the side of the ViewPoint (FIG. 1). The battery can also be charged on the ViewPort docking station. The docking station is a more effective method of charging the batteries. Refer to the VPA-DS ViewPort Docking Station section on page 49 for more information about charging batteries on the ViewPort docking station. -
Page 8: Cleaning The Touch Overlay
Product Information Cleaning the Touch Overlay You should clean the touch screen overlay after each day’s use. Always use clean cotton cloths, and a spray bottle of cleaning solution consisting of 50% isopropyl alcohol and 50% water. ViewPoint Wireless Touch Panels... -
Page 9: Designing Touch Panel Pages
Designing Touch Panel Pages Designing Touch Panel Pages The VPT-CP ViewPoint one-way models do not support bargraphs, joysticks, VGA, or video (video bargraphs and video joysticks). These functions are available in the EDIT drop-down menus and can be setup. However, the functions are not operational. Since the VPN-CP modules contain two-way RF, they support both bargraphs and joysticks. -
Page 10: Activating Edit Mode
Edit mode. When powering up the touch panel, the first page is the Main page (see FIG. 3). Note that the Edit button is not available initially. FIG. 3 Main Page To activate edit mode: 1. Press SETUP in the Main page to open the Setup page (FIG. 4). ViewPoint Wireless Touch Panels... - Page 11 7. Press EDIT to open the Edit bar. The BUTTON and PAGE options, in the Edit bar, (FIG. 6) are used to design and modify button and page settings. Edit bar FIG. 6 Main page with Edit bar ViewPoint Wireless Touch Panels...
-
Page 12: Setting The Device Base
Resizing a button 1. Press BUTTON on the Edit bar to open the BUTTON menu. 2. Press RESIZE. Then, touch any edge of the button and drag. 3. Press EXIT on the Edit bar to exit Edit mode. ViewPoint Wireless Touch Panels... -
Page 13: Button Properties
2, 3, and 4 for other manufacturer’s IR codes (at frequencies other than the supported 38 KHz and 455 KHz). For two-way ViewPoints (VPN-CP), device numbers 1 - 4 can be AMX RF. The AMX IR is not supported (38 KHz and 455 KHz); however, other manufacturer’s IR codes are supported by assigning ViewPoint device numbers 2, 3, and 4 for IR codes. -
Page 14: Setting The Variable Text Code
Adding text, icons, and bitmaps to a button 1. Press BUTTON on the Edit bar to open the BUTTON menu. 2. Press TEXT/IMAGE to add text to the button. The TEXT/IMAGE operation bar appears. ViewPoint Wireless Touch Panels... -
Page 15: Using Tpdesign3 To Download Bitmaps, Icons, And Fonts
BITMAPS, ICONS and FONTS menus. Button Properties for External Pushbuttons External pushbuttons are configured with features similar to on-screen buttons. Their functionality can be set just as any other button on the touch panel. ViewPoint Wireless Touch Panels... -
Page 16: Creating A Bargraph And Joystick
2. Enter 1, 2, 3, or 4 in the keypad. 3. Press ENTER to save the device number, close the keypad, and return to the Button Properties page. 4. Press NUM to open a keypad and set the level number assigned to the device. ViewPoint Wireless Touch Panels... - Page 17 5. Enter a number 1 – 8. Each device can range from 1 – 8 levels except for joysticks, where the range is 1 – 7. 6. Press ENTER to save, close the keypad, and return to the Button Properties page. ViewPoint Wireless Touch Panels...
- Page 18 Designing Touch Panel Pages ViewPoint Wireless Touch Panels...
-
Page 19: Programming
Example: CHECK CAL Begins the calibration check mode on the touch panel. ECHO ON Syntax: Turns On charac- "ECHO ON" ter echo. Example: ECHO ON The character echo is sent back to the computer. ViewPoint Wireless Touch Panels... - Page 20 Syntax: Puts the touch "SETUP" panel on the Example: Setup Page. SETUP Flips the touch panel to the Setup page. Syntax: Restores the cur- "VER" rent version. Example: Returns the current version of the main firmware. ViewPoint Wireless Touch Panels...
-
Page 21: System Send_Commands
0 in the Setup page. Beeps the panel. ADBEEP Syntax: Outputs a double "’ADBEEP’" beep even if the Example: double beep value SEND_COMMAND TP,"’ADBEEP’" is set to 0 in the Setup page. Double beeps the panel. ViewPoint Wireless Touch Panels... - Page 22 QBEEP command. BRIT Syntax: Adjusts brightness "’BRIT-<level>’" of display. Variable: level = 1 - 5 (1 = minimum; 5 = maximum) Example: SEND_COMMAND TP,"’BRIT-5’" Sets to highest brightness level. ViewPoint Wireless Touch Panels...
- Page 23 Inverts the joystick axis to move the origin to another corner. LZAP! This command can be used as Serial Commands and Send_Commands. Clears all low- Syntax: level memory and "’LZAP’" erases IR codes. Example: SEND_COMMAND TP,"’LZAP!’" Clears all IR codes from the panel. ViewPoint Wireless Touch Panels...
- Page 24 Clears panel sta- Syntax: tus (same as "’RESET’" power up). Example: SEND_COMMAND TP,"’RESET’" Resets the touch panel. SETUP Syntax: Goes to the Setup "’SETUP’" page. Example: SEND_COMMAND TP,"’SETUP’" Flips the touch panel to the Setup page. ViewPoint Wireless Touch Panels...
- Page 25 TPAGEON Syntax: Activates page "’TPAGEON’" tracking. Example: SEND_COMMAND TP,’TPAGEON’ DEFINE_DEVICE TP1 = 128 (*AMX Touch Panel*) TP2 = 129 (*AMX Touch Panel*) DEFINE_VARIABLE TP1_BUFFER[100] (*Buffer for TP1*) TP2_BUFFER[100] (*Buffer for TP2*) TRASH[50] (*For Parsing Above*) DEFINE_START CREATE_BUFFER TP1,TP1_BUFFER CREATE_BUFFER TP2,TP2_BUFFER SEND_COMMAND TP1,’TPAGEON’...
- Page 26 Clears all memory and erases all buttons, pages, drawings, and symbols. Only use the ZAP! command to erase the saved data in the touch panel; data cannot be recovered after it is erased. ViewPoint Wireless Touch Panels...
-
Page 27: Programming Numbers
3-dimensional round 1 Triple line 3-dimensional round 2 Single rounded 3-dimensional neon 1 Double rounded 3-dimensional neon 2 Single raised 3-dimensional neon blue Double raised 3-dimensional neon green Triple raised Single diamond Double-line two single Double diamond ViewPoint Wireless Touch Panels... -
Page 28: Shorthand Send Commands
AMX products. However, shorthand commands are smaller byte-for-byte, and are processed more efficiently. The table below lists the shorthand Send_Commands you can use with the ViewPoint touch panels. The shorthand command data is 1-byte, non-ASCII format except for pages, passwords, text, and bitmap names. - Page 29 The touch panel returns its MS-DOS file name in a string. @IDP Syntax: Queries the touch "’@IDP’" panel to return a Example: string with the SEND_COMMAND TP,"’@IDP’" TPDesign3 project name. The touch panel returns a string containing the TPDesign3 project name. ViewPoint Wireless Touch Panels...
- Page 30 "’@PPK-<popup page name>’" touch panel Variable: pages. popup page name = target popup page name Example: SEND_COMMAND TP,"’@PPK-Laser Disc 2 Transport Control’" Deactivates the Laser Disc 2 Transport Control popup page on all touch panel pages. ViewPoint Wireless Touch Panels...
- Page 31 Central Con- string = alphanumeric characters troller when the touch panel pow- Example: ers up. SEND_COMMAND TP,"’@SST-Touch Panel Power On’" Sends touch panel Power On to the Central Controller when the touch panel powers up. ViewPoint Wireless Touch Panels...
-
Page 32: Color Send_Commands
= 1 - 255 fied color. color number = See the Colors and Programming Numbers table on page 23. Example: SEND_COMMAND TP,"’CBOFF1-0’" Sets the OFF feedback border color to Red for the variable text button 1. ViewPoint Wireless Touch Panels... - Page 33 = 1 - 255 fied color. color number = See the Colors and Programming Numbers table on page 23. Example: SEND_COMMAND TP,"’CTOFF1-87’" Sets the OFF feedback text color to Black for variable text button 1. ViewPoint Wireless Touch Panels...
-
Page 34: Variable Text Send_Commands
Sets the state for button 255 to Off. BTON Syntax: Sets a specific "’BTON<variable text address>’" button's active Variable: state to On. variable text address = 1 - 255 Example: SEND_COMMAND TP,"’BTON128’" Sets the state for button 128 to On. ViewPoint Wireless Touch Panels... - Page 35 = 1 - 255 border style = See the Border Styles and Programming Numbers table on page 23. Example: SEND_COMMAND TP,"’ICON25-6’" Changes the border style on the variable text button 25 to double-rounded. ViewPoint Wireless Touch Panels...
-
Page 36: Shorthand Variable Text Commands
Variables: variable text address = 1 - 255 border style = See the Border Styles and Programming Numbers table on page 23. Example: SEND_COMMAND TP,"’@BOR’,65,11" Sets the border style to double shadow on button 65. ViewPoint Wireless Touch Panels... - Page 37 SoftROM firmware reload will re-enable the button. Reloading the touch panel file, reload- ing the Axcess program, or resetting power on the panel or master will not re-enable the button. It must be sent an Enable command once it has been disabled. ViewPoint Wireless Touch Panels...
- Page 38 Sets a specific "’@SHO’,<variable text address>,<button on/off>" button to on or off. Variables: variable text address = 1 - 255 button on/off= 0 : button Off 1 : button On Example: SEND_COMMAND TP,"’@SHO’,128,0" Sets button 128 off. ViewPoint Wireless Touch Panels...
-
Page 39: Button String Commands
Button String Commands Syntax: Sets the group ID "$ID,<group ID>" number on VPN Variables: panels. group ID = 0 (Off) - 15 Example: $ID 15 Sets the Group ID to 15. ViewPoint Wireless Touch Panels... - Page 40 This command does not set the panel to sleep, but actually puts a wavepack to sleep. Activates sleep Syntax: mode on a "$SL" wireless touch Example: panel. Activates sleep mode on a wireless touch panel (ViewPoint or other panel using a SmartPack/WavePack). Syntax: Sends data out "$SP"<data>"" through the serial Variables: port of the source...
-
Page 41: Button Ir Macro Commands
Creating an IR macro button allows you to control multiple devices with a single touch panel button. You are only limited by touch panel IR memory (16 KB). The following steps provide an example of creating an IR macro button controlling a television, VCR, and a satellite tuner. ViewPoint Wireless Touch Panels... - Page 42 The <CR> indicates an end to the command string. 7. Press EXIT CHANGE, EXIT SAVE CHANGE, and then EXIT. 8. To cancel macro execution, touch the screen. All touch panel activity stops until another button press occurs. ViewPoint Wireless Touch Panels...
-
Page 43: Using The Ir Manager
Library files for use with IR-controlled devices in your Project/ System. The IR Manager works with the AMX IRIS Infrared/Serial Data Capture Unit to capture IR files from hand-held remote controls. For detailed information on the IRIS, refer to the IRIS Infrared/Serial Data Capture Unit instruction manual. -
Page 44: System Generated File Names And Ir Files
VPXpress. VPXpress requires that certain functions be on certain channels, in order to properly populate touch panel buttons on a ViewPoint Touch Panel. 5. Edit the Channel/Function assignments as necessary. A file can only be edited if it is not Locked. -
Page 45: Entering Capture Ir Mode
The modes are called Capture Mode, Special Mode and Modes P5 - P7. You should first try to capture your IR functions in Capture Mode. If it doesn’t work, try Special mode. If you are still having trouble, try modes P5-P7. ViewPoint Wireless Touch Panels... -
Page 46: Capturing Ir Functions - Standard Capture Mode
1. Press and release the UP and SEND pushbuttons on the IRIS at the same time. The message SP briefly appears in the display, and the UP LED lights indicating that the IRIS is now in SP mode. ViewPoint Wireless Touch Panels... -
Page 47: Capturing Difficult Functions Using P5-P7 Modes
VERIFY operation. Set this mode to ON when capturing, set it to OFF when verifying or identify- ing IR functions. Loose-timing mode to capture JVC (PQ10956) HC functions. Glitch-detection mode to capture Kinderman and some Mitsubishi HC functions. Disable glitch-detection mode to capture non-carrier HC functions. ViewPoint Wireless Touch Panels... -
Page 48: Verifying Ir Codes From A Hand Control
Use the Directory to process and Report name down-arrows to open a list of recently used directories/files. 3. In the Report name field, enter a path and filename for, or use the Browse button to navigate to the target directory for the cross-reference report file. ViewPoint Wireless Touch Panels... -
Page 49: Searching For A Specific Ir Function Across Multiple Files
The files selected (checked) in the IRL tab are listed in the Files to verify box. 4. Click Yes to begin the search across the selected files. The word Yes appears next to the files (in the Found column) that contain the specified IR function. ViewPoint Wireless Touch Panels... -
Page 50: Advanced Ir Manager Features
2. Enter the target IR device’s Address information (Device, Port and Address for NetLinx devices). 3. Click Get Available Memory. The available memory for the selected device is displayed at the bottom of the dialog box. ViewPoint Wireless Touch Panels... -
Page 51: Upgrading The Firmware
Your PC must be connected to the PROGRAM DB-9 to stereo plug connector on the Controller using the programming cable in order to upgrade the firmware in the ViewPoint. Refer to the Using Connector Ports section on page 3 for more information on the use of the programming cable. - Page 52 Upgrading the Firmware ViewPoint Wireless Touch Panels...
-
Page 53: Vpa-Ds Viewport Docking Station
The ViewPort Docking Station (FIG. 9) provides a built-in battery charger and an angled desk docking station to cradle your ViewPoint touch panel. When a ViewPoint is placed in the docking station's cradle, the ViewPoint makes contact with the charging pins and power is supplied by the docking station. -
Page 54: Battery Charging
FIG. 9 ViewPort Docking Station Cradle Battery charging When a ViewPoint touch panel is not cradled on the docking station, an optional battery can be placed in the charging compartment. The optional battery begins charging when the optional power supply is plugged in to the rear of the docking station (FIG. 10). The ViewPort Docking Station provides charging of the battery inside the ViewPoint when it is cradled in the ViewPort. - Page 55 VPA-DS ViewPort Docking Station Power Supply Retaining connector ears (tabs) Rear view FIG. 10 Rear view of the docking station ViewPiont Wireless Touch Panels...
- Page 56 AMX reserves the right to alter specifications without notice at any time. brussels • dallas • los angeles • mexico city • philadelphia • shanghai • singapore • tampa • toronto* • york 3000 research drive, richardson, TX 75082 USA • 469.624.8000 • 800.222.0193 • fax 469.624.7153 • technical support 800.932.6993...
Need help?
Do you have a question about the ViewPoint and is the answer not in the manual?
Questions and answers