Advertisement
Table of Contents
- 1 Safety Instructions
- 2 Preparing for Use
- 3 Electrical Connections
- 4 Air-Conditioning Without Installation
- 5 Control Panel
- 6 Operation
- 7 Dehumidifying Mode
- 8 Fan Mode
- 9 Using the Remote Control
- 10 Dehumidifying Mode (Dry)
- 11 Setting the Timer
- 12 Cleaning the Cabinet
- 13 Troubleshooting
- Download this manual
Advertisement
Table of Contents

Related Manuals for Omega Altise OAPC1213


Summary of Contents for Omega Altise OAPC1213
- Page 1 PORTABLE AIR CONDITIONER OAPC1213 OAPC1413...
-
Page 2: Safety Instructions
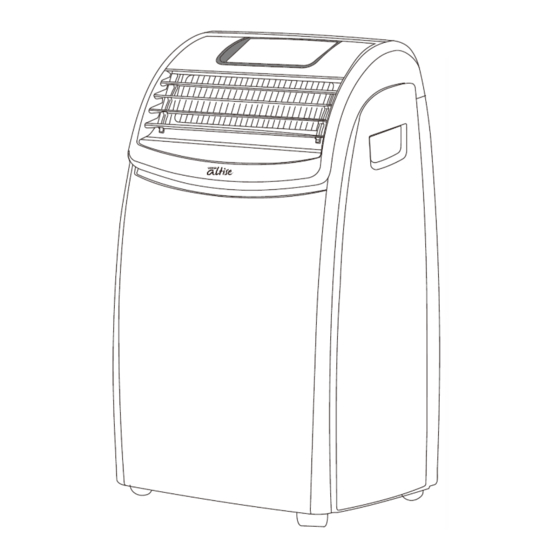
SAFETY INSTRUCTIONS & CAUTION__ • Read all instructions carefully and keep this manual for future reference. • For indoor use only. • This appliance is designed for home air conditioning and must not be used for other purposes. • It is dangerous to modify the appliance in any way. •... - Page 3 __ DESCRIPTION___ 1. Control panel 5. Filter 2. Air outlet grills 6. Evaporator air intake grill 3. Castors 7. Air exhaust hose housing 4. Handles 8. Condensate drain connection 9. Power Cable 10. Flange with cap 14. Castor locks 11. Suction caps 15.
-
Page 4: Preparing For Use
PREPARING FOR USE ELECTRICAL CONNECTIONS Before plugging the appliance into the mains socket, please check: •The mains power supply corresponds to the value indicated on the rating plate on the back of the appliance; •The mains socket and electrical circuit are adequate for the appliance; The instructions below will enable you to prepare your air conditioner for operation as efficiently as possible. - Page 5 PREPARING FOR USE AIR-CONDITIONING WITHOUT INSTALLATION Cont.…. French window Open the French window slightly and position the outlet [13] as shown in figure c. • Use the suction pads provided to hold the two parts of the window together (fig. D). Keep the air hose as short and free of curves as possible to avoid constrictions.
- Page 6 PREPARING FOR USE AIR-CONDITIONING SEMI-PERMANENT INSTALLATION If required, your appliance can also be installed semi-permanently (fig.E) Drill a hole ( 134 mm) in an outside wall or through a window pane. Respect the dimensions and height of the hole given in figure F and G. In the In the wooden window...
-
Page 7: Control Panel
CONTROL PANEL A: ON/OFF button B: MODE selection button C: FAN speed selection button D: Remote IR sensor E: Programmed operation increase temperature/time button F: Programmed operation decrease temperature/time button G: COOL mode light H: DEHUMIDIFYING mode light I: FAN mode light J: Display area K: Auto-speed fan mode light... -
Page 8: Operation
OPERATION Warning: If the air conditioner has been lying on its side, back or has been moved, leave it standing upright for at least 1 hour before plugging into the mains socket. Plug into the mains socket, you will hear three beeps, two lines will also appear on the display indicating that the appliance is in standby. -
Page 9: Using The Remote Control
USING THE REMOTE CONTROL DESCRIPTION OF THE REMOTE CONTROL 1) FAN button 2) ON/OFF button 3) MODE button 4) TIMER button 5) Display Point the remote to the remote IR sensor on the air conditioner. The remote works at a max distance of 7 meters Replacing the batteries •... -
Page 10: Dehumidifying Mode (Dry)
USING THE REMOTE CONTROL TURNING THE APPLIANCE ON Plug into the mains socket. Press the ON/OFF button (2) (when turned on, the air conditioner starts operating in the same mode as when it was turned off). Press the MODE button (3) to select the required mode AIR-CONDITIONING (COOL) DEHUMIDIFYING (DRY) FAN ONLY (FAN) -
Page 11: Setting The Timer
USING THE REMOTE CONTROL SETTING THE TIMER The timer can be used to delay appliance start up or shut down. This avoids wasting electricity by optimising operating periods. How to programme delayed shutdown • With the air-conditioning unit on, press the TIMER button 4. The time is displayed and the "h" symbol flashes, with a flashing arrow indicating TIMER OFF. - Page 12 TIPS To get the best from your air conditioner, follow these recommendations: • Close the windows and doors in the room to be air conditioned. The only exception is when the appliance is installed through a hole in the wall. In this case, you are recommended to leave a slight draught through a door or window to guarantee correct ventilation.
- Page 13 TIPS WATER DRAINAGE METHOD Water drainage will generally only be required when you store the air conditioner away or when not in use. NOTE As a safety measure, to positively prevent water spillage, the air conditioner is equipped with a fail-safe device, if, the water tank fills.
-
Page 14: Cleaning The Cabinet
CLEANING Before cleaning or maintenance, turn the appliance off by pressing the ON/OFF button [A] then unplug the appliance from the mains socket. CLEANING THE CABINET You should clean the appliance with a slightly damp cloth then dry with a dry cloth. For safety reasons, never wash the air conditioner with water. -
Page 15: Troubleshooting
TROUBLESHOOTING Wait for three minutes... - Page 16 Omega Altise products are distributed in Australia by Shriro Australia Pty Ltd. Locked Bag 5002, Kingsgrove NSW 2208 Phone: 1300 795 572 Fax: (02) 9415 5525 Web: www.omegaaltise.com.au...
Need help?
Do you have a question about the OAPC1213 and is the answer not in the manual?
Questions and answers