Advertisement
Table of Contents
- 1 Table of Contents
- 2 Important Safeguards
- 3 Description
- 4 Preparing for Use
- 5 Description of the Control Panel
- 6 Operating from the Control Panel
- 7 Description of the Remote Control
- 8 Correct Use
- 9 Using the Remote Control Unit
- 10 Self-Diagnosis
- 11 Tips for Correct Use
- 12 Cleaning
- 13 Start - End of Season Operations
- 14 Troubleshooting
- 15 Technical Specifications
- Download this manual
Advertisement
Table of Contents

Related Manuals for Omega Altise APC12CVA


Summary of Contents for Omega Altise APC12CVA
- Page 1 APC12CVA APC12RCVA APC14CVA OAPC14RCVA Portable Type Air Conditioner Instruction Manual...
-
Page 2: Table Of Contents
CONTENTS Important safeguards------------------------------------------------------------------- 2 Description--------------------------------------------------------------------------------- 4 Preparing for use------------------------------------------------------------------------- 5 Description of the control panel------------------------------------------------------- 7 Operating from the control panel----------------------------------------------------- 7 Description of the remote control----------------------------------------------------- 10 Correct use--------------------------------------------------------------------------------- 10 Using the remote control unit---------------------------------------------------------- 11 Self-diagnosis------------------------------------------------------------------------------ 13... -
Page 3: Important Safeguards
IMPORTANT SAFEGUARDS • Use this appliance only as described in this instruction manual. As with all electrical equipment, whilst the instructions aim to cover as many eventualities as possible, caution and common sense should be applied when operating and installing this appliance. - Page 4 ELECTRICAL CONNECTIONS Before plugging the appliance into the mains socket, check that: • The mains power supply corresponds to the value indicated on the rating plate on the back of the appliance; • The power socket and electrical circuit are adequate for the appliance.
-
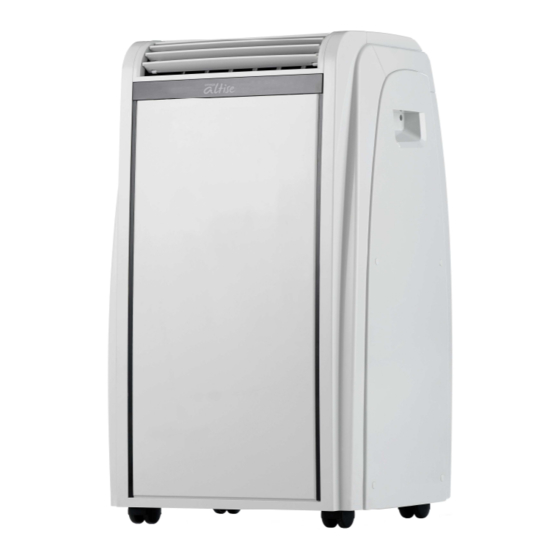
Page 5: Description
DESCRIPTION Air outlet grille Control panel Castors Handles Remote control receiver Filter Intake grille Air exhaust hose housing Condensate drain 10 Power cable 11 Air exhaust hose 12 Window outlet 13 Suckers 14 Remote control 15 Castor locks... -
Page 6: Preparing For Use
PREPARING FOR USE The instructions below will enable you to prepare your air conditioner for operation as efficiently as possible. Before use, make sure the air intake and outlet grilles are unobstructed. AIR-CONDITIONING WITHOUT INSTALLATION Just a few simple steps and your comfort is ensured with your appliance: •... - Page 7 AIR-CONDITIONING WITH INSTALLATION If required, your appliance can also be installed semi- permanently (Fig. 5). Proceed as follows: Drill in an outside wall or in the window pane a 134mm dia. hole respecting the heights shown in (Fig. 6).
-
Page 8: Description Of The Control Panel
DESCRIPTION OF THE CONTROL PANEL Cool symbol 10 Speed indicator Dry symbol 11 AUTO FAN indicator Fan symbol 12 Sleep symbol HEAT symbol – On Reverse cycle 13 MODE button (selects the models only modes) SMART symbol 14 POWERFUL button... - Page 9 COOL MODE Ideal for hot muggy weather when you need to air condition and dehumidify the room. To set this mode correctly: • Press the MODE button a number of times until the COOL symbol appears. • Select the target temperature by pressing the button until the corresponding value is displayed.
- Page 10 Maximum speed: for maximum fan power Medium speed: reduces noise levels but still maintains a good level of comfort. Low speed: for silent operation In this mode, AUTO speed cannot be selected. HEAT MODE – Only on Reverse cycle models •...
-
Page 11: Description Of The Remote Control
DESCRIPTION OF THE REMOTE CONTROL 1 Mode Indicator 2 Selected temperature scale indicator 3 Signal transmission 4 Auto fan speed indicator 5 Fan symbol 6 Sleep indicator 7 Powerful indicator 8 Swing indicator 9 Programming start up/shut down... -
Page 12: Using The Remote Control Unit
INSERTING OR REPLACING THE BATTIERS • Remove the cover on the rear of the remote control; • Insert two R03 “AAA” 1.5V batteries in the correct position (see instruction inside the battery Compartment); • Replace the cover. If the remote control unit is replaced or disposed of, the batteries must be removed and discarded in accordance with current legislation as they are harmful to the environment. - Page 13 SLEEP FUNCTION This function is useful for the night as it gradually reduces operation of the appliance. To set this function correctly: • Select the operating mode (cool, dry or smart) as described above. • Press the SLEEP button. The appliance operates in the previously selected mode.
-
Page 14: Self-Diagnosis
Programming shutdown • Press the TIMER button. The shutdown time and message “hr DELAY” flashes on the remote control display. • Press the buttons to set the time you want the appliance to shut down (from 1 hour to 12 hours). -
Page 15: Tips For Correct Use
TIPS FOR CORRECT USE To get the best from you air conditioner, follow these recommendations: • Close the windows and doors in the room to be air conditioned (Fig. 22). When installing the air conditioner semi-permanently, you should leave a door slightly open (as little as 1 cm) to guarantee correct ventilation. -
Page 16: Cleaning
CLEANING Before cleaning or maintenance, turn the appliance off by pressing button on the control panel or ON/OFF button on remote control, wait for a few minutes then unplug from the mains socket. CLEANING THE CABINET You should clean the appliance with a slightly damp cloth then dry with a dry cloth. -
Page 17: Troubleshooting
TROUBLESHOOTING • There is no current • Wait The air • It is not plugged into the mains • Plug into the mains conditioner • The internal safety device has • Wait 30 minutes, if the problem does not come on... -
Page 18: Technical Specifications
Omega Altise products are distributed in Australia by Hagemeyer Appliances, (A Division of Hagemeyer Brands Australia Pty Ltd) ABN 28 001 375 686...
Need help?
Do you have a question about the APC12CVA and is the answer not in the manual?
Questions and answers