Sign In
Upload
Download
Table of Contents
Contents
Add to my manuals
Delete from my manuals
Share
URL of this page:
HTML Link:
Bookmark this page
Add
Manual will be automatically added to "My Manuals"
Print this page
×
Bookmark added
×
Added to my manuals
Manuals
Brands
Primus Manuals
Washer
FX80
Original installation, maintenance and user's manual
Primus FX80 Original Installation, Maintenance And User's Manual
8kg, 11kg, 14kg high spin industrial washer extractors
Hide thumbs
1
2
Table Of Contents
3
4
5
6
7
8
9
10
11
12
13
14
15
16
17
18
19
20
21
22
23
24
25
26
27
28
29
30
31
32
33
34
35
36
37
38
39
40
41
page
of
41
Go
/
41
Contents
Table of Contents
Troubleshooting
Bookmarks
Table of Contents
Table of Contents
Contents
Safety Precautions
Operation
Symbols on the Machine
Version Xcontrol, Version Xcontrol Plus
Before Washing
Opening the Drum Door
Placing the Laundry into the Machine
Closing the Drum Door
Program Selections
Wash Programs Overview
Add Detergents
Start the Washer
Version Xcontrol
Version Xcontrol Plus
End of Wash Cycle
Power Cut
Version Xcontrol
How to Open the Door by Failure
First Service at Technical Problem
Technical Data
Connections
Machines 8-11-14 Kg / 18-25-30 Lb
Installation
Transportation and Unpacking
Siting and Floor
Mechanical Installation
Water Connections
Drain Connection
Venting
Liquid Soap Connection
Electrical Connection
Electronic Controller with Blue Pcb and Graphical Display
Electrical Installation
General
Residual Current Device (RCD)
Supply Protection Device
Supply Cable
Machine Protective Earth Connection and Equipotential Bonding
Multiple Machines in Line Single Phase
Maintenance and Adjustments
Checking and Maintenance Daily
Checking and Maintenance Every Three Months
Checking and Maintenance Every Six Months
Replacement of Door Rubber
Adjusting of out of Balance Switch
Belt Replacement and Adjusting Tension
Water Filters
Tightening Moments
Replacement Washer Fuses
Trouble Shooting Aids
Unblocking of the Door Lock in Case of Emergency
Error Indication Shown on Display
List of Recommended Spare Parts
Serial Number
Electrical Details
Advertisement
Quick Links
1
Symbols on the Machine
2
Program Selections
3
Maintenance and Adjustments
4
Error Indication Shown on Display
Download this manual
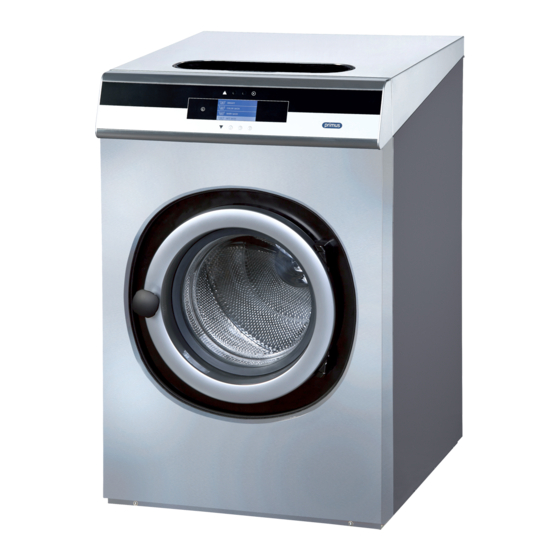
HIGH SPIN INDUSTRIAL WASHER
EXTRACTORS
8kg
11kg
14kg
ORIGINAL INSTALLATION, MAINTENANCE AND USER'S MANUAL
540889
Publication date: 1 Jul 2011
Table of
Contents
Previous
Page
Next
Page
1
2
3
4
5
Advertisement
Table of Contents
Need help?
Do you have a question about the FX80 and is the answer not in the manual?
Ask a question
Questions and answers
Related Manuals for Primus FX80
Washer Primus FX105 Original Installation, Maintenance And User's Manual
8kg, 11kg, 14kg high spin industrial washer extractors (41 pages)
Washer Primus FX135 Original Installation, Maintenance And User's Manual
8kg, 11kg, 14kg high spin industrial washer extractors (41 pages)
Washer Primus FS 6-16 Installation Manual
Soft mounted washer extractor with electronic programmer (30 pages)
Washer Primus FS 6-16 Installation And Maintenance Manual
Soft mounted washer extractor with electronic programmer (31 pages)
Washer Primus F 22-55 Installation And Maintenance Instructions Manual
Industrial washer-extractors (40 pages)
Washer Primus FS16 Service Instruction
Install an ac-reactor (15 pages)
Washer primus F22 User Manual
Industrial washer extractors (112 pages)
Washer Primus F22 User Manual
Industrial washer extractors (90 pages)
Washer Primus FS23 Service Instruction
Install an ac-reactor (15 pages)
Washer Primus R6 User Manual
Industrial washer extractor (77 pages)
Washer Primus 6kg Installation And Maintenance Manual
Professional washer extractors soap hopper on top panel (33 pages)
Washer Primus C 6 Installation And Maintenance Manual
Soft mounted washer extractor with electronic programmer (20 pages)
Washer Primus MKIIA-LC Programming Instructions Manual
(39 pages)
Washer Primus PW 5 Installation And Maintenance Manual
Tumble dryer vented and condensed version (41 pages)
Washer Primus C6 User Manual
Soft mounted washer extractor with electronic programmer (54 pages)
Washer Primus MB 90 Installation And Maintenance Manual
Hygienic washer extractor (41 pages)
This manual is also suitable for:
Fx105
Fx135
Table of Contents
Save PDF
Print
Rename the bookmark
Delete bookmark?
Delete from my manuals?
Login
Sign In
OR
Sign in with Facebook
Sign in with Google
Upload manual
Upload from disk
Upload from URL


Need help?
Do you have a question about the FX80 and is the answer not in the manual?
Questions and answers