Table of Contents
Advertisement
Quick Links
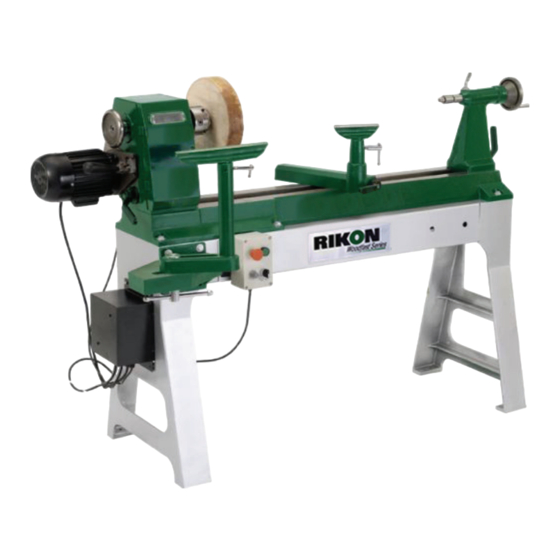
20" x 37" VS Woodfast Wood Lathe
Model: 70-450
Shown with Optional Bowl Turning Attachment
Record the serial number and date of purchase
in your manual for future reference.
Serial number:
Date of purchase:
For more information:
www.rikontools.com
info@rikontools.com
or
For Parts or Questions:
techsupport@rikontools.com
877-884-5167
or
Part # 70-450M1
Advertisement
Table of Contents

Related Manuals for Rikon Power Tools Woodfast 70-450


Summary of Contents for Rikon Power Tools Woodfast 70-450
- Page 1 20” x 37” VS Woodfast Wood Lathe Model: 70-450 Shown with Optional Bowl Turning Attachment Record the serial number and date of purchase in your manual for future reference. Serial number: Date of purchase: For more information: www.rikontools.com info@rikontools.com For Parts or Questions: techsupport@rikontools.com 877-884-5167 Part # 70-450M1...
-
Page 2: Safety Warnings
Safety Warning IMPORTANT! Safety is the single most important consideration in the operation of this equipment. The following instructions must be followed at all times. There are certain applications for which this tool was designed. We strongly recommend that this tool not be modified and/ or used for any other application other than that for which it was designed. -
Page 3: Lathe Safety Rules
ALWAYS DISCONNECT TOOLS. Disconnect tools before servicing and when changing accessories such as blades, bits, and cutters. ALWAYS AVOID ACCIDENTAL STARTING. Make sure switch is in “OFF” position before plugging in cord. NEVER LEAVE TOOLS RUNNING UNATTENDED. ALWAYS CHECK FOR DAMAGED PARTS. Before initial or continual use of the tool, a guard or other part that is damaged should be checked to assure that it will operate properly and perform its intended function. -
Page 4: Table Of Contents
Table of Contents Safety Warnings............................2-3 Lathe Safety Rules............................... 3 Specifications.............................4 Unpacking and Contents............................5 Getting to Know Your Lathe...........................6 Assembly..............................7 Determine Lathe Location In Workshop.......................7 Bolting Lathe to the Stand............................7 Adjustments..............................8 Attaching the Live Center............................8 Swiveling the Headstock......................9 Tightening or Loosening the Headstock....................9 Changing Spindle Speeds............................9 Adjusting the Tool Rest............................9... -
Page 5: Unpacking And Checking Contents
Contents of Package Unpacking and Checking Contents The 70-450 Woodfast lathe is shipped in two cartons. Unpack the lathe from both cartons and check to see that you have all of the following items. Do not turn your machine ON if any of these items are missing. -
Page 6: Getting To Know Your Lathe
Getting to Know Your Lathe A. Stand Leg K. Tool rest seat locking lever B. Stand Body L. Spur center C. Lathe Bed M. Face plate D. Tailstock locking lever N. Spindle lock E. Tailstock handwheel O. Motor F. Tail stock P. -
Page 7: Assembly
Assembly 2.With assistance, lift stand body and carefully position the CAUTION stand legs to align the bolt holes. Secure stand to legs by To avoid injury, assistance required during assembly. using eight M10X30 hex bolts and eight M10 flat washer. Note: The machine must not be plugged in and the power switch (Fig.03) must be in the OFF position until assembly is complete. -
Page 8: Adjustments
Adjustments and Operations 4.4 Tightening or Loosening Motor Belt 4.1 Removing Spur Center from the Headstock 1. Turn the belt tightening handle toward the headstock locking Insert the knockout bar into the headstock spindle from the handle handle (Fig.09). Rotate the belt tighting handle upwards to tighten end. -
Page 9: Swiveling The Headstock
Fig.15 Fig.12 locking position 4.8 Adjusting Tailstock 4.6 Swiveling Headstock 1. Loosen cam lever (A-Fig.16) to move the tailstock along the Pull the position pin out with your right hand, at the same time lathe bed to desired position. Tighten lever. loosen the locking handle and swivel the headstock with your left 2. -
Page 10: Variable Speed Switch
Fig.18 Fig.20 2. The 24 position indexing feature (A-Fig.21) allows accurate pat- tern work on projects such as straight fluting, grooving, drilling, lay out and more. This feature also allows the user to lock the spindle for removing face plates, chucks and other accessories without needing two tools. -
Page 11: Electrical Requirements
Eletrical Requirements In the event of a malfunction or breakdown, grounding provides a path of least resistance for electric current to reduce the risk of electric shock. This tool is equipped with an electric cord having an equipment-grounding conductor and a grounding plug. The plug must be plugged into a matching outlet that is properly installed and grounded in accordance with all local codes and ordinances. -
Page 12: Troubleshooting
Troubleshooting Fig.17 IIMPORTANT: When carrying out any adjustments turn off switch and make sure electrical leads are disconnected from mains power. -
Page 13: Wiring Diagram
Explosion Diagrams & Parts List... -
Page 15: Parts List
Description Description Key No. Part No. Key No. Part No. Lock nut M20 Motor M20GB889D2Z F8040504 Washer 20 Carriage bolt WSH20GB95Z JL94010115 Cam spindle Mounting plate JL94010111 JL94010301A Mounting plate Set screw M8X30 JL94010113 M8X30GB70D3Z Set screw M5X12 Handwheel M5X12GB70D3B JL94010105A Pin 5X40 Set screw M8X16... - Page 16 Description Key No. Part No. Rear stand body JL94040003 Front stand body JL94040004 Hex bolt M10X25 M10X25GB5783Z Spring washer 10 WSH10GB93Z Flat washer 10 WSH10GB97D1Z Stand leg JL94040001 Set screw M5X20 M5X20GB819Z Mounting plate JL91042001 Switch JL91042000 Locking bar JL91042100 Available for optional Rear Turning Attachment (Part No.117 through Part No.129) Tool rest support...
-
Page 17: Warranty
Warranty 5-Year Limited Warranty RIKON Power Tools, Inc. (“Seller”) warrants to only the original retail consumer/purchaser of our products that each product be free from defects in materials and workmanship for a period of five (5) years from the date the product was purchased at retail. This warranty may not be transferred. - Page 18 For more information: 16 Progress Road Billerica, MA 01821 877-884-5167 / 781-933-8400 techsupport@rikontools.com www.rikontools.com Copyright RIKON Power Tools, Inc. 200 Printed in China 3/09...
Need help?
Do you have a question about the Woodfast 70-450 and is the answer not in the manual?
Questions and answers