Table of Contents
Advertisement
Operating and installation instructions
Fridge/freezer combination
with ice cube maker
NoFrost system
and DynaCool
KFN 9855 iDE
en - CA
To avoid the risk of personal injury
or damage to the appliance,
it is essential that you read these
operating and installation instructions
before installation and use.
M.-Nr. 09 634 400
Advertisement
Table of Contents

Related Manuals for Miele KFN 9855 iDE


Summary of Contents for Miele KFN 9855 iDE
- Page 1 Operating and installation instructions Fridge/freezer combination with ice cube maker NoFrost system and DynaCool KFN 9855 iDE en - CA To avoid the risk of personal injury or damage to the appliance, it is essential that you read these operating and installation instructions before installation and use.
-
Page 2: Table Of Contents
Contents Guide to the Appliance ..........5 Included accessories . - Page 3 Contents Adjusting the door shelf / bottle shelf ........35 Adjusting the bottle divider .
- Page 4 Contents Installation Information ..........67 Location .
-
Page 5: Guide To The Appliance
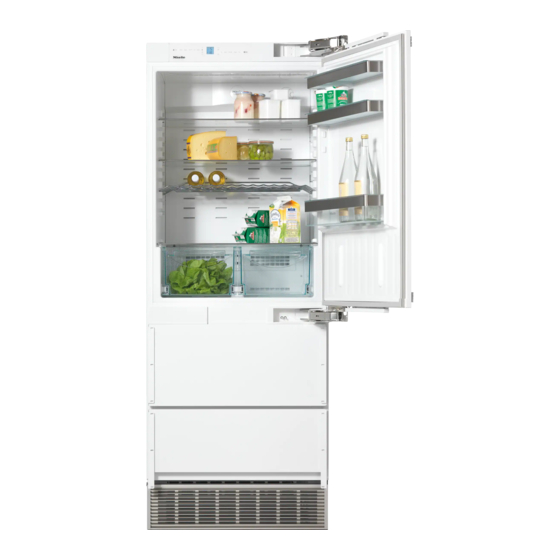
Guide to the Appliance Control panel Refrigerator section Freezer section a Alarm-off button for silencing the g Indicator lights: door alarm, or the temperature alarm Temperature alarm for the of the freezer section freezer section ® Ice cube maker is on b Button for switching Super Cool on ª... - Page 6 Guide to the Appliance a Control panel b Interior lighting c Fan d Egg tray / door shelf e Shelf f Bottle rack g Bottle shelf with bottle divider h Fruit and vegetable drawers i Freezer section interior lighting j Automatic ice cube maker behind the drawer k Ice cube drawer l Freezer drawers...
-
Page 7: Included Accessories
It has the same cleaning and protective appliance covers, windows, furniture, characteristics as the stainless steel car windows, etc. conditioner. Optional accessories are available from Miele Customer Service, your Miele dealer or online. -
Page 8: Safety Instructions And Warnings
This will protect you from injury and prevent damage to the appliance. Miele will not be held liable for damage caused by failure to comply with these instructions. Keep the instructions in a safe place and pass them along to any... - Page 9 The appliance is not suitable for use in areas where there is a risk of explosion. Miele will not be held liable for damage resulting from incorrect or improper use or operation. Individuals who are incapable of using the appliance safely...
- Page 10 If there is any doubt about the grounding of your household wiring, have it inspected by a qualified electrician. If the power cord is damaged it must be replaced by an authorized Miele technician in order to avoid any danger to the user.
- Page 11 Installation, repair and maintenance work or repairs on the ice cube maker should only be performed by a Miele authorized technician. Repairs not performed by a Miele authorized service technician...
- Page 12 Defective components should only be replaced with parts from Miele. Miele will not be held liable for damage resulting from a faulty connection to the water supply. The ice cube maker is not intended to be used with a hot water supply line.
- Page 13 Always observe the food producer's recommended storage instructions and best before dates. Use only original Miele spare parts. Adding or installing other parts will void any warranty and/or product liability claims.
- Page 14 Safety Instructions and Warnings Cleaning and care Do not use any oil or grease on the door seals. They can cause the seals to deteriorate over time. Never use a steam cleaner to clean the appliance. The steam can reach the electrical components and cause a short circuit.
-
Page 15: How To Save Energy
How to save Energy Normal Increased energy consumption energy consumption Installation / In a well ventilated room. In an enclosed, maintenance poorly ventilated room. Protected from direct In direct sunlight. sunlight. Away from heat sources Near a heat source (radiator, (radiator, stove/oven). - Page 16 How to save Energy Normal Increased energy consumption energy consumption The drawers and shelves are in the original arrangement. Only open the doors when Frequent opening of the door necessary and for as short a or for long periods will allow time as possible.
-
Page 17: Turning The Appliance On And Off
^ Immediately after pulling the film off, refrigerator and/or the freezer section wipe the stainless steel surfaces with on and off so that the respective the Miele stainless steel conditioner temperature is displayed. provided. The appliance starts cooling. Important! Each application of the... -
Page 18: Turning The Appliance Off
Turning the Appliance On and Off The alarm symbol ; on the control Switching off for longer panel flashes until the selected periods of time temperature is reached. If the appliance is not needed for a The interior lighting will come on when longer period of time: the refrigerator door or a freezer drawer ^ remove all food from the appliance,... -
Page 19: The Right Temperature
The Right Temperature The right temperature is very important Automatic cold air circulation for storing food. If food is not stored at (DynaCool) the right temperature, bacteria can Whenever the refrigerator section multiply rapidly, causing the food to switches on for cooling, the fan is spoil. -
Page 20: Temperature Display
The Right Temperature Temperature display This short-term loss of cooling is no cause for concern in the following In normal operation the display cases: shows the current mean refrigerator – when the door has been left open for temperature and the temperature in a while, for example to take out or the warmest part of the freezer. - Page 21 The Right Temperature When you tap the buttons, you will see Temperature ranges the following changes in the display: The temperature can be selected within – When first tapped: The last the following ranges: temperature selected flashes. – In the refrigerator section, 2°C to 7°C –...
-
Page 22: Using Super Cool
Using Super Cool The Super Cool function can be used to Switching Super Cool off rapidly reduce the temperature in the Super Cool automatically switches off refrigerator section to its lowest setting after approx. 6 hours. The appliance (depending on the room temperature). continues running with normal cooling performance. -
Page 23: Using Super Freeze
Using Super Freeze For best results, switch on Super Switching Super Freeze off Freeze before putting fresh food into Super Freeze switches off automatically the freezer. after approx. 30 - 65 hours. The length Fresh food will be frozen quickly, so of time required until it switches off that the nutritional value, vitamin depends on the amount of fresh food... -
Page 24: Temperature And Door Alarm
Temperature and Door Alarm The appliance is equipped with a If the temperature was above -18°C warning system to ensure that the (0°F) for a longer period of time, you temperature in the freezer section does not rise unnoticed and to avoid energy will need to check to make sure that no frozen food started to thaw. -
Page 25: Door Alarm
Temperature and Door Alarm Door alarm An alarm will sound if the appliance door or a freezer drawer is left open for more than 3 minutes. The alarm will stop as soon as the door or the freezer drawer is closed. Switching the audio alarm off If the alarm signal bothers you, it can be silenced. -
Page 26: Additional Settings
Additional Settings Sabbath mode S Certain appliance settings can only be selected in the settings mode. Sabbath mode can be selected to facilitate religious customs. Options In Sabbath mode, many functions are deactivated and cannot be selected. Sabbath mode – The interior lighting does not come Safety lock on when the door or a freezer drawer is opened. -
Page 27: Safety Lock C
Additional Settings Turning Sabbath mode on and off If not manually deactivated, Sabbath mode is automatically deselected after ca. 120 hours. Safety lock c ^ Touch the button for switching Super Freeze on and off for 5 seconds. The safety lock can be activated to The Super Freeze indicator ª... -
Page 28: Temperature Unit (Fahrenheit Or Celsius)
Additional Settings ^ Touch the Super button again to confirm your selection. 0 appears in the control panel when ^ Tap the button for setting the the safety lock is activated. temperature in the freezer section until a flashing § appears in the lower temperature display. -
Page 29: Brightness Of The Display
Additional Settings Brightness of the display ^ You can adjust the brightness of the ^ You can change the brightness within display to suit the light conditions in the levels 0 to 5 by tapping the button for room. setting the temperature in the freezer There are five different brightness section. -
Page 30: Lower Hinge Heating Control H
Additional Settings Lower hinge heating control H – H 1: select this if there is a lot of condensation, If condensed water appears in the – H 0: select this if there is no lower hinge area or on the base plate between the refrigerator and freezer condensation (heating off). -
Page 31: Using The Refrigerator Efficiently
Using the Refrigerator Efficiently Different storage zones Warmest area Due to the natural circulation of the air The warmest areas in the refrigerator in the appliance, there are different are in the top section towards the front temperature zones in the refrigerator. and in the top of the door. -
Page 32: Food That Should Not Be Stored In A Refrigerator
Using the Refrigerator Efficiently Food that should not be stored Do not store explosive materials in in a refrigerator the appliance or any products Not all food is suitable for storage at containing flammable propellants temperatures below 5°C, as some (e.g. -
Page 33: When Shopping For Food
Using the Refrigerator Efficiently When shopping for food Storing food correctly The freshness of food when first placed Always store food covered or in the appliance is the most important wrapped. This will prevent food odours factor in determining how long it stays from spreading to other foods, food fresh. -
Page 34: Arranging The Interior - Refrigerator Section
Arranging the Interior - Refrigerator Section Adjusting the shelves Fruit and vegetable drawers The shelves can be adjusted according The fruit and vegetable drawers can be to the height of the food. removed for loading and unloading or for cleaning. ^ Lift the shelf at the front, pull it ^ Pull the drawer forward, then lift it up forwards slightly, lift the recess over... -
Page 35: Adjusting The Door Shelf / Bottle Shelf
Arranging the Interior - Refrigerator Section Adjusting the door shelf / Adjusting the bottle divider bottle shelf The bottle divider can be moved to the ^ Lift the hanging container up and out left or right. This holds the bottles more securely in position when the door is of the stainless steel support frame. -
Page 36: Freezing And Storing Food
Freezing and Storing Food Maximum freezing capacity If food is frozen quickly, there is less time for the cells to lose moisture, so To ensure that fresh food placed in the they shrink less. freezer freezes through to the core as Also, because a smaller amount of quickly as possible, the maximum moisture is lost, it is easier for the food... -
Page 37: Storing Frozen Food
Freezing and Storing Food Storing frozen food – The following types of food are not suitable for freezing: When buying frozen food to store in grapes, lettuce, radishes, sour your freezer, make sure to check: cream, mayonnaise, eggs in the –... -
Page 38: Placing Food In The Freezer
Freezing and Storing Food Packing 24 h before freezing ^ Freeze food in portions. ^ When freezing more than 2 kg of fresh food, switch on Super Freeze ª Suitable packing materials 24 h before (see "Using Super : plastic film Freeze"). -
Page 39: Thawing Frozen Foods
Freezing and Storing Food Thawing frozen foods Cooling drinks quickly Frozen food can be thawed in various Bottles that are put in the freezer for ways: quick cooling must be removed within one hour. Otherwise, they could burst. – in the microwave, –... -
Page 40: Making Ice Cubes
Making Ice Cubes For the automatic ice cube maker to Do not consume or use the first operate it must be connected to the three batches of ice. This applies domestic water supply. both to using the appliance for the first time and also using it after it has not been used for a long period of Turning the ice cube maker on... -
Page 41: Setting The Water Quantity For The Ice Cube Tray E
Making Ice Cubes Turning the ice cube maker off Setting the water quantity for the ice cube tray E The ice cube maker can be turned off independently of the freezer section if The size of the ice cubes that are you do not want to make any ice cubes. - Page 42 Making Ice Cubes ^ You can change the water quantity within levels 1 to 8 by tapping the button for setting the temperature in the freezer section. ^ We recommend increasing the water quantity by one level only (first to E4) and then check whether the ice cubes are big enough.
-
Page 43: Arranging The Interior - Freezer Section
Arranging the Interior - Freezer Section Freezer drawers Adjusting the separators Both freezer drawers can be used for You can adjust the separators in the freezing and storing food. lower freezer drawer according to your needs. The ice cube container in the upper freezer drawer is only suitable for ice cubes. -
Page 44: Removing The Freezer Drawer Containers
Arranging the Interior - Freezer Section Removing the freezer drawer containers You can remove the freezer drawer containers for better cleaning. ^ Lift the container at the front left and right (1) and push it slightly backwards (2). ^ Lift the container out. ^ Replace the container by reversing the removal procedure. -
Page 45: Defrosting
Defrosting Refrigerator section Freezer section The refrigerator defrosts automatically. The appliance is equipped with a "NoFrost" system for automatic During normal operation, condensate defrosting as needed. and frost can form on the back wall of the refrigerator section. You do not The moisture generated in the need to remove this, as it will defrost appliance collects on the condenser,... -
Page 46: Cleaning And Care
– dishwasher cleaner, For stainless steel surfaces, use the – oven sprays, Miele stainless steel conditioner (see – glass cleaners, "Guide to the appliance - Optional accessories". – abrasive hard sponges and brushes... -
Page 47: Before Cleaning
The accessories are not dishwasher safe. ^ Clean dirty stainless steel surfaces with the Miele stainless steel conditioner. ^ Always wipe these surfaces with Miele stainless steel conditioner im- mediately after each cleaning. -
Page 48: Cleaning The Ice Cube Tray
Cleaning and Care Cleaning the ice cube tray Setting the ice cube maker to the vacation state for cleaning I The ice cubes freeze in the ice cube tray before they fall into the ice cube Setting the ice cube maker to the drawer. -
Page 49: Door Seal
Cleaning and Care ^ Tap the button for setting the After cleaning temperature in the freezer section ^ Replace the upper freezer drawer until I c appears in the lower together with the ice cube container temperature display. and close the drawer completely. ^ Touch the Super button again to ^ Turn the ice cube maker on. -
Page 50: Cleaning The Air Filter
Cleaning and Care Cleaning the air filter [ ^ Clean the air filter in the dishwasher or by hand with lukewarm water and ^ The air filter should be cleaned when dishwashing liquid. the air filter symbol [ on the control ^ Replace the air filter by reversing the panel comes on. -
Page 51: Resetting The Air Filter Indicator
Cleaning and Care Resetting the air filter indicator After cleaning ^ Replace all shelves and accessories The air filter indicator [ must be reset in the appliance. after each filter cleaning. ^ Plug in the power cord and turn the appliance on. -
Page 52: Problem Solving Guide
To prevent cold from escaping, open the appliance doors as little as possible until the malfunction has been corrected. Installation, repair and maintenance work should only be performed by a Miele authorized service technician to avoid potential hazards. Work by unqualified persons could be dangerous for the user. - Page 53 Problem Solving Guide The compressor runs more and more often and for longer periods of time, the temperature in the appliance drops. Problem Possible cause Solution ^ Correct the temperature The temperature in The temperature setting is setting. the appliance is too too low.
- Page 54 Problem Solving Guide Problem Possible cause Solution ^ Do not block the The ventilation slits in the ventilation slits. base of the appliance are blocked or dusty. ^ Clean the ventilation slits on a regular basis. ^ Only open the doors or The door or the drawers were opened frequently, or the drawers when...
- Page 55 Problem Solving Guide The compressor comes on less and less often and for shorter periods of time, the temperature in the appliance rises. Problem Possible cause Solution ^ Correct the temperature The temperature in This is not a fault! setting. the appliance is too high.
- Page 56 Problem Solving Guide Indication in the display Problem Possible cause Solution ^ Touch the Alarm button. The electrical power The temperature in the failure t indicator is appliance rose too much in Now the highest on and the the past days or hours temperature that occurred temperature because of a power...
- Page 57 Problem Solving Guide Interior lighting Problem Possible cause Solution ^ Call Customer Service. The interior lighting The interior lighting is not working. automatically switches off if The LED lighting may only the door has been open for be repaired by Customer approx.
- Page 58 Problem Solving Guide Other problems Problem Possible cause Solution ^ Use a blunt instrument Food has frozen The food packaging was (such as a spoon handle) together or to the not dry when loaded in the to carefully pry them wall.
- Page 59 Problem Solving Guide Problems with the ice cube maker Problem Possible cause Solution ^ Plug in the power cord You cannot switch The appliance is not the ice cube maker connected to the power and turn the appliance on. supply or is not turned on. ^ Turn the appliance and The ice cube maker The appliance or the ice...
- Page 60 Problem Solving Guide Problems with the ice cube maker Problem Possible cause Solution ^ Empty the ice cube The ice cubes have The ice cube maker is not an unpleasant used very often. Ice cubes container if you are not odour or flavour that are stored for a long going to use it for a long...
-
Page 61: Noises
Noises Normal noises What causes them? Brrrrr... Humming noise made by the compressor motor. When the motor starts, this noise may be louder for a brief period. Blubb, blubb..A gurgling noise can be heard when the coolant circulates through the pipes. Click.. -
Page 62: Customer Service / Warranty
The telephone number of the factory customer service can be found on the back cover of this manual. Your dealer or Miele will require the mo- del and serial number of your appliance. This information can be found on the data plate inside the appliance. -
Page 63: Information For Test Facilities
Information for Test Facilities All tests must be carried out according to the applicable standards and regulations. In addition, the following information provided by the manufacturer must be observed: – Loading instructions, – Information contained in the Operating and installation instructions. -
Page 65: Installation Instructions
Installation instructions Information is subject to change. Please refer to our website to obtain the most current product specification, technical & warranty information. To prevent accidents and machine damage read these instructions before installation or use. -
Page 66: Caring For The Environment
Caring for the Environment Disposing of the packaging Disposing of your old materials appliance The packaging materials help protect Old electric and electronic equipment the appliance during transport. They still contains useful materials that can have been selected from be recovered. However, it may also environmentally responsible materials contain harmful substances that were and are intended to be recycled. -
Page 67: Installation Information
Installation Information Location Safe operation of the appliance is The appliance should not be installed only assured if it has been installed directly next to a heat source (such as and connected in accordance with a kitchen range or a heater) or under a these operating and installation window in direct sunlight. -
Page 68: Climate Class
The appliance is supplied with fixed The sidewalls of the installation niche hinges. If the door needs to be must be even. hinged on the opposite side, contact Miele Customer Service. Do NOT under any circumstances change the door hinging yourself! -
Page 69: Proper Ventilation
Installation Information Proper ventilation Use only the matching base cover with the ventilation slits! If there is insufficient ventilation, the compressor will run more often and over a longer period of time. This results in higher energy consumption and a higher compressor temperature which can damage the compressor. -
Page 70: Installation Dimensions
Installation Dimensions Before installing the appliance, make sure that the cabinet has the exact specified dimensions. KFN 9855 iDE 3" 79-13/16" 29-7/8" 24" 551/4" 37-1/8" (76 mm) (2,027 mm) (757 mm) (610 mm) (1,413 mm) (952 mm) -
Page 71: Opening Angle Of The Door
Installation Dimensions Opening angle of the door Ensure that there is sufficient space at the installation location for the door to open wide enough. a This dimension line indicates the height measured from the floor. These measurements do not take the cabinet front and the door handle into account;... -
Page 72: Niche Dimensions
Niche Dimensions The location of the electrical outlet can be within a radius of 80 inch from the appliance top center. Do not install the electrical outlet behind the appliance! Cabinet Width Inset cabinet Frameless/facefra Cabinet Height Depth me cabinet Depth 30"... -
Page 73: Door Swing Clearance
Door Swing Clearance a Top View b Right side wall of appliance housing c Front of appliance housing d Front panel - door closed e Front panel - door opening angle = 115° f Panel thickness... -
Page 74: Planning The Water Connection
Planning the Water Connection Do not install the shut-off valve behind the appliance! Water line feed-in (D) from left or right The water line lead-through for the above the anti-tipping bracket. water supply line (E) is at the bottom right of the appliance:... -
Page 75: Information Concerning The Cabinet Front
Cabinet frame b Door panel Cabinet opening A Refrigerator door Stainless steel fronts are available panel B through Miele customer service. 80" 45-1/4" (2,032 mm) (1,150 mm) Please take into account the following information concerning the cabinet front: –... -
Page 76: Frameless Installation Style
Information Concerning the Cabinet Front Frameless installation style With this installation style, these wider appliance panels partially overlay the shared side gables of adjacent cabinetry so as to mimic the look of a frameless style cabinet. a Cabinet frame b Door panel Cabinet opening C Refrigerator door Please take into account the... -
Page 77: Installing The Appliance
Installing the Appliance Before installation Installing the anti-tipping brackets Warning! The anti-tipping brackets keep the This appliance is very heavy and appliance safely secured in the can tip forwards when the door is installation niche and prevent tipping. open. Make sure that there is no water ^ Before installation, take any hose or electric cable in the accessories out of the appliance... - Page 78 Installing the Appliance ^ Depending on the floor and walls of the room, select the installation method for the bracket from the following options: A, B, C or D. – Affixing to a wooden floor (screws: 6 x 63 mm) (15/64'' x 2 1/2'') –...
-
Page 79: Installation Of The Anti-Tipping Bracket In A Cabinet Of More Than 25" Depth
Installing the Appliance Installation of the anti-tipping bracket The anti-tipping bracket must be in a cabinet of more than 25" depth. level after installation even if the floor The anti-tipping bracket assures proper is not level. Install the wooden functioning up to a cabinet depth of 24 spacer in an appropriate position. -
Page 80: Pushing The Appliance Into The Niche
Installing the Appliance Pushing the appliance into the Aligning the appliance niche Prepare the water and electrical connections. ^ Use the supplied wrench to adjust ^ Gently push the appliance into the the front feet so that the appliance is niche until the back of the appliance level a. -
Page 81: Securing The Appliance In The Niche
Installing the Appliance Securing the appliance in the Aligning the appliance door niche The appliance comes with the door properly aligned. Realignment may be necessary if the door is heavily loaded. ^ Push the hinged side of the appliance to the cabinet wall. ^ Connect the appliance to the cabinet ^ Loosen the screws a. -
Page 82: Aligning The Drawer Front
Installing the Appliance Aligning the drawer front Install the base cover with the ventilation slits You can adjust the fronts of the freezer drawers if necessary. Side view of the freezer drawer pulled out ^ Remove the lower freezer drawer. ^ Remove the blue protective film from the supplied air filter. - Page 83 Installing the Appliance ^ Insert the base cover retainers on ^ Insert the locking pins on both sides both sides into the appliance to secure the retainers in the housing. appliance housing. ^ Now install the base cover with the ventilation slits.
-
Page 84: Removing The Mounting Rails
Installing the Appliance Both mounting rails will later be fastened to the furniture front of the refrigerator door. ^ To adjust the base cover height, first loosen the headless screws at the cover front and adjust the cover height. ^ Then tighten the headless screws. ^ Remove the cover caps and loosen the screws on both sides. -
Page 85: Installing The Mounting Rails On The Furniture Front / Furniture Covers
Installing the Appliance Installing the mounting rails on drawers b. Align the mounting rails according to the dimensions in the furniture front / furniture illustration detail C. covers ^ Fasten the mounting rails to the furniture covers with at least 3 screws (5/32'' x 5/8'')(4 x 16 mm). -
Page 86: Aligning The Furniture Front
Installing the Appliance Aligning the furniture front ^ Open the refrigerator door and hang the furniture front from above onto the adjustment bolts. ^ Loosely screw the nuts onto the To vertically align the furniture front with adjustment bolts. the adjacent furniture doors, ^ Close the appliance door and check ^ loosen the nuts again and adjust the the distances to the adjacent... - Page 87 Installing the Appliance To horizontally align the furniture front with the adjacent furniture doors, ^ Tighten the adjustment bolts on the lower side of the appliance door until the mounting rail sits tight on the appliance door. ^ slide the furniture door to the respective side (via the long holes in the mounting rails).
- Page 88 Installing the Appliance To adjust the depth of the furniture front, ^ Attach the upper cover piece a. ^ Attach the supplied seals b between appliance door and furniture front. ^ loosen the three screws located on the upper side of the upper mounting rail.
-
Page 89: Installing The Furniture Covers On The Freezer Drawers
Installing the Appliance ^ Now do the same on the lower Installing the furniture covers freezer drawer. on the freezer drawers ^ When finished, close the gap between the freezer drawer and the furniture cover with the supplied adhesive seal. ^ Remove the protective foil from the adhesive side of the seal and stick the seal onto the upper edge of the... -
Page 90: Plumbing
Plumbing – A separate shut-off valve must be All plumbing work should be carried installed, so that the water supply out by a suitably qualified and can be interrupted as needed. If competent person, in accordance there is none, have a water valve with all applicable local and national installed by a licensed plumber. -
Page 91: Connecting The Water Supply
Plumbing Connecting the water supply The solenoid valve on the appliance has a metric R3/4 male connector. Before any installation or An R 3/4 (metric) to a 1/4" OD adapter is included with the ice maker. maintenance work is performed, make sure that the appliance is disconnected from the electrical supply. - Page 92 Plumbing ^ Gently push the appliance into the niche until the back of the appliance slides into the anti-tipping bracket (see "Installing the appliance".) ^ Screw the OD adapter onto the solenoid valve. ^ Open the shut-off valve for the water supply and check the entire water ^ Remove the cover from the valve system for leaks.
-
Page 93: Electrical Connection
Electrical Connection Connect this appliance to a 110 – If the outlet is not easily accessible, a 120 VAC, 15 amp circuit with a circuit disconnect device for each pole must breaker or fuse. This appliance should be provided. Acceptable disconnect have its own separate grounded circuit. - Page 94 Electrical Connection Do not ground to a gas pipe. Check with a qualified elictrician if you are not sure the appliance is properly grounded. Do not have a fuse in the neutral or grounding curcuit. Electrocution hazard Electrical grounding required. This appliance is equipped with a three-prong (grounding) polarized plug for your protection against...
- Page 96 Subject to change without notice / 1913 M.-Nr. 09 634 400 / 00 KFN 9855 iDE...
Need help?
Do you have a question about the KFN 9855 iDE and is the answer not in the manual?
Questions and answers