Miele KFNS 37432 iD Operating And Installation Instructions
Hide thumbs
Also See for KFNS 37432 iD:
- Operating and installation instructions (104 pages) ,
- Operating instructions manual (92 pages) ,
- Installation instructions manual (32 pages)
Table of Contents
Advertisement
Quick Links
Advertisement
Table of Contents

Related Manuals for Miele KFNS 37432 iD


Summary of Contents for Miele KFNS 37432 iD
- Page 1 Operating and installation instructions Fridge-freezer combination KFNS 37432 iD To avoid the risk of accidents or damage to the appliance it is essential that you read these instructions before installing the appliance and using it for the first time. en - CA...
-
Page 2: Table Of Contents
Contents Guide to the appliance ..........5 Optional accessories . - Page 3 Contents Arranging the interior ..........42 Adjusting the door shelf / bottle shelf .
- Page 4 Contents Installation information ..........74 Side-by-side.
-
Page 5: Guide To The Appliance
Guide to the appliance Control panel a Switches the entire appliance e Sets the temperature on and off (X = colder), Selector button in Settings mode b Optical interface f Confirms a selection (OK button) (for Service technicians only) c Selects the refrigerator or freezer g Sets the temperature section (Y =warmer),... - Page 6 Guide to the appliance Explanation of symbols Symbol Meaning Function Safety lock Secures against unintended switching off of the appliance, unintended temperature adjustment, unintended switching on of SuperCool and SuperFreeze, and unintended entry of settings Audible tones Selection options for keypad tone and alarm tones for door and temperature Display brightness For adjusting the brightness of the display...
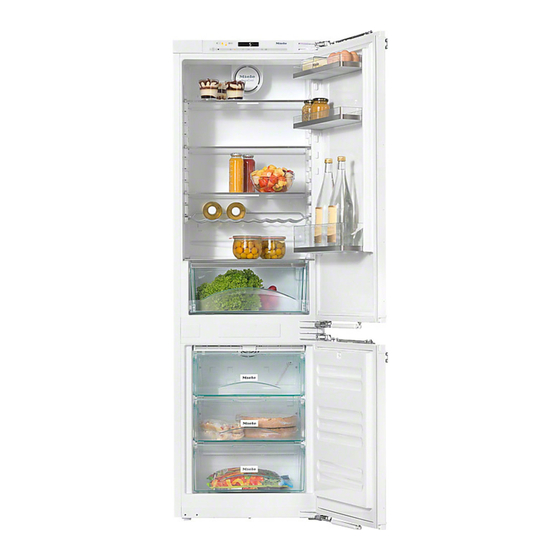
- Page 7 Guide to the appliance a Control panel b Fan c Egg tray / Door shelf d Adjustable shelf e Adjustable shelf with lighting (FlexiLight) f Bottle shelf g Bottle rack h Interior lighting for fruit and vegetable drawer i Fruit and vegetable drawer j Condensate channel and drain hole k Freezer drawers...
-
Page 8: Optional Accessories
Optional accessories are available from the Miele Customer Contact Centre, from your Miele dealer or The bottle rack can be used to store online. bottles in the refrigerator horizontally, thus saving space. -
Page 9: Warning And Safety Instructions
They contain important notes on installation, safety, use and maintenance. Miele cannot be held liable for damage occurring as a result of non-compliance with these instructions. Keep these instructions in a safe place and ensure that new users are familiar with the contents. - Page 10 The appliance is also not suitable for use in areas where there is a risk of explosion. Miele cannot be held liable for damage occurring as a result of incorrect or improper use or operation.
- Page 11 – Ventilate the room in which the appliance is located for several minutes, – Contact Miele. The more refrigerant there is in an appliance, the larger the room it should be installed in. In the event of a leakage, there is a danger of combustible gases building up if the appliance is in too small of a room.
- Page 12 If the power cable is damaged, it must be replaced by an authorized Miele technician in order to avoid any danger to the user. Do not use a power strip or extension cord to connect the appliance to electricity.
- Page 13 Any repairs not performed by a Miele authorized service technician will void the warranty. Miele can only guarantee the safety of the appliance when genuine Miele spare parts are used. Defective components must only be replaced by genuine Miele spare parts.
- Page 14 Warning and safety instructions Proper use The appliance is designed for use within a certain climate class (room temperature range) and should not be used outside this range. The climate class for your appliance is stated on the data plate inside the appliance. Operation in a room which is too cold will cause the compressor to switch off for longer periods so that the appliance cannot maintain the required temperature.
- Page 15 Only use genuine original Miele accessories and spare parts. Using accessories or spare parts from other manufacturers will void the warranty, and Miele cannot accept liability for damage caused by the use of such parts.
- Page 16 Warning and safety instructions Cleaning and care Do not use any oils or grease on the door seals. Over time, they will cause the seals to deteriorate and become porous. Do not use a steam cleaner to clean or defrost this appliance. Steam could reach electrical components and cause a short circuit.
- Page 17 Warning and safety instructions Transporting the appliance Always transport the appliance in an upright position and in its original transport packaging to avoid damage in transit. Due to the size and weight of the appliance, it must be transported by two people. Danger of injury and damage to the appliance! Disposal of your old appliance There is a risk of suffocation.
-
Page 18: How To Save Energy
How to save energy Normal energy Increased energy consumption consumption Installation/ In a ventilated room. In an enclosed, Maintenance unventilated room. Protected from direct In direct sunlight. sunlight. Away from heat sources Near a heat source (radiator, (radiator, oven). stove/oven). Where the ideal room Where there is a high room temperature is approx. - Page 19 How to save energy Normal energy Increased energy consumption consumption Drawers and shelves arranged as they were when the appliance was delivered. Only open the door when Frequent opening of the door necessary and as briefly as for long periods will cause a possible.
-
Page 20: Switching On And Off
Switching on and off Before using for the first time Accessories – Bottle holder Packaging material The fins of the bottle holder project into ^ Remove all packaging materials from the bottle shelf and help to better the inside of the appliance. stabilize bottles when the appliance door is opened or closed. -
Page 21: Operating The Appliance
Switching on and off Operating the appliance When the refrigerator door is opened, the interior lighting comes on and the A light touch of the sensor buttons with LED lighting on the adjustable shelves a finger is all that is necessary to becomes brighter until it reaches its operate this appliance. -
Page 22: Switching Off The Appliance
Switching on and off Switching off the appliance Individual settings can be configured for each cooling zone. ^ Touch the On/Off button. If this is not possible, the safety lock is active. ^ Touch the appropriate sensor button In the display, the temperature will to adjust the settings for the desired disappear and the electrical connection zone. -
Page 23: Switching The Refrigerator Back On Again
Switching on and off Switching off for longer Switching the refrigerator back on again periods of time The refrigerator can be switched on If you intend to not use the appliance separately. for a longer period of time, e.g. while on vacation: ^ Switch the appliance off ^ Unplug the power cord from the... -
Page 24: The Correct Temperature
The correct temperature . . . in the refrigerator It is very important to set the correct temperature for storing food in the We recommend a temperature of 4°C appliance. Microorganisms will cause (39°F) in the refrigerator. food which is not stored at the correct temperature to spoil rapidly. -
Page 25: Temperature Display
The correct temperature Temperature display Setting the temperature The temperatures for the refrigerator In normal operation, the temperature and the freezer are set separately. display shows the actual mean refrigerator temperature and the current temperature in the warmest part of the freezer. Dashes will flash in the display if the temperature in the freezer is not within the displayable range. - Page 26 The correct temperature When you tap the buttons, you will see Temperature range the following changes in the display: The temperature can be adjusted: – Tapping a button once: The last – From 1°C (34°F) to 9°C (48°F) in the temperature selected flashes.
-
Page 27: Using Supercool And Superfreeze
Using SuperCool and SuperFreeze SuperCool Switching off SuperCool The SuperCool function can be used to The SuperCool function switches off rapidly reduce the temperature in the automatically after approx. 12 hours. refrigerator to its lowest setting The refrigerator will once again operate (depending on the room temperature). -
Page 28: Superfreeze
Using SuperCool and SuperFreeze SuperFreeze Switching on SuperFreeze For the best freezing results, switch on When freezing smaller quantities of the SuperFreeze function before putting food in the freezer, the SuperFreeze fresh food into the freezer. function should be switched on 6 hours beforehand. - Page 29 Using SuperCool and SuperFreeze Switching off SuperFreeze The SuperFreeze function switches off automatically after approx. 30 - 65 hours. The amount of time until the SuperFreeze function is switched off depends on the amount of fresh food that was placed in the freezer. The SuperFreeze symbol ª...
-
Page 30: Temperature And Door Alarm
Temperature and door alarm Your appliance is equipped with a warning system which ensures that If the temperature in the freezer temperature increases in the freezer do remains above -18°C (0°F) for a not go unnoticed and also prevents longer period of time, check that the energy from being wasted when a door frozen food has not started to is left open. -
Page 31: Door Alarm
Temperature and door alarm Door alarm Switching the alarm off early An alarm will sound if a door is left open If you are bothered by the sound of the for too long. The alarm symbol ; will alarm, you can switch the alarm off light up. -
Page 32: Additional Settings
Additional settings Safety lock 0 Certain settings on the appliance can only be selected in the Settings mode. The safety lock can be activated to prevent: While you are in Settings mode, the door alarm and all other error – Accidental switching off of the messages are automatically appliance suppressed, but the alarm symbol ;... -
Page 33: Temperature Unit (Celsius Or Fahrenheit)
Additional settings Temperature unit (Celsius or Fahrenheit) The temperature can be displayed in either Fahrenheit °F or Celsius °C. ^ By tapping the X or Y button, you can now select whether the safety The factory default setting is Fahrenheit °F. - Page 34 Additional settings ^ By tapping the X or Y button you can ^ Tap the buttons for setting the now select °C. temperature (X or Y) repeatedly until the °F symbol and °C symbol flash in the display. ^ Touch the OK button to confirm your selection.
-
Page 35: Audible Tones )
Additional settings Audible tones ) The appliance features audible tones such as a keypad tone and a warning tone for the door and temperature ^ By tapping the X or Y button you can alarms. now select: The keypad tone and door alarm tone 0: Keypad tone off, door alarm off can be switched on or off, but the 1: Keypad tone off, door alarm on... -
Page 36: Display Brightness S
Additional settings Display brightness s The display brightness can be adjusted to suit the lighting conditions of the room. ^ By tapping the X or Y button you can The display brightness can be changed now change the brightness of the in increments from 1 to 3. -
Page 37: Sabbath Mode
Additional settings Sabbath mode ¬ Switching on the Sabbath mode To facilitate religious customs, the appliance has a Sabbath mode. The following are turned off: – The interior lighting that comes on ^ Touch the settings button. when the door is opened All symbols available for selection will –... - Page 38 Additional settings The selection is saved and the ¬ symbol lights up. Sabbath mode is on when the ¬ symbol goes out after 3 seconds. ^ Turn Sabbath mode off when the Sabbath is over. Switching off the Sabbath mode ^ Touch the settings button to leave the Sabbath mode.
-
Page 39: Using The Refrigerator Efficiently
Using the refrigerator efficiently Different storage zones Warmest area The natural circulation of the air in the The warmest area in the refrigerator is appliance causes different temperature located in the top region of the main zones to form in the refrigerator. Cold, storage area and the door. -
Page 40: Food Which Should Not Be Stored In A Refrigerator
Using the refrigerator efficiently Food which should not be WARNING! stored in a refrigerator Danger of fire Some foods are not suitable for Do not use electrical appliances refrigeration at temperatures below 5°C inside the food storage (41°F) due to their sensitivity to cold. compartments of the appliance, Depending on the type of food, its unless they are of the type... -
Page 41: What To Be Aware Of When Shopping For Food
Using the refrigerator efficiently What to be aware of when Storing food correctly shopping for food As a rule, food should only be stored covered or packaged in the The food's freshness when it is first refrigerator. This will prevent food placed in the appliance is the most smells from affecting other foods, keep important factor in determining how... -
Page 42: Arranging The Interior
Arranging the interior Adjusting the door shelf / Adjustable shelf / Adjustable bottle shelf shelf with lighting ^ To remove the bottle shelf / The LED lighting is located on the door shelf, lift it up and pull it towards stainless steel trim of the adjustable you. -
Page 43: Adjusting The Bottle Rack
Arranging the interior Fruit and vegetable drawer Stops prevent the shelves from being pulled out accidentally. (depending on model) The fruit and vegetable drawer sits on Adjusting the bottle rack telescopic runners and can be (depending on model) removed for the purposes of loading, unloading or cleaning: The bottle rack can be placed on different levels in the appliance. -
Page 44: Freezing And Storing Food
Freezing and storing food If food is frozen quickly, the cells have WARNING! less time to lose moisture, so they Danger of fire shrink less. Do not use electrical appliances During the defrosting process, the inside the food storage lower amount of moisture lost from the cells is more easily reabsorbed by the compartments of the appliance, cells, which means that the food only... -
Page 45: Home Freezing
Freezing and storing food Home freezing some spices will change when the spices are frozen. Only freeze fresh food that is in good condition. – Placing hot foods or drinks in the freezer causes food that is already Tips for home freezing frozen to partially thaw and increases energy consumption. -
Page 46: Before Placing Food In The Freezer
Freezing and storing food Before placing food in the freezer When removing the freezer drawers, ^ When freezing more than 2 kg of please note: fresh food, switch on the The bottom drawer must always SuperFreeze function for some time remain in the appliance. -
Page 47: Defrosting Frozen Food
Freezing and storing food Defrosting frozen food Making ice cubes Frozen food can be defrosted in different ways: – In a microwave oven – In a regular oven using the "Fan" or "Defrost" setting – At room temperature ^ Fill the ice cube tray three quarters full with water and place it on the –... -
Page 48: Using The Cool Pack
Freezing and storing food Using the cool pack The cool pack prevents the temperature in the freezer from rising too quickly if there is a loss of power. This can help prolong the storage time. ^ Place the cool pack in the top freezer drawer. -
Page 49: Defrosting
Defrosting Freezer WARNING! Risk of injury and This freezer is equipped with a damage "NoFrost" system. The freezer defrosts Do not use mechanical devices or automatically. other means to accelerate the defrosting process, other than those The moisture generated in the appliance collects on the evaporator, recommended by the manufacturer. -
Page 50: Cleaning And Care
(contacts) in the To clean stainless steel surfaces on left-hand side shelf support. the appliance, use the Miele care product for stainless steel (see Cleaning water must not get into the "Guide to the appliance - Optional condensate drain hole. -
Page 51: Adjustable Shelf / Adjustable Shelf With Lighting
Cleaning and care Before cleaning Stainless steel trim with LED ^ Switch the appliance off lighting The display goes dark and cooling is Important! Always loosen the side switched off. without the contacts (metal discs) If this is not the case, the safety lock for the LED lighting first. -
Page 52: Interior And Accessories
Cleaning and care Interior and accessories Door shelf and bottle shelf Clean the appliance regularly (at The stainless steel covers on the least once a month). door shelves and bottle shelf are not dishwasher-safe. Clean up any spills, stains or food im- mediately. -
Page 53: Door Seals
^ Remove any spills, stains or food on stainless steel trim and covers with the Miele care product for stainless steel. ^ Always apply this care product after cleaning to protect the stainless steel... -
Page 54: After Cleaning
Cleaning and care After cleaning ^ Return all shelves and accessories to the appliance. The left-hand side support ribs for the adjustable shelves have metal discs (contacts) inside the insertion slot to supply the LED lighting with electricity. Ensure that these contacts are clean and dry before inserting the adjustable shelf with lighting. -
Page 55: Troubleshooting
To prevent an unnecessary decrease in temperature, avoid opening the appliance door until the problem has been resolved. Installation, maintenance and repair work should only be performed by a Miele authorized service technician. Installation, maintenance and repair work by unqualified persons can cause considerable danger to users. - Page 56 Troubleshooting The compressor runs more and more frequently and for longer periods of time, and the temperature in the appliance drops. Problem Cause Solution ^ Correct the temperature The temperature in The temperature setting is setting. the appliance is too too low.
- Page 57 Troubleshooting The compressor runs more and more frequently and for longer periods of time, and the temperature in the appliance drops. Problem Cause Solution ^ Do not block the The compressor The ventilation openings in runs more and more the cabinet unit are covered ventilation openings.
- Page 58 Troubleshooting The compressor comes on less and less often and for shorter periods of time. The temperature in the appliance rises. Problem Cause Solution ^ Correct the temperature The temperature in This is not a fault. setting. the appliance is too high.
- Page 59 Troubleshooting Information in the display Problem Cause Solution ^ Eliminate the cause of the The alarm symbol The affected appliance ; and the sensor alarm. The alarm symbol section is warmer or colder ; will disappear and the button for an than the set temperature sensor button for the appliance section...
- Page 60 Troubleshooting Interior lighting Problem Cause Solution ^ Push in the shelf until it The LED lighting on The adjustable shelf is not clicks into position. one of the positioned correctly in the adjustable shelves support ribs. does not work. ^ Wipe the stainless steel The LED lighting on Liquid has come into trim with LED lighting...
- Page 61 LED stainless steel trim is faulty. lighting. It is available from the Miele Customer Contact Centre or your Miele dealer. Do not remove the light cover. If the cover is damaged or has been removed as a result of being damaged, use caution.
- Page 62 If this is not the case, then Centre. there is a fault. The LED lighting may only be repaired or replaced by a Miele authorized service technician. There are live electrical components under the lighting cover. Risk of injury and damage! Do not remove the light cover.
- Page 63 Troubleshooting Other problems Problem Cause Solution ^ Use a blunt object, e.g. Food has frozen The food's packaging was the handle of a spoon, to together. not dry when placed in the pry it apart carefully. freezer. None required. An alarm does not This is not a fault.
-
Page 64: Noises
Noises Normal noises How are they caused? Brrrrr ... A humming noise is made by the motor (compressor). This noise can get louder for brief periods when the motor switches on. Blubb, blubb ... The refrigerant makes bubbling, gurgling and hissing noises as it flows through the pipes. -
Page 65: Customer Service / Warranty
– Your Miele dealer For more information on the manufacturer's warranty specific to your country, please contact Miele. – The Miele Customer Contact Centre The telephone number can be found The telephone number for the at the back of this booklet. -
Page 66: Information For Test Institutes
Information for test institutes All tests must be carried out according to applicable standards and regulations. In addition, the following information provided by the manufacturer must be observed when preparing and performing appliance tests: – Loading instructions The cool packs (depending on mo- del) must be arranged in the appliance according to the loading instructions when determining the... -
Page 67: Information For Dealers/Retailers
Information for dealers/retailers Demo mode r This appliance can be presented in retails stores and in showrooms with the help of the "Demo mode." The controls ^ Place your finger on the X button and and lighting will still work, but the hold it there. - Page 68 Information for dealers/retailers Switching off the Demo mode The r is illuminated in the display. ^ Tap the X or Y button so that 0 appears in the display (Demo mode is inactive). ^ Touch the settings button. All symbols available for selection will appear in the display and the 0 symbol flashes.
-
Page 70: Installation Instructions
Installation instructions Information is subject to change. Please refer to our website to obtain the most current product specification, technical & warranty information. To prevent accidents and machine damage read these instructions before installation or use. -
Page 71: Caring For The Environment
You can return the packaging to your Miele dealer. Instead, please dispose of your old appliance at your local community waste collection / recycling centre. -
Page 72: Electrical Connection
Electrical connection Failure to follow these Electrocution hazard instructions can result in death, fire, Electrical grounding required. This or electrical shock. appliance is equipped with a three-prong (grounding) polarized Improper connection of the plug for your protection against equipment grounding conductor possible shock hazards. - Page 73 Electrical connection The appliance must be connected to an Do not use an extension cord to electrical outlet that is properly connect the appliance to the power grounded. The electrical installation supply. Extension cords do not must comply with the applicable guarantee the required safety of the electrical code.
-
Page 74: Installation Information
– The power outlet must not be located directly behind the appliance and Side-by-side must be easily accessible in an The KFNS 37432 iD has two side-wall emergency. heaters encased in foam and can be – The plug and power cable must not... -
Page 75: Climate Class
Installation information Climate class sufficient space for ventilation (see "Installation dimensions"): The appliance is designed for use within a certain climate class (room temperature) and should not be used outside this range. The climate class for your appliance is stated on the data plate inside the appliance. -
Page 76: Ventilation Grill
Installation information Ventilation grill Top ventilation opening There are different options available for During construction the ventilation grill constructing the top ventilation can be built-in. opening: ^ Cut an opening into the plinth b, as shown in the illustration above. ^ Place the ventilation grill a into the a Directly above the appliance with a cut-out. -
Page 77: Before Installing The Appliance
Installation information Before installing the appliance ^ Before installation, remove the accessories bag with the installation components and other accessories from the appliance, and remove the sealing strip from the appliance door. ^ Do not remove any of the following from the back of the appliance: ^ Open the appliance door and remove the red transport clips a (depending... -
Page 78: Installation Dimensions
Before installation, make sure that the cabinet space matches the required dimensions. The specified measurements for the ventilation openings must be adhered to in order to ensure the proper functioning of the appliance. Height of space [mm] Freezer [mm] KFNS 37432 iD 1772 – 1788... -
Page 79: Adjusting The Door Hinges
Adjusting the door hinges The factory setting for the door hinges allows them to open at a wide angle. However, if the opening angle of the door needs to be limited for any reason, the hinge can be adjusted to accommodate this. -
Page 80: Reversing The Door Hinging
Reversing the door hinging ^ Open both appliance doors. When reversing the door hinging, ^ Remove the shelves / bottle shelf always enlist the help of another from the appliance door. person. The appliance comes with right-hand door hinging. If left-hand hinging is required, the door hinging must be reversed: To reverse the door hinging, you will... - Page 81 Reversing the door hinging ^ Slightly loosen the screws e and f ^ Remove the screws e completely. on the hinges. ^ Place the mounting bracket i on the ^ Slide the doors g and h outwards opposite side and loosely screw in the screws e.
- Page 82 Reversing the door hinging Carry out the following steps on both doors. Removing the soft-close mechanism Caution! When removed from the appliance, the soft-close mechanism will snap shut. Risk of injury! ^ Using a screwdriver, remove the ball ^ After detaching the door, lay it face joint l and screw it into the adjacent down on a stable surface.
- Page 83 Reversing the door hinging Attaching the soft-close mechanism ^ Now turn over the appliance door so that it lies face down. ^ Screw the mount k onto the hinge and firmly tighten. ^ Pull the soft-close mechanism so that ^ Slide the appliance doors g and h it extends j and hook it onto the ball onto the premounted screws e and joint.
-
Page 84: Installing The Appliance
Installing the appliance To install the appliance, you will Two people are required to install the need the following tools: appliance. ^ The appliance must be installed in a stable, solid cabinet unit that is positioned on an even and level floor. ^ Secure the cabinet unit against tipping. -
Page 85: Preparing The Appliance
Installing the appliance You will need the following – For mounting the cabinet door: installation components Each installation component is designated by a number. The component's number can also be found in the installation steps on the following pages. – For installing the appliance in the cabinet space: All installations instructions shown here are for a right-hand door... - Page 86 Installing the appliance ^ Slide the appliance two-thirds of the way into the cabinet space. Make sure that the power cable does not get caught in the process. Tip for sliding the appliance: Tie a piece of string around the plug to "extend"...
- Page 87 Installing the appliance ^ Now screw the adjustable feet l all the way in. ^ Remove the cover f. ^ Loosely screw the mounting bracket g onto the top left corner of the appliance using the screws h. Do not tighten the screws; the bracket should still be able to slide from side to side.
- Page 88 Installing the appliance ^ Check again to see whether the top Installing the appliance and bottom mounting brackets touch ^ Slide the appliance into the cabinet the front edge of the cabinet side space until the covers of the wall. mounting brackets touch the front edge of the cabinet side wall.
- Page 89 Installing the appliance Securing the appliance in the cabinet space ^ Slide the loose bracket against the cabinet wall. ^ Fasten the mounting bracket j to the ^ Push the hinged side of the cabinet side wall using the screw s. appliance against the cabinet wall.
- Page 90 Installing the appliance For added stability of the appliance in the cabinet unit, slide the included rods between the cabinet floor and the bottom of the appliance: ^ Snap the protruding ends off of the mounting brackets. They are no longer needed and can now be disposed of.
-
Page 91: Mounting The Cabinet Doors
Ib (kg) Ib (kg) When installing the appliance in an array of kitchen units, the top edge of KFNS 37432 iD 44 (20) 26 (12) the cabinet door must be at the same height as the cabinet doors of the adjacent units. - Page 92 Installing the appliance Carry out the following steps on both doors. Tip: Slide the fitting aids b and the cabinet front up to the height of the adjacent cabinet unit doors. ^ The factory setting for the distance between the appliance door and the mounting frame is 8 mm.
- Page 93 Installing the appliance ^ Lay the cabinet door face down on a stable surface. ^ Slide the side cover q onto the mounting frame on the side opposite of the hinges. ^ Turn the furniture door over and attach the handle (if necessary). ^ Using a pencil, lightly mark a line down the centre of the inside of the cabinet door e.
-
Page 94: Adjusting The Position Of The Door
Installing the appliance ^ Open the appliance door. Adjusting the position of the door ^ Hang the cabinet door onto the – Lateral adjustments (X) alignment bolts h. ^ Move the cabinet door. ^ Loosely screw the nuts c onto the –... - Page 95 Installing the appliance ^ Drill the mounting holes l in the ^ Tighten the nuts c on each of the cabinet door and fasten the screws appliance doors using a box-end m. Make sure the two metal edges wrench j while holding the alignment bolts c in place using a are aligned flush with one another (Symbol II).
- Page 96 Installing the appliance ^ Tighten all screws again. The following confirm that the appliance has been correctly installed: – The doors close properly. – The doors do not touch the cabinet body. – The seals at the top corner of the handle side fit tightly.
- Page 100 KFNS 37432 iD en - CA M.-Nr. 09 969 830 / 01...
Need help?
Do you have a question about the KFNS 37432 iD and is the answer not in the manual?
Questions and answers