Miele KFN 9753 iD Operating And Installation Instructions
Hide thumbs
Also See for KFN 9753 iD:
- Operating and installation instructions (56 pages) ,
- Operating and installation instructions (60 pages) ,
- Operating and installation instructions (22 pages)
Table of Contents

Related Manuals for Miele KFN 9753 iD


Summary of Contents for Miele KFN 9753 iD
- Page 1 Operating and Installation Instructions Fridge-Freezer Combination KFN 9753 iD en - CA, US To prevent accidents and machine damage read these instructions before installation or use. M.-Nr. 07 270 540 Downloaded from Fridge-Manual.com Manuals...
-
Page 2: Table Of Contents
Contents IMPORTANT SAFETY INSTRUCTIONS....... . . 4 Description of the appliance ......... 7 Before use . - Page 3 Contents Frequently asked questions ........27 Noises .
-
Page 4: Important Safety Instructions
Use only as machine for any visible damage. A described in this Operating manual. damaged machine is dangerous. Contact the Miele Service Department. Only use this appliance for its intended purpose. The manufacturer Do not use an extension cord to cannot be held responsible for connect this appliance to electricity. - Page 5 Installation and repair work should After your appliance is in operation be performed by a Miele authorized do not touch the cold surfaces in the service technician. Work by unqualified machine, ice cubes or frozen food, persons could be dangerous and may particularly when hands are damp or void the warranty.
-
Page 6: Disposal Of Your Old Appliance
IMPORTANT SAFETY INSTRUCTIONS Do not use defrosting sprays or Your old refrigerator may have a de-icers, as they might contain cooling system that used CFC's substances which could damage the (chlorofluorocarbons). CFC's are plastic parts or which could cause a believed to harm stratospheric ozone. -
Page 7: Description Of The Appliance
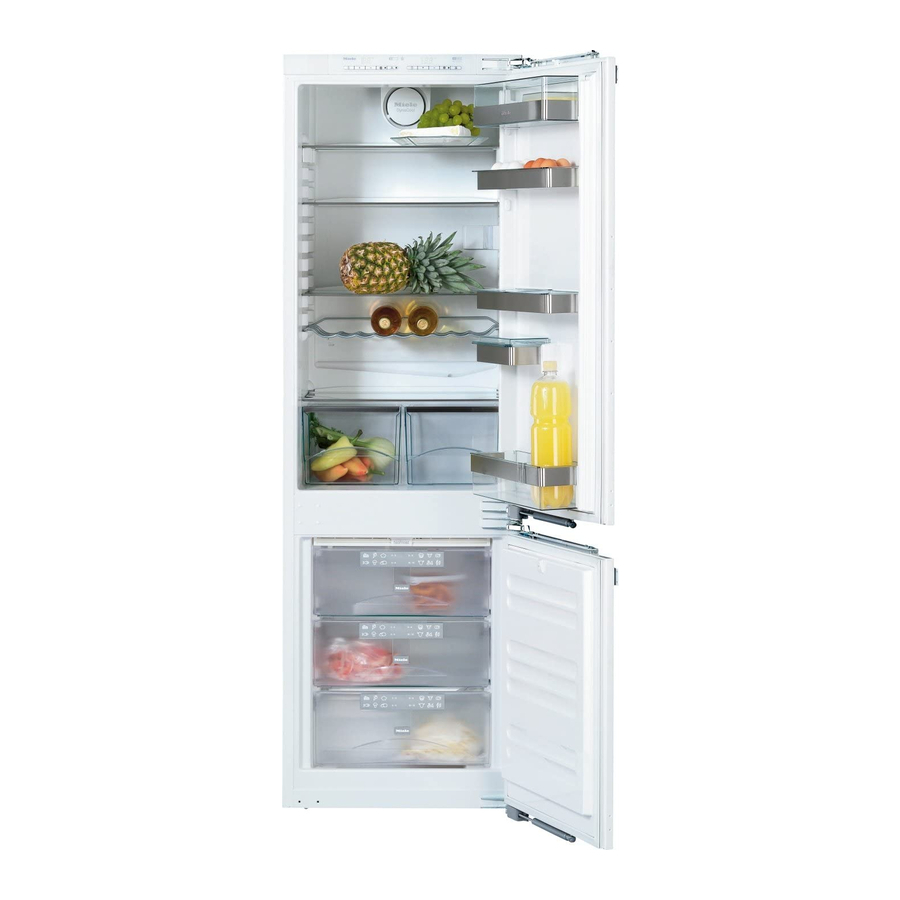
Description of the appliance a On/Off button for independently g Master switch for switching switching the refrigerator section on the whole appliance on and off and off h Freezer section temperature display b Refrigerator section temperature i Temperature selector buttons for the display freezer section c Temperature selector buttons for the... - Page 8 Description of the appliance a DynaCool fan (dynamic cooling) b Hinged door shelf c Bottle rack d Adjustable door shelves e Interior lighting f Adjustable interior shelves g Condensate channel and drain hole h Universal container i Fruit and vegetable drawer j Divider* k Bottle shelf l Freezer drawers with...
-
Page 9: Before Use
Before use Before using for the first time The temperature display for the refrigerator section lights up, and the The stainless steel frames of the interior lighting comes on when the door shelves have a protective plastic is opened. coating to prevent scratching during Bars light up in the freezer section transportation. -
Page 10: Turning The Appliance On/Off
Before use Turning the appliance on/Off Activating/Deactivating the safety lock Turning the refrigerator section off The refrigerator section can be turned off separately while the freezer section remains on, e.g. during vacation. ^ Press the Super button for the freezer for approx. -
Page 11: Turning Off For Longer Periods Of Time
Before use Turning off for longer periods of time If the appliance is not going to be used for an extended time (for example, during a vacation) some precautions should be taken. ^ Take all food out of the appliance ^ Turn the appliance off at the main switch ^ Unplug the appliance... -
Page 12: Setting The Temperature
Setting the temperature Setting the temperature in the Temperature range refrigerator and freezer The temperature can be selected within sections the following ranges: The temperatures for the refrigerator – Refrigerator: and freezer sections can be set 39°F (4° C) to 48°F (9° C). independently using the temperature A temperature of 39°F (4°... -
Page 13: Temperature Displays
Setting the temperature Temperature displays The temperature displays flash if: During normal operation, the – a different temperature is being set, temperature display shows the – the temperature in the appliance has temperature in the middle of the risen by several degrees, indicating refrigerator section and the temperature that the appliance is warming up too in the warmest part of the freezer... - Page 14 Setting the temperature Temperature display brightness The brightness of the temperature display is factory-set to the lowest setting. ^ Press the main switch on the right However when the door is opened, a side on the control panel to exit the setting is changed or an alarm is settings mode.
-
Page 15: Alarm
Alarm Turning the alarm off The appliance is equipped with an alarm system, to ensure that the Once the set temperature is reached in temperature does not rise unnoticed. the freezer, the alarm signal turns off and the temperature display stops The alarm system is always flashing. -
Page 16: Using The Super And Dynacool Functions
Using the Super and DynaCool functions Super function Turning on the Super function for the refrigerator/freezer The Super function is used to rapidly reduce the temperature in the refrigerator and freezer sections to their lowest settings (depending on the room temperature). -
Page 17: Dynacool M
Using the Super and DynaCool functions DynaCool m DynaCool should also be selected if: If the dynamic cooling function – the room temperature is high (above (DynaCool) is not switched on, the approx. 86°F (30 °C), and natural circulation of air throughout the –... -
Page 18: Using The Refrigerator Efficiently
Using the refrigerator efficiently Different storage zones Coldest area Due to the natural circulation of air in The coldest area in the refrigerator the appliance, there are different section is directly above the fruit and temperature zones in the refrigerator. vegetable drawers. -
Page 19: Using The Freezer Efficiently
Using the freezer efficiently Maximum freezing capacity Placing food in the freezer To ensure that food is frozen Food to be frozen can be placed thoroughly, the maximum freezing anywhere in the freezer section. capacity should not be exceeded. Large quantities of food should be See the data plate: placed directly on the glass plates to "Freezing capacity..lb/kg/24 hrs". -
Page 20: Freezer Calendar
Using the freezer efficiently Defrosting Freezing large items If you would like to freeze large items Frozen food can be defrosted in e.g. turkey or ham, the glass plates different ways: between the drawers can be removed. – in a microwave oven, ^ Remove the top full-width freezer –... -
Page 21: Freezer Tray
Using the freezer efficiently Cool pack Cooling drinks quickly To cool drinks quickly, turn on the The cool pack prevents the Super function for the freezer. See temperature in the freezer from rising "Super" for more information. too quickly in the event of a power failure. -
Page 22: Automatic Defrosting
Automatic defrosting Refrigerator section Freezer section The refrigerator defrosts automatically. The freezer defrosts automatically. During normal operation, condensate The moisture generated in the and frost can form on the rear wall of appliance collects on the condenser the refrigerator and drawers. and is automatically defrosted and You do not need to remove this dissipated by the condenser from time... -
Page 23: Adjusting The Interior Fittings
Adjusting the interior fittings Moving the shelves To move the split shelf: ^ Remove both halves of the glass. The shelves can be adjusted according to the height of the food: ^ Lift the shelf, pull it forwards slightly, until the notch at the side is in line with the shelf support. -
Page 24: Moving The Adjustable Door Shelves
Adjusting the interior fittings Moving the adjustable door Universal container shelves Food can be stored as well as served in the universal container. ^ Lift the shelf up and out of the stainless steel frame. The universal container consists of a deep tray a and a shallow tray b. -
Page 25: Cleaning And Care
Leave the appliance doors open for a short time, so the moisture can evaporate. ^ Clean the stainless steel surfaces with a suitable stainless steel cleaner (available from Miele). This will help protect the stainless steel and prevent resoiling. Downloaded from Fridge-Manual.com Manuals... -
Page 26: Ventilation Slits
Cleaning and Care Ventilation slits ^ Check the ventilation slits regularly. Remove any dirt/dust with a vacuum cleaner or brush. Clean as needed. Door seal Do not use oil or grease on the door seals. This may cause the seals to deteriorate and become porous over time. -
Page 27: Frequently Asked Questions
Frequently asked questions With the aid of the following guide minor problems can be corrected without a ser- vice call. Repairs should only be carried out by a qualified and trained person in strict accordance with local and national safety regulations. Unauthorized repairs could cause personal injury or machine damage and may void the warranty. - Page 28 The LED lighting should only be temperature display is working, then repaired/replaced by a Miele service the lighting is defective. technician. Danger of injury or damage. The floor of the refrigerator is wet.
- Page 29 Check the display again about 6 hours after turning it on. A fault code of "F0" to "F5" appears in one of the temperature displays. A fault has occurred. Contact Miele Technical Service. The Super indicator light for the freezer section and the temperature display are both flashing.
-
Page 30: Noises
Noises Normal noises What causes them? Humming noise made by the motor (compressor). This noise Brrrrr... may get louder for brief periods, whenever the motor kicks in. Blubb, blubb..A gurgling noise can be heard when coolant is circulating through the pipes. Click.. -
Page 31: After Sales Service
After sales service In the event of a fault which you cannot easily fix yourself, please contact the Miele Technical Service Department at the address on the back of this booklet. When contacting the Technical Service department, please quote the model... - Page 32 Downloaded from Fridge-Manual.com Manuals...
-
Page 33: Installation Instructions
Installation instructions To prevent accidents and machine damage read these instructions before installation or use. Downloaded from Fridge-Manual.com Manuals... -
Page 34: Caring For The Environment
Caring for the environment Disposal of packing materials Disposal of an old appliance The cardboard box and packing Old appliances contain materials that materials are biodegradable and can be recycled. Please contact your recyclable. Please recycle. local recycling center about the possibility of recycling these materials. -
Page 35: Electrical Information
If there are any questions regarding the electrical connection of this appliance to the power supply, please consult a licensed electrician or call the Miele Technical Service. V 1-800-565-6435 Downloaded from Fridge-Manual.com Manuals... -
Page 36: Installation
Installation Installation site Have the appliance installed by a The appliance should be installed in a qualified technician, according to dry, well-ventilated room. the enclosed installation instructions. Do not install the appliance: The manufacturer is not liable for - outdoors damage to property due to an - in an environment with dripping incorrect installation. -
Page 37: Ventilation
^ Un-install the old hinges; they are no longer necessary, the custom door panel will be mounted on the appliance door. All necessary parts are included with the appliance or can be ordered from Miele. Downloaded from Fridge-Manual.com Manuals... -
Page 38: Installation Dimensions
Installation Dimensions Freezer section height Niche height KFN 9753 iD 695 (27 3/8") 1772 - 1788 (69 3/4" - 70 3/8") Downloaded from Fridge-Manual.com Manuals... -
Page 39: Adjusting The Door Hinges
Adjusting the door hinges The door hinges are pre-adjusted so If you would like to cushion the doors that the appliance doors can be for a more gentle opening, you can opened wide. increase the spring force of the appliance door: By adjusting the hinges the doors' can be modified so they do not open as far. -
Page 40: Adjusting The Door Hinges
Adjusting the door hinges ^ Slightly loosen the fastening screws Before installing the appliance, you will e at the top, middle and bottom. need to decide which side of the door you would like hinged. For and ^ Slide the appliance doors outwards left-handed door hinge, follow the and unhinge them. - Page 41 Adjusting the door hinges Removing the door closing device ^ With its exterior facing downwards, place the appliance door on a stable surface. ^ Leave the hinges open and remove the screw in the mounting a. ^ Stand the appliance doors up Caution! When uninstalled, the door individually, and loosen the hinges on closing device will snap shut.
- Page 42 Adjusting the door hinges ^ Hang the appliance doors on the Fastening the dampers pre-fitted screws and push the doors ^ With its exterior facing downwards, inward. again place the appliance door on a stable surface. ^ Screw the ball joint b of the door closing device c into the new fixing hole.
-
Page 43: Installing The Appliance
Custom door panels The total weight of the panel(s) must not exceed the following, otherwise the hinges may be damaged: KFN 9753 iD Upper door..... 31 lbs (14 kg) Lower door..... 27 lbs (12 kg) Before installing the appliance, the cabinetry must be carefully aligned using a level. -
Page 44: Preparing The Appliance
Installing the appliance ^ Push the appliance two-thirds of the Preparing the appliance way into the installation niche. Ensure that the power cord does not get caught. ^ Slide the cover strip a (nobs facing downwards) into the holder. The nobs will fit into the holes b. - Page 45 Installing the appliance ^ Open the appliance doors. Installing the appliance ^ Using the screws h (M5 x 22), screw Depending on the thickness of the the plastic bracket g to the door niche walls, push the appliance in until : opening.
-
Page 46: Attaching The Appliance To The Installation Niche
Installing the appliance Attaching the appliance to the This space must also be taken into account with cabinetry that has a installation niche receding base, even if it means that the plastic bracket d will project beyond the base of the cabinetry. ^ If the cabinetry has door stops (i.e. -
Page 47: Mounting The Custom Door Panels
Installing the appliance Mounting the custom door panels ^ Set a gap of 5/16" (8 mm) between the appliance door and the fixing bracket a. ^ Screw the screw c through the fixing bracket d. ^ Slide the mounting aids b to the height of the custom door: The lower ^ Push the bracket towards the niche edge X of the mounting aids must be... - Page 48 Installing the appliance ^ Hang the custom door on the ^ With a pencil, lightly mark a line down adjusting bolts h. the center of the inside of the custom ^ Loosely attached the nuts c onto the door. adjusting bolts. ^ Hang the fixing bracket d with the ^ Close the door.
- Page 49 Installing the appliance Securing the appliance door to the custom door panel ^ Secure the fixing bracket using the pre-drilled holes a using the (4 x ^ Close both the doors and align them 14 mm) screws b. with the adjacent cabinetry doors. Ensure that the two metal edges are ^ While holding the adjusting bolts g flush (symbol //).
- Page 50 Installing the appliance The following confirms that the appliance is installed correctly: – The doors close properly. – The doors do not touch the cabinetry. – The seal at the upper corner of the hinged-side contacts tightly. ^ To verify this, place a flashlight in the appliance and close the appliance doors.
- Page 51 Downloaded from Fridge-Manual.com Manuals...
- Page 52 Subject to change without notice / 1408 M.-Nr. 07 270 540 / 02 KFN 9753 iD Downloaded from Fridge-Manual.com Manuals...
Need help?
Do you have a question about the KFN 9753 iD and is the answer not in the manual?
Questions and answers