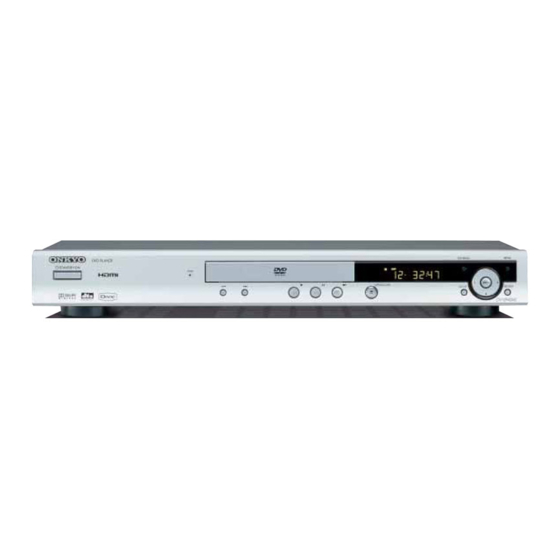
Onkyo DV-SP404 Service Manual
For usa/canada, black/ silver
Hide thumbs
Also See for DV-SP404:
- Specifications (2 pages) ,
- Instruction manual (60 pages) ,
- Specification sheet (10 pages)
Table of Contents
Advertisement
Quick Links
Download this manual
See also:
Instruction Manual
SERVICE MANUAL
SERVICE MANUAL
DVD PLAYER
DV-SP404
MODEL
(For USA/Canada, Black/ Silver)
Black and Silver models
BTUA, STUA
110-240V AC, 50/60Hz
BTDD, STDD
120V AC, 60Hz
SAFETY-RELATED COMPONENT
WARNING!!
COMPONENTS IDENTIFIED BY MARK
SCHEMATIC DIAGRAM AND IN THE PARTS LIST ARE
CRITICAL FOR RISK OF FIRE AND ELECTRIC SHOCK.
REPLACE THESE COMPONENTS WITH ONKYO
PARTS WHOSE PART NUMBERS APPEAR AS SHOWN
IN THIS MANUAL.
MAKE LEAKAGE-CURRENT OR RESISTANCE
MEASUREMENTS TO DETERMINE THAT EXPOSED
PARTS ARE ACCEPTABLY INSULATED FROM THE
SUPPLY CIRCUIT BEFORE RETURNING THE
APPLIANCE TO THE CUSTOMER.
Ref. No. 3947
ON
1
4
7
TOP MENU
RETURN
AUDIO
RC-616DV
ON THE
DV-SP404
072006
STANDBY
OPEN/
CLOSE
PLAY
MODE
2
3
DISPLAY
5
6
8
9
0
CLEAR
MENU
ENTER
SETUP
ANGLE SUBTITLE ZOOM
RC-616DV
Advertisement
Table of Contents

Related Manuals for Onkyo DV-SP404


Summary of Contents for Onkyo DV-SP404
-
Page 1: Dvd Player
COMPONENTS IDENTIFIED BY MARK ON THE SCHEMATIC DIAGRAM AND IN THE PARTS LIST ARE CRITICAL FOR RISK OF FIRE AND ELECTRIC SHOCK. REPLACE THESE COMPONENTS WITH ONKYO PARTS WHOSE PART NUMBERS APPEAR AS SHOWN IN THIS MANUAL. MAKE LEAKAGE-CURRENT OR RESISTANCE... -
Page 2: Caution
CAUTION THIS DIGITAL VIDEO PLAYER EMPLOYS A LASER SYSTEM. TO ENSURE PROPER USE OF THIS PRODUCT, PLEASE READ THIS SERVICE MANUAL CARE- FULLY AND RETAIN FOR FUTURE REFERENCE. SHOULD THE UNIT REQUIRE MAINTENANCE, CONTACT AN AUTHORIZED SERVICE LOCATION-SEE SERVICE PROCEDURE. USE OF CONTROLS, ADJUSTMENTS OR THE PERFORMANCE OF PROCEDURES OTHER THAN THOSE SPECIFIED HEREIN MAY RESULT IN HAZARDOUS RADIATION EXPOSURE. -
Page 3: Important Service Safety Information
IMPORTANT SERVICE SAFETY INFORMATION Safety precautions to be followed during servicing: Parts marked with an are critical parts for safety. Replace only with the one described in the parts list. Before returning the DVD product to the customer, make the appropriate leakage current check or resistance measurements to ensure that exposed parts are properly insulated from the supply circuit. -
Page 4: Important Safeguards
IMPORTANT SAFEGUARDS READ INSTRUCTIONS All the safety and operating instructions should be read before the unit is operated. RETAIN INSTRUCTIONS The safety and operating instructions should be retained for future reference. HEED WARNINGS All warnings on the unit and in the operating instructions should be adhered to. FOLLOW INSTRUCTIONS All operating and use instructions should be followed. - Page 5 IMPORTANT SAFEGUARDS (CONTINUED) OUTDOOR ANTENNA GROUNDING If an outside antenna or cable system is connected to the unit, be sure the antenna or cable system is grounded so as to provide some protection against voltage surges and built-up static charges. Section 810 of the National Electrical Code, ANSI/NFPA 70, provides information with respect to proper grounding of the mast and supporting structure, grounding of the lead-in wire to an antenna discharge unit, size of grounding conductors, location of antenna discharge unit, connection to grounding electrodes, and requirements for the grounding electrode.
- Page 6 IMPORTANT SAFEGUARDS (CONTINUED) EXAMPLE OF ANTENNA GROUNDING AS PER THE NATIONAL ELECTRICAL CODE ANTENNA LEAD IN WIRE GROUND CLAMP ANTENNA DISCHARGE UNIT (NEC SECTION 810-20) ELECTRIC SERVICE EQUIPMENT GROUNDING CONDUCTORS (NEC SECTION 810-21) GROUND CLAMPS POWER SERVICE GROUNDING NEC-NATIONAL ELECTRICAL CODE ELECTRODE SYSTEM (NEC ART 250, PART H) S2898A...
- Page 7 (For USA/CANADA, SILVER) SERVICE MANUAL DVD VIDEO PLAYER This SUPPLEMENT must be used together SERVICE MANUAL for DV-SP404 (For USA/CANADA, BLACK). All other test and repair procedures are as shown in the ORIGINAL MANUAL. Please file this SUPPLEMENT with the ORIGINAL VERSIONS.
- Page 8 MECHANICAL REPLACEMENT PARTS LIST DV-SP404 (For USA/CANADA, BLACK) DV-SP404 (For USA/CANADA, SILVER) REF. NO. PART NO. DESCRIPTION PART NO. DESCRIPTION 7A701A785A FRONT CABI ASS'Y 7A701A798A FRONT CABI ASS'Y 101A 701WPBA069 CABINET FRONT 701WPBA073 CABINET FRONT 101B 701WADA004 PANEL FRONT 701WADA005 PANEL FRONT...
- Page 9 MECHANICAL EXPLODED VIEW DV-SP404 (For USA/CANADA, SILVER) 101M 101D 101A 101J 101G 101I 101E 101F 101H 101K 101L 101B 101N 101C ADD: 101N...
-
Page 10: When Replacing Dvd Deck
WHEN REPLACING DVD DECK [ When removing the DVD Deck ] Before removing Pick Up PCB and DVD PCB connector, the short circuit the position shown in Fig. 1 using a soldering iron. If you remove the DVD Deck with no soldering, the Laser may be damaged. [ When installing the DVD Deck ] Remove all the soldering on the short circuit position after the connection of Pick Up PCB and DVD PCB connector. -
Page 11: Disc Removal Method At No Power Supply
DISC REMOVAL METHOD AT NO POWER SUPPLY Slide the Rack Loading (White) toward the arrow direction by using a minus driver to release the lock. (Refer to Fig. 1) Manually open the Tray. NOTE: Please strongly pushing Rack Loading (White) to release the lock because the tray doesn't go out easily. -
Page 12: About Lead Free Solder (Pbf)
ABOUT LEAD FREE SOLDER (PbF) Distinction of PbF PCB: PCBs (manufactured) using lead free solder will have a PbF printing on the PCB. (Please refer to figures.) Caution: • Pb free solder has a higher melting point than standard solder; Typically the melting point is 86°F~104°F(30°C~40°C) higher. -
Page 13: Table Of Contents
TABLE OF CONTENTS CAUTION ................................A1-1 IMPORTANT SERVICE SAFETY INFORMATION ..................... A1-2 IMPORTANT SAFEGUARDS ..........................A1-3~A1-5 WHEN REPLACING DVD DECK ........................A1-6 DISC REMOVAL METHOD AT NO POWER SUPPLY ..................A1-7 PARENTAL CONTROL- RATING LEVEL ......................A1-7 PREPARATION OF SERVICING ........................A1-7 ABOUT LEAD FREE SOLDER (PbF) ......................... -
Page 14: General Specifications
GENERAL SPECIFICATIONS DVD System Color System NTSC Disc DVD, CD-DA, CD-R/RW, Video CD, SVCD DVD-R/RW, DVD+R/+RW (w/o VCPS) Disc Diameter 120 mm , 80 mm Drive DM4PB Search speed 4 step Fwd-Actual 4, 8, 16, 32 times 4 step Rev-Actual 4, 8, 16, 32 times Slow speed 4 step... - Page 15 GENERAL SPECIFICATIONS Unit RC-LP Remote Control Unit Glow in Dark Remocon Remocon Format ONKYO Format Custom Code D2-2B Power Source Voltage (D.C) UM size x pcs UM-3 x 2 pcs Total Keys 36 Keys Power ON Power Off (STAND BY)
- Page 16 GENERAL SPECIFICATIONS Progressive Video Out DVD Features Echo Mic Mixing Digital Out (Dolby Digital) (MPEG) (PCM) (DTS) Down Mix Out (Dolby Digital) (DTS) (SACD) (DVD Audio) Surround MTK original Surround Screen Saver Auto Stop Dynamic Range Control Disc Navigator Video CD Playback SVCD Playback SACD Playback DVD Audio Playback...
- Page 17 GENERAL SPECIFICATIONS G-11 Interface Switch-Front Standby/On Play Open/Close Skip (>>|) Skip (|<<) Pause Stop Top Menu Home Menu Menu Return Enter Down Right Left Shuttle (Search/REV/FWD) Main Power SW Display DISPLAY Type Fluorescent Indicator Pause/Play Progressive Remain Surround Track Video PROG Mic Mark Title...
- Page 18 GENERAL SPECIFICATIONS G-14 Carton Master Carton Content --- Sets Material --- / --- Dimensions W x D x H (mm) Description of Origin Gift Box Material Single/Brown W/Color Photo Label Dimensions W x D x H (mm) 507 x 290 x 130 Description of Origin Natural Dropping At 1 Corner / 3 Edges / Drop Test...
-
Page 19: Disassembly Instructions
DISASSEMBLY INSTRUCTIONS 1. REMOVAL OF MECHANICAL PARTS 1-3: DVD DECK (Refer to Fig. 1-3) AND P.C. BOARDS Short circuit the position shown in Fig. 1-3 using a soldering iron. If you remove the DVD Deck with no 1-1: TOP CABINET/FRONT CABINET/OPERATION 1/2/ soldering, the Laser may be damaged. -
Page 20: Removal Of Dvd Deck Parts
DISASSEMBLY INSTRUCTIONS 2. REMOVAL OF DVD DECK PARTS NOTE In case of the Traverse Ass'y, install it from (1) to (4) in NOTE order. (Refer to Fig. 2-2-B) 1. Disassemble only the DVD DECK PARTS parts listed In case of the Traverse Ass'y installation, hook the wire here. - Page 21 DISASSEMBLY INSTRUCTIONS NOTE 2-4: RACK LOADING/MAIN GEAR/PULLEY GEAR (Refer to Fig. 2-4-A) In case of the Pulley Motor installation, check if the value Unlock the support 2 and remove the Gear Pulley. of the Fig. 2-3-B is correct. When installing the wire of the Loading Motor PCB Ass'y, Remove the Gear Main.
- Page 22 DISASSEMBLY INSTRUCTIONS NOTE 1. In case of the Clamper Ass'y installation, install Feed Motor correctly as Fig. 2-5-B. Gear Motor Plate Clamper Check Lock Clamper Traverse Ass'y Gear Feed Fig. 2-5-B 2-6: HOLDER TRAVERSE/INSULATOR (F)/INSULATOR (R) (Refer to Fig. 2-6-A) Rack Feed Ass'y Gear Middle Remove the Holder Traverse.
- Page 23 DISASSEMBLY INSTRUCTIONS Switch PCB Ass'y ~ FEED MOTOR ~ WHITE (4) BROWN (3) • Install wire from (1) to (4) in order. ~ SPINDLE MOTOR ~ YELLOW (2) GREEN (1) Fig. 2-7-D Traverse Ass'y Check Hook Check Hook Check Hook Check Hook •...
-
Page 24: Removal And Installation Of Flat Package Ic
DISASSEMBLY INSTRUCTIONS REMOVAL AND INSTALLATION OF When IC starts moving back and forth easily after desoldering completely, pickup the corner of the IC using FLAT PACKAGE IC a tweezers and remove the IC by moving with the IC desoldering machine. (Refer to Fig. 3-3.) REMOVAL NOTE Put Masking Tape (cotton tape) around the Flat Pack-... - Page 25 DISASSEMBLY INSTRUCTIONS INSTALLATION When bridge-soldering between terminals and/or the soldering amount are not enough, resolder using a Thin- Take care of the polarity of new IC and then install the tip Soldering Iron. (Refer to Fig. 3-8.) new IC fitting on the printed circuit pattern. Then solder each lead on the diagonal positions of IC temporarily.
-
Page 26: Servicing Fixtures And Tools
SERVICING FIXTURES AND TOOLS Remote control JIG JG176 Up-Date Disc Ref. No. Part No. Parts Name Remarks ––– Remote control JIG Check for the Firmware version ––– Up-Date of the Firmware JG176 Up-Date Disc Up-Date of the Firmware APJG176112 RE-WRITE FOR DVD FIRMWARE Turn on the power. -
Page 27: Troubleshooting Guide
TROUBLESHOOTING GUIDE POWER DOES NOT TURN ON Is the voltage at pin 8 and pin 9 of CP502 about Check AT+3.3V line of POWER BLOCK. 3.3V and at pin 5 of Check Q515 and peripheral circuit. CP502 about 5V? Is there waveform at Check X4001, IC4001 and X4001 about 3.0Vp-p ? peripheral circuit. - Page 28 TROUBLESHOOTING GUIDE DECK DOES NOT ACCEPT OPEN/CLOSE Is the voltage at pins 3,18 and Check P.CON 6V line of 19 of IC2301 about DC6V ? POWER BLOCK. Is the lose connection Check CP2302 at CP2302 to DECK ? connection to DECK. Change DVD LOADER.
- Page 29 TROUBLESHOOTING GUIDE DOES NOT LIGHT ON DISPLAY Is the voltage at pin 13 Check AT+3.3V line of and pin 43 of IC651 POWER BLOCK. about 3V ? Replace V651 or IC651.
- Page 30 TROUBLESHOOTING GUIDE NO PLAYBACK PICTURE OF AV JACK Is there a voltage (beam current) at Check LOADER BLOCK. JG008 and JG009 ? Check IC4001 and Is there a signal at pin 164 of IC4001 ? peripheral circuit. Check J7302 and peripheral Is there video signal at pin 33 of IC7301 ? circuit.
- Page 31 TROUBLESHOOTING GUIDE NO DIGITAL AUDIO ON PLAYBACK OF COAXIAL JACK Check connection at RCA Is there waveform at pin 7 Cable. of J7301 about 0.3Vp-p? Is there waveform at Check Q8005 and pin 159 of IC4001 peripheral circuit. about 0.3Vp-p ? Change IC4001.
- Page 32 TROUBLESHOOTING GUIDE NO ANALOG AUDIO ON PLAYBACK Is there AUDIO signal Check J8003 and peripheral at pins 1 and 7 of circuit. IC8003 ? Is there AUDIO signal at Check AT pins 184 and pins 2 and 6 of IC8003 ? 186 of IC4001.
- Page 33 DVD LOADER/MPEG BLOCK DIAGRAM Loader (DM-4) IOA, V20 RF, A, B, C, D, E, F, MDI1 X4001 27MHz RESET IC S+COAXIAL JACK RESET IC4003 LD_DVD, LD_CD LDO1, LDO2 J7301 Q2302~2305 BD5229G-TR LD DRIVE DMSO, FMSO, ASPDIF T+/-, F+/-, TROPEN, TRCLOSE, LOAD+/-, TRSO, FOSO, MOTOR DRIVER IC...
- Page 34 POWER BLOCK DIAGRAM PHOTO COUPLER IC504 VOLTAGE CTL PS2561AL1-1-V (W) IC501 KIA431A-AT REG+1.8V POWER CTL IC4006 +1.8V IC502 LM1117S-ADJ STR-A6131M AT+12V for mute Q510 P.CON+12V P.CON +12V SW Q515 P.CON+5V P.CON +5V SW SWITCHING 6V REG P.CON+6V TRANS AC IN IC503 T501 PQ070XF01SZH...
-
Page 35: Dvd Loader/Mpeg
OVERALL BLOCK DIAGRAM AMP_AUDIO_L/R AUDIO AMP IC 8K EEPROM IC8003 IC4002 RC4580IDR BR24L08FJ-WE2 HNV-08SS44T AMUTE SDA, SCL AUDIO_L, AUDIO_R 27MHz MPEG/MICON BLOCK FIP DRIVER IC IC4001 FP,STB AUDIO CODEC/ CVBS IC651 MT1389FE/E-L INTERNAL DAC PT6315 VIDEO DRIVER 6CH IC CH VIDEO DAC IC7301 LA73054-TLM-E S_VIDEO... -
Page 36: Printed Circuit Boards
PRINTED CIRCUIT BOARDS DVD MT (BOTTOM SIDE) DVD MT (TOP SIDE) R5928 C4055 C4052 R5906 B5902 R5922 C5920 C5903 IC4005 C5910 C5911 C5912 NR4003 L5904 C5902 B5905 C4058 C5913 C4049 L5903 R4065 C4066 L5902 R4045 R4066 C5914 R4046 L5901 NR4002 W832 Q4001 Q7302... - Page 37 PRINTED CIRCUIT BOARDS POWER (INSERTED PARTS) POWER (CHIP MOUNTED PARTS) SOLDER SIDE SOLDER SIDE D503 C511 R548 Q503 R536 R537 D506 R531 Q512 F501 Q513 FH501_1 FH502_1 R544 D502 D511 C502_1 D505 B501 DPF010A IC502 W814 R540 D509_1 IC504 R542 D508 W012 C506...
-
Page 38: Loading Motor/Sw
PRINTED CIRCUIT BOARDS LOADING MOTOR (INSERTED PARTS) LOADING MOTOR (CHIP MOUNTED PARTS) SOLDER SIDE SOLDER SIDE DED021A M2603 CD2302 SOLDER SIDE DED020A M2602 M2601... -
Page 39: Mpeg/Micon/Dsp
MPEG/MICON/DSP SCHEMATIC DIAGRAM (DVD MT PCB) X4001 100GT02720 B4010 27MHz FROM/TO POWER PORT MMZ1608R102CT C4035 ANALOG VIDEO OUTPUT!! NECESSARY SHIELD FROM/TO LOADER/MOTOR DRIVE R/CR 390P CH R4024 B/CB V+3E MDI1 100K V+1R8 R4022 PWDN# V+3V STBY -28V 750K FLDC- FLDC+ ADAC_GND D_GND V+3RF... -
Page 40: Memory
MEMORY SCHEMATIC DIAGRAM (DVD MT PCB) 64Mbit(4M*16) 143MHz SDRAM IC4005 EM638165TS-7G C4052 16Mbit FLASH 0.1 B IC4004 S29AL016D70TFI020 DQ15 DQ15 FROM/TO MPEG/MICON/DSP VSSQ VCCQ NC (BYTE#) DQ14 DQ14 DQ13 DQ13 D15/A1 C4048 VDDQ VSSQ 0.1 B DQ10 DQ12 DQ12 DQ11 DQ12 DQ13 DQ11... -
Page 41: Loader/Motor Drive
LOADER/MOTOR DRIVE SCHEMATIC DIAGRAM (DVD MT PCB) C2303 FROM/TO LOADER FROM/TO MPEG/MICON/DSP 0.1 B PICK-UP(GOLD) CP2301 C2301 V+5S LD07T2-24ND-03 0.1 B JG001 TP2304 RF33 JG010 TP2305 TP2332 JG008 W807 TP2341 V+3F JG002 TP2306 MDI1 R2307 JG003 TP2307 VCR_CTL LDO2 Q2307 JG004 TP2308 100K... -
Page 42: Audio Jack
AUDIO JACK SCHEMATIC DIAGRAM (DVD MT PCB) FROM POWER PORT D_GND R8035 V+12AT V+12 2.2K JACK MUTE(H:ON) C8036 Q8014 KTA1504S_Y_RTK XAMUTE(L:ON) TO VIDEO JACK Q8013 KRC407-RTK/P COAXIAL ZERO MUTE(H:ON) Q8010 COAXIAL DRIV KRC407-RTK/P Q8005 R8044 KTC3875S_Y_RTK 8.2K R8039 C8038 C8074 330P CH W840 FROM MPEG/MICON/DSP... -
Page 43: Video Jack
VIDEO JACK SCHEMATIC DIAGRAM (DVD MT PCB) VIDEO DRIVER 6CH IC IC7301 LA73054 VCC1 AMP1 (9dB=H,6dB=L) C7306 CVBS in DRIVE1 (1D=H,2D=L) C7304 SQUEEZE VCC21 0.1 B FROM MPEG/MICON/DSP LETTER CVBS out LETTER MUTE1 GND21 SQUEEZE (ON=H,OFF=L) VSEL1 C7305 I/XP C in C out R/CR 0.1 B... -
Page 44: Hdmi
HDMI SCHEMATIC DIAGRAM (DVD MT PCB) (92_DV33) C5925 FROM/TO MPEG/MICON/DSP W850 A_GND D_GND V+3H DVDD18 W851 V+5H 92_VCK 92_Y0 92_Y1 92_Y2 92_Y3 92_Y4 92_Y5 C5901 DVDD18 92_Y6 92_Y7 0.1 B URST# PWDN# ASPDIF 92_ACLK HDMI_SCL DVSS SWING HDMI_SDA TX2+ C1 (PD) TX2+ C0 (PD) AVSS... -
Page 45: Power Port
POWER PORT SCHEMATIC DIAGRAM (DVD MT PCB) TO AUDIO/VIDEO/JACK V+3F V+6A (VIDEO/OPT/COAX) V+12AT (AUDIO MUTE) V+12AT B4002 V+12 (AUDIO AMP) V+12 ADACVDD REG MMZ1608R102CT D_GND Q4001 KTC3875S_Y_RTK W826 TO LOADER/MOTOR DRIVE V+6A (MOTOR) V+6A B4001 (OPU) V+5S V+5S MMZ1608R102CT V+3F (F/E) V+3F D_GND... -
Page 46: Power
POWER SCHEMATIC DIAGRAM (POWER PCB) REG P.CON+12V SW Q510 6V REG (DVD MOTOR) IC KTA1281_Y IC503 W817 PQ070XF01SZH 12.9 12.6 W804 12.3 W803 12.3 REG+12V CTL 12.9 R546 Q509 R545 CHASSIS GND D512 KTC3875S_Y_RTK 22K +-1% 3.3K 1/4W REG+12V CTL FR155-F D534 Q511... -
Page 47: Display
DISPLAY SCHEMATIC DIAGRAM (OPERATION PCB) V651 HNV-08SS44T DVD CD TRACK ALL REPEAT A FLDC- W805 FLDC+ D652 1SS133 D655 1SS133 D657 1SS133 D659 1SS133 -28V (OPERATION4 PCB) DOWN ENTER SW652 SW653 EVQ11L05R EVQ11L05R RETURN RIGHT SW655 SW654 HDMI LED(RED) EVQ11L05R EVQ11L05R D660 MENU... -
Page 48: Loading Motor/Sw
LOADING MOTOR/SW SCHEMATIC DIAGRAM (LOADING MOTOR PCB) (SW PCB) ESE22MH22 CD2302 CD2301 2H051602 2H061605 M2603 LOADING MOTOR(-) GND(SW) BCZ3B05 LOADING MOTOR(-) PICK UO INNER LIMIT SWITCH SW-1(OPEN) FEED MOTOR(-) M2602 BCZ3B05 GND(SW) FEED MOTOR(+) SSS-28-5 SW-2(CLOSE) SPINDLE MOTOR(-) M2601 SPINDLE MOTOR(+) JCV9B12 PCB640 PCB610... -
Page 49: Interconnection Diagram
INTERCONNECTION DIAGRAM OPERATION3 PCB OPERATION4 PCB PCBDF0 PCBDG0 DEF086 DEF095 S+COAXIAL DVD AUDIO OUT CVBS/Y/U/V J7301 J8003 J7302 CP2301 FOCS RTN FOCS RTN FOCS DRV FOCS DRV TRKG RTN TRKG RTN TRKG DRV TRKG DRV DRIVE OPERATION PCB LD_DVD(650) LD_DVD(650) DM-4PB PCB270 PD/GND... -
Page 50: Waveforms
WAVEFORMS MPEG/MICON/DSP 500µs 20µs 500µs 1.0V 500mV 200mV 20µs 200ns 500mV 1.0V 500mV VIDEO JACK 10µs 200ns 10µs 500mV 1.0V 200mV DISPLAY 20µs 1.0V 1µs 10µs 500mV 500mV AUDIO JACK 20µs 500µs 500mV 1.0V NOTE: The following waveforms were measured at the point of the corresponding balloon number in the schematic diagram. -
Page 51: Mechanical Exploded View
MECHANICAL EXPLODED VIEW PCB240 (POWER PCB ASS'Y) PCBDG0 (OPERATION 4 PCB ASS'Y) PCBDF0 (OPERATION 3 PCB ASS'Y) PCB130 (DVD MT PCB ASS'Y) PCB280 (OPERATION 2 PCB ASS'Y) 101M 101D 101A 101J 101G 101F 101I 101E 101H 101K PCB270 (OPERATION PCB ASS'Y) 101L 101B 101C... -
Page 52: Packing Diagram
MECHANICAL EXPLODED VIEW (PACKING DIAGRAM) POLYBAG,INSTRUCTION (RED CAUTION) INSTRUCTION BOOK GUARANTEE CARD PACKAGE BATTERY,MANGAN POLY BAG INSTA5 TRANSMITTER CORD,RCA PIN CORD,RCA PIN PACKAGE GIFT SHEET PACKAGE PACKAGE GIFT BOX CARTION LABEL I1-2... -
Page 53: Dvd Deck Exploded View
DVD DECK EXPLODED VIEW Cannot supply separately. If the repair is needed, replace the LOADER SUB ASS'Y. M2603 CD2001 PCB610 M2602 (LOADING MOTOR PCB ASS'Y) CD2302 Do not replace the parts. Because, minute adjustments are needed if this condition is disassembled further more. -
Page 54: Mechanical Replacement Parts List
MECHANICAL REPLACEMENT PARTS LIST REF. NO. PART NO. DESCRIPTION 7A701A785A FRONT CABI ASS'Y CABINET FRONT 101A 101B PANEL FRONT 101C PLATE DISPLAY 101D FLAP DVD 101E GLASS LED 101F BADGE BRAND 101G SHEET DOUBLE TAPE 101H BUTTON CAP 101I BUTTON CAP EJECT 101J BUTTON FRAME 2 101K... -
Page 55: Dvd Deck Replacement Parts List
DVD DECK REPLACEMENT PARTS LIST REF. NO. PART NO. DESCRIPTION ! 600 DVD MECHA ASS'Y A2I802A650 A2I802A650 HOLDER,TRAVERSE 92P100125A CLAMPER 92P100122A GEAR,MOTOR 92P100088A GEAR,MIDDLE 92P100117A INSULATOR(F) 92P200013A INSULATOR(R) 92P200016A 92AAA0019B LOADER SUB ASS'Y(B) GEAR,PULLEY 92P100123A PULLEY,MOTOR 92P100097A GEAR,MAIN 92P100124A BELT,LOADING 92P200015A PLATE,CLAMPER 92P000023A... -
Page 56: Electrical Replacement Parts List
ELECTRICAL REPLACEMENT PARTS LIST REF. NO. PART NO. DESCRIPTION REF. NO. PART NO. DESCRIPTION RESISTORS RESISTORS R502 R,METAL OXIDE 1.8 OHM 1W R2335 2.2 OHM 1/16W R503 1.5M OHM 1/2W R2337 5.6K OHM 1/16W R504 680K OHM 1/16W R2338 10K OHM 1/16W R505 OHM 1/4W R2341... - Page 57 ELECTRICAL REPLACEMENT PARTS LIST REF. NO. PART NO. DESCRIPTION REF. NO. PART NO. DESCRIPTION RESISTORS CAPACITORS R8036 3.9K OHM 1/16W C2320 100 UF 10V R8037 1.8K OHM 1/16W C2321 100 UF 10V R8038 220 OHM 1/16W C2322 0.0022UF 50V B R8039 OHM 1/16W C2323...
- Page 58 ELECTRICAL REPLACEMENT PARTS LIST REF. NO. PART NO. DESCRIPTION REF. NO. PART NO. DESCRIPTION CAPACITORS DIODES C4095 UF 6.3V D509 DIODE,RECTIFIER RL106F-E C4096 UF 10V B D510 DIODE,SILICON FR155-F C4098 UF 10V B D511 DIODE,RECTIFIER 1H3-E C4099 0.001 UF 50V B D512 DIODE,SILICON FR155-F...
- Page 59 ELECTRICAL REPLACEMENT PARTS LIST REF. NO. PART NO. DESCRIPTION REF. NO. PART NO. DESCRIPTION COILS &TRANSFORMERS MISCELLANEOUS L501 COIL,LINE FILTER SS11V-03550-CH TM601 TRANSMITTER SBBM00102A L503 COIL R7 22 V651 096F82R601 TUBE FLUORESCENT DISPLAY HNV-08SS44T L505 COIL R7 22 X4001 100GT02720 CRYSTAL B27000C005 L5901...
- Page 60 FIRMWARE DOWN LOADING HOME MENU Confirm the Regional code and Firmware version. 1. Connect the TV monitor to the DV-SP404. Audio Settings Video Adjust 2. Turn ON the standby switch ON. (No Disc) 3. Press "SET UP" key of remote controller (RC-616DV).
- Page 61 Sales & Product Planning Div. : 2-1, Nisshin-cho, Neyagawa-shi, OSAKA 572-8540, JAPAN Tel: 072-831-8023 Fax: 072-831-8124 ONKYO U.S.A. CORPORATION 18 Park Way, Upper Saddle River, N.J. 07458, U.S.A. Tel: 201-785-2600 Fax: 201-785-2650 http://www.us.onkyo.com/ ONKYO EUROPE ELECTRONICS GmbH Liegnitzerstrasse 6, 82194 Groebenzell, GERMANY Tel: +49-8142-4401-0 Fax: +49-8142-4401-555 http://www.eu.onkyo.com/...
Need help?
Do you have a question about the DV-SP404 and is the answer not in the manual?
Questions and answers