Table of Contents
Advertisement
Advertisement
Table of Contents

Related Manuals for Sennheiser D 10 series


Summary of Contents for Sennheiser D 10 series
- Page 1 D 10 series Wireless DECT headset system Instruction manual...
-
Page 2: Table Of Contents
Sharing a workplace ..................32 Cleaning and maintaining the headset system ........33 Replacing the ear pads ................34 Replacing the headset’s rechargeable battery ........35 If a problem occurs ..................36 Specifications ....................37 Manufacturer Declarations ................39 D 10 series... -
Page 3: Important Safety Information
Do not short-circuit the contacts of the product. Make sure that no metal objects (e.g. paper clips, hair pins, earrings) come into contact with the interfaces and contacts. Only use the base station or the CH 10 charger for charging D 10 series headsets. Intended use/Liability The headset system can be used for calling and –... - Page 4 (about every 3 months). points or return them to your specialist dealer. Only use rechargeable Switch battery pack-powered batteries recommended products off after use. by Sennheiser and the appropriate chargers. D 10 series...
-
Page 5: Scope Of Delivery
Scope of delivery Scope of delivery The D 10 series base stations marked with in their name are optimized ™ for Microsoft Lync Base stations with components D 10 BS USB for computer D 10 BS USB ML for computer, optimized for Microsoft Lync... -
Page 6: Product Overview
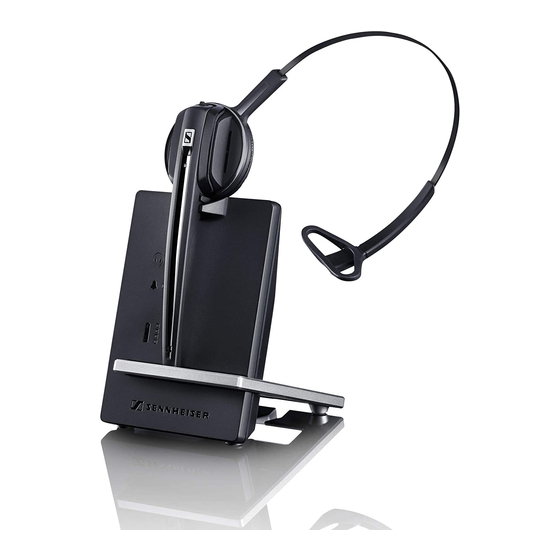
µ PC ² Microphone volume control socket (USB) ¶ ¸ DC IN Set button socket º ¹ Phone DIP switch row socket ¾ ABC switch Handset socket socket Sticker for DIP switches (located underneath the headset holder) D 10 series... -
Page 7: Product Overview Of The Headset
Sticker for DIP switches (located underneath the ¾ Loudspeaker headset holder) Product overview of the headset Headband Audio button: volume +/–, mute Headset holder Ear hook, adjustable Ear pad Charging contacts Microphone Battery compartment Headset LED Ear piece Link button D 10 series... -
Page 8: Overview Of The Buttons
Press the Mutes the microphone/unmutes the Audio button microphone Press and hold the Link Changes the direction of the volume button and the up/down function of the Audio Audio button button 5 seconds Special pairing mode (GAP) D 10 series... -
Page 9: Overview Of The Leds
Standby mode or headset is switched off/ headset’s rechargeable battery is fully charged flashes blue/red Special pairing mode/direction of the volume up/down function of the Audio button is being changed Pairing of an additional headset with the base station/conference call D 10 series... -
Page 10: Setting Up And Connecting The Base Station
Connect the power supply unit to a wall socket. The Link LED lights up red. Disconnecting the base station from the mains power supply If the product is not used for extended periods of time, unplug the power supply unit from the wall socket. D 10 series... -
Page 11: Connecting The Base Station To A Fixed Line Phone
Connect the telephone cable to the handset socket on the telephone and to the Phone socket (marked green) on the base station. Use a pointed object (e.g. a ball pen) to set the DIP switches the position shown. D 10 series | 10... - Page 12 Connecting the base station to an optional mechanical handset lifter The Sennheiser HSL 10 mechanical handset lifter is an optional accessory available from your Sennheiser partner. The handset lifter allows you to answer calls even when you are away from your desk.
-
Page 13: Connecting The Base Station To An Optional Electronic Hook Switch Control (Ehs)
The necessary EHS connection cables as well as adapter cables for manu- facturer specific standards are available as optional accessories from your Sennheiser partner. The corresponding quick guides are supplied with the cables or can be found on the product page on our website at www.sennheiser.com/cco. -
Page 14: Connecting The Base Station To A Computer
Connect the USB cable to the socket (marked orange) on the base station and to a USB socket of your computer. The operating system detects the USB audio device “Sennheiser D 10” and installs the neces- sary drivers. Sennheiser PC software The free Sennheiser PC software allows you to add value to your Sennheiser products. -
Page 15: Individually Adjusting The Headset
Insert the ear hook into the ear hook slot. Pre-shape the ear hook by bending it slightly. Place the ear hook around your ear. Bend the flexible ear hook so that the headset sits comfortably and securely on your ear. Right Left D 10 series | 14... -
Page 16: Using The Headset With The Headband
Remove the ear hook by carefully pulling it upwards. Attach the headset to the headset holder of the headband. Rotate the microphone boom and adjust the headset so that the ear pad rests comfortably on your right or left ear. Left Right 15 | D 10 series... -
Page 17: Configuring The Headset System
Switch position Function Manual operation Lifts/hangs up the handset manually or using the handset lifter (Sennheiser HSL 10). Electronic hook switch (DHSG standard) Call control via the headset system. For faster link establishment, see Fast Link. Electronic hook switch (MSH standard) Call control via the headset system. - Page 18 Limiting the volume – DIP switch 6 Switch position Function Standard limitation Limited volume (country specific) • AU version: in compliance with Directive AS/ACIF G616:2006 • EU and US version: in compliance with Directive 2003/10/EC 17 | D 10 series...
-
Page 19: Adjusting The Audio Signal By Means Of The Dial Tone
Press the Link button on the headset. The Link LED on the base station lights up blue. Lift the handset. You hear a dial tone. Set the switch to the position A, so that you can hear a clear dial tone in the headset. D 10 series | 18... -
Page 20: Adjusting The Volume Of The Transmission
When the minimum or maximum volume is reached, you hear a double beep in the headset. Adjusting the ring tone volume of the base station Turn the volume control to reduce or increase the ring tone volume. Ring Volume 19 | D 10 series... -
Page 21: Adjusting The Automatic Audio Transmission "Auto Audio
Use a pointed object to press the Set button for approx. 5 seconds. The Link LED rapidly flashes red several times. Activating the “Auto Audio” function Use a pointed object to press the Set button for approx. 5 seconds. The Link LED rapidly flashes blue several times. D 10 series | 20... -
Page 22: Making Calls Using The Headset
The Headset LED alternately flashes blue/red. Push the Audio button in the direction “volume down” until the Headset LED goes off. The direction of the volume up/down function of the Audio button is changed. The headset switches to standby mode. 21 | D 10 series... -
Page 23: Muting The Headset's Microphone
You hear a ring tone in the headset. 55 m Press the Link button on the headset to resume the call. If your softphone supports call control, the call will automatically be ended 60 seconds after leaving the DECT range. D 10 series | 22... -
Page 24: Calling Via The Fixed Line Phone Using The Headset
Lift the handset and dial the desired number. The phone connection is established. Ending a call: Hang up the handset or press the “end call” button on your fixed line phone. 23 | D 10 series... - Page 25 In case of a fixed line phone with a handset lifter/an electronic hook switch, this switching can only be done on the fixed line phone. D 10 series | 24...
-
Page 26: Calling Via The Computer Using The Headset
If the “Auto Audio” function is activated, this step is not necessary (see page 20). Start the call using your softphone. Ending a call: End the call using your softphone. 25 | D 10 series... - Page 27 Sennheiser software you additionally require. If necessary, install the software in order to manage calls directly via the headset. Accepting a call: The softphone signals that you are receiving a call. You hear a ring tone in the headset.
-
Page 28: Making A Conference Call
Making calls using the headset Making a conference call The headset system allows you to make a conference call with up to 4 D 10 series headsets. The first headset paired (master) is used control GUEST 1 the call establishment and end of conversation. - Page 29 Headset LED alternately flashes blue/red until a link is established. Ending a conference call Place the master headset into the magnetic holder of the base station to end the conference call and to drop the guest headsets from the conference call. D 10 series | 28...
-
Page 30: Charging The Headset And Storing The Headset System
You have several minutes of battery reserve. When the rechargeable battery is flat, the headset switches off. f the headset is outside the range of the base station, it will switch off after 30 minutes in order to conserve battery power. 29 | D 10 series... - Page 31 Charging the headset using the optional CH 10 headset charger The CH 10 headset charger is an optional accessory available from your Sennheiser partner. The CH 10 allows you to charge additional D 10 series headsets, e.g. for sharing the same base station when working shifts.
-
Page 32: Switching The Headset System Off During Extended Non-Use
Plug the power supply unit into a wall socket. The base station is switched on. Place the headset into the magnetic holder of the base station. The Headset LED flashes blue 3 times and then lights up blue. The base station and the headset are paired. 31 | D 10 series... -
Page 33: Sharing A Workplace
Sharing a workplace Sharing a workplace The headsets and base stations of the D 10 series are compatible with each other. If, for example, you share a workplace, you can use one base station with different headsets. The last headset paired with the base station can be used without more ado. -
Page 34: Cleaning And Maintaining The Headset System
Only use a dry and soft cloth to clean the product. Clean the charging contacts of the base station and the charging contacts of the headset from time to time using e.g. a cotton swab. 33 | D 10 series... -
Page 35: Replacing The Ear Pads
Replacing the ear pads For reasons of hygiene, you should replace the ear pads from time to time. Spare ear pads are available from your Sennheiser partner. Carefully remove the old ear pad from the ear cup. Make sure that the fastening ring of the old ear pad is also removed from the ear cup. -
Page 36: Replacing The Headset's Rechargeable Battery
Carefully open the battery compartment and loosen the connector plug of the rechargeable battery. Spare rechargeable batteries are available from your Sennheiser partner. Only use spare rechargeable batteries recommended by Sennheiser. Remove the ear hook or the headband (see page 14) and open the battery compartment. -
Page 37: If A Problem Occurs
If a problem occurs that is not listed in the above table or if the problem cannot be solved with the proposed solutions, please contact your local Sennheiser partner for assistance. To find a Sennheiser partner in your country, search at www.sennheiser.com under “Service & Support”. D 10 series... -
Page 38: Specifications
Operating temperature range +5 °C to +45 °C (+41 °F to +113 °F) Storage temperature range –20 °C to +70 °C (–4 °F to +158 °F) Relative humidity operation: 20 to 85% storage: 20 to 95% Weight approx. 75 g 37 | D 10 series... - Page 39 (D 10 BS Phone-US, D 10 BS USB-US, D 10 BS USB ML-US) IC: 2099A-D10HS (D 10 HS) USA: FCC ID: DMOCBDDGG (D 10 BS Phone-US, D 10 BS USB-US, D 10 BS USB ML-US) FCC ID: DMOCDHDGG (D 10 HS) D 10 series | 38...
-
Page 40: Manufacturer Declarations
Manufacturer Declarations Manufacturer Declarations Warranty Sennheiser Communications A/S gives a warranty of 24 months on this product. For the current warranty conditions, please visit our website at www.sennheiser.com or contact your Sennheiser partner. In compliance with the following requirements • WEEE Directive (2012/19/EU) Please dispose of this product by taking it to your local collection point or recycling center for such equipment. - Page 41 Industry Canada SAR limits for devices used by the general public. Trademarks Sennheiser is a registered trademark of Sennheiser electronic GmbH & Co. KG. Other product and company names mentioned in this instruction manual may be the trademarks or registered trademarks of their respective owners.
- Page 42 Sennheiser Communications A/S Industriparken 27, DK-2750 Ballerup, Denmark www.sennheiser.com Publ. 01/15, A02...
Need help?
Do you have a question about the D 10 series and is the answer not in the manual?
Questions and answers