Table of Contents
Advertisement
IMPORTANT: ALUMINUM FRAME. NOT INTENDED
FOR HARD RIDING. DO NOT JUMP OR HIT
CURBS, AVOID IMPACTS. INSPECT FRAME FOR
FRACTURES.
SERIOUS
OCCUR IF MISUSED.
SEE MANUAL FOR ADDITIONAL INFORMATION.
BODILY
HARM
CAN
USER GUIDE
Some of the content of this manual may differ from
your bicycle depending on the options of the bicycle
and what your dealer provided.
© 2013 PRODECO TECHNOLOGIES.
reserved.
PRODECO
PRODECO TECHNOLOGIES logo are trademarks of
PRODECO TECHNOLOGIES. Printed in USA.
2
0
1
3
2 0
0 1
1 3
3
2
All rights
TECHNOLOGIES
and
the
Advertisement
Table of Contents

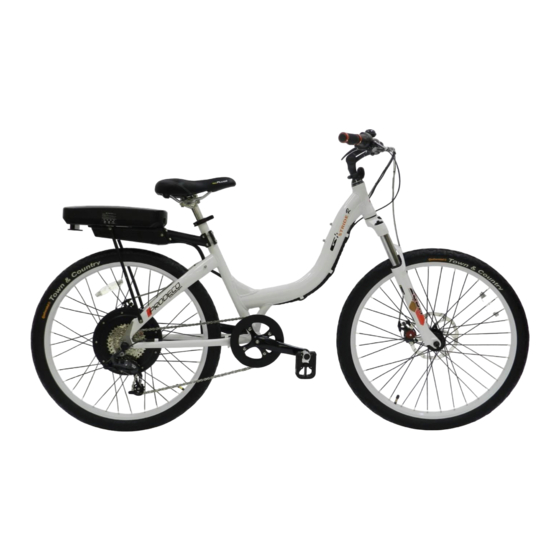
Related Manuals for Prodeco Technologies Stride 500


Summary of Contents for Prodeco Technologies Stride 500
- Page 1 Some of the content of this manual may differ from your bicycle depending on the options of the bicycle and what your dealer provided. © 2013 PRODECO TECHNOLOGIES. All rights reserved. PRODECO TECHNOLOGIES PRODECO TECHNOLOGIES logo are trademarks of PRODECO TECHNOLOGIES. Printed in USA.
-
Page 2: Table Of Contents
Unpacking your box ……………………………………………………………………………………………….. 5 Familiarize yourself with your bicycle‘s parts …………………………………………………………………… 5 Contents of the box ………………………………………………………………………………………………... 6 A guideline of your Stride 500 tool set …………………………………………………………………………... 6 Registering your new bike ………………………………………………………………………………………… 6 Chapter 3: Basic Instructions ……………………………………………………………………………………….. 6 Bicycle fit ……………………………………………………………………………………………………………. - Page 3 2 year limited warranty …………………………………..………………………..………………………………. 27 Registering your bike ……..…………………….………..………………………..………………………………. 28 Serial numbers and where to find them ………………..………………………..………………………………. 28 Registration card …………………..……………………..………………………..………………………………. 28 Part replacement procedure …………...………………..………………………..………………………………. 29 Contacting Prodeco Technologies ……………………..…………….…………..………………………………. 29 Chapter 11: Specifications …………………….………………………………...…………………………………… 29 Chapter 12: Parts ……………………………………………………..…….…………………………….……….……30 WHITE...
-
Page 4: Chapter 1: Introduction
You should ride your Stride 500 as a traditional bicycle under pedal power prior to riding under motor power for the first time. This will allow for the familiarization of how your Stride 500 rides and balances. -
Page 5: A Special Note To Parents
As a parent or guardian, you should read and understand this manual. Before letting any child ride the Stride 500 or any of Prodeco Technologies electric bicycles, review with them all warnings and cautions; as well as the information on the proper usage of your battery pack, charger and bicycle. -
Page 6: Contents Of The Box
Contents of the box Check the contents of your box. Your new Stride 500 should include the following items in the box or your dealer should have included these items with your purchase: Stride 500 electric bicycle 2 keys ... -
Page 7: Installing And Adjusting The Handlebar Stem
Installing and adjusting the handlebar stem (SEE PHOTOS NEXT PAGE) The handlebar and stem of the Stride 500 is shipped not inserted into the steerer tube. The handlebar and stem is temporarily attached to the frame with shipping ties. Using scissors, cut the ties to free the handlebar and stem from the frame. You will need to slide the stem quill into the steerer tube and set the stem to the preferred height for riding. -
Page 8: Your Local Electric Bicycle And Bicycle Laws
Your local electric bicycle and bicycle laws Your new Stride 500 was designed to follow the federal guidelines to establish the Stride 500 as a traditional pedal power bicycle within most USA states and to be allowed to ride in bicycle pathways. However, electric bicycle laws change often and you are responsible to confirm legal status of the riding of your electric bicycle in bicycle pathways. -
Page 9: Safety First
Safety first It is important you follow your local bicycle laws but also it is important you ride safely. Below are examples of understanding how to ride your new Stride 500 safely. ‗ ... -
Page 10: Before Your First Motorized Ride
Using your twist throttle The variable throttle on your Stride 500 was designed to allow you the ability to choose the speed to ride at and determine the amount of torque off the line. -
Page 11: Using Your Brakes
Pedaling your Stride 500 is the same as pedaling a traditional bicycle. It is recommended you add pedaling to the power of the bicycle to enhance the distance per charge. The Stride 500 is a 8 speed bicycle and has the ratio of a 44T front chain ring (sprocket) against a 11-28T rear freewheel which is designed to offer an easy pedaling pace at any speed from 1 MPH to 18 MPH. -
Page 12: Chapter 4: Safety
Assure Bicycle Readiness: Ensure Proper Size and Function of Bicycle - Make sure the bicycle fits you: Stand over the top of the Stride 500 bicycle – there should be minimum 3 inches of clearance from the frame bar. Seat height —... -
Page 13: Wet Weather Riding
A properly sized and adjusted bicycle allows the rider to remain fully alert and avoid injury. Review this chapter carefully and all the adjusting points of your new Stride 500. If you have difficulty in obtaining the most comfortable riding position or performing available adjustments, contact your authorized dealer for advice. -
Page 14: Frame Size
The top tube length is traditionally the distance from the center of the seat tube to the center of the steering tube. For purposes of sizing the Stride 500, we will name the distance of the center of the saddle to the center of the handlebar the steering length (similar to the top tube length). -
Page 15: Chapter 6: Tire, Tube, Wheel Or Axle Repair
The rear motorized wheel easily installs onto the rear frame dropouts within a few minutes. Follow the instructions below on installing the rear motor wheel. Your Stride 500 included additional cable ties with the User Guide. 1 cable tie will be needed to install the motor. -
Page 16: Removing And Installing The Front Wheel
Removing and installing the front wheel The front wheel on the Stride 500 can be removed or installed without tools. A quick release skewer through a hollow axle is utilized for easy and quick wheel removal. A quick release skewer is a rod that has a threaded acorn nut on one end and a cam lever assembly on the other end. - Page 17 Some tires may need to be brought up to pressure every week or two. Other high-performance tires may also have unidirectional treads, similar to the factory tires on your Stride 500: their tread pattern is designed to work better in one direction than in the other.
-
Page 18: Chapter 7: Maintenance And Replacement
Keeping your bike clean Your new Stride 500 is an outdoor friendly electric bicycle but should be kept clean and free from dirt. Dirt on and around seals and drive train components can cause premature wear and dirt on paint and part finishes can cause premature aging. -
Page 19: Brake Pad Replacement
FINE TUNING Before each ride Check cables for signs of wear or fraying. Squeeze the brake lever firmly and check for proper brake function. Adjust for pad wear if necessary. Check pads for wear and replace if necessary. Ensure rotors are free of foreign substances and oils. Cable Slack Adjustment Use the barrel adjuster on the brake lever to remove any cable slack from the system. -
Page 20: Derailleur Adjustments
Adjust the Pads Turn both pad adjustment knobs counterclockwise until desired pad/rotor clearance is achieved (approx. 2 or 3 clicks each). Important: only use the barrel adjuster at the brake lever to adjust for cable slack. For lever throw, use the outboard adjustment knob. -
Page 21: Wheel Check
Lubricating A common area of maintenance with all bicycles is lubrication. Your Stride 500 was designed to be virtually maintenance free but depending on the amount of riding and the environment, your bicycle should be lubricated from time to time. -
Page 22: Crankset
Pedals The Stride 500 has folding pedals to allow for a smaller size space when folded. Each pedal has 2 tabs on the outside edges of the pedal‘s nylon cage. To fold the pedals, squeeze the tabs and pull the pedal outwards with a slight force. Once the pedal nylon cage slides out ½‖... -
Page 23: Torque Specifications For Common Parts
Over time, use and even shipping could cause nuts and bolts to become loose. Below is a chart on the torque settings in Lb per Inch for the common parts of the Stride 500. They have also been converted to Lb per Foot and NM. -
Page 24: Installing And Locking The Battery
c) Installing and locking the battery As shown in the photos above, the battery has 2 thin ―slotted rails‖ (1 on each side of the battery towards the front) and a ―raised slot‖ (towards the rear and near the handle) at the underside of the battery. These rails and slots hold the battery in place when riding. -
Page 25: Charging The Battery
Storing the battery The Li-ion battery the Stride 500 utilizes is the safest and latest technology in Li-ion battery cells. It is recommended that you do not store the battery in extremely hot conditions. If the bicycle is being stored indoors in a cool environment, the battery should be stored on the bicycle in the ―OFF‖... -
Page 26: Chapter 9: Electrical Components
HUB motor The HUB motor utilized on your Stride 500 is one of the most advanced e-bike HUB motors developed today. It is a high efficiency, high torque brushless direct drive motor with a simplified design utilizing sealed bearings and no gears. The rear dropouts incorporate Prodeco‘s uniquely designed stainless steel axle plates which have been specifically engineered to... -
Page 27: Chapter 10: Warranty Service And Repair
Chapter 10: Warranty Service and Repair Prodeco Technologies has taken great measures in designing and producing your new bicycle to be issue free while offering years of performance. The bicycle however is a mechanical item and an issue can arise. Your bike components are covered for a 2 year period from the date of purchase or within 30 months of the production date, whichever is sooner. -
Page 28: Registering Your Bike
2 weeks from the date of purchase. You must save your receipt of purchase. To register your bicycle, you can fill out the form on the Prodeco Technologies website at www.prodecotech.com or you can fill out the registration card in the next section below and either scan it to service@prodecotech.com, fax it to... -
Page 29: Part Replacement Procedure
Part replacement procedure In the occurrence of a component becoming defective, Prodeco Technologies tries to make part replacement as painless as possible. Simply contact Prodeco Technologies service department and explain the problem. A representative will assist you with getting the part at issue replaced quickly. You can also bring your bicycle to a local authorized dealer and they can assist you with any problem. -
Page 30: Chapter 12: Parts
ACCESSORY - TOOL - Y Tri Hex - 18021 - 4mm, 5mm & 6mm - Black AC.TO.Y.21.B $2.95 BATTERY - Prodeco Technologies - LiFEPO4 - 38.4V - -- 12Ah -- - v1.3a PT.BA.LIFE.36V.12A.13A $499.95 BATTERY CHARGER - 43.8V 2Ah - LiFEPO4 - (for 36V Battery) PT.BC.36V.2A.13A...
Need help?
Do you have a question about the Stride 500 and is the answer not in the manual?
Questions and answers