Foscam FI9804W User Manual
Outdoor hd ip camera
Hide thumbs
Also See for FI9804W:
- User manual (99 pages) ,
- Quick installation manual (2 pages) ,
- Quick installation manual (2 pages)

Related Manuals for Foscam FI9804W


Summary of Contents for Foscam FI9804W
- Page 1 V1.1 User Manual User Manual Outdoor HD IP Camera Model: FI9804W Model: FI9805W Model: FI9805E...
-
Page 2: Table Of Contents
.foscam.co .foscam.co Table of Contents 1 Overviews..................................... 1 1.1 Key Features................................1 1.2 PoE (Power over Ethernet-FI9805E)........................2 1.3 Read Before Use................................ 2 1.4 Packing Contents............................... 2 1.5 Physical Description..............................3 1.6 The different features between the models involved....................5 2 Accessing the Network Camera............................5 2.1 Access the Camera in LAN............................ -
Page 3: Overviews
IPCAM and managing images are simplified by using the provided web interface across the network utilizing wireless connectivity. FOSCAM provides Phone APPs for Android and iPhone users, please search “Foscam ip cam viewer” and install it through APP Store, then you can view your camera directly as a computer. -
Page 4: Poe (Power Over Ethernet-Fi9805E)
.foscam.co .foscam.co 1.2 PoE (Power over Ethernet-FI9805E) The Network Camera is PoE-compliant, allowing transmission of power and data via a single Ethernet cable. Such as the following picture: connect the Network Camera to a PoE-enabled router/ switch via Ethernet cable. -
Page 5: Physical Description
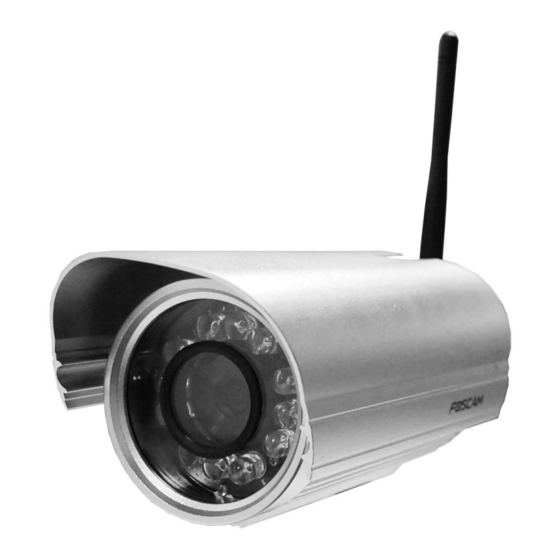
.foscam.co 1.5 Physical Description Front Panel Figure 1.1 1 WIFI Antenna: Wireless Antenna (FI9804W FI9805W) 2 Infrared LED: 12 IR LEDs(FI9804W), 36 IR LEDs(FI9805W FI9805E) 3 LENS: CMOS sensor with fixed focus lens 4 Induction IC Interface Figure 1.2 alarm terminal block This network camera provides a I/O alarm terminal block which is used to connect to external input / output device. -
Page 6: Bottom View
There are up to three labels located at the bottom of the camera; this is an important feature of original Foscam cameras. If your camera does not have labels as shown in Figure 1.3, it may be a clone. Cloned Foscam cameras can not use original firmware and are not eligible for warranty or technical services. -
Page 7: The Different Features Between The Models Involved
.foscam.co .foscam.co MAC address of wireless connection . MAC address of wired connection . FOSCAM DDNS Service . S/N Sticker of FOSCAM . Figure 1.3 1.6 The different features between the models involved Differences Model Wireless PoE (Power over Ethernet) - Page 8 .foscam.co .foscam.co (1) Http:// LAN IP + Http Port no. Double click the IP Camera Tool icon and it should find the camera’s IP address automatically after you plug in the network cable. Figure 2.1 Double click the IP address of the camera; your default browser will open to the camera login page.
- Page 9 .foscam.co .foscam.co Open Internet Explorer if it is not already opened. Click on Tools, then click Internet Options. Next, click the Security tab, then click the Trusted sites button. Figure 2.3 For Firefox, you can add the trusted as the following way:...
- Page 10 .foscam.co .foscam.co Tools ---- Options ---- Advanced --- View Certificates --- Servers Figure 2.4 Click View Certificates, and go to Servers option . Figure 2.5 Go to Add Exception panel. Shenzhen Foscam Intelligent Technology Co., Limited Shenzhen Foscam Intelligent Technology Co.,...
-
Page 11: Access The Camera In Wan
.foscam.co .foscam.co Enter the camera’s url , here take https://192.168.8.129:443 for example . Click this button to add it . Figure 2.6 2.2 Access the Camera in WAN 2.2.1 Static IP Addresses Users who have static IP addresses do not need to set DDNS service settings for remote access. When you have finished connecting the camera using the LAN IP address and port forwarding, you can access the camera directly from the Internet using the WAN IP address and port number. - Page 12 .foscam.co .foscam.co Figure 2.7 Access your IP Camera from the Internet You can access the IP Camera from the Internet (remote access). Enter the WAN IP address and port number in your standard browser. For example, you would enter http:// 183.37.28.254:85 NOTE : Make sure port forwarding is successful.
-
Page 13: Dynamic Ip Addresses
.foscam.co .foscam.co 2.2.2 Dynamic IP Addresses DDNS is a service that allows your IP Camera, especially when assigned with a dynamic IP address, to have a fixed host and domain name. This means that even though your WAN IP address is constantly changing, you will have a fixed hostname you can use to access your cameras at all times. -
Page 14: How Do We Configure Port Forwarding
.foscam.co .foscam.co Figure 2.10 What is Port forwarding? If you have never done port forwarding before, you can open and view the following link to understand the basic concept. Port forwarding allows for outside connections to access a specific device on your network from anywhere in the world. - Page 15 NOTE : If you have set Third Party DDNS successfully ,the Foscam Domain Name will be invalid. The Third Party DDNS and the Foscam Domain Name cannot work at the same time, the last time you configured will take effect.
-
Page 16: Using The Vlc Player
.foscam.co .foscam.co 2.3 Using the VLC player This camera supports RTSP streaming, here you can view the camera using VLC player. RTSP URL rtsp:// [user name][:password]@IP:HTTP port number/videosream The part in the square brackets may be omitted. user name & password: The user name and password to access the camera. - Page 17 .foscam.co .foscam.co Figure 2.14 Sometimes you may need to enter the user name and password again. Click OK and you can see the real-time preview. Figure 2.15 Shenzhen Foscam Intelligent Technology Co., Limited Shenzhen Foscam Intelligent Technology Co., Limited Tel:...
-
Page 18: Ip Camera Connection To The Server
.foscam.co .foscam.co Figure 2.16 If you cannot play the video in the VLC player, please check the port mapping. You can read Quick Installation Guide about How to configure port forwarding. NOTE If you modify the camera’s username or password, you had better reboot the camera, or else the new username and password cannot take effect when you enter the authentication in the VLC. -
Page 19: Login Window
.foscam.co .foscam.co 3.1 Login Window Figure 3.1 Please check the login window above, it was divided to 4 sections from no. 1 to 4. Section1 Enter the Username and password The default administrator username is admin with no password, please reset the password at first using and prevent unauthorized users login the camera (read chapter 3.2.4 about how to change). -
Page 20: Surveillance Window
.foscam.co .foscam.co Figure 3.2 3.2 Surveillance Window Figure 3.3 Section1 FOSCAM Logo/ LiveVideo / Settings buttons : FOSCAM LOGO Shenzhen Foscam Intelligent Technology Co., Limited Shenzhen Foscam Intelligent Technology Co., Limited Tel: 2674 5668 Fax: 2674 5168 Tel: 2674 5668... -
Page 21: Surveillance Window
.foscam.co .foscam.co : Path to surveillance window. Click this button and back to the surveillance window Path to Administrator Control Panel, Click it, and it will lead to Administrator Control Panel and do advanced settings. Section2 Multi-Device Window The firmware inside the camera supports up to maximum of 9 cameras being monitoring at the same time. You can add other cameras in multi-camera panel (read chapter 4.2.5). - Page 22 .foscam.co .foscam.co rate is 30 fps. You should lower frame rate when the bandwidth is limited. Normally, when the frame rate above 15, you can achieve fluently video. 4) Bit rate Generally speaking, the larger the bit rate is, the clearer video will become. But the bit rate configuration should combine well with the network bandwidth.
-
Page 23: Onscreen Mouse Control
.foscam.co .foscam.co 1------Play Click it to play the video of the camera 2------Stop Click it to stop the video of the camera 3------ Talk: Click the button and the icon will become to , then talk to the microphone that connected with PC, people around the camera can hear your voice if the camera has connected with audio output device. - Page 24 .foscam.co .foscam.co Figure 3.6 Full Screen: Select it and Click it to make full-screen, press ESC and exit full-screen. Zoom up/down: Click it and the live view will be digital zoomed up, then click Zoom Down and the live view back to original size.
-
Page 25: Advanced Camera Settings
.foscam.co .foscam.co 4 Advanced Camera Settings Click the button “Settings”, goes to Administrator Control Panel to make advanced camera settings. 4.1 Device Status Device Status contains four columns: Device Information, Device Status, Session Status and Log, it will show you various information about your camera. -
Page 26: Session Status
.foscam.co .foscam.co Figure 4.2 4.1.3 Session status Session status will display who and which IP is visiting the camera now. Figure 4.3 4.1.4 Log The log record shows who and which IP address accessed or logout the camera and when. -
Page 27: Basic Settings
.foscam.co .foscam.co Click the page number and go to the corresponding page to see more logs . Fill in one page number, click Go button and go to the corresponding page . Figure 4.4 4.2 Basic Settings This section allows you to configure your Camera Name, Camera Time, Mail, User Accounts and Multi-Device. -
Page 28: Mail Settings
.foscam.co .foscam.co Figure 4.6 Time Zone: Select the time zone for your region from the dropdown menu. Sync with NTP server: Network Time Protocol will synchronize your camera with an Internet time server. Choose the one that is closest to your camera. - Page 29 .foscam.co .foscam.co 1----- SMTP Server/ Port /Transport Layer Security Enter SMTP server for sender. SMTP port is usually set as 25. Some SMTP servers have their own port, such as 587 or 465, and Transport Layer Security usually is None. If you use Gmail, Transport Layer Security must be set to TLS or STARTTLS and SMTP Port must be set to 465 or 25 or 587, which port you choose should be decided by which Transport Layer Security you select.
-
Page 30: User Accounts
.foscam.co .foscam.co Figure 4.9 If the test fails with one of the following errors after clicking Test, verify that the information you entered is correct and again select Test . 1) Cannot connect to the server 2) Network Error. Please try later... - Page 31 .foscam.co .foscam.co Figure 4.10 How to change the password? Firstly, select the account which you want to change the password, then select “Change password”, enter the old password and the new password, lastly click modify to take effect. Figure 4.11 How to add account ? Select one blank column, then enter the new user name, password and privilege, last click Add to take effect.
- Page 32 The firmware within the camera can support a maximum of 9 devices monitoring all at the same time. This page you can both add FOSCAM MJPEG and H.264 series cameras to the first camera and view multi-surveillance screen on one window.
- Page 33 .foscam.co .foscam.co Add cameras in LAN In Multi-Device Settings page, you can see all devices searched in LAN. The 1st Device is the default one. You can add more cameras in the list in LAN for monitoring. The camera’s software supports up to 9 IP Cameras online simultaneously.
- Page 34 .foscam.co .foscam.co Figure 4.15 Back to Surveillance Windows, and click Four Windows option, you will see four cameras you added. Figure 4.16 Shenzhen Foscam Intelligent Technology Co., Limited Shenzhen Foscam Intelligent Technology Co., Limited Tel: 2674 5668 Fax: 2674 5168...
- Page 35 .foscam.co .foscam.co Figure 4.17 Add cameras in WAN If you want to view all cameras via the internet(remote computer), you will need to add them using DDNS domain name. Firstly, make sure all of the cameras you added can be accessed through the internet. (Read How to configure DDNS settings in chapter 4.3.3)
- Page 36 .foscam.co .foscam.co Figure 4.19 1----- The camera model: MJ or H264. 2----- The 2nd camera’s name 3----- Fill in the 2nd camera’s DDNS host not LAN IP NOTE: The FI98s series have the same HTTP Port no.. 4 ---- Enter the 2nd camera’s user name and password...
- Page 37 .foscam.co .foscam.co Figure 4.20 Return to video window. You will see all of the cameras accessible through the internet. When you are away from home, you can use the first camera’s DDNS domain name and port to view all the cameras via internet.
-
Page 38: Network
.foscam.co .foscam.co 4.3 Network This section will allow you to configure your camera’s IP, PPOE, DDNS, Wireless Settings, UPnP and Port. 4.3.1 IP Configuration If you want to set a static IP for the camera, please go to IP Configuration page. Keep the camera in the same subnet of your router or computer. - Page 39 .foscam.co .foscam.co Figure 4.23 Set the same Subnet Mask and gateway of the camera with your PC . There are two DNS servers . You can set any of them . Same with gateway is also OK . Figure 4.24 If you don’t know the DNS server, you can use the same settings as the Default Gateway.
- Page 40 If you are using a PPPoE connection, enable it and enter the User Name and Password for your PPPoE account. Figure 4.25 4.3.3 DDNS FOSCAM camera has embedded a unique DDNS domain name when producing, and you can directly use the domain name, you can also use the third party domain name. FOSCAM domain name Here take test09.myfoscam.org for example.
- Page 41 .foscam.co .foscam.co Firstly: Login on www.no-ip.com and click No-IP Free to register. Click here to register Figure 4.27 Please register an account step by step according to instructions on www.no-ip.com After registration, please login your email which used to register. You will receive an email from website, please click the link to activate your ACCOUNT as indicated in email.
- Page 42 NOTE : If you have set Third Party DDNS successfully ,the Foscam Domain Name will be invalid. The Third Party DDNS and the Foscam Domain Name cannot work at the same time, the last time you configured will take effect.
- Page 43 2000for example, the accessing link of the camera via internet would be http:// ycxgwp.no-ip.info:2000 4.3.4 WiFi ( FI9804W FI9805W ) Step 1: Choose “Settings” on the top of the camera interface, and go to the “Network” panel on the left side of the screen, then click “Wireless Settings.”...
- Page 44 .foscam.co .foscam.co Click the Scan button to search for wireless networks. Click the Page number to see other wireless networks devices if there are more than 10. Figure 4.31 Step 2: Click the SSID (name of your router) in the list, the corresponding information related to your network, such as the name and the encryption, will be filled into the relevant fields automatically.
- Page 45 .foscam.co .foscam.co Step 3: Please click on the Save button after all settings have been entered and disconnect the network cable. Never shut down the power of the camera until the IP camera is able to connect to the wireless network.
- Page 46 .foscam.co .foscam.co Figure 4.34 Another way to change the HTTP port no. Step 1: Open the IP Camera Tool, select the camera you would like to change the port of, right click on the IP address, and click on ”Network Configuration”, this brings up the network configuration box as shown in Figure 4.35 and 4.36.
- Page 47 .foscam.co .foscam.co back on, the camera will remain on this LAN IP address. This is very important that a static LAN IP address is set, or you may have problems later with remote access and seeing the camera remotely if the camera loses power and reconnects on a different LAN IP address.
- Page 48 .foscam.co .foscam.co user name & password: The user name and password to access the camera. This part can be omitted. IP: WAN or LAN IP address. Videostream: Here support three mode: videoMain, videoSub and audio. When the network speed is bad, here you had better select videoSub.
- Page 49 .foscam.co .foscam.co Sometimes you may need to enter the user name and password again. Click OK and you can see the real-time preview. Shenzhen Foscam Intelligent Technology Co., Limited Shenzhen Foscam Intelligent Technology Co., Limited Tel: 2674 5668 Fax: 2674...
-
Page 50: Video
.foscam.co .foscam.co If you cannot play the video in the VLC player, please check the port mapping. You can read Quick Installation Guide about How to configure port forwarding. NOTE If you modify the camera’s username or password, you had better reboot the camera, or else the new username and password cannot take effect when you enter the authentication in the VLC. -
Page 51: On Screen Display
.foscam.co .foscam.co should combine well with the network bandwidth. When the bandwidth is very narrow, and bit rate is large, that will lead to video can not play well. Frame rate: Note that a larger frame size takes up more bandwidth. When the video format is 50Hz, the maximum frame rate is 25 fps. -
Page 52: Alarm
.foscam.co .foscam.co Click Back button and return to the OSD page, click Save to take effect. Back to the surveillance window, you can see the mask area as the following picture: Figure 4.40 4.4.3 Snapshot Settings On this page you can set the snapshot pictures’ image quality and the storage path. - Page 53 .foscam.co .foscam.co Figure 4.42 To enable motion detection, follow the steps below: 1 Enable Motion detection 2 Sensitivity---- It supports three modes: Low, Middle and High. The higher the sensitivity, the camera will be more easily alarmed. Select one motion sensitivity.
- Page 54 .foscam.co .foscam.co detected, the people around the camera will hear beep alarm sound. B Send Mail If you want to receive alarm emails when motion is detected, you must select Send Mail and set Mail Settings first. The alarm email cannot contain the alarm picture if you have not selected Snap picture.
- Page 55 .foscam.co .foscam.co Click this button and select all time range . Figure 4.44 ② Specify an alarm schedule Click the week day words, the corresponding column will be selected. For example, click TUE, the all column of TUE turns to red, that means during Tuesday whole day, when something moving in the detection area, the camera will alarm.
-
Page 56: Record
.foscam.co .foscam.co 7 Click Save button to take effect. When the motion is detected during the detection time in the detection area, the camera will alarm and adopt the corresponding alarm indicators. NOTE : You must set the detection area and detection schedule, or else there is no alarm anywhere and anytime. -
Page 57: Firewall
.foscam.co .foscam.co Figure 4.49 FTP server: If your FTP server is located on the LAN, you can set as Figure 4.48. If you have an FTP server which you can access on the internet, you can set as Figure 4.49. -
Page 58: System
.foscam.co .foscam.co Enable firewall, If you select Only allow access from these IP addresses and fill in 8 IP addresses at most, only those clients whose IP addresses listed in the Only allow access from these IP addresses can access the Network Camera. If you select Block access from these IP addresses, only those clients whose IP addresses are in the IP list cannot access the Network Camera. - Page 59 .foscam.co .foscam.co If you want to verify the firmware version of you camera, please go to Device Status-( Device Information Page to check Upgrade Firmware by IP Camera Tool Double click the IP Camera Tool shot icon , select the Camera IP that you want to upgrade the firmware. Then select Upgrade Firmware and enter the username and password, choose the firmware file, and upgrade.
-
Page 60: Appendix
.foscam.co .foscam.co 6) After upgrade successfully, please clear the cache of browser, uninstall the old plugin and re-install it, then reset the camera to the default factory settings before using the camera. 4.9.3 Factory Reset Click Factory Reset button and all parameters will return to factory settings if selected. - Page 61 .foscam.co .foscam.co Click here to download the plugin. Figure 5.1 Drag the download file to Firefox web page and it will prompt you to Install it. Click Install Now . Figure 5.2 Reboot the Firefox after the plugin installation is successfully completely, then relogin the camera again, you can see the...
-
Page 62: To Download/Install Activex For Chrome Users
.foscam.co .foscam.co surveillance window NOTE : If you could not view living video after running the ActiveX, only a red cross in the center of the video or just a black screen. Please change another port number to try. Make sure all firewall or antivirus software on your computer does not block the active download and installation. If you are unable to run the ActiveX control, try shutting down the firewall or antivirus program. -
Page 63: I Have Forgotten The Administrator Password
.foscam.co .foscam.co Click Add button to install the plugin . Figure5.4 Click Add button to install the Plugins. Click Add button to install the plugin . Figure 5.5 Reboot the browser and re-login the camera, you will see the surveillance window. -
Page 64: No Pictures Problems
.foscam.co .foscam.co 5.1.4 Subnet doesn’t match Check whether your ipcamera in the same subnet of your computer. The step is Control Panel -- Network Connections -- Dbclick Local Area Connections -- Choose General -- Properties.(Figure 4.23/4.24) Check subnet mask, IP address and gateways. - Page 65 .foscam.co .foscam.co Figure 5.6 If you allow the ActiveX running, but still could not see living video. Please change another port number to try. Don’t use port 8000. Figure 5.7 NOTE : Make sure that your firewall or anti-virus software does not block the camera or ActiveX. If you could not see video, please shut down firewall or anti-virus software to try again.
-
Page 66: Default Parameters
Make sure broadcast your SSID; use the same encryption for router and camera. 5.2 Default Parameters Default network Parameters IP address: obtain dynamically Subnet mask: obtain dynamically Gateway: obtain dynamically DDNS: Embedded FOSCAM DDNS Service Username and password Default admin username: admin with a blank password 5.3 Specification ITEMS FI9804W... - Page 67 .foscam.co .foscam.co Night visibility 12pcs IR-LEDs, night vision range up to 20 metres Audio Input/Output External standard 3.5mm interface for two-way audio Audio Compression PCM/G.726 Ethernet One 10/100Mbps RJ45 port Wireless Standard IEEE802.11b/g/n Data Rate IEEE802.11b: 11Mbps(Max.); Network IEEE802.11g: 54Mbps(Max.);...
- Page 68 .foscam.co .foscam.co Resolution 960p(1280 x 960), 720p(1280 x 720), VGA(640 x 480) View H.264 dual streaming Video Image adjust The brightness, contrast, saturation, chromaticity, is adjustable Infrared mode Off & Manually Night visibility Φ8mm 36 IR LEDs, Night visibility up to 30 meters...
- Page 69 .foscam.co .foscam.co Linear Input/Output, which can realize two-way voice the Audio Input/Output intercom Image Compression H.264 Image Frame Rate 25fps(50Hz), 30fps(60Hz),Down adjustable Resolution 960p(1280 x 960),720p(1280 x 720),VGA(640 x 480), View H.264 dual streaming Video Image adjust The brightness, contrast, saturation, chromaticity, is adjustable Infrared mode Auto &...
-
Page 70: Ce & Fcc
Distributors may sell products to resellers who then sell products to end users. No warranty service is provided unless the product is returned to an authorized return center in the region where the product was first shipped by FOSCAM or to the point-of-purchase, which may have regional specific warranty implications. - Page 71 FOSCAM provide 2-year limited warranty for naked product and 6-month limited warranty for accessories. Limited Hardware Warranty FOSCAM products are warranted to be free from manufacturing defects in materials and workmanship starting from the shipping date of FOSCAM. This limited hardware warranty does not cover: ...
-
Page 72: Limitation Of Liability
Purchaser's exclusive remedy, as against FOSCAM, shall be the repair or replacement of defective parts. If FOSCAM lists a product on its website specification in error or that is no longer available for any reason, FOSCAM reserves the right to explain it without incurring any liability. -
Page 73: Obtaining Technical Support
User’s Guide has not answered. If you have problem with FOSCAM IP camera, please first contact FOSCAM reseller for solving the problems. If our reseller cannot provide service, please contact our service department: tech@foscam.com...
Need help?
Do you have a question about the FI9804W and is the answer not in the manual?
Questions and answers